はじめに
Raspberry pi4 を用いて Google Drive を共有フォルダーとして使う方法について記す。
外部から Raspberry pi に取り込んだデータをサーバ上に置くことを目的としている。調査する中で Rclone が比較的ハードルが低い様に感じたので このツールを用いて取り組むことにした。
尚、このツールは Google Drive だけでなく One Drive など 多くのサービスに対応している。
参考:Rcloneのページ
1:Rclone を Raspberry pi にインストール
$ curl https://rclone.org/install.sh | sudo bash
2:Rclone のメニューを起動
$ rclone config
3:以下の設定を行う
No remotes found, make a new one?
n) New remote
s) Set configuration password
q) Quit config
n/s/q>n <-新規に作成

Enter name for new remote.
name>TestDrive <-Raspberry pi が認識するドライブ名(任意)

Option Storage.
Type of storage to configure.
Choose a number from below, or type in your own value.
<省略>
Storage> 20 <-20が Google Drive / 36がOne Drive (Rclone のVersionにより異なるので注意!)
<省略>
client_id>     [Enter] <-何もしない(※)
client_secret> [Enter] <-何もしない(※)
<省略>
scope> 1 <- 1:Full access all files / 2:Read-only access to file .......
service_account_file> [Enter] <-何もしない

Edit advanced config?
y) Yes
n) No (default)
y/n> n

Use web browser to automatically authenticate rclone with remote?
y) Yes (default)
n) No
y/n> y
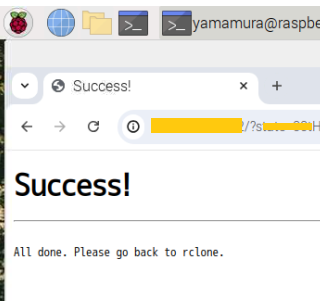
ここで、Google への Login 画面が表示されるので Loginする
※ client_id> / client_secret> に Googleで あらかじめ指定した値を入れると自動でLoginされると思われる。
Google Drive と共有されると 以下の画面が出る。
Configure this as a Shared Drive (Team Drive)?

y) Yes
n) No (default)
y/n> n <- Team Drive とは、何かは不明

Keep this "TestDrive" remote?
y) Yes this is OK (default)
e) Edit this remote
d) Delete this remote
y/e/d> y

Current remotes:

Name                 Type
====                 ====
TestDrive            drive

e) Edit existing remote
n) New remote
d) Delete remote
r) Rename remote
c) Copy remote
s) Set configuration password
q) Quit config
e/n/d/r/c/s/q> q <-設定終了!!
Rclone 主なコマンドの使い方
参考:Rclone コマンド一覧
◎Google Drive 内 全ての フォルダーと ファイルの一覧を表示
$rclone ls TestDrive:
◎Googleドライブ内に TestFolder を作成
$ rclone mkdir TestDrive:TestFolder
◎ファイル(Type001.py) をGoogleドライブに作成したフォルダー(TestFolder)へコピー
$ rclone copy Test001.py TestDrive:TestFolder
◎Googleドライブ内にあるファイル(TestFolder/Test001.py)をRaspberry pi の MyWork フォルダーにコピーする
$ rclone copy TestDrive:TestFolder/Test001.py ./MyWork
☆2025年 4月1日(火) 午後14時50分 初版(Ver1.00) 作成