はじめに
YOLOv5を使って動画から物体検出を行い、その結果をPOSTして送ってみたいと思います。
この記事は以下の内容に興味がある人向けに書いています。
- YOLOV5をとりあえず動かす
- YOLOV5を組み込んだオリジナルのスクリプトを書く
- VS Codeの
Dev Containersで開発環境を用意する(Docker Desktopが有料になってしまったのでRancher Desktopで) - モック環境(httpbin)を使ってテストする
では早速、YOLOv5のREADMEを読みながら作業を進めます。
インストール手順は非常にシンプルでCloneしてから必要なPythonモジュールをインストールするだけです。。※READMEより抜粋
git clone https://github.com/ultralytics/yolov5  # clone
cd yolov5
pip install -r requirements.txt  # install
ご自身の好きな環境で作業を行なっていただくのが良いと思いますが、私はM1 Macを使っておりPython周りの環境構築がめんど普段VS Codeを使っていることと、手間をかけずにコンテナで用意したい、コンテナ環境とはいえローカル環境を触る感じで作業したいと思いますので、Visual Studio CodeのDev Containersを使おうと思います。
コンテナを用意して、そこにClone、必要なモジュールのインストールなどしていきます。ローカル環境で作業を進めることもできますので、開発環境の用意の手順は必要に応じて読み飛ばしてください。
この機能を使うには、Docker daemonが動作している必要があります。私はDocker Desktopが有料化してまったのでRancher Desktopを使っています。Rancher Desktopを使う場合、Container Engineがcontainerdになっていると動作しないのでdockerd(moby)を選択するようにしてください。また、Dev Containersは拡張機能です。
1. 開発環境の用意
開発用コンテナを用意していきます。選択肢を選んでいくと、次の項目へ遷移していきます。
開発環境の用意の手順に関してはVS Code(+Dev Containers)、Rancher Desktopの準備は済んでいる前提で書いています。
-
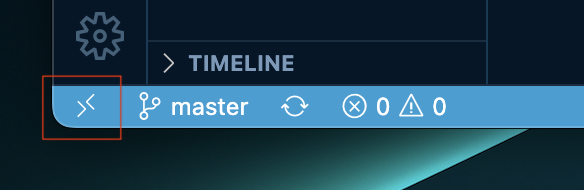
VS Codeを開き左下の赤線部分のアイコンをクリックする
-
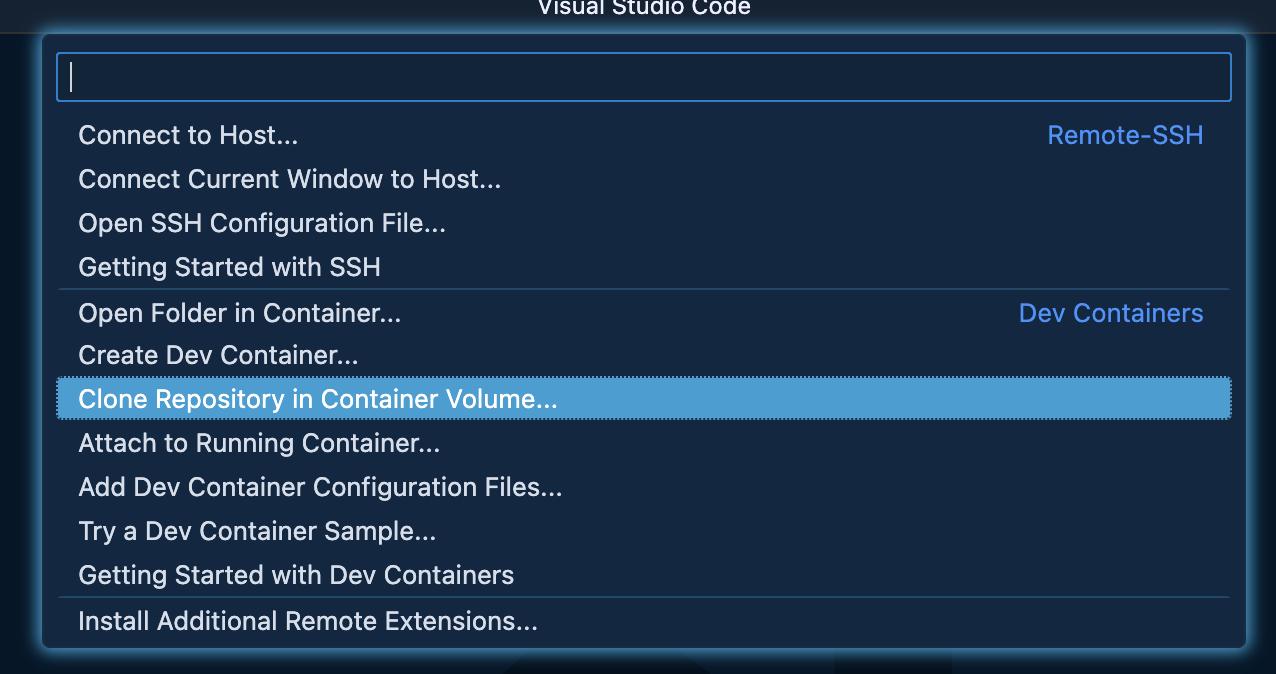
Dev ContainersのClone Repository in Container Volume...をクリックする
-
YOLOv5のリポジトリのURLをペーストし、
Clone a repository from GitHub in a Container Volumeをクリックする

-
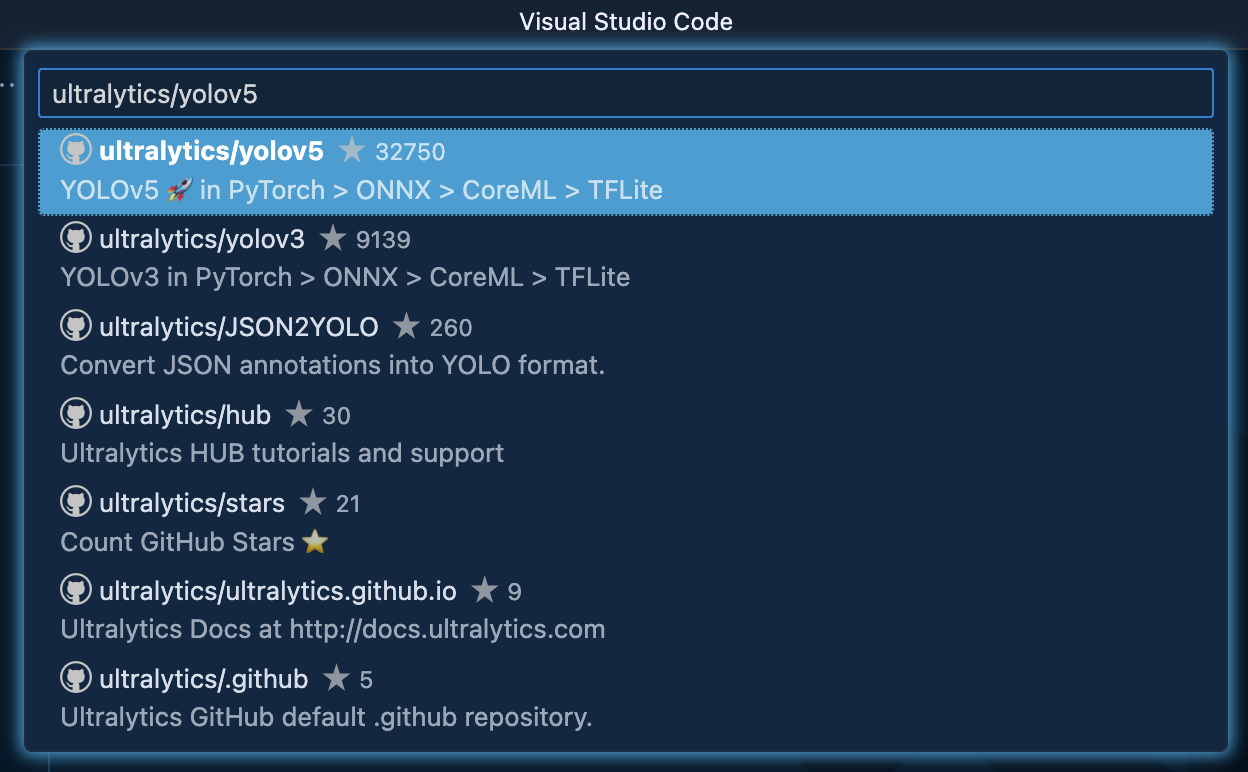
YOLOv5のリポジトリ名を入力して検索し、選択する
-
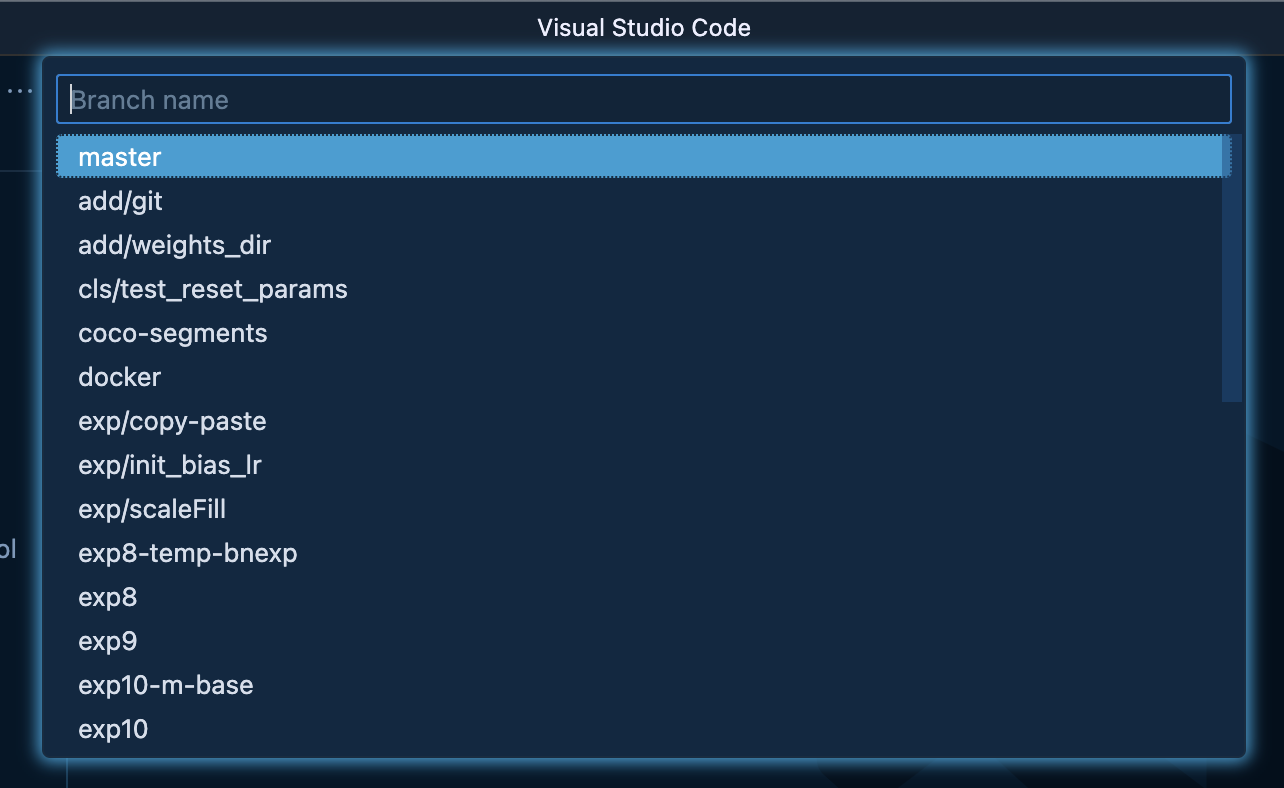
masterブランチを選択する
ここまで選択するとリポジトリの設定は終わり、VS Codeのウィンドウが開き直されてコンテナの設定に遷移します。
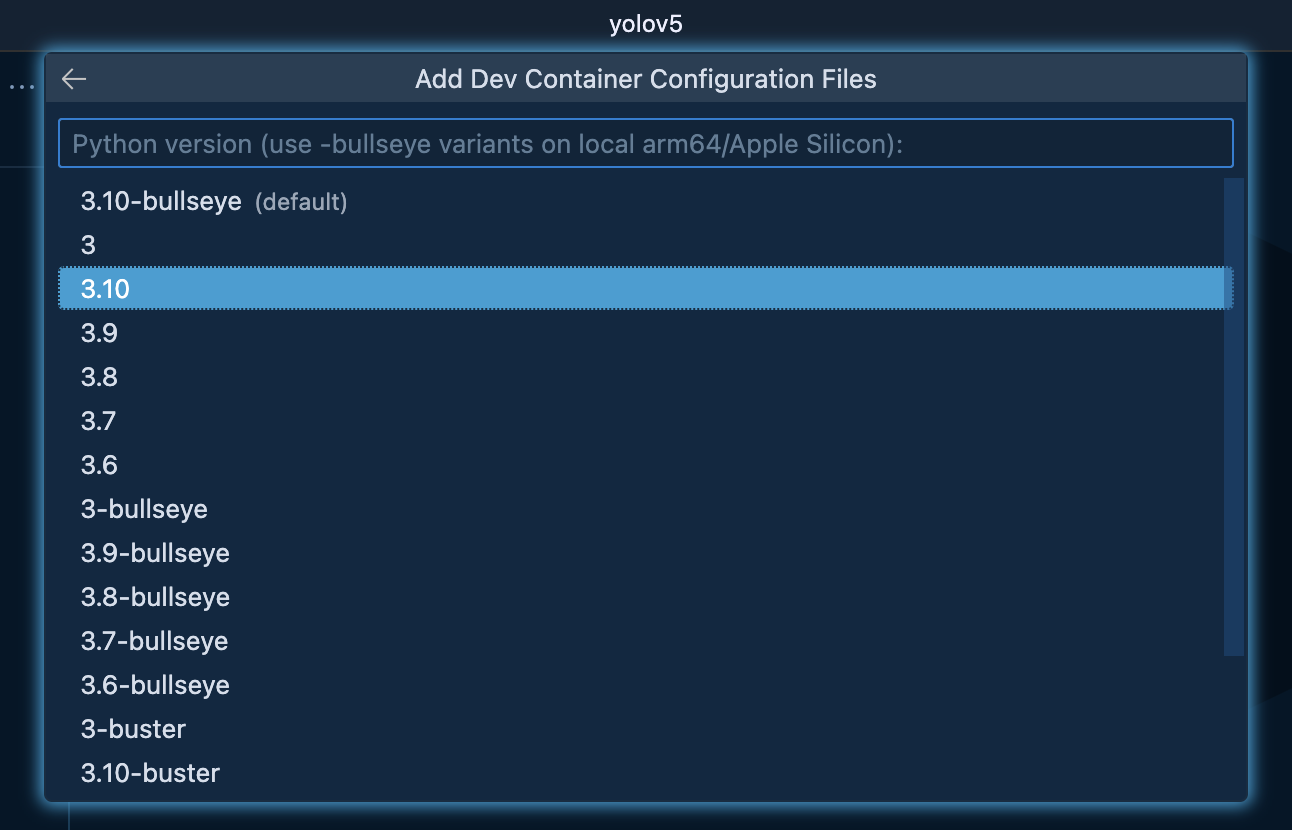
- Dev Containerの設定を行う
YOLOv5を使うにあたってPythonを使いたいのでPython 3にしました。

Python 3.7.0以上であれば良いです。今回は3.10にしました。
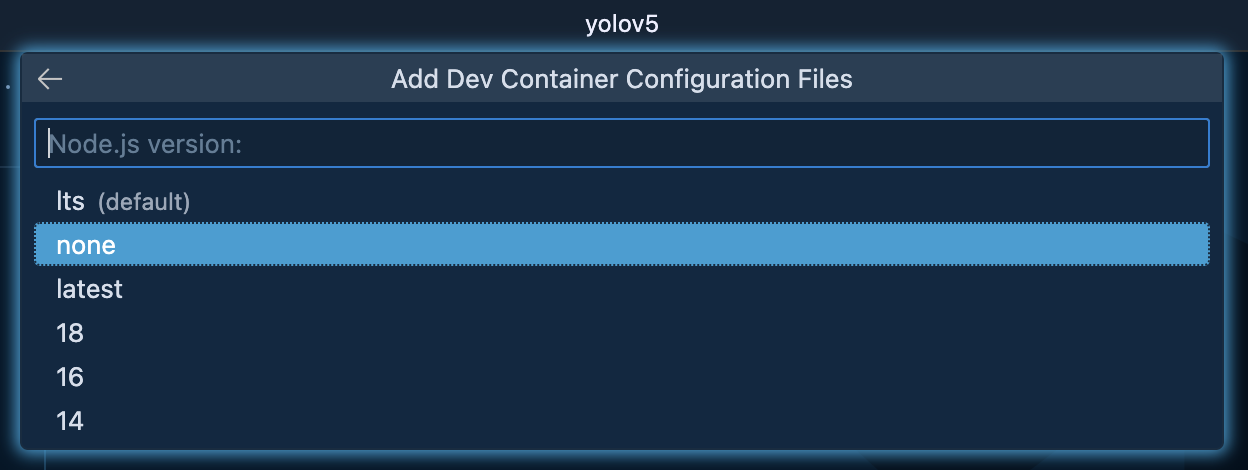
Node.jsは特に必要ないのでNoneにしました。
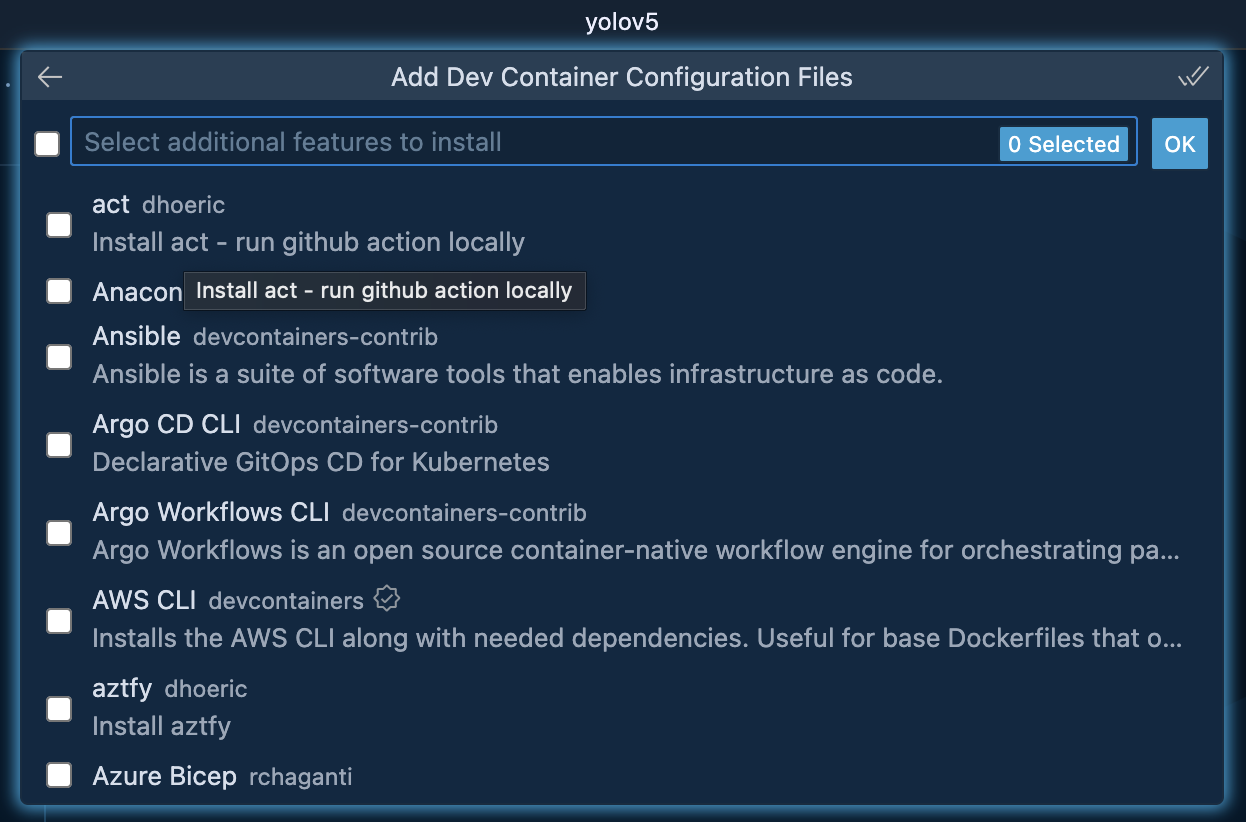
追加で入れたいものも特にないのでそのままOKしました。
設定が終わると少しのインターバルの後にコンテナが起動し、ウィンドウが再び開き直されます。
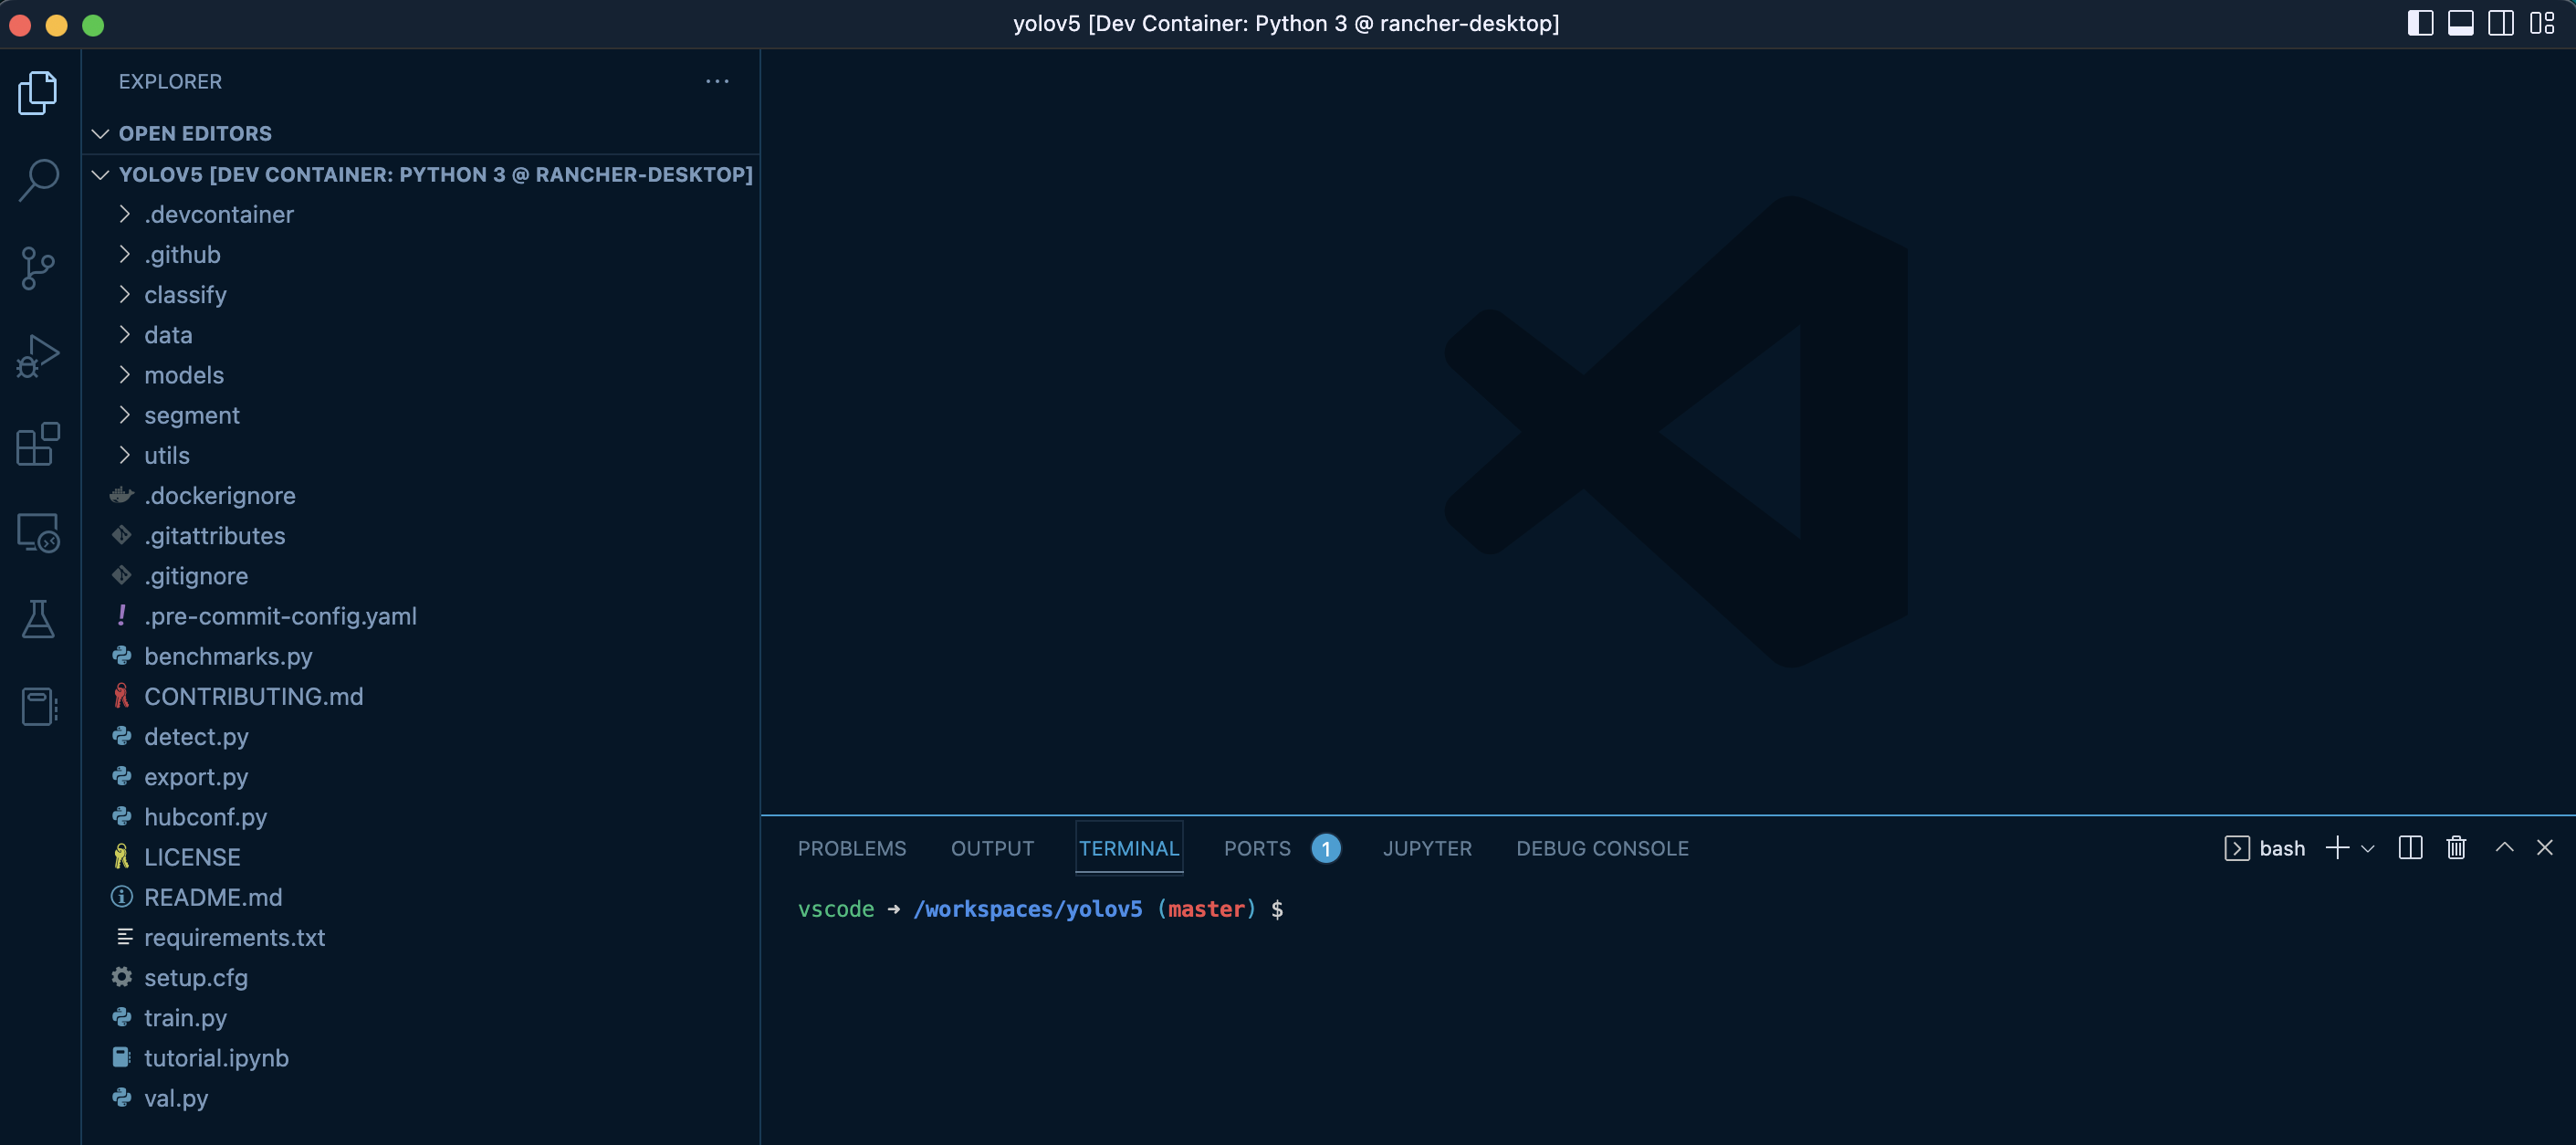
左側にYOlOv5のリポジトリからCloneした内容と.devcontainerのフォルダ(設定ファイルであるdevcontainer.jsonを含む)があることが確認できます。ローカル環境に存在しているかのようにファイルの中身などを確認できます。
また、ウィンドウ上部にyolov5[Dev Container: Python3@rancher-desktop]と表示されていることも確認できます。
これで準備OKです。
余談ですが、OSはDebianです。
$ cat /etc/os-release
PRETTY_NAME="Debian GNU/Linux 11 (bullseye)"
NAME="Debian GNU/Linux"
VERSION_ID="11"
VERSION="11 (bullseye)"
VERSION_CODENAME=bullseye
ID=debian
HOME_URL="https://www.debian.org/"
SUPPORT_URL="https://www.debian.org/support"
BUG_REPORT_URL="https://bugs.debian.org/"
2. 必要なPythonモジュールのインストール
手順といってもこれだけです。
pip install -r requirements.txt
3. YOLOv5の動作確認
インストールが完了したので動作するか確認します。
READMEを確認するとdetect.pyというスクリプトで実際に試せると書いてあります。※READMEより抜粋
python detect.py --source 0  # webcam
                          img.jpg  # image
                          vid.mp4  # video
                          screen  # screenshot
                          path/  # directory
                          'path/*.jpg'  # glob
                          'https://youtu.be/Zgi9g1ksQHc'  # YouTube
                          'rtsp://example.com/media.mp4'  # RTSP, RTMP, HTTP stream
Cloneした中にdata/imagesというディレクトリがあり、そこにサンプル画像があるのでこれを使って試してみます。
ジダンの画像とバスの画像があります。今回はジダンの画像を使ってみます。
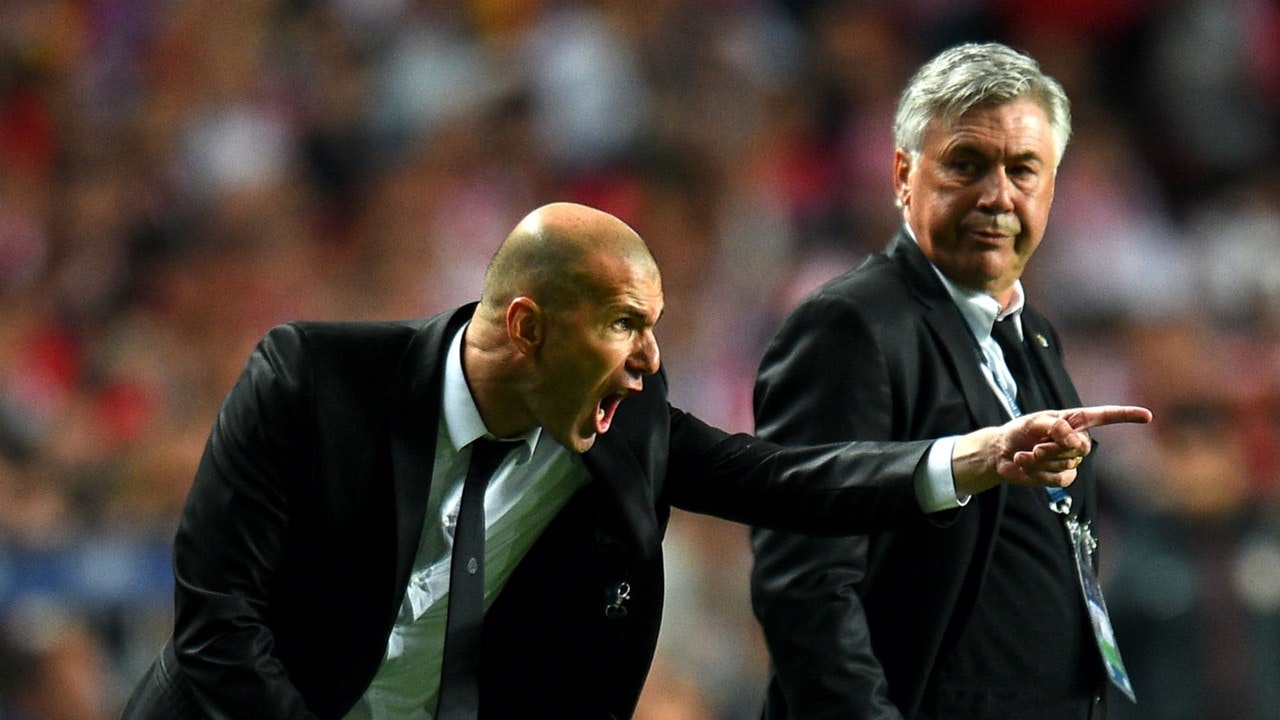
$ python detect.py --source data/images/zidane.jpg
- 略 -
ImportError: libGL.so.1: cannot open shared object file: No such file or directory
実行したところエラーになりました。
OpenCVに必要なパッケージが足りないようなのでインストールします。
sudo apt install -y libgl1-mesa-dev
気を取り直してもう一度試します。
$ python detect.py --source data/images/zidane.jpg
/home/vscode/.local/lib/python3.10/site-packages/torchvision/io/image.py:13: UserWarning: Failed to load image Python extension:
  warn(f"Failed to load image Python extension: {e}")
detect: weights=yolov5s.pt, source=data/images/zidane.jpg, data=data/coco128.yaml, imgsz=[640, 640], conf_thres=0.25, iou_thres=0.45, max_det=1000, device=, view_img=False, save_txt=False, save_conf=False, save_crop=False, nosave=False, classes=None, agnostic_nms=False, augment=False, visualize=False, update=False, project=runs/detect, name=exp, exist_ok=False, line_thickness=3, hide_labels=False, hide_conf=False, half=False, dnn=False, vid_stride=1
YOLOv5 🚀 v6.2-240-gabbfd69 Python-3.10.8 torch-1.13.0 CPU

Fusing layers...
YOLOv5s summary: 213 layers, 7225885 parameters, 0 gradients
image 1/1 /workspaces/yolov5/data/images/zidane.jpg: 384x640 2 persons, 2 ties, 192.1ms
Speed: 0.3ms pre-process, 192.1ms inference, 1.1ms NMS per image at shape (1, 3, 640, 640)
Results saved to runs/detect/exp
runs/detect/expに結果が保存されているとのことなので見てみます。
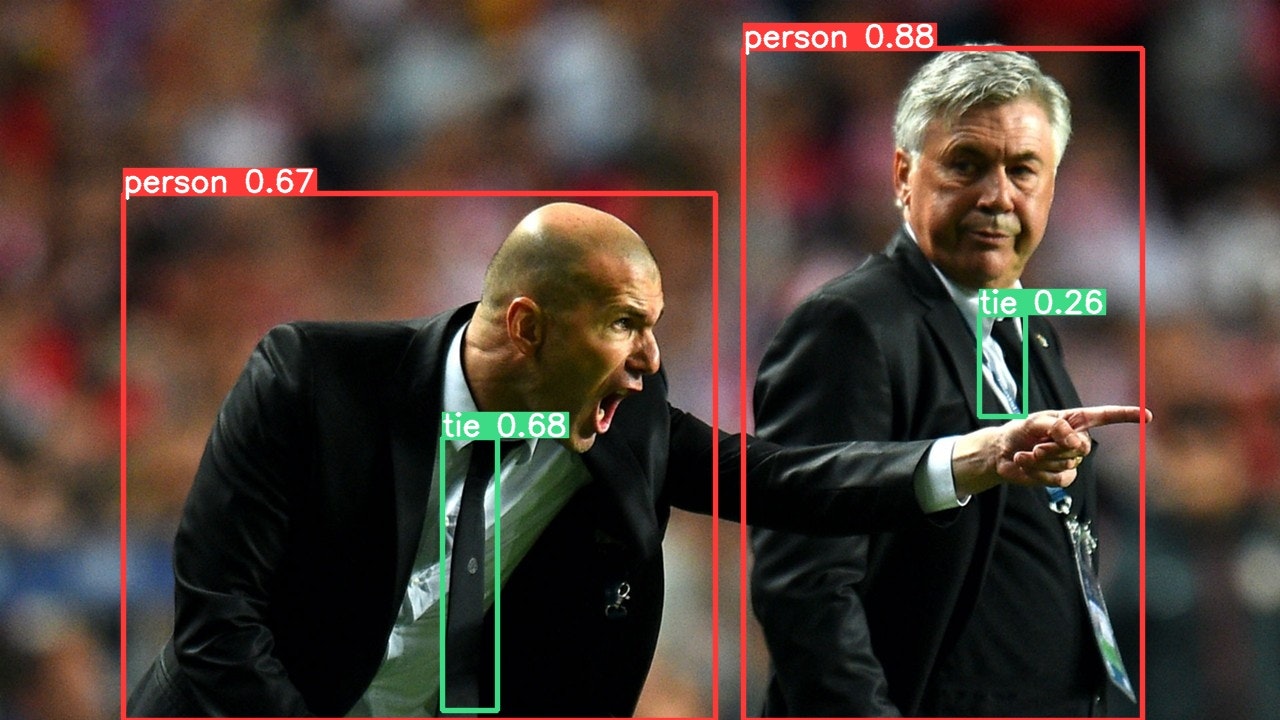
推論結果が反映された画像が出力されていました。
Warningが出ていますが本内容と関係がないのでここでは無視します
4. 検出結果をPOSTする
単に検出だけするよりも、その結果を他システムに渡せた方が役立てやすいと思いますのでその実装をして行きます。
REAMEを確認すると検出までのサンプルが記載されています。
import torch

# Model
model = torch.hub.load('ultralytics/yolov5', 'yolov5s')  # or yolov5n - yolov5x6, custom

# Images
img = 'https://ultralytics.com/images/zidane.jpg'  # or file, Path, PIL, OpenCV, numpy, list

# Inference
results = model(img)

# Results
results.print()  # or .show(), .save(), .crop(), .pandas(), etc.
モデルを読み込み→画像を取得→推論→結果の表示とすごくシンプルです。これをベースにスクリプトを作ってみました。また、先ほどの動作確認では画像でしたが今度は動画にします。コンテナで作業している都合上、Webカメラの映像ではなくこちらのYoutubeの動画を使います。
検出結果の送信先にはhttpbin を使います。
HTTPリクエストをするとレスポンスを返してくれるサービスです。
Youtubeの動画から物体を検出し、その結果をhttpbinに送信します。
送信しすぎても邪魔なのでこのスクリプトは5秒に一度POSTします。
import torch
import cv2
import pafy
import json
import requests
import time
import pprint

MOVIE_URL = 'https://youtu.be/Zgi9g1ksQHc'
SENDING_INTERVAL_SEC = 5
EXTERNAL_SERVICE_ENDPOINT = 'https://httpbin.org/post'

def post_to_external(detections):
    headers = {
        'content-type': 'application/json'
    }
    message = {
        'camera_id': 'yolov5_object_detection_camera',
        'detections': detections
    }
    response = requests.post(EXTERNAL_SERVICE_ENDPOINT, headers=headers, data=json.dumps(message))
    print('-----')
    pprint.pprint(response.json())

def main():
    model = torch.hub.load('ultralytics/yolov5', 'yolov5s')
    movie = pafy.new(MOVIE_URL)
    best = movie.getbest()
    cap = cv2.VideoCapture(best.url)
    last_sent_time = time.time()
    while True:
        ret, frame = cap.read()
        result = model(frame)
        result.render()
        dict_detections = result.pandas().xyxy[0].to_dict(orient='records')
        results = []
        for detection in dict_detections:
            result = {
                'confidence': round(detection['confidence'], 2),
                'label': detection['name'],
                'xmin': int(detection['xmin']),
                'xmax': int(detection['xmax']),
                'ymin': int(detection['ymin']),
                'ymax': int(detection['ymax'])
            }
            results.append(result)
        now = time.time()
        if len(results) != 0:
            if now - last_sent_time > SENDING_INTERVAL_SEC:
                post_to_external(results)
                last_sent_time = time.time()
        key = cv2.waitKey(1)
        if key == 27:
            break

if __name__ == '__main__':
    main()
実行してみると、httpbinからのレスポンスが表示されます。httpbinはこちらがPOSTした際の内容を含めてレスポンスを返してくれます。
{'args': {},
 'data': '{"camera_id": "yolov5_object_detection_camera", "detections": '
         '[{"confidence": 0.85, "label": "person", "xmin": 0, "xmax": 419, '
         '"ymin": 345, "ymax": 535}, {"confidence": 0.76, "label": "cup", '
         '"xmin": 8, "xmax": 167, "ymin": 292, "ymax": 368}, {"confidence": '
         '0.54, "label": "laptop", "xmin": 165, "xmax": 1198, "ymin": 48, '
         '"ymax": 653}]}',
 'files': {},
 'form': {},
 'headers': {'Accept': '*/*',
             'Accept-Encoding': 'gzip, deflate',
             'Content-Length': '335',
             'Content-Type': 'application/json',
             'Host': 'httpbin.org',
             'User-Agent': 'python-requests/2.28.1',
             'X-Amzn-Trace-Id': 'Root=1-63748bc5-5bf64a0141077caa1215f19b'},
 'json': {'camera_id': 'yolov5_object_detection_camera',
          'detections': [{'confidence': 0.85,
                          'label': 'person',
                          'xmax': 419,
                          'xmin': 0,
                          'ymax': 535,
                          'ymin': 345},
                         {'confidence': 0.76,
                          'label': 'cup',
                          'xmax': 167,
                          'xmin': 8,
                          'ymax': 368,
                          'ymin': 292},
                         {'confidence': 0.54,
                          'label': 'laptop',
                          'xmax': 1198,
                          'xmin': 165,
                          'ymax': 653,
                          'ymin': 48}]},
 'origin': '61.119.203.193',
 'url': 'https://httpbin.org/post'}
data、jsonというパラメーターの中に検出結果が含まれていることが確認できます。
まとめ
Dev Containersを使う手順の説明があったので少し長くなりましたが、YOLOv5で推論するだけなら、
git clone https://github.com/ultralytics/yolov5  # clone
cd yolov5
pip install -r requirements.txt  # install
python detect.py --source data/images/zidane.jpg
で終わりです。とても手軽ですね。
今回のようにどこかにPOSTする処理を加えるようなアレンジをしたい際もベースがシンプルなのでやりやすいです。
import torch

# Model
model = torch.hub.load('ultralytics/yolov5', 'yolov5s')  # or yolov5n - yolov5x6, custom

# Images
img = 'https://ultralytics.com/images/zidane.jpg'  # or file, Path, PIL, OpenCV, numpy, list

# Inference
results = model(img)

# Results
results.print()  # or .show(), .save(), .crop(), .pandas(), etc.