この記事は
この記事の目標は
ものすごく簡単な関数をHaskellで書いて、それをSwiftから呼び出せるようにしてみます。
今回呼び出す関数は
plus10 :: Int -> IO Int
plus10 i = do
    putStrLn "Called!"
    return $ i + 10
です。なんもしない関数ですね。成功すればstdoutに"Called!"が出るはずです。
まずはお決まりのghc-ios用xcodeプロジェクトの設定
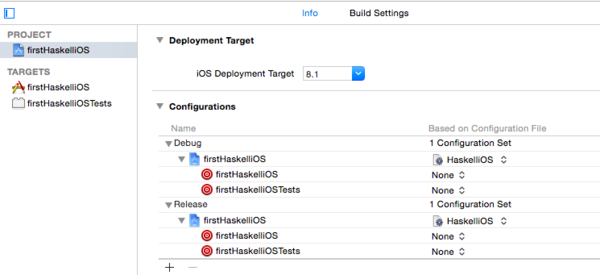
HaskelliOS.xcconfigをプロジェクトにコピーします。
Info -> Configurations を両方HaskelliOSに変更
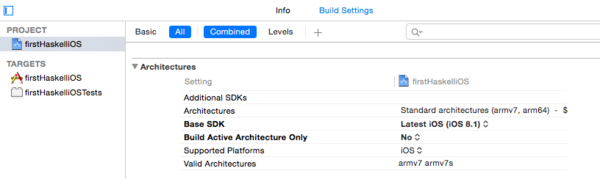
PROJECT -> Build Settings -> Architectures -> Build Active Architecture OnlyをすべてNOに
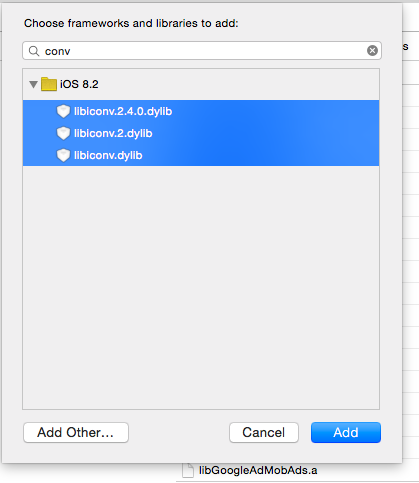
そして追加で libconv*.dylibを追加
libconvがないとリンカが通らないので適当にlibconv*.dylibをすべて追加しておきます。

まずはghc-iosでバイナリとスタブヘッダを作ります。
ソースコードはFFIを使ってこんな感じに:
{-# LANGUAGE ForeignFunctionInterface #-}
module Counter where
import Control.Monad

foreign export ccall plus10 :: Int -> IO Int

plus10 :: Int -> IO Int
plus10 i = do
    putStrLn "Called!"
    return $ i + 10
という感じでplus10をforeign export ccallしておきます。そうするとこの関数の呼び出しがスタブヘッダに出てきます。モジュール名は適当です。ghc-iosの例をそのまま改変したのでモジュール名が残っています。
HaskellプロジェクトはXcodeのプロジェクトルート直下にディレクトリを掘ってその中にIntelliJプロジェクトまるごと入れておくと全部簡単にGithubにプッシュできておすすめです。
これをビルドしてhoge.aファイルとhoge_stub.hを作ります。
$ ghc-ios src/*.hs
[1 of 1] Compiling Counter          ( src/Main.hs, build/arm/Counter.o )
Linking build/arm/Main.a ...
[1 of 1] Compiling Counter          ( src/Main.hs, build/i386/Counter.o )
Linking build/i386/Main.a ...
これで出来上がりです。
ビルドしたものをXcodeにコピーします。
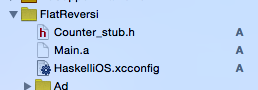
使えるようにincludeします。
普通にSwiftからはimportできないのでブリッジヘッダにimportをします。
ブリッジヘッダの名前は<プロジェクト名>-Bridging-Header.hとします。
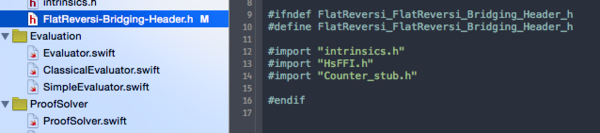
# ifndef FlatReversi_FlatReversi_Bridging_Header_h
# define FlatReversi_FlatReversi_Bridging_Header_h

# import "intrinsics.h"
# import "HsFFI.h"
# import "Counter_stub.h"

# endif
こんな感じでHsFFI.hとCounter_stub.h(ファイル名は環境に合わせてください)をインポートします。
HsFFI.hはHaskellシステムを初期化するコードの呼び出しに必要です。
hs_initを呼び出してHaskellシステムを初期化する。
hs_initを呼び出すまではHaskellの関数を呼び出すことはできません。万が一呼び出すとそのままエラーメッセージとともに停止します。
呼び出す場所はなるべくアプリケーションの初期化場所に近いところがいいのですが、それほど初期化地点に拘る必要は今のところありません。最初のHaskell関数の呼び出し前であればどこでも構いません。なのでAppDelegateの中で呼び出すのがよいでしょう。
import UIKit

@asmname("hs_init")
    func hs_init(UnsafePointer<String>, UnsafePointer<Int>)

@UIApplicationMain
class AppDelegate: UIResponder, UIApplicationDelegate {

    var window: UIWindow?


    func application(application: UIApplication, didFinishLaunchingWithOptions launchOptions: [NSObject: AnyObject]?) -> Bool {
        // Override point for customization after application launch.
        hs_init(nil, nil);
        NSLog("hs_init initialized!");
        return true
    }
...
という感じで (1) hs_initをSwift内で使えるように宣言し、(2) 実際に呼び出しをします。
@asmnameでC関数を使えるようにします。asmname()のカッコの中にはCヘッダ内の関数の名前を、その次の行にはその関数をどのようにSwift内にエクスポートするかを指定します。
hs_initはHsFFI.hでみてみると
extern void hs_init (int *argc, char **argv[]);
なので、第一引数はUnsafeMutablePointer<int>とします。第二引数はUnsafeMutablePointer<String>とします。constついていないのでMutableにします。
hs_init(nil, nil)で呼び出します。なのでMutableは(結局)どっちでも大丈夫です。なんやねん。
作った関数plus10を呼び出す。
同じ要領で上で書いた関数を呼び出してみます。再掲すると
plus10 :: Int -> IO Int
plus10 i = do
    putStrLn "Called!"
    return $ i + 10
です。Swift風に言うと型はInt -> Intです。なので
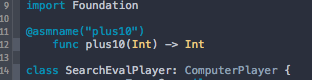
import Foundation

@asmname("plus10")
    func plus10(Int) -> Int

class SearchEvalPlayer: ComputerPlayer {
とグローバルで関数を宣言します。
使う場所では普通の関数とかわりなく使えます(この例では返り値使ってないですね)。
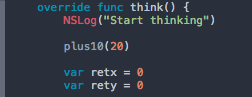
    override func think() {
        NSLog("Start thinking")

        plus10(20)

        var retx = 0
        var rety = 0
...
と呼び出します。
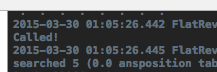
できた!