ユーザー登録
この記事ではrailsで作成したアプリのユーザー登録機能を実装する方法について説明する。
まず、ユーザーの名前とプロフィールを表示するユーザーページを作成する。そのため、まずデータベースにユーザーが登録されている必要がある。コンソールで以下のように入力し、ユーザーを一人追加する。このユーザーのidを1とする。
$ user = User.new(name:"YSD",email:"foobar@gmail.com",password:"foobar",password_confirmation:"foobar")
そしてRESTアーキテクチャの習慣に従い、ユーザー情報をプロフィールページに表示するために、
Rails.application.routes.draw do
  root 'static_pages#home'
  get  '/help',    to: 'static_pages#help'
  get  '/about',   to: 'static_pages#about'
  get  '/contact', to: 'static_pages#contact'
  get  '/signup',  to: 'users#new'
  resources :users
end
configのroutesファイルにresources:usersを追加し、ユーザーリソースに対してCRUD操作(change,read,update,delete)ができるようにする。
| HTTPリクエスト | URL | アクション | 名前付きルート | 用途 |
| GET | /users | index | users_path | すべてのユーザーを一覧するページ |
| GET | /users/1 | show | user_path(user) | 特定のユーザーを表示するページ |
| GET | /users/new | new | new_user_path | ユーザーを新規作成するページ (ユーザー登録) |
| POST | /users | create | users_path | ユーザーを作成するアクション |
| GET | /users/1/edit | edit | edit_user_path(user) | id=1のユーザーを編集するページ |
| PATCH | /users/1 | update | user_path(user) | ユーザーを更新するアクション |
| DELETE | /users/1 | destroy | user_path(user) | ユーザーを削除するアクション |
結果として上のようなリクエストとURL,名前つきルートの対応関係が生成される。
次にユーザーのプロフィールページを表示するapp/views/users/show.html.erbファイルを編集する。
<% provide(:title, @user.name) %>
<div class="row">
  <aside class="col-md-4">
    <section class="user_info">
      <h1>
        <%= gravatar_for @user %>
        <%= @user.name %>
      </h1>
    </section>
  </aside>
</div>
ここではユーザーモデルのインスタンス変数@userが使われているので、Userコントローラーのshowアクションで@userを定義する必要がある。
class UsersController < ApplicationController

  def show
    @user = User.find(params[:id])
  end

  def new
  end
end
params変数のidキーには現在表示しているプロフィールページのユーザーのidが入る。(URLのusers/idのid)これでユーザーのビューとアクション、ルートが用意されたので、/users/1が完全に動作するようになった。
なお、showファイルのgravatar_forメソッドは、ユーザーのコントローラーに関連づけられているヘルパーファイルで定義されているメソッドで、プロフィール写真をアップロードして指定したメールアドレスと紐付けることができる無料サービスであるGravatarをRailsに導入できる。erbの<%= gravatar_for @user %>では@userのメールアドレスに対応した画像がプロフィールページに表示される。このメソッドの中身は
module UsersHelper

  # 引数で与えられたユーザーのGravatar画像を返す
  def gravatar_for(user)
    gravatar_id = Digest::MD5::hexdigest(user.email.downcase)
    gravatar_url = "https://secure.gravatar.com/avatar/#{gravatar_id}"
    image_tag(gravatar_url, alt: user.name, class: "gravatar")
  end
end
このようになっており、メールアドレスをハッシュ化したもの(gravatar_id)を含むGravatarのurlをimage_tagに渡し、対応する画像を表示するような機構になっている。
ここでユーザー登録ページの実装を行う。すでにルーティングにより登録フォームとnewアクションは紐づけられており、ユーザー登録フォームではform_forメソッドを用い、引数に@userを取るので、コントローラーのnewアクションに@userを追加する。
class UsersController < ApplicationController

  def show
    @user = User.find(params[:id])
  end

  def new
    @user = User.new
  end
end
フォームそのものは、以下のようになる
<% provide(:title, 'Sign up') %>
<h1>Sign up</h1>

<div class="row">
  <div class="col-md-6 col-md-offset-3">
    <%= form_for(@user) do |f| %>
      <%= f.label :name %>
      <%= f.text_field :name %>

      <%= f.label :email %>
      <%= f.email_field :email %>

      <%= f.label :password %>
      <%= f.password_field :password %>

      <%= f.label :password_confirmation, "Confirmation" %>
      <%= f.password_field :password_confirmation %>

      <%= f.submit "Create my account", class: "btn btn-primary" %>
    <% end %>
  </div>
</div>
表示されるフォームは
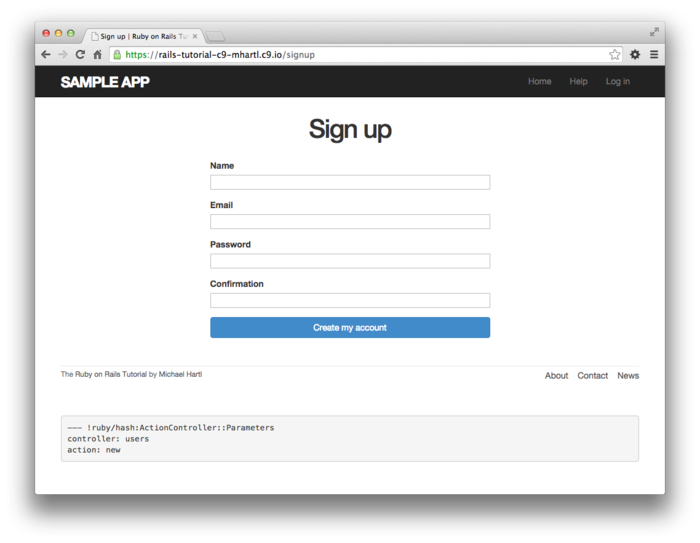
となる。
form_forのブロック内のfオブジェクトはHTMLフォーム要素 (テキストフィールド、ラジオボタン、パスワードフィールドなど) に対応するメソッドが呼び出されると、@userの属性を設定するために特別に設計されたHTMLを返す。
<%= f.label :name %>
<%= f.text_field :name %>
例えば、このようなコードでは、Userモデルのname属性を設定する、ラベル付きテキストフィールド要素を作成するのに必要なHTMLを作成する。
結果として生成されたformのHTMLは
<form accept-charset="UTF-8" action="/users" class="new_user"
      id="new_user" method="post">
<input name="utf8" type="hidden" value="✓" />
<input name="authenticity_token" type="hidden"
value="NNb6+J/j46LcrgYUC60wQ2titMuJQ5lLqyAbnbAUkdo=" />
<label for="user_name">Name</label>
<input id="user_name" name="user[name]" type="text" />
<label for="user_email">Email</label>
<input id="user_email" name="user[email]" type="email" />
<label for="user_password">Password</label>
<input id="user_password" name="user[password]"
type="password" />
<label for="user_password_confirmation">Confirmation</label>
<input id="user_password_confirmation"
name="user[password_confirmation]" type="password" />
<input class="btn btn-primary" name="commit" type="submit"
value="Create my account" />
</form>
となり、
<form accept-charset="UTF-8" action="/users" class="new_user"
id="new_user" method="post">
の部分では新規ユーザー作成のためにPOSTリクエストを/usersに発行してcreateアクションを呼び出している。また、各inputのname属性の値が、paramas変数をuserハッシュのキーの値となる。例えば、
<input id="user_email" name="user[email]" type="email" />
では、user[email]の値がuserの:emailキーの値となる。要するにnameやemailなどの各フォームに入力した内容がparams変数のuserハッシュの各キーの値となる。
そしてcreateアクションは
class UsersController < ApplicationController
  .
  .
  .
  def create
    @user = User.new(params[:user])
    if @user.save
      redirect_to @user
    else
      render 'new'
    end
  end

end
となる。ここで、
redirect_to @user
は
redirect_to user_url(@user)
等価であり、もし、ユーザー登録に成功すれば、ユーザーのプロフィールページにリダイレクトされ、失敗すればユーザー登録のフォームにリダイレクトされるようになっている。
なお
@user = User.new(params[:user])
は、
@user = User.new(name: "Foo Bar", email: "foo@invalid",
                 password: "foo", password_confirmation: "bar")
のようなコードと等価である。