declarative pipeline とは
Jenkins pipelineは次の2つの構文をサポートしています。
- Scripted Pipeline
- Declarative Pipeline (Pipeline 2.5で導入)
Scripted Pipelineは柔軟な表現ができますがやや複雑でした。
Declarative Pipeline ではよりシンプルな記述が可能になりました。
そして、Declarative Pipeline では必要に応じてScripted Pipelineの柔軟な表現も行えるため、両者のメリットを共に享受することができる構文となっています。
本記事では実際にdeclarative pipelineでどのようなことができるのかを紹介していきたいと思います。
Jenkinsfileはこちらコミットしてありますので、併せて紹介をしていきます。
また関連するページもサンプルごとに随時紹介をしていきます。
ここで紹介するsampleを実行できるサーバーを立てていますので、実際に触ってください。
2020/01/19追記
たくさんの方に閲覧、ストックしていただきありがとうございます。
以下のページでJenkins Pipelineを使って実際にどうやってジョブを作っていくかについてまとめてあります。
- 【Jenkins】Pipelineジョブを使ってみよう ~ 基本編 ~
https://sre.leprofront.tech/index.php/sre/ci-cd/jenkins/pipeline-basic/ - 【Jenkins】Pipelineジョブを使ってみよう ~ 応用編 ~
https://sre.leprofront.tech/index.php/sre/ci-cd/jenkins/pipeline-advance/
もう少し具体的にPipelineで何ができるのかについて、興味ある方はこちらも是非読んでいただけると嬉しいです。
サンプル集 - Sample pipelines
- 利用している実行環境
- ubuntu 16.04
- Jenkins 2.107.3
- gihub
- Sample jenkins
1. hello world
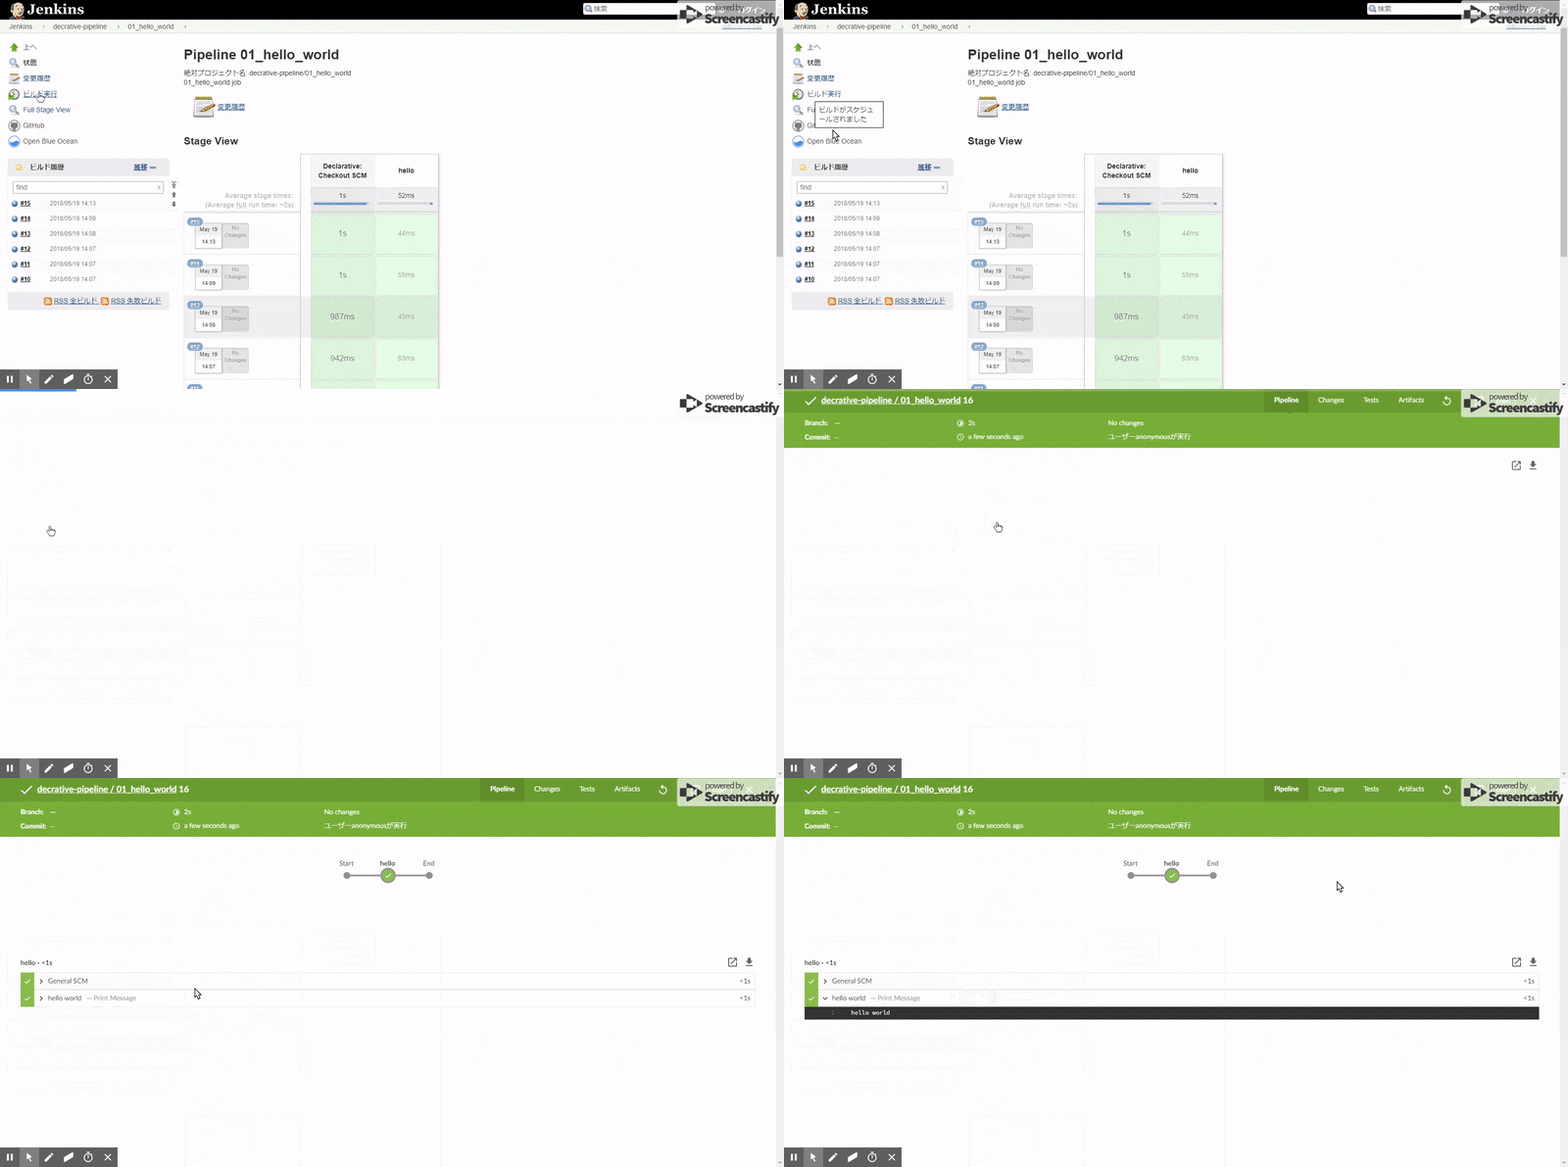
まずはhello worldをやってみます。
topics
sample code
pipeline {
    agent any
    stages {
        stage('hello') {
            steps {
                echo 'hello world'
            }
        }
    }
}
link
2. sh step を使ってコマンドを実行する
sh stepを使ってlinuxのos情報を表示してみます。
topics
sample code
pipeline {
    agent any
    stages {
        stage('show os information') {
            steps {
                sh 'cat /etc/os-release'
            }
        }
    }
}
link
3. ファイルの書き込みをする
writeFile stepを使ってファイルの書き込みをやってみます。
書き込む内容はパラメータから受け取ります。
topics
sample code
pipeline {
    agent any
    stages {
        stage('write file') {
            steps {
                writeFile(file: "output.txt", text: "${OUTPUT_TEXT}")
            }
        }
    }
}
link
4. ファイルを成果物として保存する。
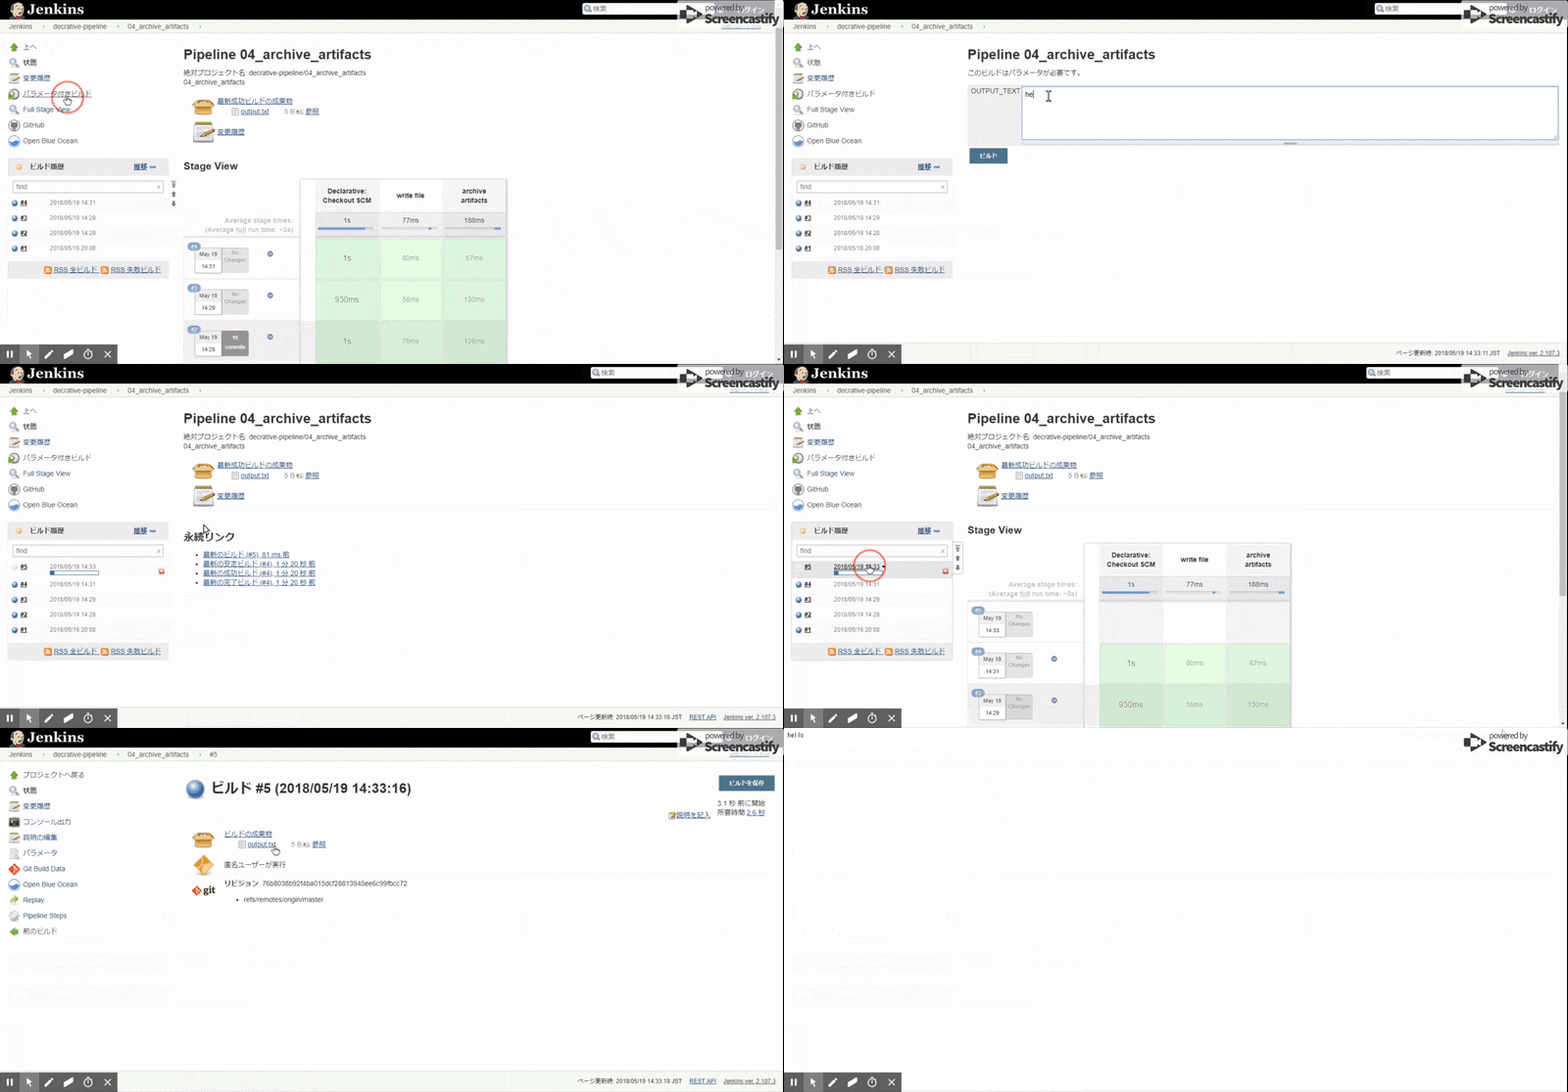
書き込んだファイルをビルドの成果物として保存してみます。
このサンプルではファイル名をenvironment blockを使って定数として宣言してみます。
topics
sample code
pipeline {

    agent any

    environment {
        fileName = "output.txt"
    }

    stages {

        stage('write file') {
            steps {
                writeFile(file: fileName, text: "${OUTPUT_TEXT}")
            }
        }

        stage('archive artifacts') {
            steps {
                archiveArtifacts fileName
            }
        }
    }
}
link
5. buildの後にワークスペースをクリーンします。
ビルドが成功したらcleanWs stepを使ってworkspaceを一掃します。
topics
sample code
pipeline {

    agent any

    environment {
        fileName = "output.txt"
    }

    stages {

        stage('write file') {
            steps {
                writeFile(file: fileName, text: "${OUTPUT_TEXT}")
            }
        }

        stage('archive artifacts') {
            steps {
                archiveArtifacts fileName
            }
        }
    }

    post {
        success {
            cleanWs()
        }
    }
}
link
6.ほかのジョブから取得した成果物を表示する。
ほかのジョブの成果物として保存されているファイルを取得し、
そのファイル名を表示するサンプルです。
ファイル名を一つずつ表示させるためscriptブロックを使います。
topics
- parameters
- deleteDir
- copyArtifacts
- script
- [findFiles](https://jenkins.io/doc/pipeline/steps/pipeline-utility-steps/#findfiles-find-files-in-the-workspace
*/)
sample code
pipeline {

    agent any

    parameters {
        string(
            name: 'COPY_SOURCE_PROJECT',
            defaultValue: "",
            description: 'Name of source project for copying of artifact(s).'
        )
    }

    stages {

        stage('delete workspace') {
            steps {
                deleteDir()
            }
        }

        stage('copy artifacts') {
            steps {
                copyArtifacts(projectName: "${params.COPY_SOURCE_PROJECT}")
            }
        }

        stage('find files') {
            steps {
                script {
                    files = findFiles(glob: '*.*')
                    for (file in files) {
                        echo file.name
                    }
                }
            }
        }
    }
}
link
7. json を読み込んで使ってみる
日付データをjsonテストのページから取得し、今日の日付を表示してみます。
topics
sample code
pipeline {

    agent any

    stages {
        stage('get current date') {
            steps {
                script {
                    sh 'curl -f -o date.json "http://date.jsontest.com"'
                    json = readJSON file: 'date.json'
                    echo "TODAY is ${json.date}"
                }
            }
        }
    }
}
link
8. ほかのジョブを並列実行で呼び出す。
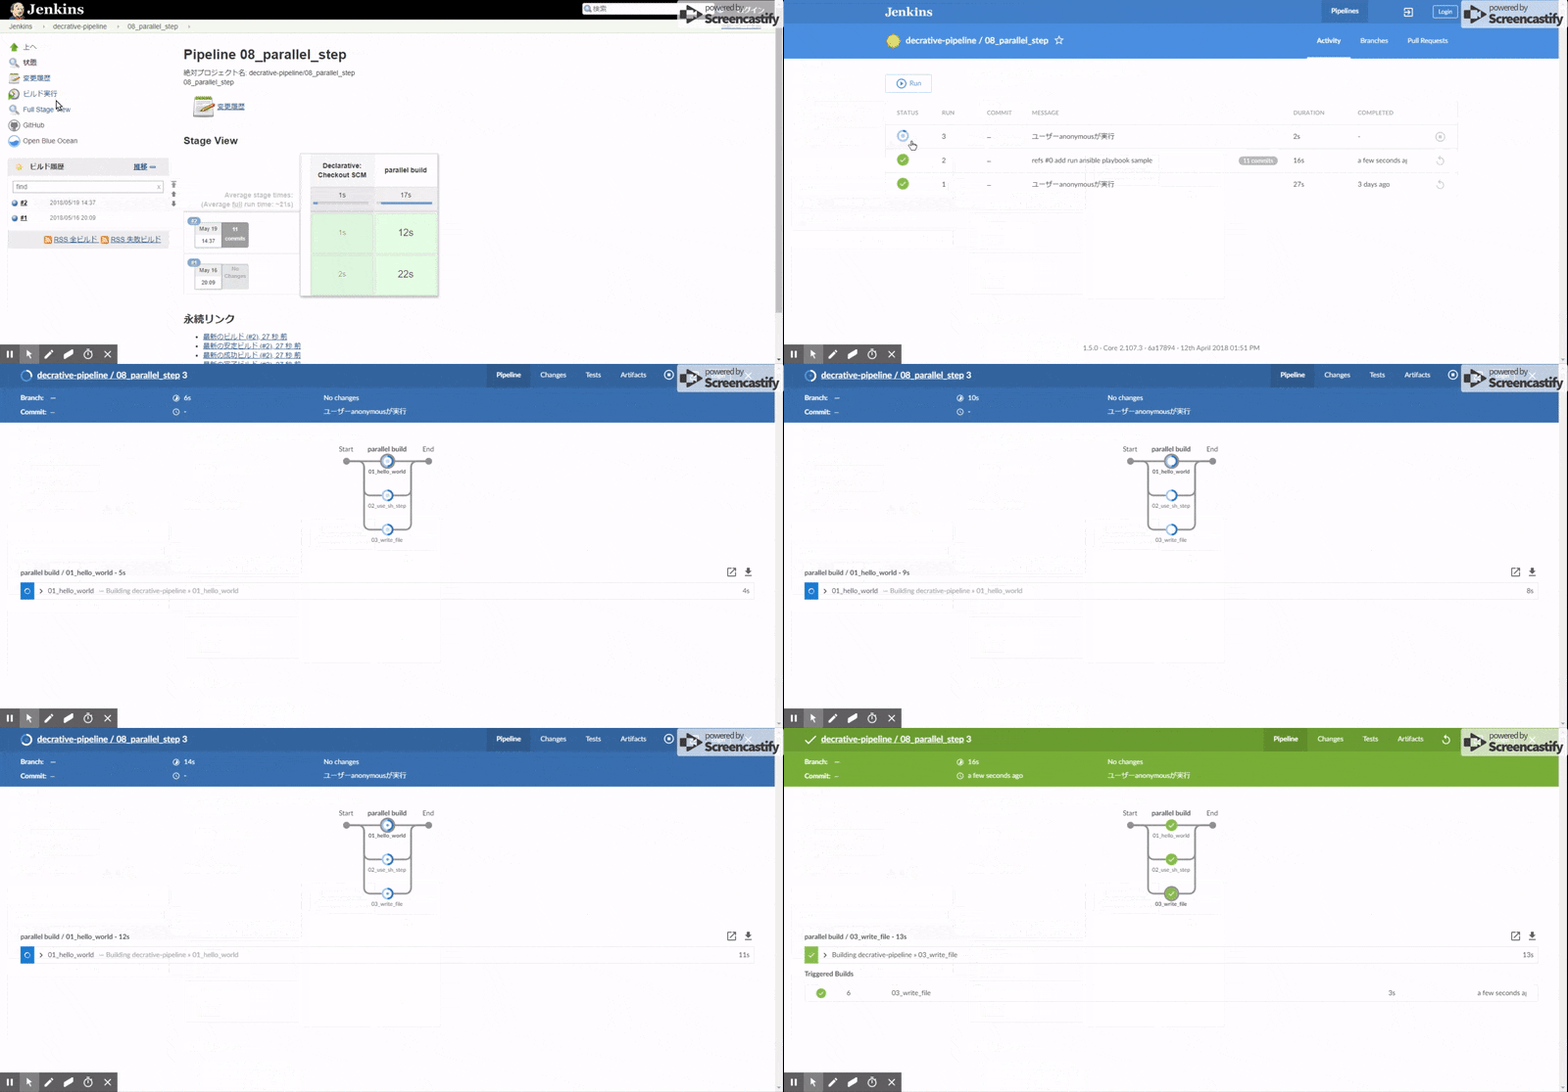
parallel step を使ってほかのジョブを並列実行するサンプルです。
topics
sample code
pipeline {

    agent any

    stages {
        stage('parallel build') {
            steps {
                parallel(
                    "01_hello_world": {
                        build '01_hello_world'
                    },
                    "02_use_sh_step": {
                        build '02_use_sh_step'
                    },
                    "03_write_file": {
                        build(
                            job: '03_write_file',
                            parameters: [
                                text(name: 'OUTPUT_TEXT', value: 'hoge hoge')
                            ]
                        )
                    }
                )
            }
        }
    }
}
link
9. agent にdockerを使う
agent docker image を指定してshステップを実行してみます。
topics
sample code
pipeline {

    agent {
        docker {
            image 'node:7-alpine'
        }
    }

    stages {
        stage('version') {
            steps {
                sh 'node --version'
            }
        }
    }
}
link
10. 一つのパイプラインで複数のdocker image をagentにする
一つのパイプラインの中で複数のdocker imageをagentにするためのサンプルです。
ポイントは最初にagente none と設定し、stage ブロックの中で改めて利用するagentを指定することです。
topics
sample code
pipeline {
    agent none

    stages {
        stage('Back-end') {
            agent {
                docker {
                    image 'maven:3-alpine'
                }
            }
            steps {
                sh 'mvn --version'
            }
        }

        stage('Front-end') {
            agent {
                docker {
                    image 'node:7-alpine'
                }
            }
            steps {
                sh 'node --version'
            }
        }
    }
}
link
11. YAMLを使ってデータのやり取りをしてみる。
YAML形式のデータのやり取りをやってみました。
YAMLのデータを書き換えてファイルに書き出すサンプルです。
topics
sample code
def SAMPLE_YAML = """\
name:
  first: ""
  last: ""
dates:
  birth: ""
"""

def datas

pipeline {
    agent any

    environment {
        fileName = "sample.yml"
    }

    stages {
        stage('read yaml') {
            steps {
                script{
                    datas = readYaml text: "${SAMPLE_YAML}"
                    echo "Name is ${datas.name.first} ${datas.name.last}"
                    echo "Birthday is ${datas.dates.birth}"
                }
            }
        }

        stage('write yaml') {
            steps {
                script{
                    datas.name.first = "Ichiro"
                    datas.name.last = "Sato"
                    datas.dates.birth = "1980-01-01"
                    echo "Name is ${datas.name.first} ${datas.name.last}"
                    echo "Birthday is ${datas.dates.birth}"
                    writeYaml file: fileName, data: datas
                }
            }
        }

        stage('archive sample.yml') {
            steps {
                 archiveArtifacts fileName
            }
        }
    }

    post {
        always {
            cleanWs()
        }
    }
}
link
12. input でユーザー入力を受け付ける
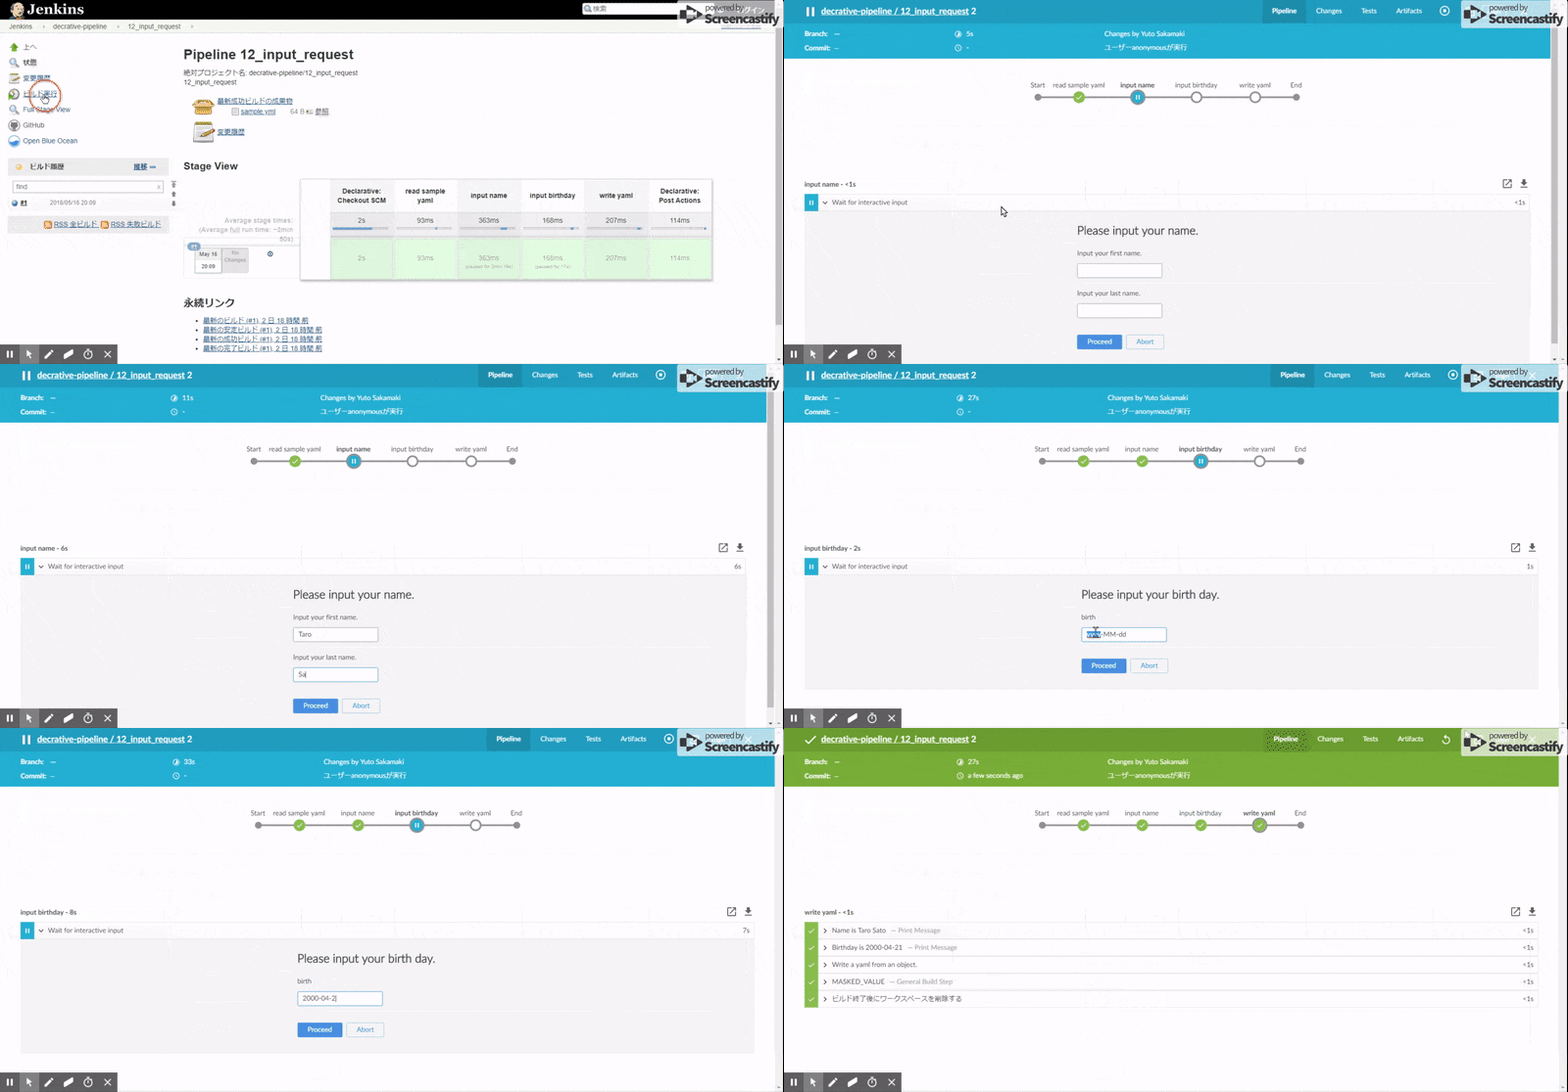
パイプラインの途中でユーザーからの入力を受け付けるサンプルです。
入力がされなかったときはタイムアウトするようにしています。
topics
sample code
def SAMPLE_YAML = """\
name:
  first: ""
  last: ""
dates:
  birth: ""
"""

def datas

pipeline {
    agent any

    environment {
        fileName = "sample.yml"
    }

    stages {
        stage('read sample yaml') {
            steps {
                script{
                    datas = readYaml text: "${SAMPLE_YAML}"
                }
            }
        }

        stage('input name') {
            steps {
                script{
                    timeout(time:3, unit:'MINUTES') {
                        inputName = input(
                            id: "inputName",
                            message: "Please input your name.",
                            parameters:[
                                string( name: 'first', defaultValue: '', description: 'Input your first name.'),
                                string( name: 'last', defaultValue: '', description: 'Input your last name.')
                            ]
                        )
                        datas.name.first = inputName.first
                        datas.name.last = inputName.last
                    }
                }
            }
        }

        stage('input birthday') {
            steps {
                script{
                    timeout(time:3, unit:'MINUTES') {
                        inputBirthday = input(
                            id: "inputBirthday",
                            message: "Please input your birth day.",
                            parameters:[
                                string( name: 'birth', defaultValue: 'yyyy-MM-dd', description: ''),
                            ]
                        )
                        datas.dates.birth = inputBirthday
                    }
                }
            }
        }

        stage('write yaml') {
            steps {
                script{
                    echo "Name is ${datas.name.first} ${datas.name.last}"
                    echo "Birthday is ${datas.dates.birth}"
                    writeYaml file: fileName, data: datas
                    archiveArtifacts fileName
                }
            }
        }
    }

    post {
        always {
            cleanWs()
        }
    }
}
link
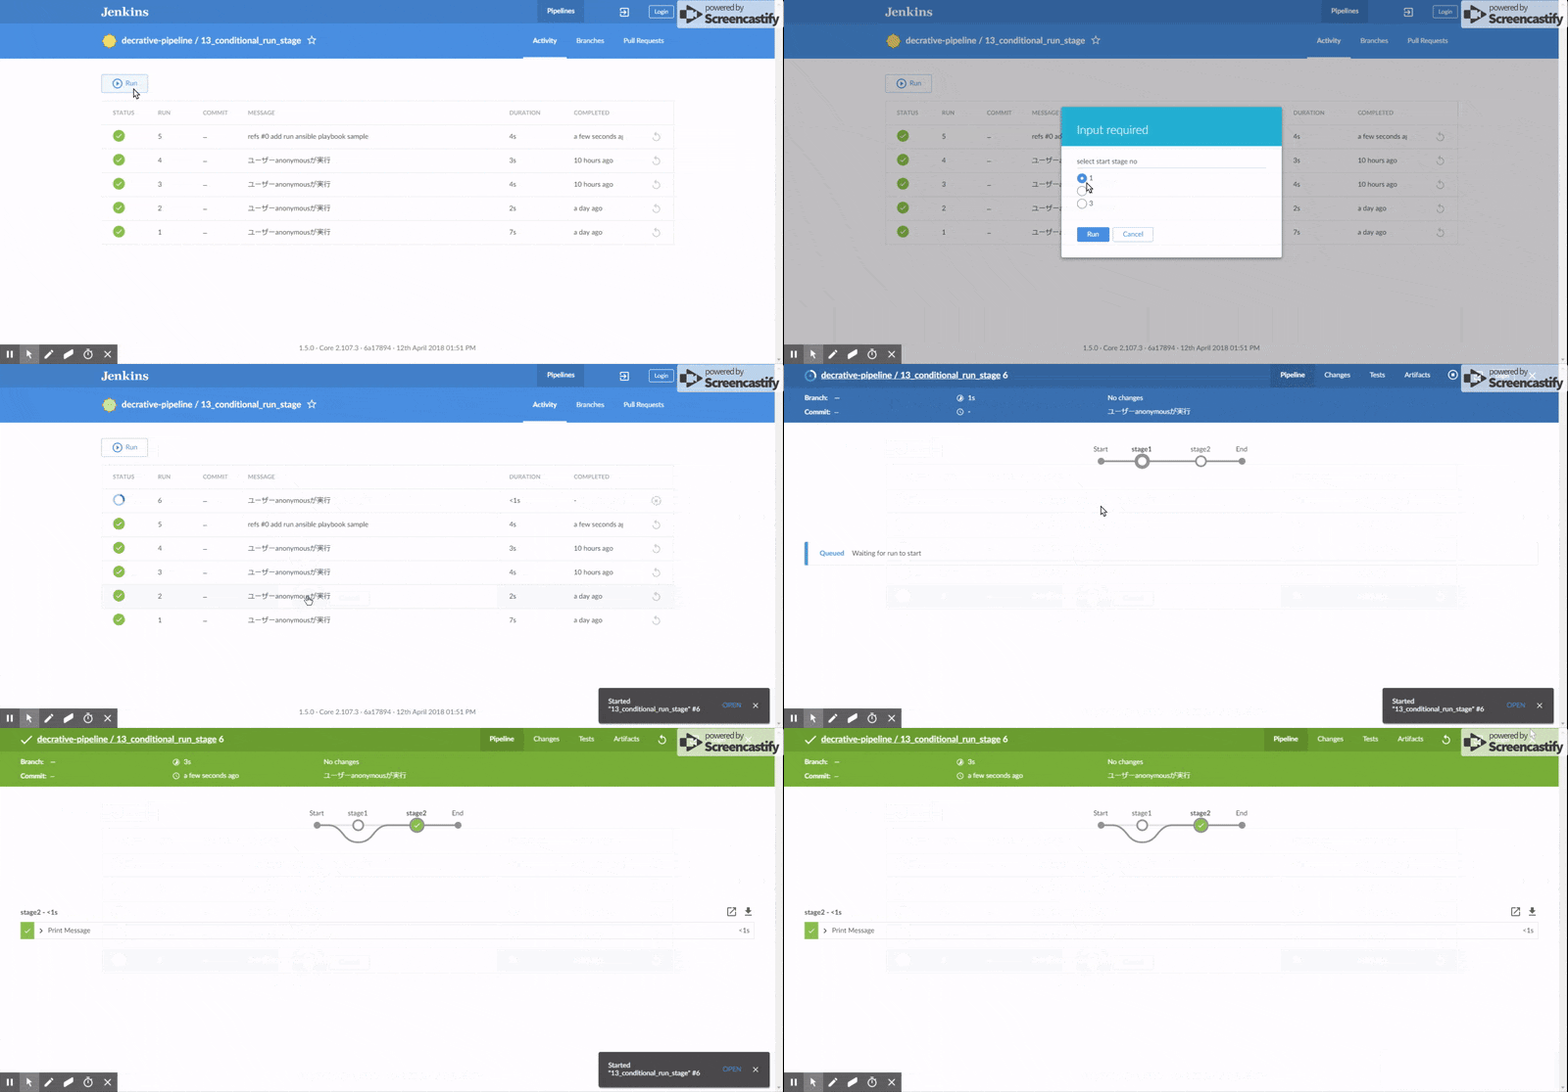
13. ステージの実行を条件ごとに制御する
when ブロックを使って、条件に応じてステージの実行を制御します。
- environment 特定の文字列を比較する際に使います。
- expression スクリプトの真偽値の判定に使います。
pipeline内でファンクションを使用してサンプルを作りました。
topics
sample code
def boolean skipStage( String startStageNo, String stageNo ){
    if( startStageNo.toInteger() <= stageNo.toInteger() ){
        return false
    } else {
        return true
    }
}

pipeline {
    agent any

    stages {
        stage('stage1') {

            when {
                environment name: 'START_STAGE_NO', value: '1'
            }

            steps {
                echo "run stage 1"
            }
        }

        stage('stage2') {

            when{
                not{
                    expression {
                        return skipStage( START_STAGE_NO, "2" )
                    }
                }
            }

            steps {
                echo "run stage 2"
            }
        }
    }
}
link
14. gitからansible-playbookのスクリプトを取得しDockerContainerを使って実行する
ansible-playbook をdocker を使ってhello worldするサンプルです。
- https://github.com/chusiang/helloworld.ansible.role からansible-playbookのsampleを取得。
- williamyeh/ansible:alpine3 のdocker image を利用してansible-playbook を実行。
- ansible.logを成果物に保存。
topics
sample code
def ANSIBLE_CONFIG = """\
[defaults]
log_path = ./ansible.log
"""

pipeline {
    agent any

    stages {
        stage('set up ansible files') {
            steps {
                deleteDir()
                git 'https://github.com/chusiang/helloworld.ansible.role'
                writeFile(file: "ansible.cfg", text: "${ANSIBLE_CONFIG}")
            }
        }

        stage('run helloworld.yml') {
            steps {
                withDockerContainer(args: '-u 0', image: 'williamyeh/ansible:alpine3') {
                    echo "show ansible version"
                    sh "ansible --version"

                    echo "run ansible-playbook"
                    ansiblePlaybook(
                        playbook: 'setup.yml',
                        extras: '-c local'
                    )
                }
            }
            post {
                always {
                    archiveArtifacts 'ansible.log'
                }
            }
        }
    }
    post {
        success {
            cleanWs()
        }
    }
}
link
参考ページ
jenkins 公式ページ
Qiita
- Jenkins2のPipline参考リンク集
- Declarative PipelineでJenkinsfileを書いてみた(Checkstyle,Findbugs,PMD,CPDとか)
- 【Jenkins】Declarative Pipeline入門
