ImageMagick の畳み込みオプション -convolve と -morphology Correlate|Convolve の解説です。
畳み込みとは
画像の畳み込み処理は、雑にいうと周囲の色を混ぜて新しい色とする処理です。
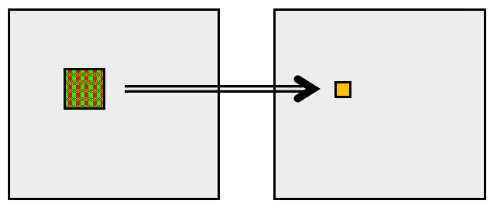
周囲の色をどんな割合で足すかの情報は畳み込みカーネルと呼びます。
このカーネルの種類によって、さまざまな画像変換エフェクトが得られます。
傾向として周囲のピクセルを + で取り込むとぼかし効果、- で取り込むと先鋭化(差異を強調)になります。
畳み込みの実際の例を紹介します。
カーネル実例
ぼかし(Blur)
主に、平滑化とガウシアンがあります。
平滑化 (smoothing)
\frac{1}{9}
\begin{bmatrix}
1 & 1 & 1 \\
1 & 1 & 1 \\
1 & 1 & 1 \
\end{bmatrix}
平均化フィルタとも呼ばれます。以下のコマンドで実行できます。
% convert sample.png -convolve '1 1 1, 1 1 1, 1 1 1' smooth.png
, は読みやすいように便宜的につけました。全部スペース区切りでも OK です。
| sample | smooth.png |
|---|---|
 |
 |
1/9 でなく 1 を指定してうまく処理出来てますが、係数を全部足すと 1 になる正規化が内部で行われてます。
- morphology:showKernel
morphology:showKernel で実際に適用されたカーネルが確認できます。
% convert sample.png -define morphology:showKernel=1 \
          -convolve '1 1 1, 1 1 1, 1 1 1' smooth.png
Kernel "User Defined" of size 3x3+1+1 with values from 1 to 1
Forming a output range from 0 to 9 (Sum 9)
 0:  0.111111  0.111111  0.111111
 1:  0.111111  0.111111  0.111111
 2:  0.111111  0.111111  0.111111
- convolve:scale
9倍して元に戻したい場合は、convolve:scale が使えます
% convert sample.png -define morphology:showKernel=1 \
          -define convolve:scale=9 \
          -convolve '1 1 1, 1 1 1, 1 1 1' smooth9.png
Kernel "User Defined" of size 3x3+1+1 with values from 9 to 9
Forming a output range from 0 to 81 (Sum 81)
 0:         1         1         1
 1:         1         1         1
 2:         1         1         1
| sample.png | smooth9.png |
|---|---|
|
 |
輝度が9倍なので期待通り明るくなります。
ガウシアン・ブラー (gaussian blur)
\frac{1}{16}
\begin{bmatrix}
1 & 2 & 1 \\
2 & 4 & 2 \\
1 & 2 & 1 \\
\end{bmatrix}
ガウス分布(正規分布)を使った、より正確なブラーです。ぼかしが小さいうちは平滑化(smoothing)とほぼ同じ且つ微妙にボケが弱いですが、ボケの面積を増やすとガウシアンブラーの方が自然なボケ方をします。
% convert sample.png -convolve '1 2 1, 2 4 2, 1 2 1' gauss.png
| sample.png | gauss.png |
|---|---|
|
 |
数列はパスカルの三角形(Pascal's triangle)で算出できます。上の2つの数値を足して下の数値にするだけのルールです。
| https://app.awm.jp/image.js/pascal.html |
|---|
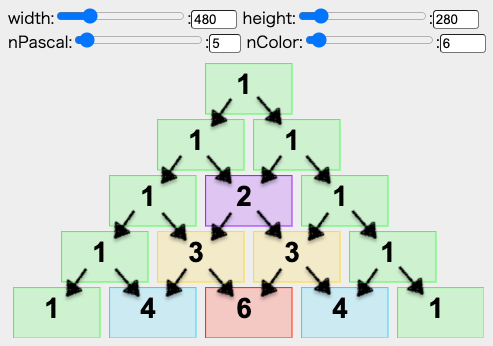 |
更に、{1 2 1} を縦と横で掛け算すれば {1 2 1, 2 4 2, 1 2 1} の先ほどの2次元カーネルが出てきます。
尚、先に示したガウシアンカーネルは正規分布 σ:0.8495 相当のようです。
% convert sample.png  -define morphology:showKernel=1 \
                    -morphology Convolve Gaussian:1x0.8495 gauss_0.8495.png
Kernel "Gaussian" of size 3x3+1+1 with values from 0 to 0.249927
Forming a output range from 0 to 1 (Normalized)
 0: 0.0625182     0.125 0.0625182
 1:     0.125  0.249927     0.125
 2: 0.0625182     0.125 0.0625182
先鋭化(Sharpen)
\begin{bmatrix}
0 & -1 & 0 \\
-1 & 5 & -1 \\
0 & -1 & 0 \
\end{bmatrix}
% convert sample.png -convolve '0 -1 0, -1 5 -1, 0 -1 0' sharpen.png
| sample.png | sharpen.png |
|---|---|
|
 |
画像がシャープになります。文字が読みやすくなるので是非、ご活用を。
ラプラシアン
\begin{bmatrix}
0 & 1 & 0 \\
1 & -4 & 1 \\
0 & 1 & 0 \
\end{bmatrix}
% convert sample.png -convolve '0 1 0, 1 -4 1, 0 1 0' laplacian.png
ラプラシアンは2次微分の事で、変化の強い場所が抽出されます。
| sample.png | laplacian.png |
|---|---|
|
 |
エッジ
\begin{bmatrix}
-1 & -1 & -1 \\
-1 &  8 & -1 \\
-1 & -1 & -1 \
\end{bmatrix}
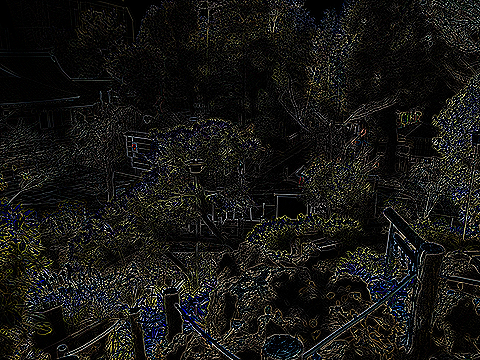
エッジを抽出します。
% convert sample.png -convolve '-1 -1 -1, -1 8 -1, -1 -1 -1' edge.png
| sample.png | edge.png |
|---|---|
|
 |
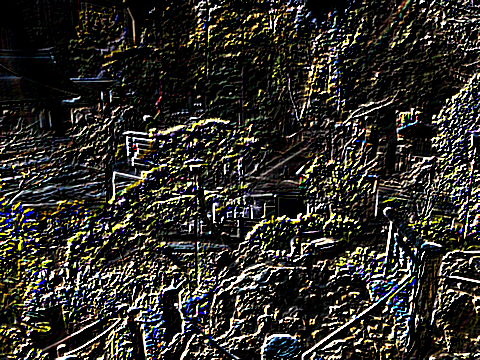
ゾーベル
こちらもエッジ抽出に便利です。
\begin{bmatrix}
-2 & -2 & 0 \\
-2 &  0 & 2 \\
 0 &  2 & 2 \
\end{bmatrix}
% convert sample.png -convolve '-2 -2 0, -2 0 2, 0 2 2' sobel.png
| sample.png | sobel.png |
|---|---|
|
 |
-morphology Correlate
-morphology オプションでも畳み込み処理が出来ます。
Correlate
-convolve は -morphology Convolve でなく -morphology Correlateと同じです。
% convert sample.png -morphology Correlate '-2 -2 0, -2 0 2, 0 2 2' sobel-mol.png
| sample.png | sobel-mol.png |
|---|---|
|
 |
-convolve はこの機能をそのまま使っています。
MagickExport Image *ConvolveImage(const Image *image,
  const KernelInfo *kernel_info,ExceptionInfo *exception)
{
  Image
    *convolve_image;
(略)
  convolve_image=MorphologyImage(image,ConvolveMorphology,1,kernel_info,
    exception);
  return(convolve_image);
}
Convolve
Correlate はカーネルを素直に適用しますが、Convolve はカーネルを逆向きに適用します。
これは非対称なカーネルを使うと理由が想像つきます。試しに、F の字カーネルで畳み込んでみましょう。
\begin{bmatrix}
1 & 1 & 1 & 1 & 1\\
1 & 0 & 0 & 0 & 0 \\
1 & 1 & 1 & 0 & 0 \\
1 & 0 & 0 & 0 & 0 \\
1 & 0 & 0 & 0 & 0 \\
\end{bmatrix}
しつこいですが、-morphology Correlate は -convolve とほぼ同じです。
ただし、-convolve と違ってカーネル正規化がデフォルトoffのようです。 -define convolve:scale=’!’ で正規化を有効に出来ます。
% convert star.png -define convolve:scale='!' -morphology Correlate \
    " 1 1 1 1 1 \
      1 0 0 0 0 \
      1 1 1 0 0 \
      1 0 0 0 0 \
      1 0 0 0 0 "  F.png
| star.png | F.png |
|---|---|
 |
 |
左上の一部を normalize した上でドット拡大してみます。
% convert F.png -crop 40x32+0+0 -normalize F-crop.png
| F-crop.png | ドット化 |
|---|---|
 |
 |
こんな感じに、カーネルを180度回転させた形で適用されます。なので -morphology Convolve はあえてカーネルを逆向きに適用します。
% convert star.png -define convolve:scale='!' -morphology Convolve \
    " 1 1 1 1 1 \
      1 0 0 0 0 \
      1 1 1 0 0 \
      1 0 0 0 0 \
      1 0 0 0 0 "  F-molconv.png
| star.png | F-melconv.png |
|---|---|
|
 |
| F-molconv-crop.png | ドット化 |
|---|---|
 |
 |
この方が直感に合うでしょう。
畳み込みでは対称な構造のカーネルを使う事が多くあまり問題になりませんが、モルフォロジーではこれが重要になります。
カーネルサイズ指定
-convolve で並べる係数は 2*n (1, 4, 9, ...) 個並べると正方形のカーネルとして解釈されますが、縦と横のサイズを指定する事も出来ます。
例えば以下のようにして横方向だけブラーをかけられます。
% convert sample.png -define morphology:showKernel=1 \
          -convolve '5x1: 1 1 1 1 1' smooth5x1.png
Kernel "User Defined" of size 5x1+2+0 with values from 1 to 1
Forming a output range from 0 to 5 (Sum 5)
 0:       0.2       0.2       0.2       0.2       0.2
| sample.png | smooth5x1.png (横ブラー) |
|---|---|
|
 |
この機能は、セパラブルフィルタを処理するのに使えます。
セパラブル・フィルタ (Separable Filter)
2次元カーネルを横1行、縦1列で分けて1次元カーネルの処理にできるフィルタが存在します。
ブラーはその典型です。2次元カーネルは処理が重たい事が多いので、この手法は実用的です。
ガウシアン・ブラー
ガウシアンブラー 5x5 は以下のカーネルを持ちます。
\frac{1}{256}
\begin{bmatrix}
1 &  4 &  6 &  4 & 1 \\
4 & 16 & 24 & 16 & 4 \\
6 & 24 & 36 & 24 & 6 \\
4 & 16 & 24 & 16 & 4 \\
1 &  4 &  6 &  4 & 1 \\
\end{bmatrix}
{ 1 4 6 4 1} の掛け算で表現できるので、以下のように分ける事ができます。
\frac{1}{16}
\begin{bmatrix}
1 &  4 &  6 &  4 & 1 \\
\end{bmatrix}
\frac{1}{16}
\begin{bmatrix}
1 \\
4 \\
6 \\
4 \\
1 \\
\end{bmatrix}
% convert sample.png -convolve '5x1: 1 4 6 4 1' gauss5x1.png
% convert sample.png -convolve '1x5: 1 4 6 4 1' gauss1x5.png
| sample.png | gauss5x1.png (横ブラー) | gauss1x5.png (縦ブラー) |
|---|---|---|
|
 |
 |
% convert sample.png -convolve '5x1: 1 4 6 4 1' -convolve '1x5: 1 4 6 4 1' \
          gauss5x5.png
これで普通のブラーが実現できます。
| sample.png | gauss5x5.png |
|---|---|
|
 |
おまけ
ソフトブラー
昔のセル画でみかけたブラスチック越しで微妙にボケる味わいある効果は、元の画像と合成するだけで実現できます。ソフトブラー(softened Blurring)と呼ぶそうです。
% convert wakaru.png  -define convolve:scale=50,50% \
          -morphology Convolve Gaussian:0x2 \
          wakaru_soft_blur.png
| wakaru.png | wakaru_soft_blur.png |
|---|---|
 |
 |
Gaussian の数値は解像度に依存するので、大きめの画像では 0x3 以上に変えてみて下さい。あと、convolve:scale で元画像とブラーの混ぜ率、つまりエフェクトの効き具合を調整できます。0,100% が元画像のままで、100,0% だとただのボケ画像です。
TODO
- ネームドコンボリューションカーネルの紹介
参考
- https://www.imagemagick.org/Usage/convolve/
- https://www.imagemagick.org/Usage/morphology/
- OpenCV - 画像の平滑化
- OpenCV – 平均化フィルタとガウシアンフィルタについて