これまで、ちょこちょこ Teachable Machine を使って Qiita に複数の記事を書いたりしてきてましたが、その時に見かけて気になっていた「Coral用のモデルのエクスポート」。
このモデルを使って Edge TPU を試せればと思い、Mac上で Coral USB Accelerator を使う準備をして、Teachable Machine からエクスポートしたモデルを使った推論(画像分類)を実行する、ところまでやってみました。
ちなみに、Coral USB Accelerator を入手したのは 2019年6月の話だったっぽい・・・。
定期投稿w pic.twitter.com/b2YnGuTudM
— you (@youtoy) June 21, 2019
Mac で Coral USB Accelerator を利用する準備をする
必要な環境の確認
ここから、Coral USB Accelerator を Mac で利用するための準備のための情報を見つつ、実際にセットアップも行っていきます。
●Get started with the USB Accelerator | Coral
https://coral.ai/docs/accelerator/get-started/#requirements
まずは上記のページの「Requirement」の部分を見ていきます。
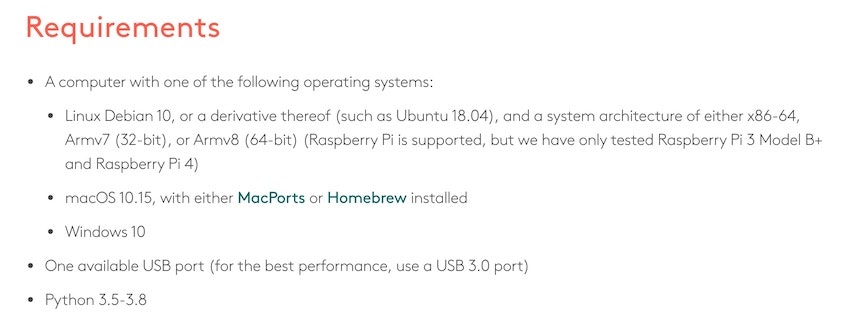
自分は Mac で利用するので、関係する部分は以下のみになりそうです。今の自分の環境だと準備できないものはなさそうなので、次へ進んでいきます。
- macOS 10.15, with either MacPorts or Homebrew installed
- One available USB port (for the best performance, use a USB 3.0 port)
- Python 3.5-3.8
Edge TPU runtime のインストール
最初に「Edge TPU runtime」のインストールが必要になるようです。「Linux、Mac、Windows」のそれぞれ向けに準備されているようで、Mac用は以下の手順になるようでした。
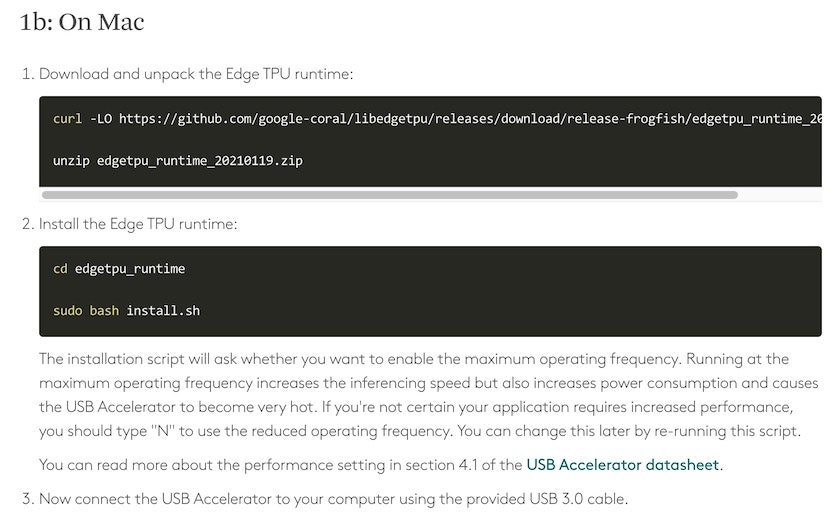
コマンドの部分を以下に抜粋します。
年月日が入ってるファイル名になってるので、またこれを進める機会があるときは、公式ページを再度見たほうが良さそうな感じです。
$ curl -LO https://github.com/google-coral/libedgetpu/releases/download/release-frogfish/edgetpu_runtime_20210119.zip
$ unzip edgetpu_runtime_20210119.zip
$ cd edgetpu_runtime
$ sudo bash install.sh
最後の行で sudoコマンドを使っているので、この部分はコマンド実行後に Mac にログインしているユーザのパスワードを入力します。
その後、以下のように「Would you like to the maximum operating frequency ...」と表示されて「Y/N」で回答する部分が出てきます。

上記のセットアップ手順の説明の中で「推論実行時に処理負荷が高くなるけど高速な処理にするか(「causes the USB Accelerator to become very hot」なんてことも書いてあります・・・)、処理負荷を抑えるか」を選択するもの、と書いてあります。今回実行しているスクリプトを後で再実行すると変更もできる、とも書いてあったので適当に Yes のほうを選択して進めました。
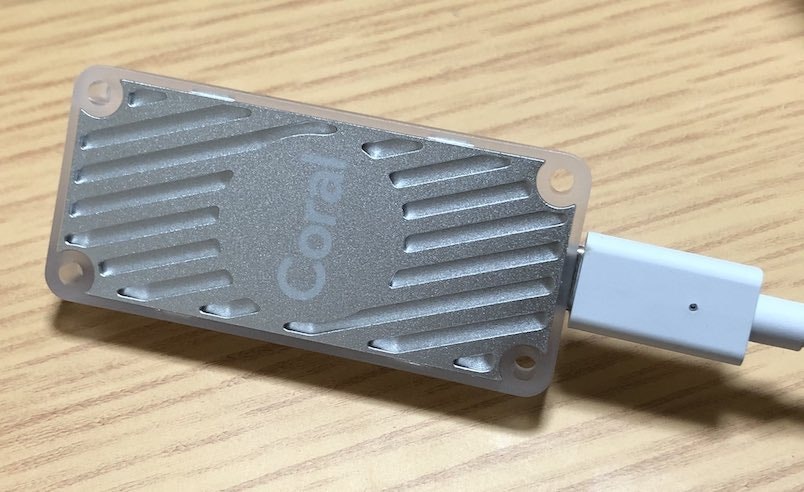
これらが完了したら Coral USB Accelerator を USB3.0 のコネクタに接続するように、と書いてあるので、Mac に Coral USB Accelerator を接続します。
PyCoral library のインストール
次の手順は「PyCoral library のインストール」になるようです。
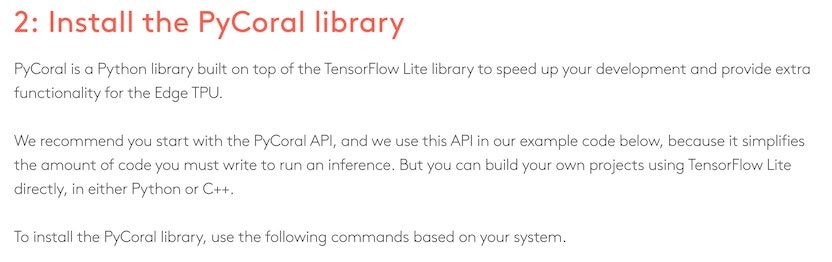
上記の内容を見ると、Python で TensorFlow Lite のモデルを扱ったりなどできるもののようです。
Mac の場合、以下のコマンドを実行して「PyCoral (and TensorFlow Lite)」をインストールするように、と書いてあります。
pip3 install --extra-index-url https://google-coral.github.io/py-repo/ pycoral
そして、この部分でエラーが出ました。
どうやら自分の環境の Python 3.x 系のバージョンが 3.9.x だったようです(上の Requirement の部分で、「Python 3.5-3.8」という記載があり、上限が設定されてたところ・・・)。対応されているバージョンにしてから、再度上記の PyCoral のインストールをおこなったらエラーが出なくなりました。
環境構築後に簡単なテストを行う
「3: Run a model on the Edge TPUlink」の部分を続けて進めていきます。以下のコマンドを順番に進めます。
# Download the example code from GitHub:
$ mkdir coral && cd coral
$ git clone https://github.com/google-coral/pycoral.git
$ cd pycoral
# Download the model, labels, and bird photo:
$ bash examples/install_requirements.sh classify_image.py
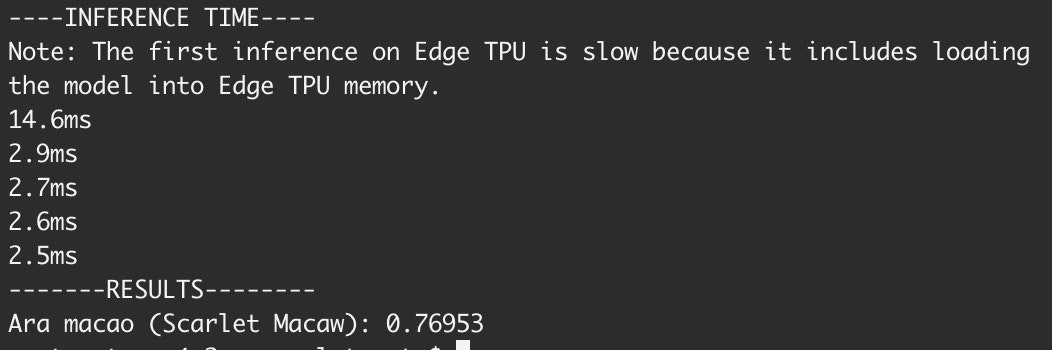
# Run the image classifier with the bird photo (shown in figure 1):
$ python3 examples/classify_image.py \
--model test_data/mobilenet_v2_1.0_224_inat_bird_quant_edgetpu.tflite \
--labels test_data/inat_bird_labels.txt \
--input test_data/parrot.jpg
そして、上記を進めた結果、最後に以下の出力が得られました。公式ページの説明を見ると、以下の内容はうまくいった状態を示しているようです。
その後の説明をざっくり読んでみて、この後の作業に関係するかは分からないものの「Or to create your own model that's compatible with the Edge TPU, read TensorFlow Models on the Edge TPU.」と書かれた部分のリンクをメモ。
●TensorFlow models on the Edge TPU | Coral
https://coral.ai/docs/edgetpu/models-intro/
Teachable Machine で機械学習モデルの出力
Coral USB Accelerator を使う準備はできたと思われるので、Teachable Machine でのモデルのエクスポートを進めていきます。
過去の記事と同様に、この記事では学習に関する説明は省略し、モデルがエクスポートできる状態になった後からの手順を記載していきます。
なお、過去の記事の「ブラウザ上での学習」に参考リンクは掲載しているので、学習に関する情報については、よろしければそちらをご参照ください。
Coral用のモデルをエクスポート
Teachable Machine でのCoral用モデルのエクスポートを、以下から行っていきます。
ちなみに、ここでエクスポートするモデルは「Class 1」・「Class 2」という 2つのクラスを含んだものになります。
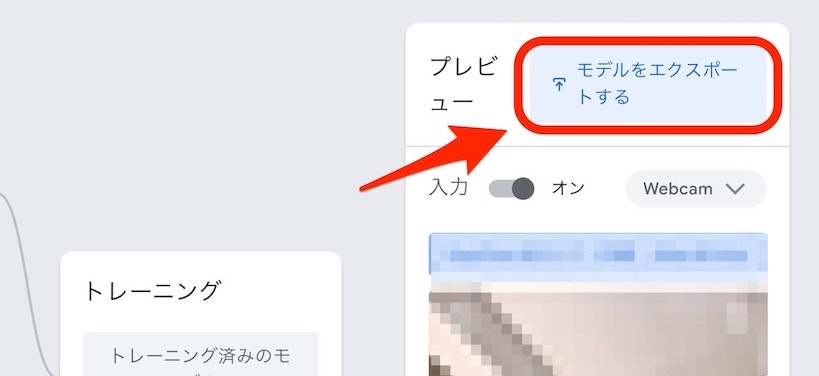
そして、エクスポートで行う操作は以下のとおりで、選択する部分は「TensorFlow Lite ⇒ EdgeTPU ⇒ モデルのダウンロード」となります。
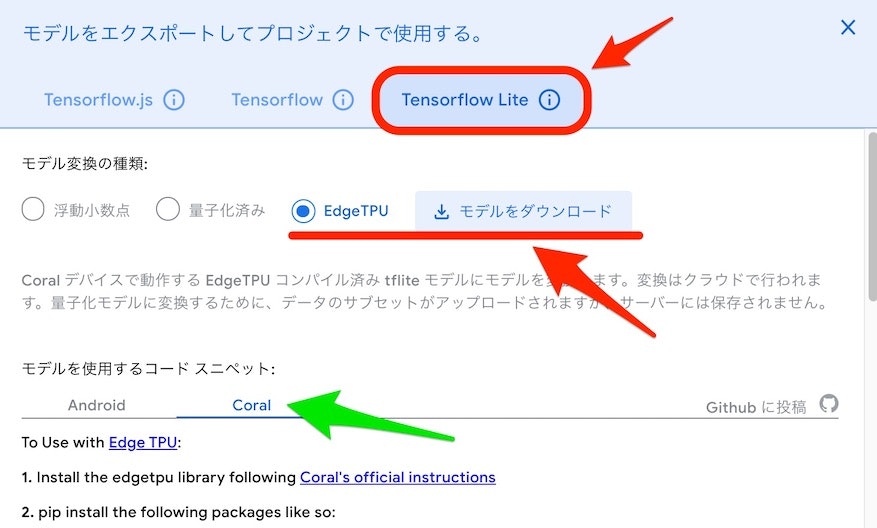
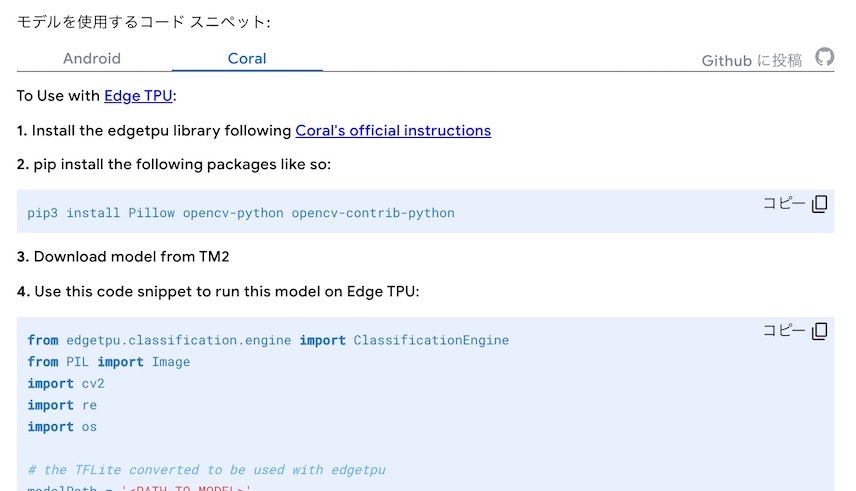
また、上の画像の緑矢印で示した部分を選ぶと、エクスポートしたモデルを利用するための手順やソースコードのサンプルを見ることができます。Coral を選択すると、以下のような内容が表示されます。
いったん、モデルのダウンロードの話に戻ります。モデルのダウンロードを行うと、converted_edgetpu.zip というファイルがダウンロードされ、その ZIPファイルを解凍すると「labels.txt」・「model_edgetpu.tflite」という 2つのファイルを得られます。
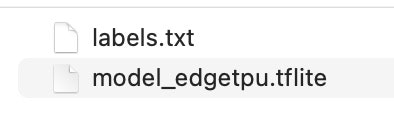
これらのファイルをこの後に使っていきます。
プログラムの準備と実行(うまくいかず試行錯誤)
モデルのダウンロードができたところで、それを利用して動かすプログラムを準備します。
上で「エクスポートしたモデルを利用するための手順やソースコードのサンプルを見ることができる」と書いていた部分を見ていきます。ここまでの手順を考慮すると、次に必要になりそうな手順は以下となりそうです。
$ pip3 install Pillow opencv-python opencv-contrib-python
上記の実行はエラーが出ることもなく、進められました。
あとは、サンプルコードを少し書きかえて動かすだけで良さそうです。書きかえが必要な箇所は以下の部分だけでした。
# the TFLite converted to be used with edgetpu
modelPath = '<PATH_TO_MODEL>'

# The path to labels.txt that was downloaded with your model
labelPath = '<PATH_TO_LABELS>'
それぞれ、Teachable Machine でエクスポートした「model_edgetpu.tflite」と「labels.txt」のパスを指定しましょう(それらのファイルを置く場所は、必要があれば変更もしつつ)。自分の場合は ZIPファイルが解凍されてできた「converted_edgetpu」というフォルダを、Python のプログラムのファイル(名前は適当に test.py とつけました)と同じ階層に置きました。
そして pytnon test.py というコマンドでプログラムを実行したところ、以下のエラーが・・・。

Teachable Machine のページに出ていたリンクやリンク先の情報を見直してみると、以下が関係していそうでした。
●Edge TPU Python API overview | Coral
https://coral.ai/docs/edgetpu/api-intro/#install-the-library
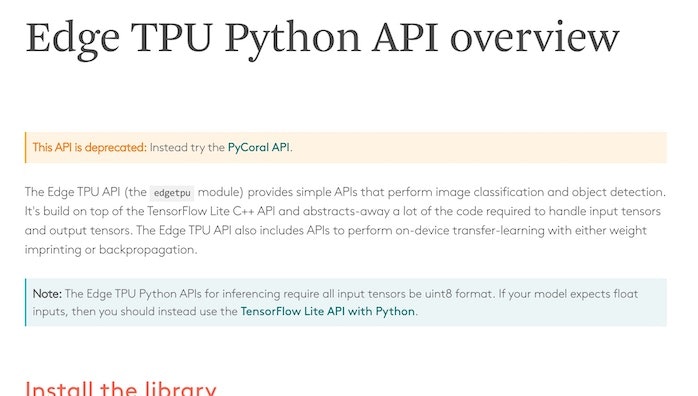
利用できなくなった API が使われている部分があるので、そのプログラムの中の一部を PyCoral API を使ったものに置きかえれば問題が解決しそうです。
from edgetpu.classification.engine import ClassificationEngine の部分に関わるところの置き換えが必要となりそうなので、該当箇所をピックアップしてみます。
engine = ClassificationEngine(modelPath)
classifications = engine.ClassifyWithImage(image)
以下の情報を見つつ、書きかえを行ってみます。
●New Coral APIs and tools for AI at the edge — The TensorFlow Blog
https://blog.tensorflow.org/2020/11/new-coral-apis-and-tools-for-ai-at-edge.html
●pycoral/classify_image.py at master · google-coral/pycoral
https://github.com/google-coral/pycoral/blob/master/examples/classify_image.py
そして、あれこれ試したのですが失敗が続き・・・。
Teachable Machine のサンプルコードを使わない方向に変更
ここで方針を変更して、Teachable Machine のカメラ入力を使う処理のサンプルを使う方向から、以下の画像ファイルを読み込んで処理するサンプルを使う方向にします。
●Run inference on the Edge TPU with Python | Coral
https://coral.ai/docs/edgetpu/tflite-python/#run-an-inference-with-the-pycoral-api
元の内容は以下のとおりです。
import os
import pathlib
from pycoral.utils import edgetpu
from pycoral.utils import dataset
from pycoral.adapters import common
from pycoral.adapters import classify
from PIL import Image

# Specify the TensorFlow model, labels, and image
script_dir = pathlib.Path(__file__).parent.absolute()
model_file = os.path.join(script_dir, 'mobilenet_v2_1.0_224_quant_edgetpu.tflite')
label_file = os.path.join(script_dir, 'imagenet_labels.txt')
image_file = os.path.join(script_dir, 'parrot.jpg')

# Initialize the TF interpreter
interpreter = edgetpu.make_interpreter(model_file)
interpreter.allocate_tensors()

# Resize the image
size = common.input_size(interpreter)
image = Image.open(image_file).convert('RGB').resize(size, Image.ANTIALIAS)

# Run an inference
common.set_input(interpreter, image)
interpreter.invoke()
classes = classify.get_classes(interpreter, top_k=1)

# Print the result
labels = dataset.read_label_file(label_file)
for c in classes:
  print('%s: %.5f' % (labels.get(c.id, c.id), c.score))
ここで、上記の中の以下の部分を変更します。
- model_file の指定(自分が準備したファイルの名前・パスに変更)
- label_file の指定(自分が準備したファイルの名前・パスに変更)
- image_file の指定(この後準備する画像ファイルの名前・パスを指定)
- classify.get_classes の top_k の値(1 から 2 に変更)
さらに、このプログラムでは画像分類の処理対象となる画像をファイルで用意する形のため、Python のプログラムのファイルを置いた同じ階層に「test01.jpg(Class 1 となることが期待されるもの)」・「test02.jpg(Class 2 となることが期待されるもの)」という 2つの画像ファイルを置きました。
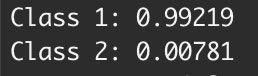
そしてプログラムを実行してみると、以下の結果が得られました。
test01.jpg を処理対象とした結果
test02.jpg を処理対象とした結果
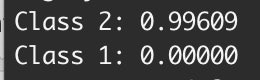
2つの画像のうち、どちらを用いた場合にも期待される結果が得られました。
最終的に利用したプログラムを以下に掲載します(2つの画像のどちらかを指定する部分は、コメントアウトで対応しています)。
import os
import pathlib
from pycoral.utils import edgetpu
from pycoral.utils import dataset
from pycoral.adapters import common
from pycoral.adapters import classify
from PIL import Image

script_dir = pathlib.Path(__file__).parent.absolute()
model_file = os.path.join(script_dir, 'converted_edgetpu/model_edgetpu.tflite')
label_file = os.path.join(script_dir, 'converted_edgetpu/labels.txt')
image_file = os.path.join(script_dir, 'test01.jpg')
# image_file = os.path.join(script_dir, 'test02.jpg')

interpreter = edgetpu.make_interpreter(model_file)
interpreter.allocate_tensors()

size = common.input_size(interpreter)
image = Image.open(image_file).convert('RGB').resize(size, Image.ANTIALIAS)

common.set_input(interpreter, image)
interpreter.invoke()
classes = classify.get_classes(interpreter, top_k=2)

labels = dataset.read_label_file(label_file)
for c in classes:
  print('%s: %.5f' % (labels.get(c.id, c.id), c.score))
まとめ
Teachable Machine のサンプルコードで使われてた API が使えなくなっていて、新しい API は仕様がけっこう違っていて、という部分があって想定より苦労させられましたが、なんとか画像分類の実行までたどり着けて良かったです。
(普段 Python は全くと言っていいほど書かないため、試行錯誤の部分の苦労がさらに上乗せされた感)