はじめに
daily.dev をに出てきているのを見かけて気になった、以下の「Magic UI」を試してみた話です。
●Magic UI
https://magicui.design/

先に試した結果を示してみます。
これを「公式の手順通りに進めれば完了」となると思ってやったのですが、エラーが出てしまい、そのエラーの対処をしました。そのあたりの話も、以下で書いていきます。
少し情報を見てみる
ページ上部に以下の Pro版記載があったので、こちらも見てみました。

そうすると以下のページが表示され、有償版があるようで、その有償版でのみ提供されている内容があるようでした。
●Magic UI Pro
https://pro.magicui.design/

もう少し公式情報を見てみる
もう少し公式情報を見ていくと、以下のドキュメントや GitHub のリポジトリがあるようです。
●Introduction | Magic UI
https://magicui.design/docs

●magicuidesign/magicui: UI Library for Design Engineers. Animated components and effects you can copy and paste into your apps. Free. Open Source.
https://github.com/magicuidesign/magicui
公式ドキュメントの左メニューで「Pro」という表示されている項目も混じっていて、上で書いた Pro版の機能の項目になるようでした。
使い方を少し見てみる
とりあえず無償版を試そうと思い、使い方を見ていきました。
公式ドキュメントの左に「Installation」という項目があるので、それを選択します。

「Note: We have the exact same installation process as shadcn/ui.」という記載があり、使い方について shadcn/ui と同じようなやり方ができるようです。それと、導入方法については「pnpm、npm、yarn、bun」を使った方法が確認できるようです。

自分はこの後、npm を使った手順で進めてみることにしました。
実際に試していく
実際に試していきます。
プロジェクトの作成(shadcn/ui + Next.js を扱うコマンド)
最初に以下のコマンドでプロジェクトを作成します。
npx shadcn@latest init
この後に選択肢がいくつか出てきましたが、デフォルトの選択肢で進めていきました。


プロジェクト作成は、ひとまず完了です。
確認のために開発サーバーを起動してみる
次に進む前に、いったん確認のために開発サーバーを起動してみます。先ほどのコマンドで作った「my-app」フォルダに移動して、 npm run dev コマンドを実行します。
cd my-app
npm run dev
その後、以下が出力されます。

そこに出てきている http://localhost:3000 にブラウザでアクセスして、以下が表示されることを確認できました。

コンポーネントの追加
次はコンポーネントの追加です。公式が書いているコマンドをそのまま使います。
「my-app」フォルダ内で以下のコマンドを実行します。
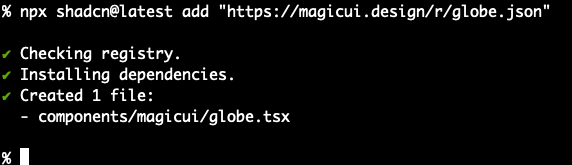
npx shadcn@latest add "https://magicui.design/r/globe.json"
page.tsx を書きかえる
appフォルダの page.tsx が、デフォルトでは以下となっていますが、これを書きかえます。
import Image from "next/image";

export default function Home() {
  return (
    <div className="grid grid-rows-[20px_1fr_20px] items-center justify-items-center min-h-screen p-8 pb-20 gap-16 sm:p-20 font-[family-name:var(--font-geist-sans)]">
      <main className="flex flex-col gap-[32px] row-start-2 items-center sm:items-start">
        <Image
          className="dark:invert"
          src="/next.svg"
          alt="Next.js logo"
          width={180}
          height={38}
          priority
        />
        <ol className="list-inside list-decimal text-sm/6 text-center sm:text-left font-[family-name:var(--font-geist-mono)]">
          <li className="mb-2 tracking-[-.01em]">
            Get started by editing{" "}
            <code className="bg-black/[.05] dark:bg-white/[.06] px-1 py-0.5 rounded font-[family-name:var(--font-geist-mono)] font-semibold">
              app/page.tsx
            </code>
            .
          </li>
          <li className="tracking-[-.01em]">
            Save and see your changes instantly.
          </li>
        </ol>

        <div className="flex gap-4 items-center flex-col sm:flex-row">
          <a
            className="rounded-full border border-solid border-transparent transition-colors flex items-center justify-center bg-foreground text-background gap-2 hover:bg-[#383838] dark:hover:bg-[#ccc] font-medium text-sm sm:text-base h-10 sm:h-12 px-4 sm:px-5 sm:w-auto"
            href="https://vercel.com/new?utm_source=create-next-app&utm_medium=appdir-template-tw&utm_campaign=create-next-app"
            target="_blank"
            rel="noopener noreferrer"
          >
            <Image
              className="dark:invert"
              src="/vercel.svg"
              alt="Vercel logomark"
              width={20}
              height={20}
            />
            Deploy now
          </a>
          <a
            className="rounded-full border border-solid border-black/[.08] dark:border-white/[.145] transition-colors flex items-center justify-center hover:bg-[#f2f2f2] dark:hover:bg-[#1a1a1a] hover:border-transparent font-medium text-sm sm:text-base h-10 sm:h-12 px-4 sm:px-5 w-full sm:w-auto md:w-[158px]"
            href="https://nextjs.org/docs?utm_source=create-next-app&utm_medium=appdir-template-tw&utm_campaign=create-next-app"
            target="_blank"
            rel="noopener noreferrer"
          >
            Read our docs
          </a>
        </div>
      </main>
      <footer className="row-start-3 flex gap-[24px] flex-wrap items-center justify-center">
        <a
          className="flex items-center gap-2 hover:underline hover:underline-offset-4"
          href="https://nextjs.org/learn?utm_source=create-next-app&utm_medium=appdir-template-tw&utm_campaign=create-next-app"
          target="_blank"
          rel="noopener noreferrer"
        >
          <Image
            aria-hidden
            src="/file.svg"
            alt="File icon"
            width={16}
            height={16}
          />
          Learn
        </a>
        <a
          className="flex items-center gap-2 hover:underline hover:underline-offset-4"
          href="https://vercel.com/templates?framework=next.js&utm_source=create-next-app&utm_medium=appdir-template-tw&utm_campaign=create-next-app"
          target="_blank"
          rel="noopener noreferrer"
        >
          <Image
            aria-hidden
            src="/window.svg"
            alt="Window icon"
            width={16}
            height={16}
          />
          Examples
        </a>
        <a
          className="flex items-center gap-2 hover:underline hover:underline-offset-4"
          href="https://nextjs.org?utm_source=create-next-app&utm_medium=appdir-template-tw&utm_campaign=create-next-app"
          target="_blank"
          rel="noopener noreferrer"
        >
          <Image
            aria-hidden
            src="/globe.svg"
            alt="Globe icon"
            width={16}
            height={16}
          />
          Go to nextjs.org →
        </a>
      </footer>
    </div>
  );
}
書きかえる内容は以下の内容です。

テキストで書き出すと、以下のとおりです。
import { Globe } from "@/components/ui/globe";

export default function Home() {
  return (
    <div>
      <Globe />
    </div>
  );
}
エラーを解決する
これで完了と思っていたら以下のエラーが出ました。

1つ目のエラーの解決
上記のエラーの原因を探ってみます。
プロジェクトの構成を確認したところ、フォルダ名の部分が違っているようです。具体的には、 "@/components/ui/globe" の部分を "@/components/magicui/globe" にする必要がありそうです。

上記の修正をしたところ、2つ目のエラーが出ました。
2つ目のエラーを解決
2つ目のエラーは以下のとおりです。

プロジェクトルートから「components > magicui」とたどったところにある globe.tsx の冒頭の部分が関係しているようです。

この部分のパスが問題のようなので、7行目の "/lib/utils" を "@/lib/utils" に書きかえます。

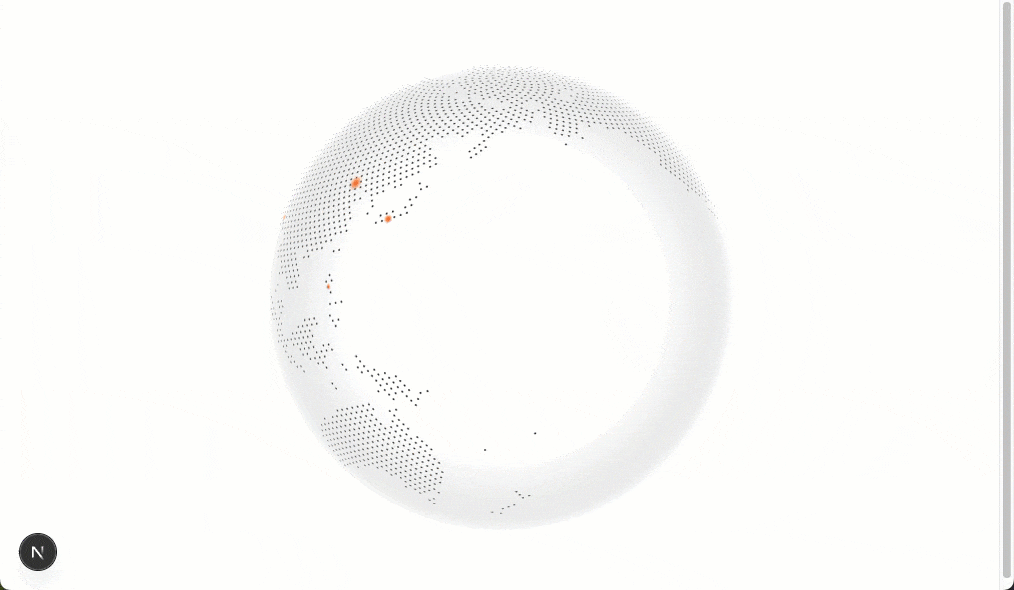
これでエラーが解消され、以下が表示されました。
上記のエラー解決時に参照した内容
上記のエラー解決の際に、shadcn/ui のほうの手順やファイルの中身を見て、解決方法を探っていきました。
●Next.js - shadcn/ui
https://ui.shadcn.com/docs/installation/next
shadcn/ui の手順は、以下の通りでした。
手順1: プロジェクトの作成
以下のコマンドを実行します。
npx shadcn@latest init
手順2: コンポーネントの追加
以下のコマンドで、フォルダへの移動と npxコマンドを使った処理を実行します。
cd my-app
npx shadcn@latest add button
手順3: app/page.tsx の書きかえ
「app」フォルダの page.tsx を以下の内容に書きかえます。
import { Button } from "@/components/ui/button"

export default function Home() {
  return (
    <div>
      <Button>Click me</Button>
    </div>
  )
}
手順3 まで終えた後の表示の確認
手順3 まで終えた後、 http://localhost:3000 にアクセスすると、そこで表示される内容が以下のようになりました。
