Babylon.js を実行できる HTML を準備する際、「最小限の内容はどのようになるだろう?」と思って調べたら、公式に情報があったので、それを見てみました。
具体的には、以下のページの内容です。
●Starter HTML Template | Babylon.js Documentation
https://doc.babylonjs.com/setup/starterHTML
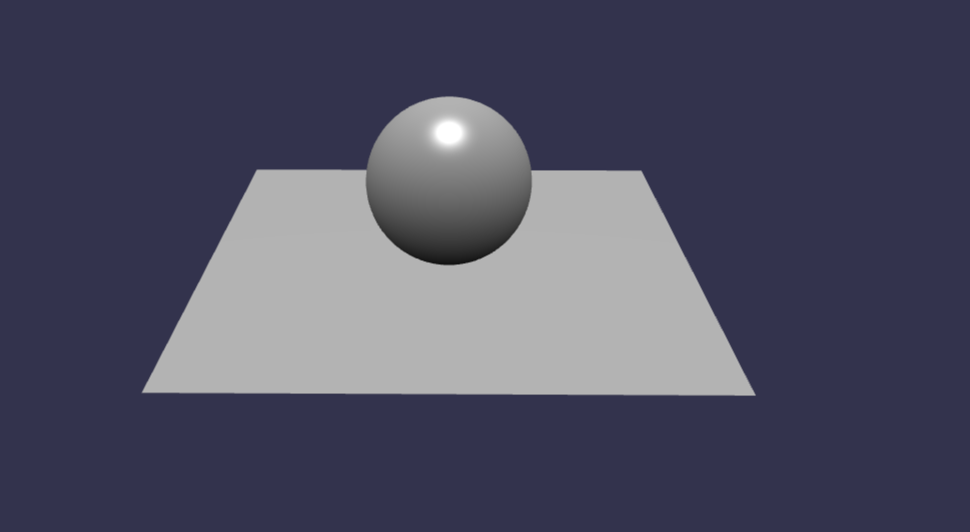
そして、実行した際に以下の内容が表示されるものです。
公式情報の内容
HTMLファイルの内容
まずは、公式ページに書かれた内容を掲載してみます。
<!DOCTYPE html>
<html xmlns="http://www.w3.org/1999/xhtml">

    <head>
        <meta http-equiv="Content-Type" content="text/html; charset=utf-8"/>
        <title>Babylon Template</title>

        <style>
            html, body {
                overflow: hidden;
                width: 100%;
                height: 100%;
                margin: 0;
                padding: 0;
            }
            #renderCanvas {
                width: 100%;
                height: 100%;
                touch-action: none;
            }
        </style>

        <script src="https://cdn.babylonjs.com/babylon.js"></script>

    </head>

   <body>

	<canvas id="renderCanvas"></canvas>

	<script>
        const canvas = document.getElementById("renderCanvas"); // Get the canvas element
        const engine = new BABYLON.Engine(canvas, true); // Generate the BABYLON 3D engine
        const createScene = function () {
            // Creates a basic Babylon Scene object
            const scene = new BABYLON.Scene(engine);
            // Creates and positions a free camera
            const camera = new BABYLON.FreeCamera("camera1",
                new BABYLON.Vector3(0, 5, -10), scene);
            // Targets the camera to scene origin
            camera.setTarget(BABYLON.Vector3.Zero());
            // This attaches the camera to the canvas
            camera.attachControl(canvas, true);
            // Creates a light, aiming 0,1,0 - to the sky
            const light = new BABYLON.HemisphericLight("light",
                new BABYLON.Vector3(0, 1, 0), scene);
            // Dim the light a small amount - 0 to 1
            light.intensity = 0.7;
            // Built-in 'sphere' shape.
            const sphere = BABYLON.MeshBuilder.CreateSphere("sphere",
                {diameter: 2, segments: 32}, scene);
            // Move the sphere upward 1/2 its height
            sphere.position.y = 1;
            // Built-in 'ground' shape.
            const ground = BABYLON.MeshBuilder.CreateGround("ground",
                {width: 6, height: 6}, scene);
            return scene;
        };
        const scene = createScene(); //Call the createScene function
        // Register a render loop to repeatedly render the scene
        engine.runRenderLoop(function () {
                scene.render();
        });
        // Watch for browser/canvas resize events
        window.addEventListener("resize", function () {
                engine.resize();
        });
	</script>

   </body>

</html>
この後、中身を見ていきます
HTML・CSS
HTML・CSS の基本的な構成は、以下の通りです。
- 読み込む JavaScriptライブラリ
-
https://cdn.babylonjs.com/babylon.jsのみ
-
- 描画部分の要素
- Canvas要素の
<canvas id="renderCanvas"></canvas>のみ
- Canvas要素の
- CSS の内容
- body の余白をなくす等の設定
- キャンバスのタッチ無効化など
JavaScript の内容
スクリプトタグ内の JavaScript の処理は、以下の通りです(※ コメントは削除)。
      const canvas = document.getElementById("renderCanvas");

      const engine = new BABYLON.Engine(canvas, true);
      const createScene = function () {
        const scene = new BABYLON.Scene(engine);
        const camera = new BABYLON.FreeCamera(
          "camera1",
          new BABYLON.Vector3(0, 5, -10),
          scene
        );
        camera.setTarget(BABYLON.Vector3.Zero());
        camera.attachControl(canvas, true);
        const light = new BABYLON.HemisphericLight(
          "light",
          new BABYLON.Vector3(0, 1, 0),
          scene
        );
        light.intensity = 0.7;
        const sphere = BABYLON.MeshBuilder.CreateSphere(
          "sphere",
          { diameter: 2, segments: 32 },
          scene
        );
        sphere.position.y = 1;
        const ground = BABYLON.MeshBuilder.CreateGround(
          "ground",
          { width: 6, height: 6 },
          scene
        );
        return scene;
      };
      const scene = createScene();
      engine.runRenderLoop(function () {
        scene.render();
      });
      window.addEventListener("resize", function () {
        engine.resize();
      });
大枠のみを残したもの
JavaScript の部分について、大枠の部分のみを残して見ていきます。
const canvas = document.getElementById("renderCanvas");
const engine = new BABYLON.Engine(canvas, true);

const createScene = function () {
};
const scene = createScene();

engine.runRenderLoop(function () {
});

window.addEventListener("resize", function () {
});
最初の 2行は、HTML で用意していた Canvas要素を、Babylon.js の Engine に紐付ける処理です。
その後の 3つの固まりは、それぞれ以下のとおりです。
- Scene の作成
- 描画用のループ
- ウィンドウがリサイズされた際の処理
上記の「描画用のループ」は、最小構成では描画の更新を行っていると思われる処理のみのようです。
また、「ウィンドウがリサイズされた際の処理」は、リサイズによるウィンドウサイズの変更が生じた際に、それに合わせて描画領域のサイズを変更する処理のようです。
Scene作成の部分
ここで、残り 1つの「Scene の作成」の部分を見ていきます。以下で、コードを抜粋したものを利用しつつ見ていきます。
以下は Engine に Scene を紐付けるもののようです。
const scene = new BABYLON.Scene(engine);
以下は、3D空間内のカメラの設定のようです。
ざっくり見た感じだと、カメラの位置・向きを決めているようです。また、カメラを固定されたものでなく、操作可能なものにしているようです。
  const camera = new BABYLON.FreeCamera(
    "camera1",
    new BABYLON.Vector3(0, 5, -10),
    scene
  );
  camera.setTarget(BABYLON.Vector3.Zero());
  camera.attachControl(canvas, true);
ここは、光の当たり具合を設定しているようです。
  const light = new BABYLON.HemisphericLight(
    "light",
    new BABYLON.Vector3(0, 1, 0),
    scene
  );
  light.intensity = 0.7;
そして、以下は描画された内容に出てくる球体・床の部分です。
  const sphere = BABYLON.MeshBuilder.CreateSphere(
    "sphere",
    { diameter: 2, segments: 32 },
    scene
  );
  sphere.position.y = 1;

  const ground = BABYLON.MeshBuilder.CreateGround(
    "ground",
    { width: 6, height: 6 },
    scene
  );
最低限、必要な内容だけだと、とてもシンプルになるようです。
ミニマムなサンプルに手を加えてみる
上記のミニマムなサンプルに、少しだけ手を加えてみます。
とりあえず、描画が更新されるごとに、ちょっとした変化を加えてみます。元々ある処理を活かして、それをやってみます。
具体的には、以下のとおり engine.runRenderLoop() の部分で sphere.position.y をシンプルに変化させてみます。
      engine.runRenderLoop(function () {
        scene.render();

        sphere.position.y += 0.03;
        if (sphere.position.y > 3) {
          sphere.position.y = 1;
        }
      });
実行結果は、以下の通りです。
球体が一定の高さまで浮き上がって、特定の高さになったら初期値の高さに戻る、という内容です。
この後、これをベースに、他の変更を加えたり処理を追加してみたりしようと思います。
