以下の記事のと同様に、「GPT-4o、Node.js、公式ライブラリ」が関係する記事です。
●GPT-4o と Node.js の process.loadEnvFile() と OpenAI のライブラリを組み合わせる - Qiita
https://qiita.com/youtoy/items/d535f9dd3db95b914fab
今回も、上記と同様に OpenAI の Node.js用ライブラリを使って、GPT-4o の API を扱います。
また、処理の内容は GPT-4o での画像ファイルの入力で、さらに、その画像は自前で Base64エンコードするというものです。
流れとしては、入力用の画像ファイルを用意して、それを Node.js の処理で Base64エンコードして、そのエンコードされた結果を GPT-4o の API にわたす形です。
GPT-4o での画像入力
Web上の画像を扱う(※ 公式サンプルベース)
まずは、公式サンプルをベースに、GPT-4o での画像ファイルの入力に URL指定を使うやり方を試します。
元にするサンプルは以下です。
●Vision - OpenAI API
https://platform.openai.com/docs/guides/vision?lang=node
これを少しだけ書きかえて、以下の内容にしました。
import OpenAI from "openai";

process.loadEnvFile("./development.env");

const openai = new OpenAI();

async function main() {
  const message = "この画像には何がうつってる?";
  // const message = "What’s in this image?";
  const response = await openai.chat.completions.create({
    model: "gpt-4o",
    messages: [
      {
        role: "user",
        content: [
          { type: "text", text: message },
          {
            type: "image_url",
            image_url: {
              url: "https://upload.wikimedia.org/wikipedia/commons/thumb/d/dd/Gfp-wisconsin-madison-the-nature-boardwalk.jpg/2560px-Gfp-wisconsin-madison-the-nature-boardwalk.jpg",
            },
          },
        ],
      },
    ],
  });
  console.log(response.choices[0]);
}
main();
「process.loadEnvFile()」の利用、「development.env」の準備についての説明(環境変数に関する話)は、前回の記事をご覧ください。
入力として指定した画像の URL は公式サンプルのとおりで、リンク先を見ると以下の画像となるようです。
実行結果は、以下のとおりです。
画像の内容を説明したテキストが得られました。
Base64エンコードした画像ファイルを使う
次に、入力する画像ファイルを指定する部分を変えてみます。
画像ファイルの読み込み、読みこんだ画像に対して Base64エンコードの処理をする、というのを Node.js で行ってみます。
まず、画像は以下の自前のもの(自分が試作したとある作品の画像)を使いました。
この画像のファイル名は「input.jpg」という名前にしています。
そして、JavaScript で実装した内容は以下のとおりです。
import OpenAI from "openai";
import fs from "fs";

process.loadEnvFile("./development.env");

const openai = new OpenAI();

async function main() {
  const message = "この画像には何がうつってる?";
  console.log(message);

  const imagePath = "./input.jpg";
  const imageBuffer = fs.readFileSync(imagePath);
  const imageBase64 = imageBuffer.toString("base64");

  const response = await openai.chat.completions.create({
    model: "gpt-4o",
    messages: [
      {
        role: "user",
        content: [
          { type: "text", text: message },
          {
            type: "image_url",
            image_url: {
              url: `data:image/jpeg;base64,${imageBase64}`,
            },
          },
        ],
      },
    ],
  });
  console.log(response.choices[0]);
}
main();
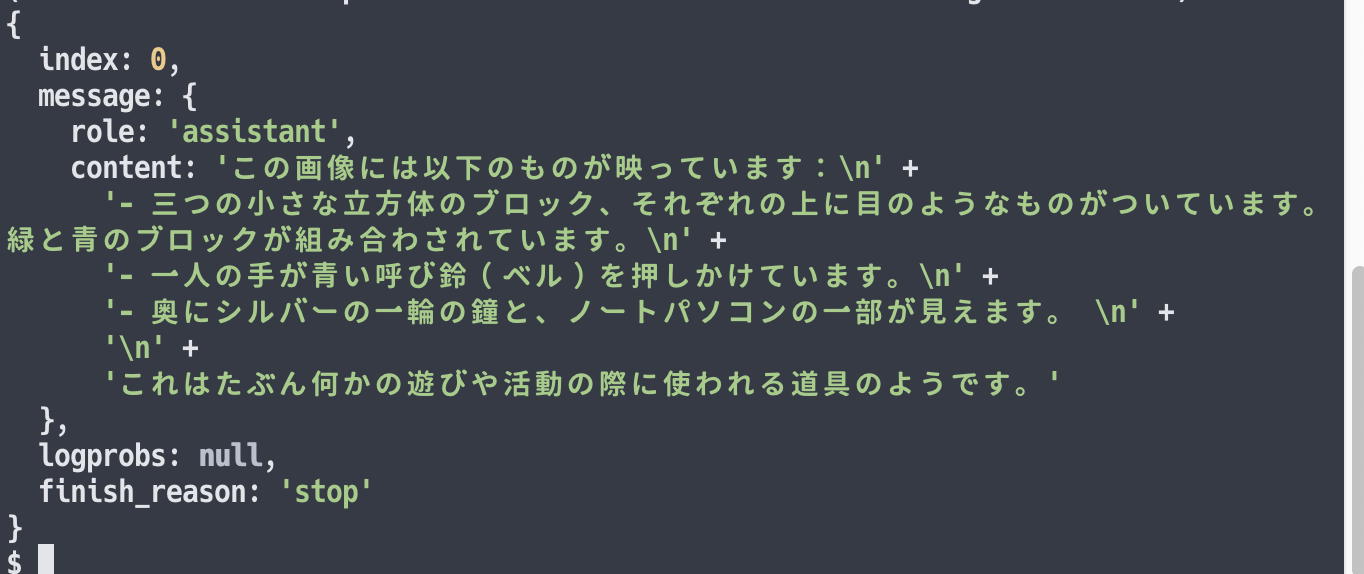
これを実行した結果は、以下のとおりです。
content の部分を取り出して、テキストのみにすると以下となります。
この画像には以下のものが映っています:
- 三つの小さな立方体のブロック、それぞれの上に目のようなものがついています。
    緑と青のブロックが組み合わされています。
- 一人の手が青い呼び鈴(ベル)を押しかけています。
- 奥にシルバーの一輪の鐘と、ノートパソコンの一部が見えます。

これはたぶん何かの遊びや活動の際に使われる道具のようです。
画像の内容を理解して説明してくれてそうです。


