どうも洋梨🍐です。
ゲームによくある「スコアランキング」ですが、この機能を実装していくまでの話を簡単に書いていきます。
こちらも是非ご覧ください。
環境
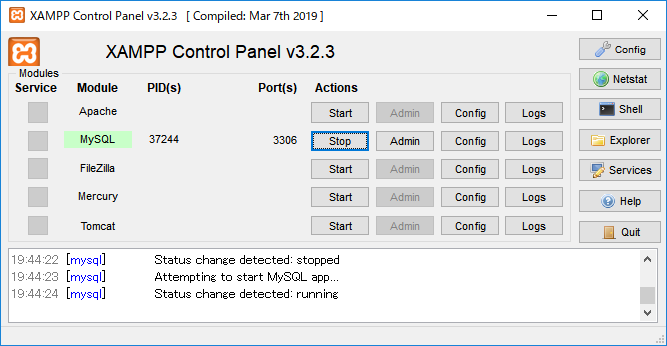
テスト環境としてXAMPP
データーベースはMySQL (MariaDB)
サーバーはNode.js
フロント側はUnityで行っています。
データーベースを構築する
今回構築するデーターベースは
id(プレイヤー のID) ,name (プレイヤー の名前) ,score (プレイヤーの点数) ,date(記録した日時)
を保存するものとします。
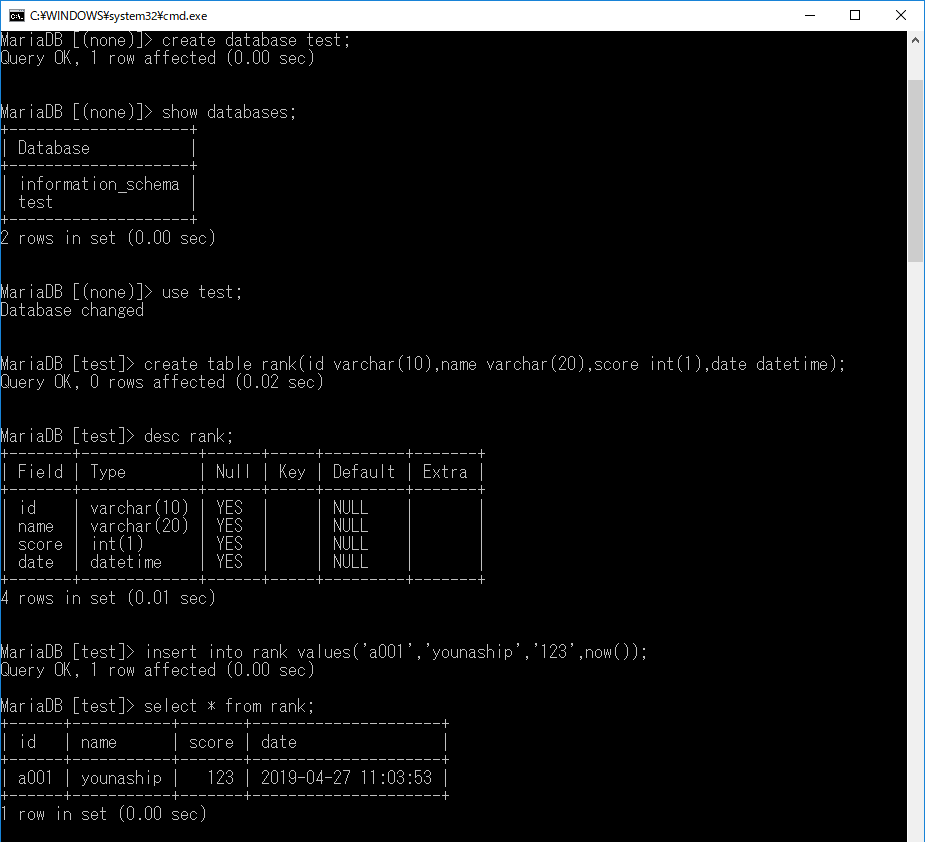
今回はテストとしてデーターをいくつか追加しておきます。なお、テーブル名は**”RANK“**としてます。
Node.jsでサーバーを構築
今回フレームワークとして Express を使用します。
なお、サーバーはポート番号:3000で待ち受け、 localhost:3000/Getにアクセスされ、データーの一覧をjson形式で返すものとします。
const exp = require("express");
const app = exp();

app.listen(3000,function(){
    console.log("Start Server.");
})

const mysql = require('mysql');

app.get("/Get",function(req,res,nex){

    let con = mysql.createConnection({
        host : 'localhost',
        user : 'root',
        port : 3306,
        database : 'test'
    });
    con.query("SELECT * FROM RANK",function(e,r){
        console.log(r);
        response(res,"OK",r);
    })
})

function response(res,result,data){
    let resJson = {status:result,data:data}
    res.json(resJson);
}
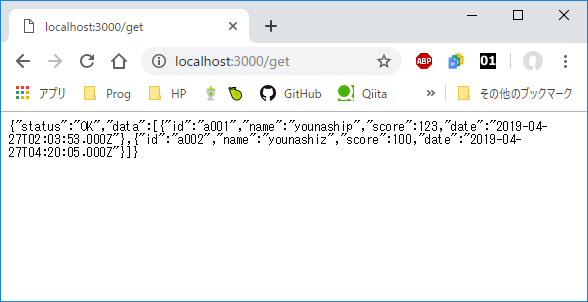
実行した後、ブラウザなどでアクセスすると動いているのを確認できると思います。
Unityでサーバから情報を受け取る
まずはUnity上でサーバーから受信できるかをテストします。
画面のGETボタンをクリックしたら受信をするようにします。
    public void OnPushGET()
    {
        var req = WebRequest.Create("http://localhost:3000/Get");
        var res = req.GetResponse();

        using (Stream stm = res.GetResponseStream())
        using(StreamReader str = new StreamReader(stm))
        {
            string json = str.ReadToEnd();
            Debug.Log(json);
        }
    }
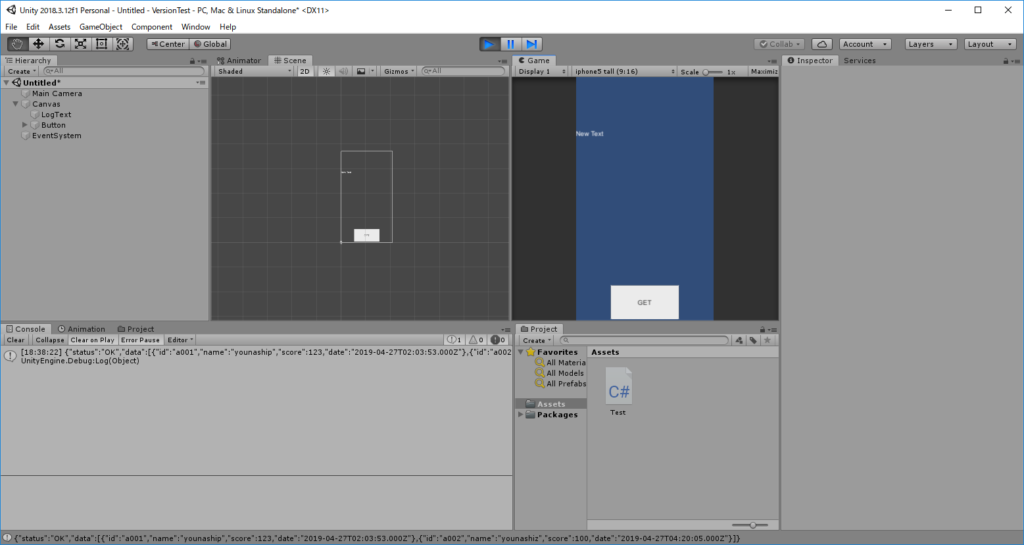
取得できている場合、ログに出力されると思います。
デシリアライズし、使える形式にする
[Serializable]
public class Json
{
    public string status;
    public Data[] data;
}

[Serializable]
public class Data
{
    public string id;
    public string name;
    public int score;
    public string date;
}
シリアライズに使うクラス(構造)はこんな感じです。
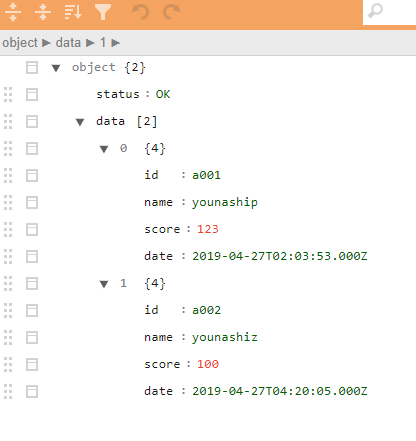
サーバーからのリスポンス(JSON)はこのようなデーターです
    public void OnPushGET()
    {
        var req = WebRequest.Create("http://localhost:3000/Get");
        var res = req.GetResponse();

        using (Stream stm = res.GetResponseStream())
        using(StreamReader str = new StreamReader(stm))
        {
            string json = str.ReadToEnd();
            Debug.Log(json);

            Json j = JsonUtility.FromJson<Json>(json);

            string s = "結果\n";
            foreach (Data data in j.data) s += "[" + data.name + "] Score:" + data.score + "\n";
            text.text = s;
        }
    }
先ほど書いたソースコードを受信したJSONデーターを表示するように書き換えます。
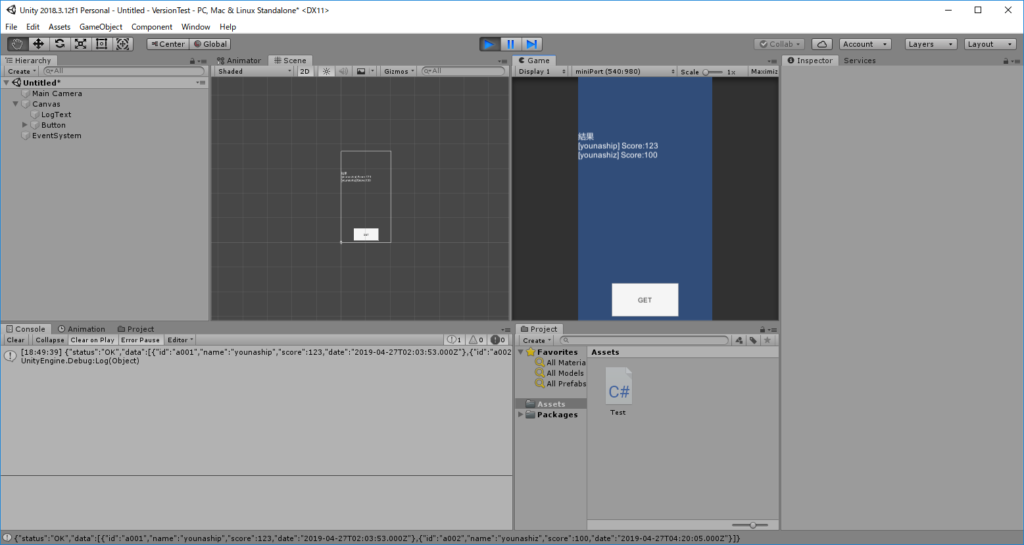
成功するとこのように表示されます。
これでUnity上でサーバーから取得した情報が使えるようになりました。
データーベースに情報を登録する
次はUnityからサーバーにスコア(情報)を登録できるようにしていきたいと思います。
リクエスト構造(JSON)
今回サーバーに送信するリクエスト形式は次のようにしました。
JSON { id , action, name , score }
id : ユーザー識別用ID
action : 操作内容(例:追加 = ADD)
name : ユーザー名
score : スコア
リクエストを処理する(サーバー側)
まずはNode.jsでリクエストを処理するためのプログラムを作成します。
今回は追加(ADD)リクエストが来たらとりあえず何も考えずデーターベースに登録するとします。
なお、リクエスト先は localhost:3000/post とします。
app.post("/Post",function(req,res,nex){
    let b = req.body;
    console.log("POST Receive. ["+b+"]");
    database_action(res,b.id,b.action,b.name,b.score);
})

function database_action(res,id,action,name,score){
    switch(action){
        case "ADD":
        console.log("Run Query : INSERT INTO RANK VALUES("+id+","+name+","+score+",now())");
        con.query("INSERT INTO RANK VALUES('"+id+"','"+name+"',"+score+",now())",function(e,r){
            if(e) response(res,"ERROR",null);
            else response(res,"OK",null);
        })
        break;
    }
}
リクエストを送信する(Unity)
テストデーターとして
{ id:”a003” , action:”ADD” , name:”MyUser” , score:300 }
を送信するとします。
なお、送信はPOSTで行います。
    public void OnPushPost()
    {
        var send = "{ \"id\":\"a003\" , \"action\" : \"ADD\" ,\"name\":\"MyUser\" ,\"score\": 300 }";
        var bytes = System.Text.Encoding.UTF8.GetBytes(send);

        var req = WebRequest.Create("http://localhost:3000/Post");
        req.Method = "POST";
        req.ContentType = "application/json; charset=utf-8";
        req.ContentLength = bytes.Length;
        req.Timeout = 3000;

        var reqStm = req.GetRequestStream();
        reqStm.Write(bytes, 0, bytes.Length);

        var res = req.GetResponse();
        using (Stream stm = res.GetResponseStream())
        using (StreamReader str = new StreamReader(stm))
        {
            string json = str.ReadToEnd();
            Debug.Log(json);
        }

        Debug.Log("Send POST:" + bytes.Length);

        reqStm.Close();
        res.Close();
    }
実行してみるとデーターベースに登録されているのがわかると思います。
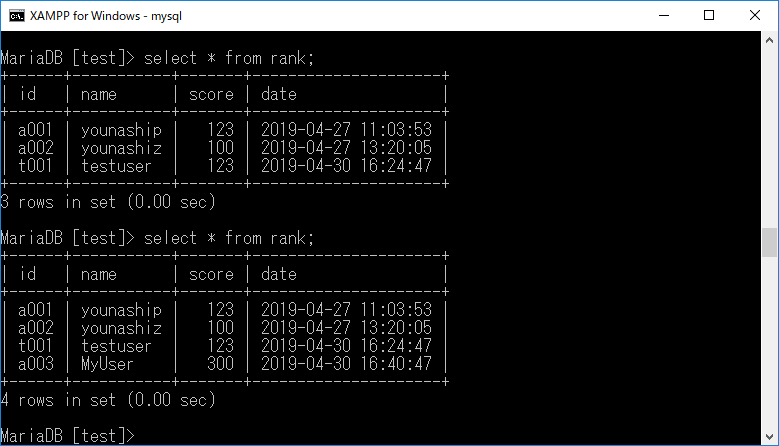
↑ リクエスト送信前と送信後でデーターが追加されているのがわかる
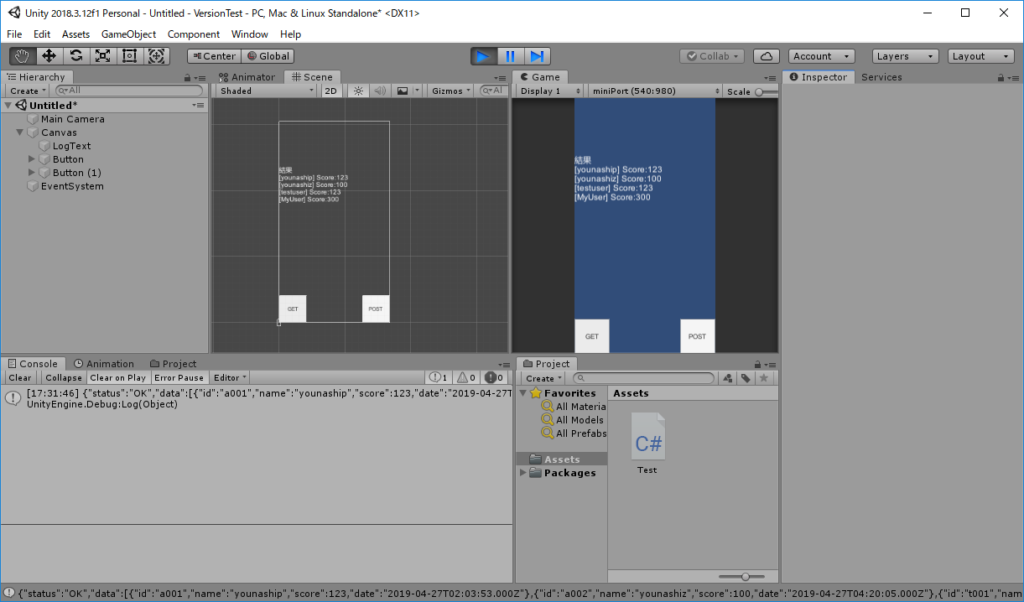
送信後 /Get でリストを取得すると確かに登録されていることが確認できます。これでUnityからサーバーに登録もできるようになり、ランキング表示機能として使えるようになりました👼
インジェクション対策(例:SQL文に?を利用していない等)などせず簡単に書いてしまってあるのでこのまま運用すると間違いなく問題が起きますのであしからず。
