Sign in with Appleは、2019年のWWDCで発表されて、サードパーティのログインを提供するアプリの場合は、Sign In With Appleも提供しなければならないらしい?ということです。
Expoでの対応は2019年の9月頃からで、11月の半ばにFirebaseも対応(beta)をしました。パット見この組み合わせの実装の例が見当たらなかったので、残しておきます。
公式ドキュメント。まずはこちらを呼んでもろもろセットアップしましょう。
https://docs.expo.io/versions/latest/sdk/apple-authentication/
app.jsonにフラグを追加
iosの配下に、 "usesAppleSignIn": true を追加します。
{
    "expo": {
        "ios": {
            "usesAppleSignIn": true
        }
}
Apple Developer consoleでの設定
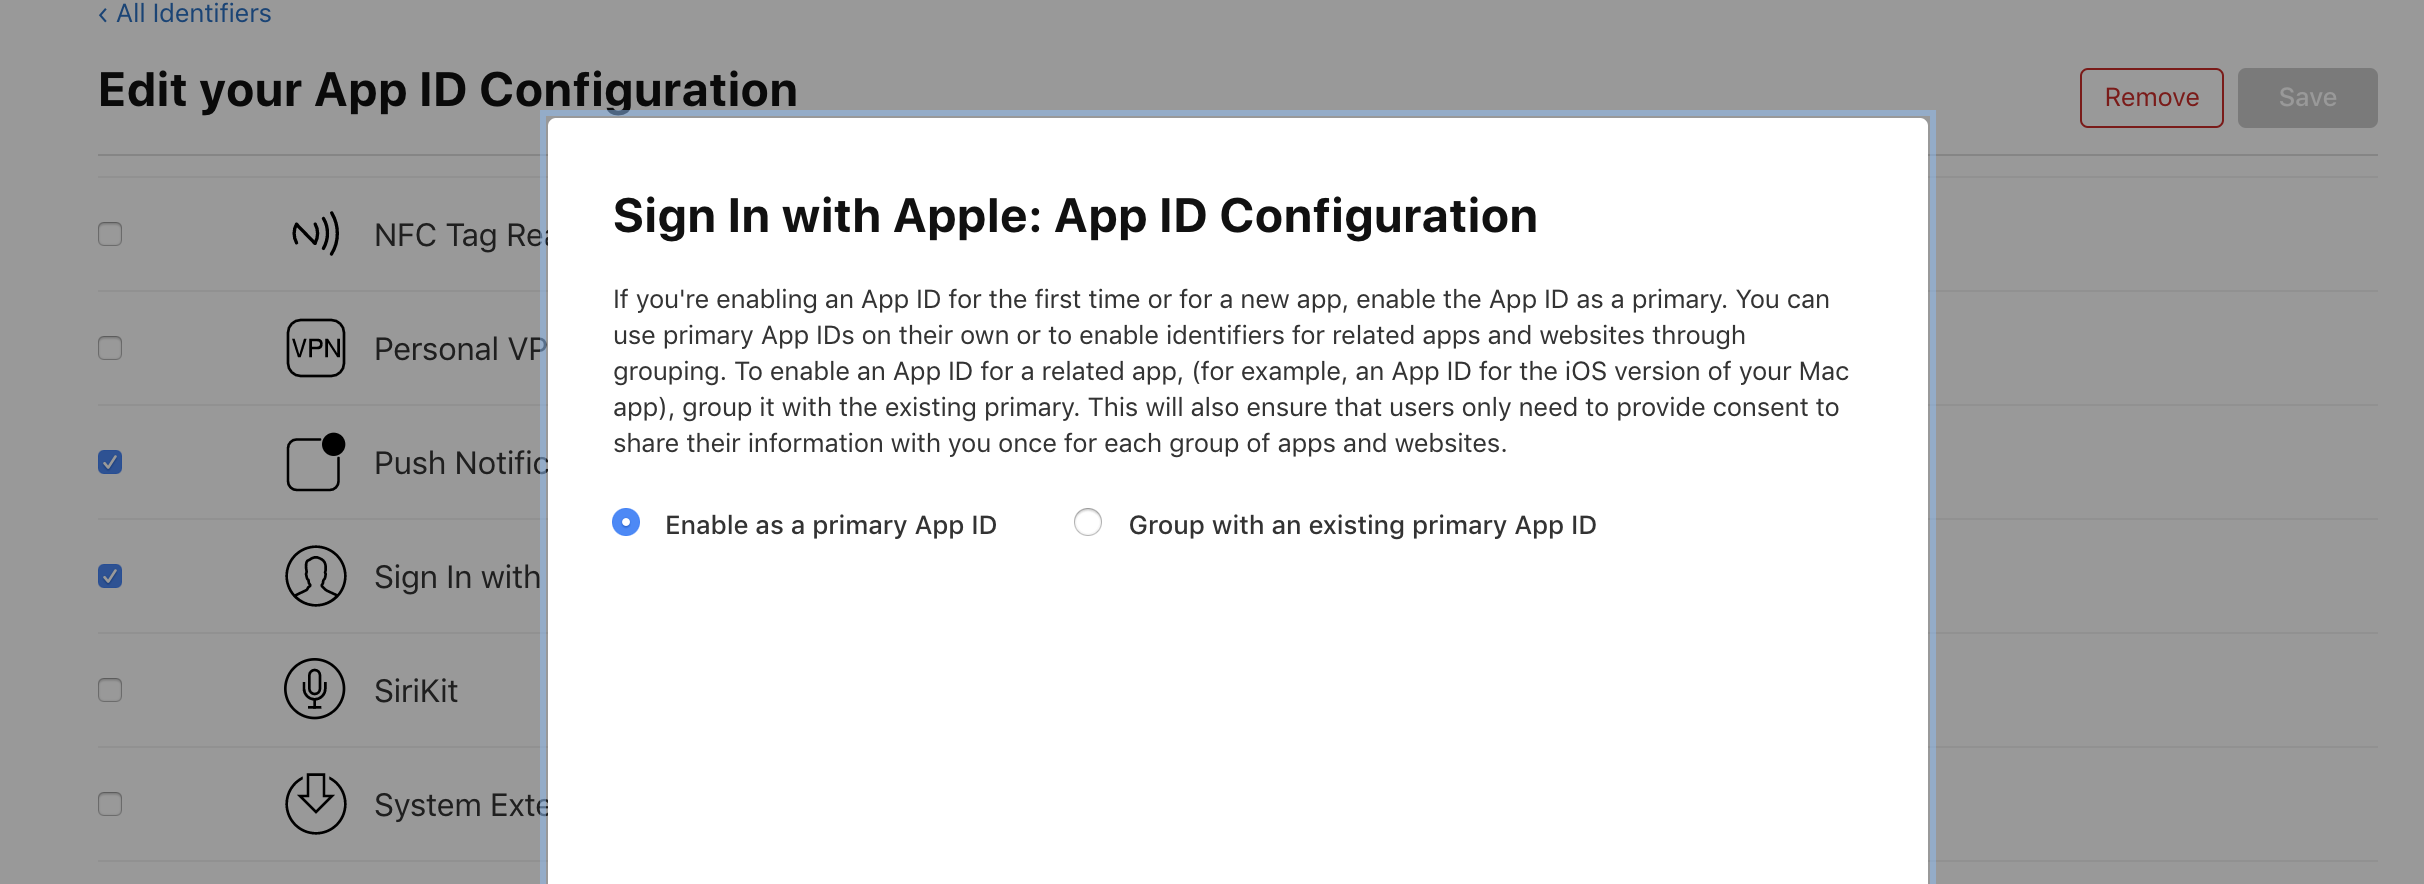
Apple Developer Consoleにログインして、"Certificates, Identifiers, & Profiles" のページに言って、さらに "Identifiers"を選択します。そこにあるIdentifiersのリストから、該当アプリのものを選択し、 Sign In with Appleを有効にします。

Firebase側
Authenticationの一覧から、Apple(beta)となっているのを選択し、自分のidentifierを入力します。

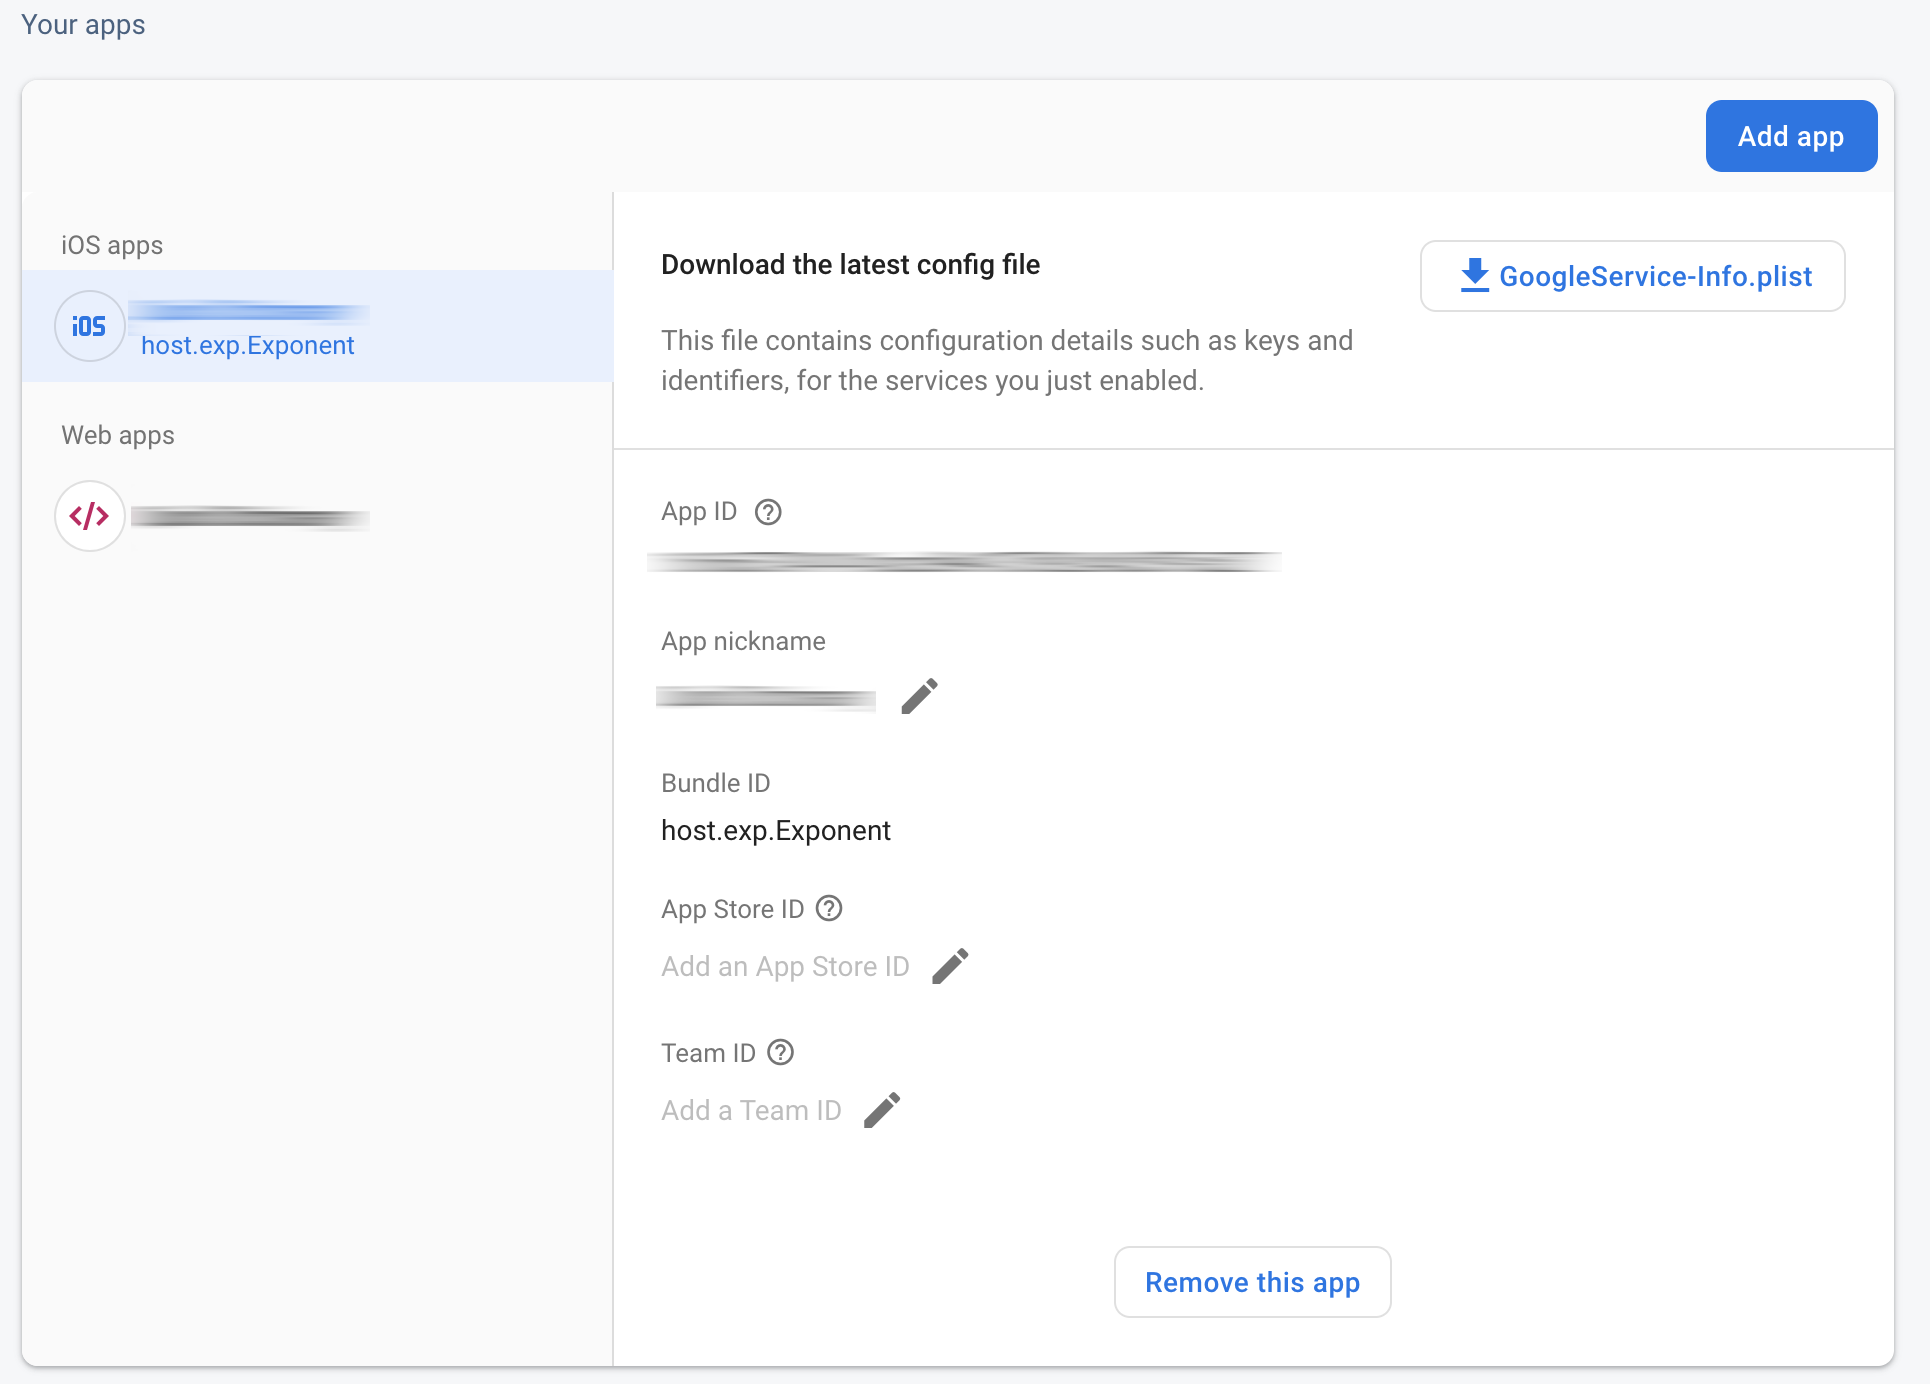
ただ、これが問題で、ローカルのシミューレーターでのテストの時のクライントはExpoのクライントなので、この値を host.exp.Exponent としておかないとだめです。 The audience in ID Token [host.exp.Exponent] does not match the expected audience com.example みたいなエラーが出てしまいます。
一方で、StandaloneアプリとしてBuildした場合は com.example のほうの値が渡されるので host.exp.Exponent を設定すると通らなくなります。。。と困っていたら、コメント欄からFirebaseのプロジェクトにiOSアプリを追加すればいいというのを教えてもらいました。~~~仕方ないので、ある程度検証できたら、Expoクライントでのテストは諦めて通常のidentifierを設定しておくようにしました。~~~
下の図のようにiOSアプリを1つ追加して、Bundle IDに host.exp.Exponent を入れておけば大丈夫でした。

Google認証の場合、すでにこれの対策としてStandaloneアプリとExpoクライントでそれぞれ別の設定ができるので問題ないのですが、Appleはまだそういうところまで配慮されてないようです。
実装
基本的にはExpoのドキュメントにあるもののコピペですが、 AppleAuthentication.signInAsync が成功すると返ってくる identityToken を使ってfirebase側の認証をします。
ここはFirebaseのGoogle/Facebook認証とほぼ同じの流れになります。
AppleSignInView = () => {
    const nonceString = nonceGen(32);
    return (
      <AppleAuthentication.AppleAuthenticationButton
        buttonType={AppleAuthentication.AppleAuthenticationButtonType.SIGN_IN}
        buttonStyle={AppleAuthentication.AppleAuthenticationButtonStyle.BLACK}
        cornerRadius={5}
        style={{ width: 200, height: 64 }}
        onPress={() => {
          try {
            AppleAuthentication.signInAsync({
              requestedScopes: [
                AppleAuthentication.AppleAuthenticationScope.FULL_NAME,
                AppleAuthentication.AppleAuthenticationScope.EMAIL
              ],
              state: nonceString
            }).then(result => {
              let provider = new firebase.auth.OAuthProvider("apple.com");
              let credential = provider.credential({
                idToken: result.identityToken,
                rawNonce: nonceString
              });
              firebase
                .auth()
                .signInWithCredential(credential)
                .catch(error => {
                  const errorCode = error.code;
                  const errorMessage = error.message;
                  console.log("firebase auth failed with Apple Sign In");
                  console.log(errorMessage);
                });
              // setSignInStatus(true);認証が終わったら状態変更する何か
            });
          } catch (e) {
            if (e.code === "ERR_CANCELED") {
              // handle that the user canceled the sign-in flow
            } else {
              // handle other errors
            }
          }
        }}
      />
    );
  };
nonceの値は、Swiftのサンプルコードを見たところランダムに生成しておけば良さそうだったので、stackoverflowあたりで見つけたものを使ってます。
function nonceGen(length) {
  let result = "";
  let characters =
    "ABCDEFGHIJKLMNOPQRSTUVWXYZabcdefghijklmnopqrstuvwxyz0123456789";
  let charactersLength = characters.length;
  for (let i = 0; i < length; i++) {
    result += characters.charAt(Math.floor(Math.random() * charactersLength));
  }
  return result;
}