これは
多くの文献でassetsの下にfontsを作り、その中でttf拡張子のファイルを入れてカスタムフォントを使う方法が利用されています。
├── App.js
├── app.json
├── assets
│      ├── fonts←これですね
│      │     ├── fa-solid-900.ttf
│      │     └── fontawesome-webfont.ttf
│      ├── icon.png
│      └── splash.png
│
├── babel.config.js
├── node_modules
│   ├── @babel
│   ├── @expo
│  いろいろ
├── package-lock.json
├── package.json
└── src
    ├── components
    ├── elements
    └── screens
しかし、上記の方法を利用すると、importだけではなくたくさんの処理を記述する必要があります。
今回は、expoが標準で用意してるvector-iconsを利用して、たった2行でFontAwesomeなどのカスタムフォントが利用する方法をご紹介します!
※npmやyarnで何かをinstallする必要もありません。
使い方
使用したいfontを選ぶ
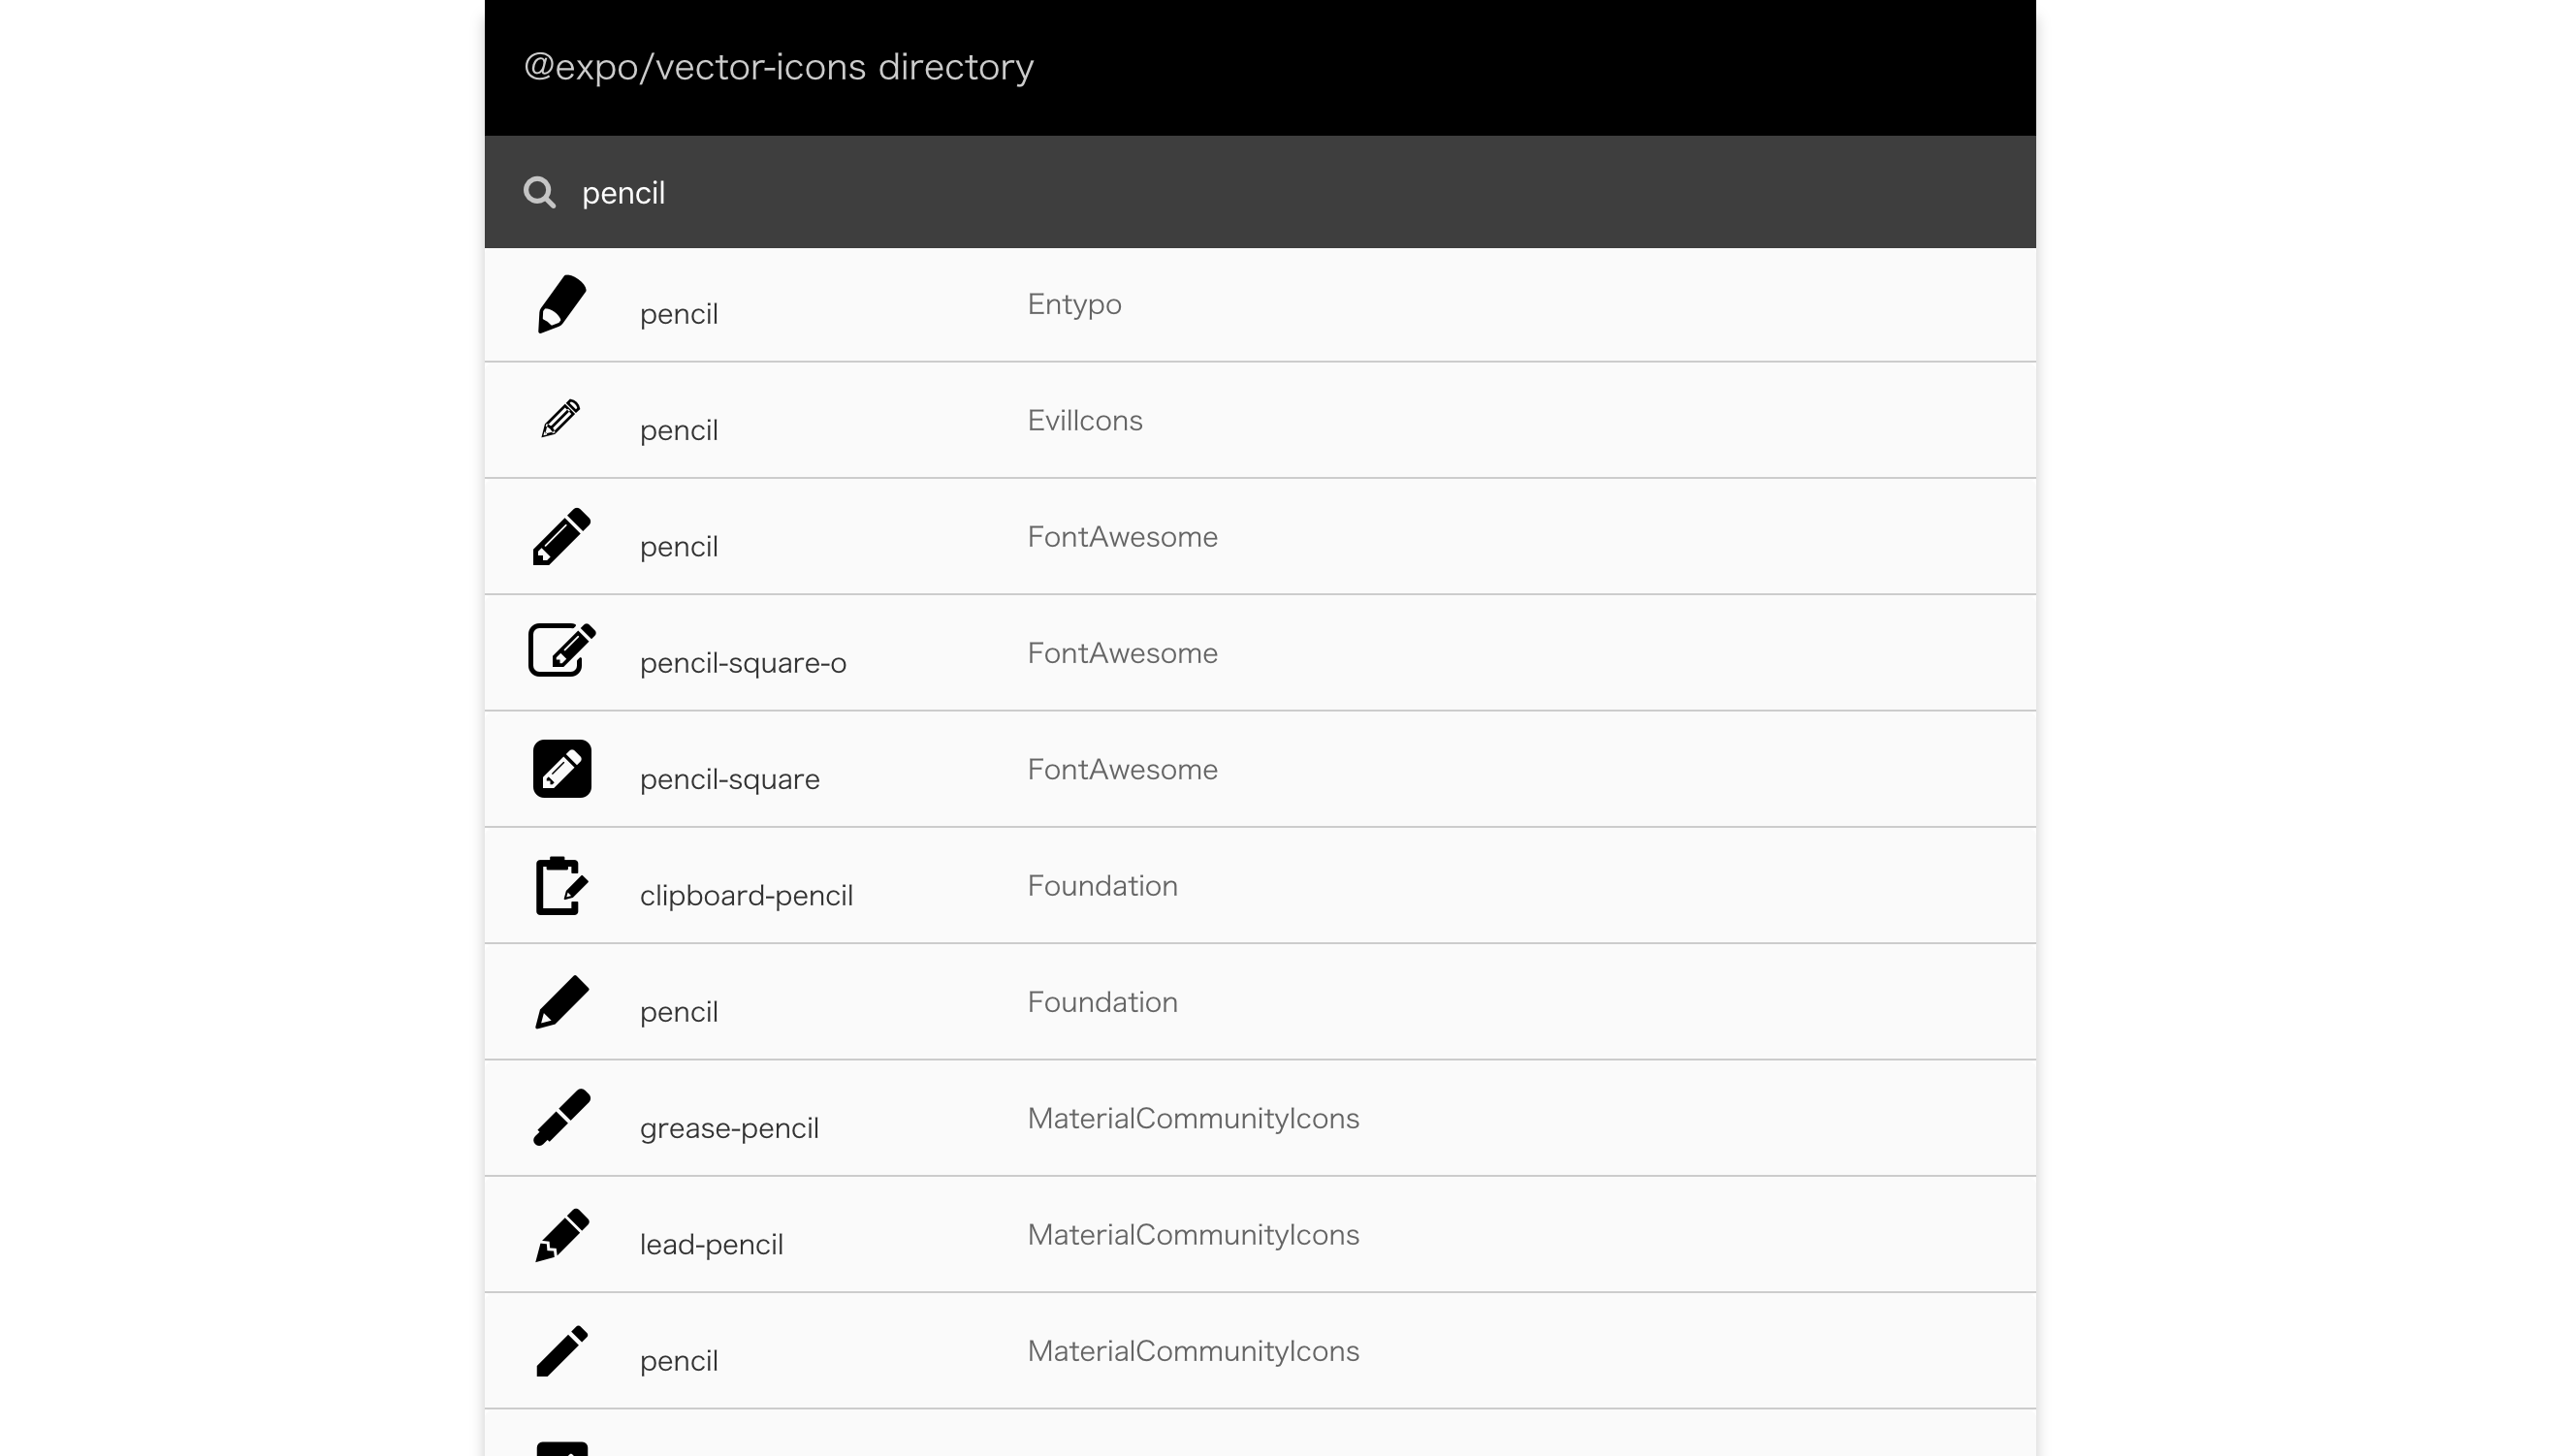
vector-iconsが対応しているfontにどのようなものがあるか調べていきます。

検索窓があるため、希望のfontを探せます。
使用する
vector-iconsから使用したいfontをimportします。

例えば、上記の画像と同じfontを利用したい場合は、このように書きます。
App.js
import { Entypo } from '@expo/vector-icons';

class FontElement extends React.Component{
    render(){
        return(
            <View style={styles.container}>
                <Entypo name="pencil" size={希望の大きさ} />
            </View>
        );
    }
}

export default FontElement;
どの方法よりもこのやり方が簡単なので、是非ご利用ください!
最後に
他にもoptionがあるようなので、是非気になる方は調べてみてください!