どうも。1月になって急に冷え込んで来ましたね。
みなさん今年の目標は立てましたか?
私はQiitaでの目標は「1週間に1つ記事の作成または更新を行う」に設定しました。
知識を蓄えることも重要ですが「情報を発信する」ことを念頭に置いていきたいと思います。
情報発信のためにも、今更ですがGitHubデビューしました!!!が使い方になかなか慣れない。
とりあえず何か作ってみたかったので今回はiOS用のプルダウンのようなものを作成してみました。
iOSでのプルダウンの実装
iOS開発を始めた時にみなさん思ったことがあるのではないでしょうか。
windowsでよく見るプルダウンはないのか・・・と。
ドラムロール式のコントロールはどうも苦手なのでプルダウンのようなコントロールを作成してみました。
2時間程度でパッと作ったものなので機能、品質はイマイチですが、少しづつ改良を重ねる予定です。
使って頂いた方はコメント頂けるとありがたいです。
ソースはGitHubのページから落としてください。
GitHub_iOS_pulldown
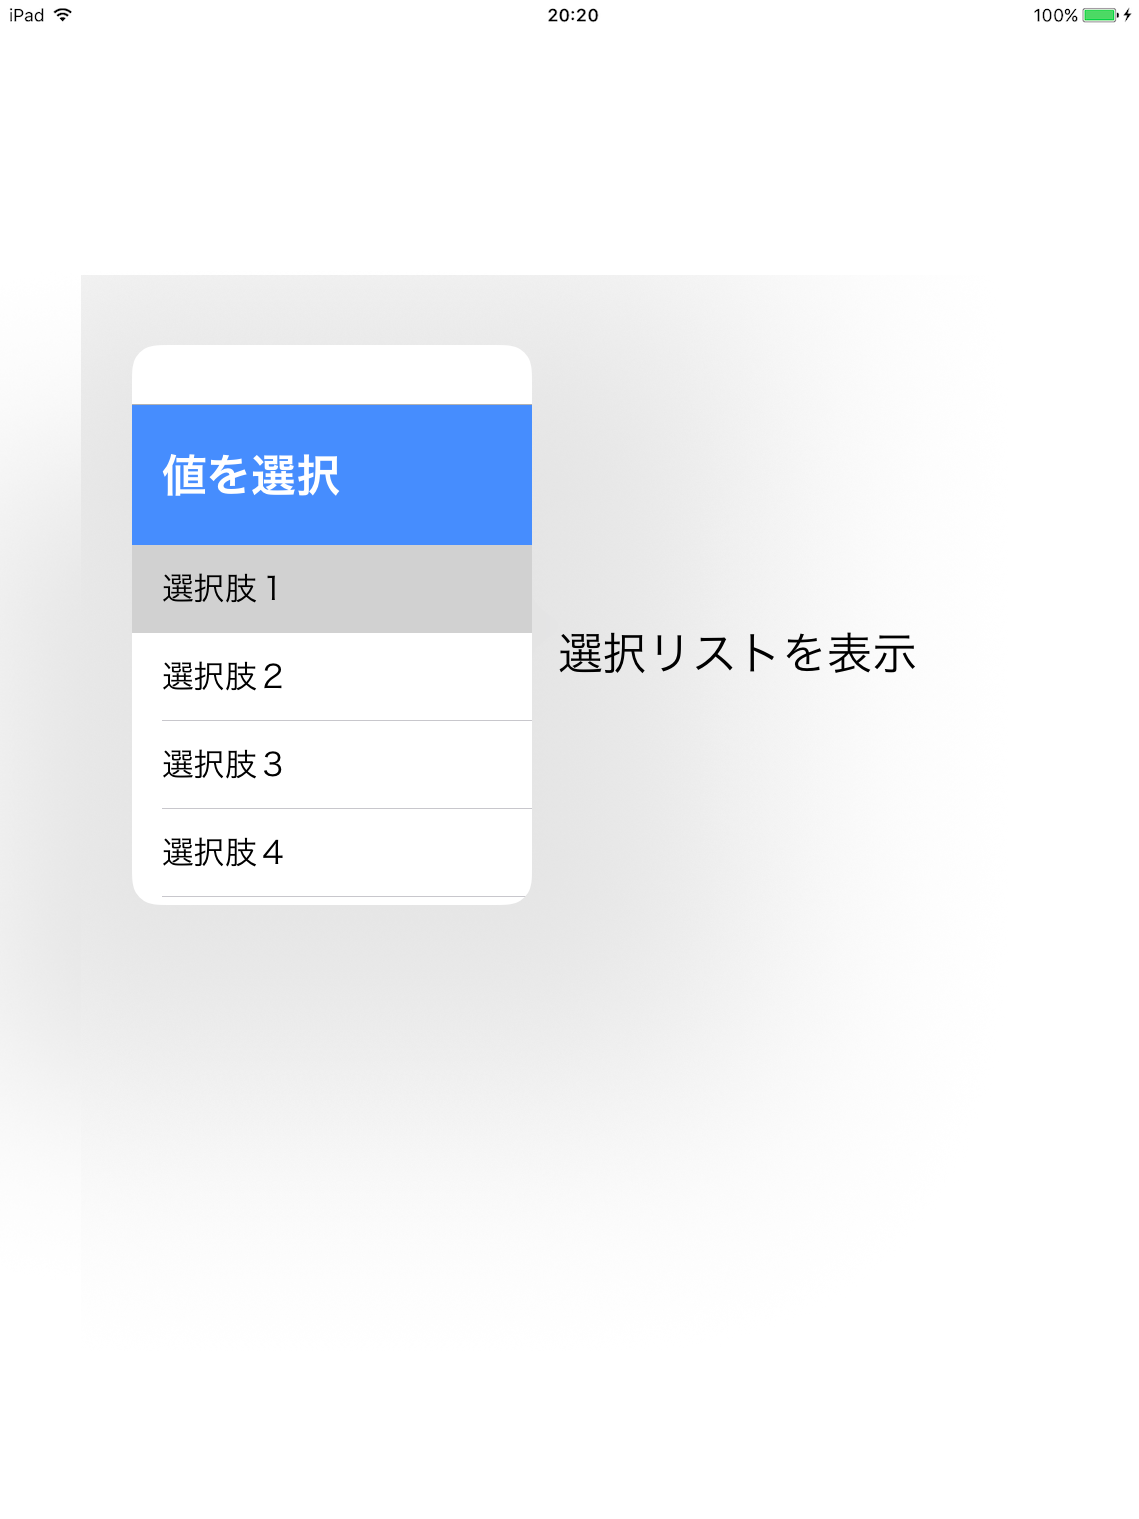
まずは完成イメージから

画像はiPadでの表示イメージになります。
iPhoneの場合フルスクリーンで表示されます。(設定で変更できるのかな・・・?)
プルダウンの作りについてですが、配列を渡してあげるとリストを表示してくれるものになります。
渡された配列をtableviewに表示してポップアップで表示しているだけの簡単なものです。
以下の手順で使用してください。
①GitHubから落としたソースからSelectListViewController.h、SelectListViewController.m、SelectListViewController.xibのファイルを自分のプロジェクトへコピー
②選択肢リストの作成
今回はplistで作成しました。
③プルダウン表示処理の実装
presentViewControllerを使ってポップアップ形式でプルダウンを表示
①自分のプロジェクトへコピー
ここは割愛します。
②選択肢の作成
DBから取得というパターンが多いと思いますが、今回はplistから取得。
下記、作成例になります。
Arrayの中にStringもしくはDictionaryで値を入れたものを作成します。
<?xml version="1.0" encoding="UTF-8"?>
<!DOCTYPE plist PUBLIC "-//Apple//DTD PLIST 1.0//EN" "http://www.apple.com/DTDs/PropertyList-1.0.dtd">
<plist version="1.0">
<dict>
	<key>arrayString</key>
	<array>
		<string>選択肢1</string>
		<string>選択肢2</string>
		<string>選択肢3</string>
	</array>
	<key>items</key>
	<array>
		<dict>
			<key>title</key>
			<string>タイトル1</string>
			<key>value</key>
			<string>選択肢1</string>
		</dict>
		<dict>
			<key>title</key>
			<string>タイトル2</string>
            <key>value</key>
            <string>選択肢2</string>
		</dict>
		<dict>
			<key>title</key>
			<string>タイトル3</string>
            <key>value</key>
            <string>選択肢3</string>
		</dict>
		<dict>
			<key>title</key>
			<string>タイトル4</string>
            <key>value</key>
</dict>
</plist>
③プルダウン表示処理の実装
- (void)viewDidLoad {
    [super viewDidLoad];

    //ラベルへタップイベントの追加
    [self.pulldownLabel addGestureRecognizer:[[UITapGestureRecognizer alloc] initWithTarget:self action:@selector(commonTapAction:)]];
}

- (void)didReceiveMemoryWarning {
    [super didReceiveMemoryWarning];
}

/** 処理概要:タップ処理
 *
 */
- (void)commonTapAction:(UITapGestureRecognizer *)tapGesture
{
    //プルダウンを表示する
    [self showPopUpList:@"PopupListData"
              arrayName:@"items"
                 scrKey:@"value"
                  title:@"title"
                   view:self.pulldownLabel];
}

/** 処理概要:ポップアップリスト表示処理
 *
 * param  :pListName, title, label
 * return :なし
 */
- (void)showPopUpList:(NSString *)pListName arrayName:(NSString *)arrayName scrKey:(NSString *)scrKey title:(NSString *)title view:(UIView *)view
{
    //ポップアップリストに表示するデータを設定する
    NSString* path = [[NSBundle mainBundle]pathForResource:pListName ofType:@"plist"];
    NSDictionary *dic = [NSDictionary dictionaryWithContentsOfFile:path];
    SelectListViewController *slVC = [[SelectListViewController alloc] initWithSource:[dic objectForKey:arrayName]
                                            dataSrcKey:scrKey
                                              selectedIndex:0];//初期選択値を設定

    slVC.modalPresentationStyle = UIModalPresentationPopover;
    slVC.delegate = self;
    slVC.title = title;
    //ポップアップのサイズを変更
    slVC.preferredContentSize = CGSizeMake(200, 300);

    //ポップアップの表示
    [self presentViewController:slVC animated: YES completion: nil];
    UIPopoverPresentationController *presentationController = [slVC popoverPresentationController];
    presentationController.permittedArrowDirections = UIPopoverArrowDirectionRight;
    presentationController.sourceView = view;
    presentationController.backgroundColor = [UIColor clearColor];
}

/** 処理概要:リスト選択時
 *
 */
- (void)popupList:(SelectListViewController*)sender willCloseWithFinished:(BOOL)finished
{
    //選択値をセット
    if (sender.dataSrcKey != nil || [sender.dataSrcKey isEqualToString:@""])
    {
        id obj = [sender.dataSrcArray objectAtIndex:sender.selectedIndex];
        self.pulldownLabel.text = [obj valueForKey:sender.dataSrcKey];
    }
    else
    {
        self.pulldownLabel.text = [[sender dataSrcArray] objectAtIndex:sender.selectedIndex];
    }

    //ポップアップを閉じる
    [self dismissViewControllerAnimated:YES completion:nil];
}


/** 処理概要:ウィンドウ移動時に呼ばれる
 *
 */
- (void)movePosition:(CGPoint)pos
{

}
プルダウンの初期選択値を設定するためには初期化の際に渡します。
UIlabelなどをカスタマイズして覚えさせておくのが良いと思います。
modalPresentationStyleはポップアップの表示形式になります。
ここでフルスクリーンだったりポップオーバーなどを設定できます。
各値の仕様は下記を参照して見てください。
時間があれば今度日本語訳乗せておきます。
https://developer.apple.com/reference/uikit/uimodalpresentationstyle
以上となります。
この記事が少しでもみなさんのお役に立てれば幸いです。