はじめに
こちらの記事にてCustomVisionのモデルをJetson Nanoを使って推論することは出来ましたが、一回の推論に1秒半くらいかかってるのでTensorRTで高速化できないかと思いやってみました。結果として高速になったものの結果がうまく得られていないような気もするのでこの記事は参考までにしてください。間違いがあればご指摘よろしくお願いします。
環境
- JetPack4.4
CustomVisionモデルのダウンロードと準備
CustomVisionのモデルをエクスポートして、Dockerコンテナ内でTensorRTとFlaskを使って推論用のサーバを立てます。
ここを参考にモデルをエクスポートします。
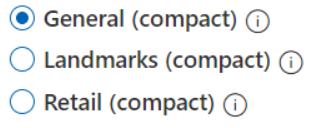
まずCustomVisionで以下のどれかのドメインで学習します。
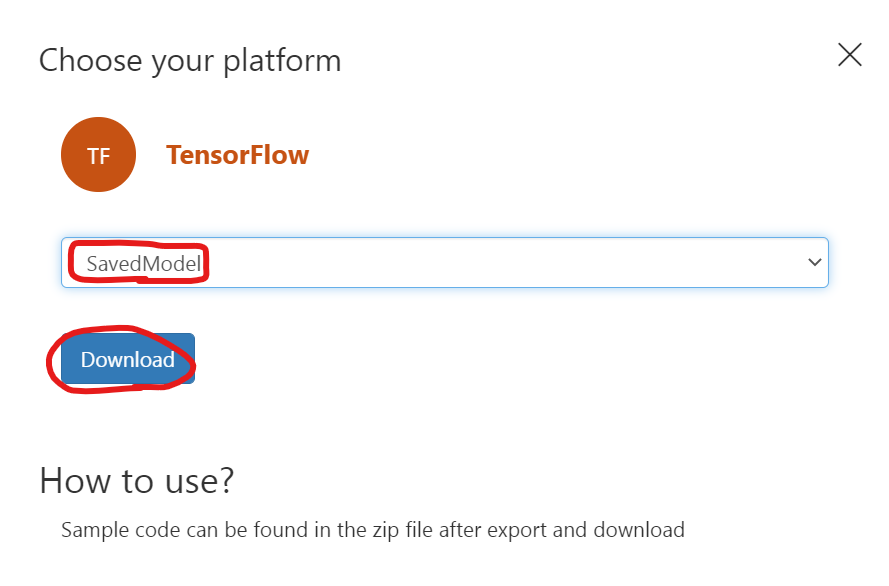
学習が終わったらCustomVisionのPerformanceタブ→Exportを押してTensorFlowのSavedModelでエクスポートを押して、終わったらダウンロードします。
エクスポートしたモデルのzipファイルをJetson Nanoに持ってきてから展開します。
$ unzip CustomVision.TensorFlow.TensorFlowSavedModel.zip -d customvision
展開したらこんなディレクトリ構成にします。
$ tree
.
├── app
│   ├── app.py
│   ├── convert.py
│   ├── object_detection.py
│   ├── predict.py
│   └── customvision
│       ├── cvexport.manifest
│       ├── labels.txt
│       ├── LICENSE
│       ├── python
│       │   ├── object_detection.py
│       │   └── predict.py
│       └── saved_model.pb
└── Dockerfile
app.py, convert.py, predict.py, Dockerfileは今から説明していきます。./app/object_detection.pyは展開したモデルの中にある./app/customvision/python/object_detection.pyをコピーしたものです。
convert.py
SavedModel形式で保存されたモデルをTensorRTで読み込める形式に変換します。
from tensorflow.python.compiler.tensorrt import trt_convert as trt
input_saved_model_dir="./customvision"
output_saved_model_dir="./output_model"
converter = trt.TrtGraphConverterV2(input_saved_model_dir=input_saved_model_dir)
converter.convert()
converter.save(output_saved_model_dir)
これは後にDockerコンテナの中で実行します。実行するとappディレクトリの下にoutput_modelというディレクトリができます。
predict.py
./app/customvision/app/python/predict.pyを以下のように編集して./appの下に保存します。画像サイズが固定になるのは仕方ないのでしょうか。
import sys
import tensorflow as tf
import numpy as np
from PIL import Image
from urllib.request import urlopen
from datetime import datetime
from object_detection import ObjectDetection

MODEL_FILENAME = './output_model'
LABELS_FILENAME = 'customvision/labels.txt'

od_model = None

class TFObjectDetection(ObjectDetection):

    def __init__(self, model_path, labels):
        super(TFObjectDetection, self).__init__(labels)
        model = tf.saved_model.load(model_path,tags=[tf.saved_model.SERVING])
        self.infer = model.signatures[tf.saved_model.DEFAULT_SERVING_SIGNATURE_DEF_KEY]

    def predict(self, preprocessed_image):
        preprocessed_image = preprocessed_image.resize((416,416))
        inputs = np.array(preprocessed_image, dtype=np.float32)[np.newaxis, :, :, (2, 1, 0)]  # RGB -> BGR

        outputs = self.infer(tf.convert_to_tensor(inputs))
        return np.array(outputs['outputs'][0])

def log_msg(msg):
    print("{}: {}".format(datetime.now(), msg))

def initialize():
    print('Loading labels...', end='')
    with open(LABELS_FILENAME, 'r') as f:
        labels = [l.strip() for l in f.readlines()]
    print("{} found. Success!".format(len(labels)))

    global od_model
    od_model = TFObjectDetection(graph_def, labels)

def predict_url(image_url):
    log_msg("Predicting from url: " + image_url)
    with urlopen(image_url) as image_binary:
        image = Image.open(image_binary)
        return predict_image(image)

def predict_image(image):
    log_msg('Predicting image')

    w, h = image.size
    log_msg("Image size: {}x{}".format(w, h))

    predictions = od_model.predict_image(image)

    response = {
        'id': '',
        'project': '',
        'iteration': '',
        'created': datetime.utcnow().isoformat(),
        'predictions': predictions }

    log_msg('Results: ' + str(response))
    return response
app.py
これはCustomVisionのモデルをDockerでエクスポートしたときについているサンプルコードを参考にしています。というかまんまだと思います。
import json
import os
import io

# Imports for the REST API
from flask import Flask, request, jsonify

# Imports for image procesing
from PIL import Image

# Imports for prediction
from predict import initialize, predict_image, predict_url

app = Flask(__name__)

# 4MB Max image size limit
app.config['MAX_CONTENT_LENGTH'] = 4 * 1024 * 1024

# Default route just shows simple text
@app.route('/')
def index():
    return 'CustomVision.ai model host harness'

# Like the CustomVision.ai Prediction service /image route handles either
#     - octet-stream image file
#     - a multipart/form-data with files in the imageData parameter
@app.route('/image', methods=['POST'])
@app.route('/<project>/image', methods=['POST'])
@app.route('/<project>/image/nostore', methods=['POST'])
@app.route('/<project>/classify/iterations/<publishedName>/image', methods=['POST'])
@app.route('/<project>/classify/iterations/<publishedName>/image/nostore', methods=['POST'])
@app.route('/<project>/detect/iterations/<publishedName>/image', methods=['POST'])
@app.route('/<project>/detect/iterations/<publishedName>/image/nostore', methods=['POST'])
def predict_image_handler(project=None, publishedName=None):
    print("got an image")
    try:
        imageData = None
        if ('imageData' in request.files):
            imageData = request.files['imageData']
        elif ('imageData' in request.form):
            imageData = request.form['imageData']
        else:
            imageData = io.BytesIO(request.get_data())

        img = Image.open(imageData)
        results = predict_image(img)
        return jsonify(results)
    except Exception as e:
        print('EXCEPTION:', str(e))
        return 'Error processing image', 500


# Like the CustomVision.ai Prediction service /url route handles url's
# in the body of hte request of the form:
#     { 'Url': '<http url>'}
@app.route('/url', methods=['POST'])
@app.route('/<project>/url', methods=['POST'])
@app.route('/<project>/url/nostore', methods=['POST'])
@app.route('/<project>/classify/iterations/<publishedName>/url', methods=['POST'])
@app.route('/<project>/classify/iterations/<publishedName>/url/nostore', methods=['POST'])
@app.route('/<project>/detect/iterations/<publishedName>/url', methods=['POST'])
@app.route('/<project>/detect/iterations/<publishedName>/url/nostore', methods=['POST'])
def predict_url_handler(project=None, publishedName=None):
    try:
        image_url = json.loads(request.get_data().decode('utf-8'))['url']
        results = predict_url(image_url)
        return jsonify(results)
    except Exception as e:
        print('EXCEPTION:', str(e))
        return 'Error processing image'

if __name__ == '__main__':
    # Load and intialize the model
    initialize()
    # Run the server
    app.run(host='0.0.0.0', port=80)
Dockerfile
Dockerfileは以下のようにしました。
FROM nvcr.io/nvidia/l4t-tensorflow:r32.4.4-tf2.3-py3
RUN apt-get update -y && apt-get -y install vim
RUN pip3 install flask pillow
COPY app /app
# Expose the port
EXPOSE 80
# Set the working directory
WORKDIR /app
推論
以上の編集を終えたらイメージをビルドしてコンテナを起動します。
$ docker build . -t tensorrt_customvision
$ docker run -it --name tensorrt_customvision -p 127.0.0.1:80:80 tensorrt_customvision
コンテナの中に入ると思うのでまずは先ほど作成したconvert.pyを実行します。
$ root@0b71bc1f3806:/app# python3 convert.py
無事に変換できたらappディレクトリの下にoutput_modelというディレクトリができると思います。そしたらapp.pyを実行して準備完了です。
$ root@0b71bc1f3806:/app# python3 app.py
Pythonなどで画像をPOSTして推論ができます。
import requests
import cv2
import json
import os

image = './test.png'

with open(image, 'rb') as f:
    data = f.read()

url = "http://127.0.0.1/image"
files = {"imageData":data}

response = requests.post(url,files=files)
results = json.loads(response.content)
print(results)
結果↓
{'created': '2020-12-06T11:01:40.524003', 'id': '', 'iteration': '', 'predictions': [{'boundingBox': {'height': 0.1296114, 'left': 0.72604883, 'top': 0.43649145, 'width': 0.0695776}, 'probability': 0.47629955, 'tagId': 0, 'tagName': '1'}, {'boundingBox': {'height': 0.1296114, 'left': 0.72604883, 'top': 0.43649145, 'width': 0.0695776}, 'probability': 0.38941449, 'tagId': 8, 'tagName': '6'}, {'boundingBox': {'height': 0.14256309, 'left': 0.73250461, 'top': 0.43548942, 'width': 0.03123055}, 'probability': 0.29384127, 'tagId': 8, 'tagName': '6'}], 'project': ''}
うーん、結果は出てるしBBの位置もあってるぽいけどこんなにprobabilityが下がるものなのか、なにか間違えてるのか。。。
おわりに
推論速度は高速化前は1.6秒ほど、高速化後は一枚目の推論はかなり時間がかかりましたがそれ以降は0.18秒ほどになりました。約10分の1ってすごいですね。ただ、メモリをかなり使ってました。
間違い等ありましたらご指摘よろしくお願いします。