はじめに
ラズパイやJetsonでCustomVision推論するときに、時間かかるわエラーが出るわでなぜかonnxruntimeが入らないのでOpenCVでやってみようと思いました。その予行演習としてまずはWindowsノートPCで動かしてラズパイ+Windowsで動かそうと思います。ちなみに、ノートPCで推論するなら普通にonnxruntime入れるほうが手っ取り早いです。
ノートPCで推論
環境
- Python3.6(Anaconda)
- OpenCV>=4.0.0
必要なライブラリは、OpenCVとpillowとnumpyです。
pip install pillow numpy opencv-python
OpenCVはバージョン4以降じゃないとだめかもです。
CustomVisionのモデルは、ONNXでエクスポートしてダウンロードしておいてください。Compactドメインで学習して、パフォーマンスタブからエクスポートできます(参考)。
展開したら以下のような構成になっていると思います。C#とPythonのサンプルコードがついてます。
$ tree /f
E:.
│  cvexport.manifest
│  labels.txt
│  LICENSE
│  model.onnx
│
├─CSharp
│      ObjectDetection.cs
│
└─python
    │  cntk_predict.py
    │  object_detection.py
    │  onnxruntime_predict.py
    │
    └─__pycache__
            object_detection.cpython-36.pyc
pythonというフォルダに移動して以下のコードを保存します。
import cv2
import numpy as np
from object_detection import ObjectDetection
from PIL import Image, ImageDraw

filename = 'test1.png'        # 推論したい画像のパス
modelname = '../model.onnx'   # 推論に使うモデルのパス
labelpath = '../labels.txt'   # エクスポートした中にあったlabels.txtへのパス

class ODbyCV2(ObjectDetection):
    def __init__(self, model_filename, labels):
        super(ODbyCV2, self).__init__(labels)
        self.model = cv2.dnn.readNetFromONNX(modelname)
    def predict(self, img):
        img = self.pil2cv(img)
        h,w,c = img.shape
        self.model.setInput(cv2.dnn.blobFromImage(img,size=(w,h),swapRB=True,crop=False))
        results = self.model.forward()
        return np.squeeze(results).transpose((1,2,0)).astype(np.float32)
    def pil2cv(self, image):
        new_image = np.array(image, dtype=np.uint8)
        if new_image.ndim == 2:
            pass
        elif new_image.shape[2] == 3:
            new_image = cv2.cvtColor(new_image, cv2.COLOR_RGB2BGR)
        elif new_image.shape[2] == 4:
            new_image = cv2.cvtColor(new_image, cv2.COLOR_RGBA2BGRA)
        return new_image

# ラベル読み込み
with open(labelpath, 'r') as f:
    labels = [l.strip() for l in f.readlines()]

model = ODbyCV2(modelname,labels)
img = Image.open(filename)

# 推論
results = model.predict_image(img)
print(results)

# 以下推論結果の表示
img = cv2.imread(filename)
height,width,channel = img.shape

font_face = cv2.FONT_HERSHEY_DUPLEX
font_scale = 0.6
font_thickness = 1
for result in [results[0]]:
    # if result['probability'] >= 0.3:
    text_str = str(int(result['tagName']))
    text_w, text_h = cv2.getTextSize(text_str, font_face, font_scale, font_thickness)[0]
    score_w, score_h = cv2.getTextSize(str(round(result['probability'],2)), font_face, font_scale, font_thickness)[0]
    x1 = int(width*result['boundingBox']['left'])
    y1 = int(height*result['boundingBox']['top'])
    x2 = int(width*result['boundingBox']['width']+width*result['boundingBox']['left'])
    y2 = int(height*result['boundingBox']['height']+height*result['boundingBox']['top'])
    text_pt = (x1, y1 - 3)
    text_color = [255,255,255]
    rgb = [255,0,0]
    cv2.rectangle(img, (x1, y1),(x2,y2),rgb,2)
    cv2.rectangle(img, (x1, y1),(x1+text_w,y1-text_h-4),rgb,-1)
    cv2.rectangle(img, (x1, y1),(x1+score_w,y1+score_h+4),rgb,-1)
    cv2.putText(img, text_str, text_pt, font_face, font_scale, text_color, font_thickness, cv2.LINE_AA)
    cv2.putText(img, str(round(result['probability'],2)), (x1, y1 +score_h), font_face, font_scale, text_color, font_thickness, cv2.LINE_AA)

cv2.imshow('test',img)
cv2.waitKey(0)
cv2.destroyAllWindows()
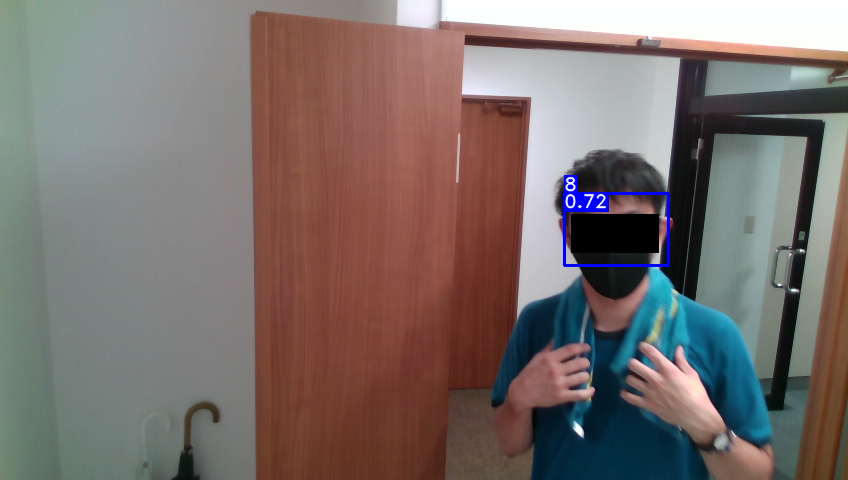
エクスポートしてきたときについているサンプルコードを参考にしました。object_detection.pyのObjectDetectionクラスを継承してpredict関数をオーバーライドしています。このコードを実行すると以下のような結果が得られます。8がtagName、0.72がprobabilityです。
ラズパイ(Windows10)で推論
環境
- Raspberry Pi4 Model B 4GB RAM
- Windows10
ラズパイでWindows10を動かす方法は、こちらを参考にしてください。
結論からいうと上記と全く同じ流れでできます。しかし、NumpyがWindows+Armに対応してないのか、import時に以下のようなwarningが出て、推論時にもたくさんwarningが出てきます。
C:\Users\pi\anaconda3\envs\test\lib\site-packages\numpy\core\getlimits.py:172: RuntimeWarning: divide by zero encountered in exp2
  eps=exp2(ld(-112)),
C:\Users\pi\anaconda3\envs\test\lib\site-packages\numpy\core\getlimits.py:51: RuntimeWarning: divide by zero encountered in log10
  self.precision = int(-log10(self.eps))
C:\Users\pi\anaconda3\envs\test\lib\site-packages\numpy\core\getlimits.py:52: RuntimeWarning: divide by zero encountered in power
  self.resolution = float_to_float(float_conv(10) ** (-self.precision))
C:\Users\pi\anaconda3\envs\test\lib\site-packages\numpy\core\getlimits.py:184: RuntimeWarning: divide by zero encountered in exp2
  epsneg_f80 = exp2(ld(-64))
C:\Users\pi\anaconda3\envs\test\lib\site-packages\numpy\core\getlimits.py:185: RuntimeWarning: divide by zero encountered in exp2
  tiny_f80 = exp2(ld(-16382))
C:\Users\pi\anaconda3\envs\test\lib\site-packages\numpy\core\getlimits.py:199: RuntimeWarning: divide by zero encountered in exp2
  eps=exp2(ld(-63)),
C:\Users\pi\anaconda3\envs\test\lib\site-packages\numpy\core\getlimits.py:212: RuntimeWarning: divide by zero encountered in nextafter
  if hasattr(umath, 'nextafter')  # Missing on some platforms?
C:\Users\pi\anaconda3\envs\test\lib\site-packages\numpy\core\getlimits.py:224: RuntimeWarning: divide by zero encountered in exp2
  eps=exp2(ld(-105)),
C:\Users\pi\anaconda3\envs\test\lib\site-packages\numpy\core\getlimits.py:225: RuntimeWarning: divide by zero encountered in exp2
  epsneg= exp2(ld(-106)),
C:\Users\pi\anaconda3\envs\test\lib\site-packages\numpy\core\getlimits.py:227: RuntimeWarning: divide by zero encountered in exp2
  tiny=exp2(ld(-1022)))
C:\Users\pi\anaconda3\envs\test\lib\site-packages\numpy\__init__.py:316: RuntimeWarning: divide by zero encountered in subtract
  if not abs(x.dot(x) - 2.0) < 1e-5:
C:\Users\pi\anaconda3\envs\test\lib\site-packages\numpy\__init__.py:316: RuntimeWarning: divide by zero encountered in absolute
  if not abs(x.dot(x) - 2.0) < 1e-5:
ここに同じwarningが出るという報告がありますが解決策はわからず...。import時はともかく推論実行時に出るのでうまく推論できているのかもわからないです(同じような結果が得られるのでただしそうではありますが...)。解決策があれば教えてください。
おわりに
お疲れさまでした。opencvでCustomVisionのモデルの推論をしました。cv2.dnn.forward()の出力が何を表しているかもわかっていないので知っている方は教えていただければ幸いです。
間違い等ありましたらご指摘よろしくお願いします。