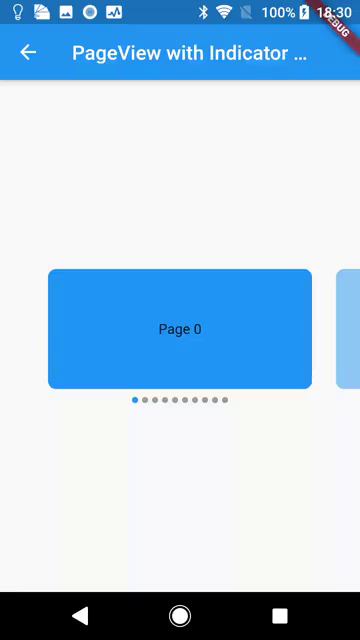
PageViewと、表示中のページのIndexを知らせるIndicatorの組み合わせを作ってみた。
Indicatorを表示するだけなら意外と簡単に作れた(Flutterの標準APIだけで作れた)ので書いてみました。
このサンプルで備えていない機能
- Indicatorをタップまたはドラッグして、任意のページに移動できる機能は備えてません。
- ドラッグはあったほうがよさそうな気がしましたが、実装が面倒くさいのでやめました。
- タップは、今回作ったIndicatorが小さいので、「ユーザーが移動したいと考えてタップした(つもりの)もの」と「実際にタップされたもの」と違ってしまうことが多いと思い、それなら使っててストレスなので不要だなと思った次第です。
サンプルコード
試したい方はこちらをどうぞ。
コード(クリックすると開きます)
class PageViewWithIndicatorDemo extends StatefulWidget {
  final String title = 'PageView with Indicator Demo';
  final List<String> labelForChildren =
      List<String>.generate(10, (int index) => 'Page $index');

  @override
  _PageViewWithIndicatorDemoState createState() =>
      _PageViewWithIndicatorDemoState();
}

class _PageViewWithIndicatorDemoState extends State<PageViewWithIndicatorDemo> {
  static const double _pageViewFraction = 0.8;
  static const double _pageIndicatorFraction = 0.6;

  final StreamController<int> _pageIndexSubject =
      StreamController<int>.broadcast();
  PageController _controller;

  @override
  void initState() {
    super.initState();
    _controller = PageController(
      viewportFraction: _pageViewFraction,
    );
  }

  @override
  void dispose() {
    _controller.dispose();
    _pageIndexSubject.close();
    super.dispose();
  }

  @override
  Widget build(BuildContext context) {
    return Scaffold(
      appBar: AppBar(
        title: Text(widget.title),
      ),
      body: Center(
        child: Column(
          mainAxisSize: MainAxisSize.min,
          children: <Widget>[
            _buildPageView(),
            const SizedBox(height: 8),
            FractionallySizedBox(
              widthFactor: _pageIndicatorFraction,
              child: _buildPageIndicator(context),
            ),
          ],
        ),
      ),
    );
  }

  Widget _buildPageView() {
    return ConstrainedBox(
      constraints: const BoxConstraints.expand(height: 120),
      child: PageView(
        onPageChanged: _pageIndexSubject.sink.add,
        controller: _controller,
        children:
            List<Widget>.generate(widget.labelForChildren.length, (int index) {
          return Padding(
            padding: const EdgeInsets.symmetric(horizontal: 12),
            child: _buildPageViewChild(
              index,
              color: Colors.blue.withOpacity(1 / (index % 3 + 1)),
              child: Center(child: Text(widget.labelForChildren[index])),
            ),
          );
        }),
      ),
    );
  }

  Widget _buildPageViewChild(
    int index, {
    Color color,
    Widget child,
  }) {
    return Container(
      decoration: BoxDecoration(
        borderRadius: BorderRadius.circular(8),
        color: color,
      ),
      clipBehavior: Clip.antiAlias,
      child: child,
    );
  }

  Widget _buildPageIndicator(BuildContext context) {
    return Wrap(
      spacing: 4,
      runSpacing: 4,
      alignment: WrapAlignment.center,
      children: List<Widget>.generate(
        widget.labelForChildren.length,
        (int index) {
          return StreamBuilder<int>(
            initialData: _controller.initialPage,
            stream: _pageIndexSubject.stream.where((int pageIndex) =>
                index >= pageIndex - 1 && index <= pageIndex + 1),
            builder: (_, AsyncSnapshot<int> snapshot) {
              return Container(
                width: 6,
                height: 6,
                decoration: ShapeDecoration(
                  shape: const CircleBorder(),
                  color: snapshot.data == index
                      ? Theme.of(context).primaryColor
                      : Colors.grey,
                ),
              );
            },
          );
        },
      ),
    );
  }
}
動作
apngです。再生されない場合は更新してみてください。
apngを作った時のコマンドも記録まで。
-pix_fmt bgra を指定しないとrgb24で生成されるので、ファイルサイズがmp4より大きくなってしまうことがある。
ffmpeg -i hoge.mp4 -pix_fmt bgra -f apng -y hoge.png
説明
PageView
PageViewの構築部分はこんな感じ。
なんら難しいことはないかなと思います。
  Widget _buildPageView() {
    return ConstrainedBox(
      constraints: const BoxConstraints.expand(height: 120),
      child: PageView(
        onPageChanged: _pageIndexSubject.sink.add,
        controller: _controller,
        children:
            List<Widget>.generate(widget.labelForChildren.length, (int index) {
          return Padding(
            padding: const EdgeInsets.symmetric(horizontal: 12),
            child: _buildPageViewChild(
              index,
              color: Colors.blue.withOpacity(1 / (index % 3 + 1)),
              child: Center(child: Text(widget.labelForChildren[index])),
            ),
          );
        }),
      ),
    );
  }
PageViewの子要素のwidthは _controller 初期化時で調整。画面幅の80%になるようにしてます。
Landscapeのときは考慮してないです。
  static const double _pageViewFraction = 0.8;

  @override
  void initState() {
    super.initState();
    _controller = PageController(
      viewportFraction: _pageViewFraction,
    );
  }
子要素のWidgetを生成している _buildPageViewChild はなんら難しいコードはないので説明は割愛します。
Indicator
次にIndicatorの部分ですが、個人的に凝ったのは以下です。
- Wrap
- StreamBuilderに与えるストリーム
  Widget _buildPageIndicator(BuildContext context) {
    return Wrap(
      spacing: 4,
      runSpacing: 4,
      alignment: WrapAlignment.center,
      children: List<Widget>.generate(
        widget.labelForChildren.length,
        (int index) {
          return StreamBuilder<int>(
            initialData: _controller.initialPage,
            stream: _pageIndexSubject.stream.where((int pageIndex) =>
                index >= pageIndex - 1 && index <= pageIndex + 1),
            builder: (_, AsyncSnapshot<int> snapshot) {
              return Container(
                width: 6,
                height: 6,
                decoration: ShapeDecoration(
                  shape: const CircleBorder(),
                  color: snapshot.data == index
                      ? Theme.of(context).primaryColor
                      : Colors.grey,
                ),
              );
            },
          );
        },
      ),
    );
  }
Wrap
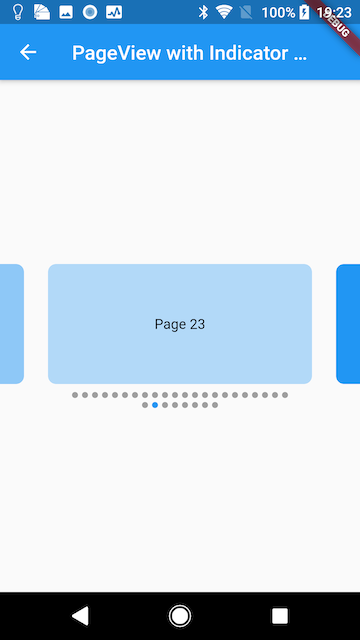
たいしたポイントではないですが、Wrapを使うことで収まらなかった時に折り返してくれます。便利です。
数が決まっていて折り返しをすることがない前提ならRowで事は足りてますが、Rowと違って間隔を自分で調整できるのでなんとなく便利かな、と思ってます。
StreamBuilderに与えるストリーム
StreamBuilderを使い _pageIndexSubject に渡されたページ番号を受け取って、ページ番号に応じて色を変えてます。
return StreamBuilder<int>(
  initialData: _controller.initialPage,
  stream: _pageIndexSubject.stream.where((int pageIndex) =>
      index >= pageIndex - 1 && index <= pageIndex + 1),
  builder: (_, AsyncSnapshot<int> snapshot) {
    return Container(
      width: 6,
      height: 6,
      decoration: ShapeDecoration(
        shape: const CircleBorder(),
        color: snapshot.data == index
            ? Theme.of(context).primaryColor
            : Colors.grey,
      ),
    );
  },
);
streamは _pageIndexSubject.stream でも動作するのですが、そうすると移動をするたびにIndicatorが全て再ビルドされます。
些細なパフォーマンスの改善ですが、それを避けるため、前後のページに移動した時にのみビルドするようにしました。(例えば8ページ目のIndicatorであれば、7〜9ページに移動した時にだけ色が変わるように。)
ちなみにタップやドラッグをできるようにする場合はこの実装も見直す必要があるはず、と思ってます。
備えていない機能を実装するにあたっての課題点
ドラッグでページ移動できる機能
IndicatorがWrapで構成されているので、もしIndicatorが2行になった場合のジェスチャーのハンドリングが大変になると思います。
ページ数が少ないという前提でRowで構成するなら全く問題ないと思います。
タップでページ移動できる機能
ドラッグほど難しい事はないと思いますが、ユーザーがタップしやすいようIndicatorの間隔を広めにしてあげる、ということぐらいでしょうか。
その場合は1行に含めることができるIndicatorの個数が少なくなるので、ページ数が少ないほうがいいと思います。