概要
google社の透明性レポート「ウェブ上でのHTTPS暗号化」によると、2022年現在では95%以上のWebサイトがhttps通信に対応しています。残りの5%未満にならないようにhttps通信出来るようにしてみました。
actix-webは高速に動作するRust製のWebフレームワークとして知られていて、ダウンロード数やexampleプロジェクトも多いのでactix-webを利用することにしました。
環境
- rustc 1.62.0 (on docker container rust:1.62.0-slim)
- actix-web 4.1 (rust crate)
- openssl 0.10 (rust crate)
- openSSL 1.1.1
- pkg-config 0.29.2
- mkcert 1.4.4
準備
必要なパッケージをインストールします。libssl-devとpkg-configは今回のRustプログラムのコンパイルに必要になります。wget、curl、libnss3-toolsはmkcertのダウンロード&実行に必要なパッケージです。
$ apt update && apt install -y libssl-dev pkg-config wget curl libnss3-tools
自己署名証明書
環境に合わせてmkcertをダウンロードしてきます。ここではlinux-amd64をダウンロードしてきます。ダウンロードしてきたファイル名をmkcertに変更して実行権を与えます。最後にmkcertを/usr/local/binディレクトリに移動します。
$ curl -s https://api.github.com/repos/FiloSottile/mkcert/releases/latest | grep browser_download_url | grep linux-amd64 | cut -d '"' -f 4 | wget -qi - \
    && mv mkcert-v*-linux-amd64 mkcert \
    && chmod a+x mkcert \
    && mv mkcert /usr/local/bin/

$ mkcert --version
v1.4.4
自己認証局の証明書と秘密鍵
自己認証局の証明書と秘密鍵をmkcert -installコマンドで作成します。
$ mkcert -install
Created a new local CA 💥
The local CA is now installed in the system trust store! ⚡️
作成されたディレクトリはmkcert -CAROOTコマンドで確認できます。rootCA-key.pem(秘密鍵)とrootCA.pem(証明書)が作成されているのがわかります。
$ mkcert -CAROOT
/home/rustuser/.local/share/mkcert

$ ls /home/rustuser/.local/share/mkcert/
rootCA-key.pem  rootCA.pem
サーバ証明書
mkcertコマンドでサーバ証明書を発行します。指定したドメイン(IPアドレス)の証明書を発行します。ここではローカル環境で使う予定なのでローカルホストを表す3つのドメイン(IPアドレス)、localhost、127.0.0.1、::1を指定しています。
$ mkcert localhost 127.0.0.1 ::1

Created a new certificate valid for the following names 📜
 - "localhost"
 - "127.0.0.1"
 - "::1"

The certificate is at "./localhost+2.pem" and the key at "./localhost+2-key.pem" ✅

It will expire on 20 October 2024 🗓
作成されたlocalhost+2.pem(サーバ証明書)とlocalhost+2-key.pem(サーバ秘密鍵)はRustのソースコードで使用します。
ソースコード
actix-webの公式サイトのHTTP/2のページを参考にしています。
use actix_web::{get, App, HttpRequest, HttpServer, Responder, HttpResponse};
use openssl::ssl::{SslAcceptor, SslFiletype, SslMethod};

#[get("/")]
async fn index(_req: HttpRequest) -> impl Responder {
    HttpResponse::Ok()
        .content_type("text/plain")
        .body("welcome!!!")
}

#[actix_web::main]
async fn main() -> std::io::Result<()> {
    let mut builder = SslAcceptor::mozilla_modern_v5(SslMethod::tls_server()).unwrap();
    builder.set_private_key_file("localhost+2-key.pem", SslFiletype::PEM).unwrap();
    builder.set_certificate_chain_file("localhost+2.pem").unwrap();

    HttpServer::new(|| App::new().service(index))
        .bind_openssl("0.0.0.0:8080", builder)?
        .run()
        .await
}
SslAcceptor::mozilla_modern_v5メソッドはMozillaのサーバサイドTLS勧告バージョン5で定義されているConfigurationのうちの一つのモダンを利用します。プロトコルはtlsとdtlsを選択できますがここではSslMethod::tls_serverメソッドでtlsを選択しています。set_private_key_fileメソッドでサーバの秘密鍵(localhost+2-key.pem)、set_certificate_chain_fileメソッドでサーバ証明書(localhost+2.pem)を指定します。
MozillaのサーバサイドTLS勧告ではオールド、インターメディエイト、モダンの3つの構成を定義していますが詳しくはリンクを張っておきます。
ビルド&実行
cargo runコマンドでコンパイル&実行します。
$ cargo run
   Compiling web v0.1.0 (/web)
    Finished dev [unoptimized + debuginfo] target(s) in 3.28s
     Running `target/debug/web`
ブラウザで接続
証明書リストへの追加
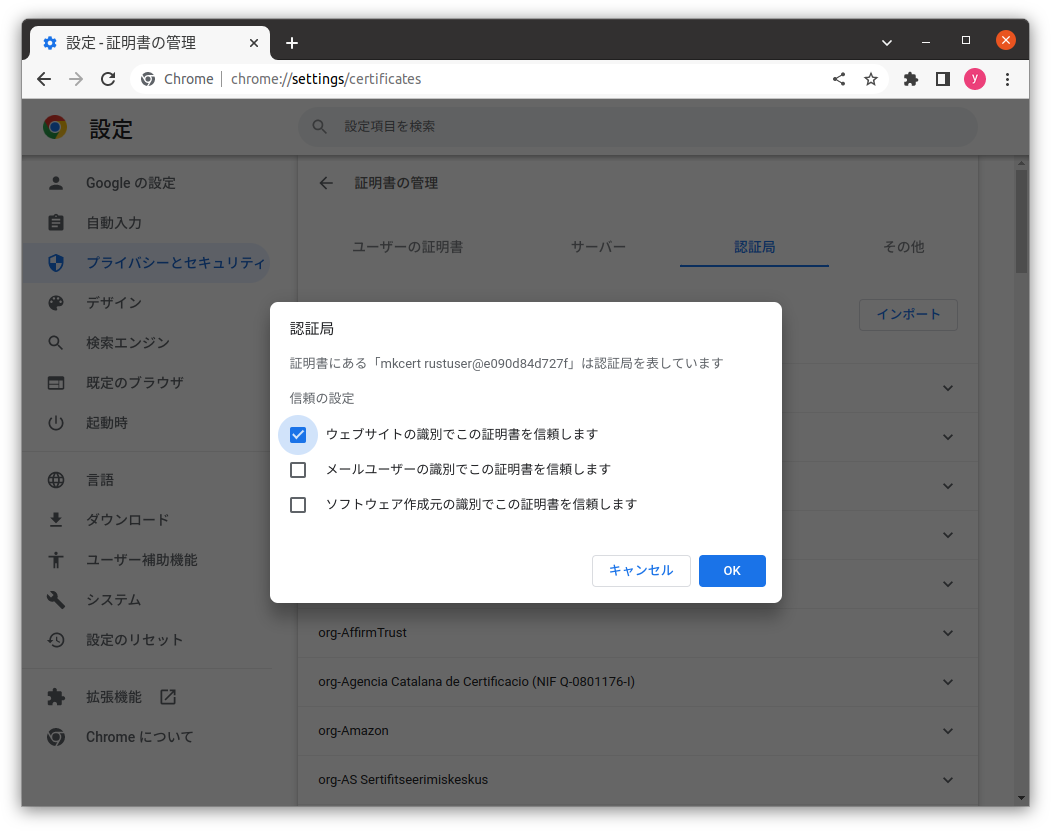
作成した自己認証局の証明書(rootCA.pem)をブラウザの証明書リストへ追加します。ここではChromeを使います。Chromeのアドレス欄にchrome://settings/certificatesと入力して認証局-->インポートと進んでrootCA.pemを選択肢します。
ウェブサイトの識別でこの証明書を信頼しますをチェックしてOKを押します。
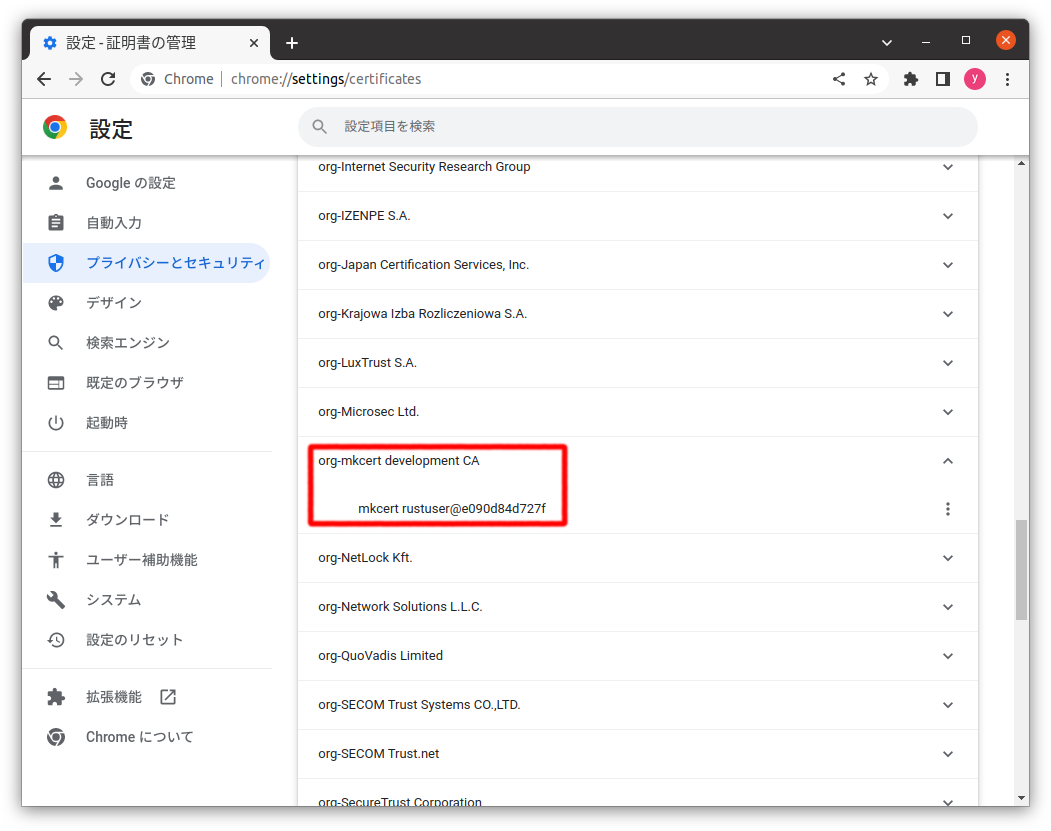
認証局リストにorg-mkcert~~~の項目があれば完了です。
接続
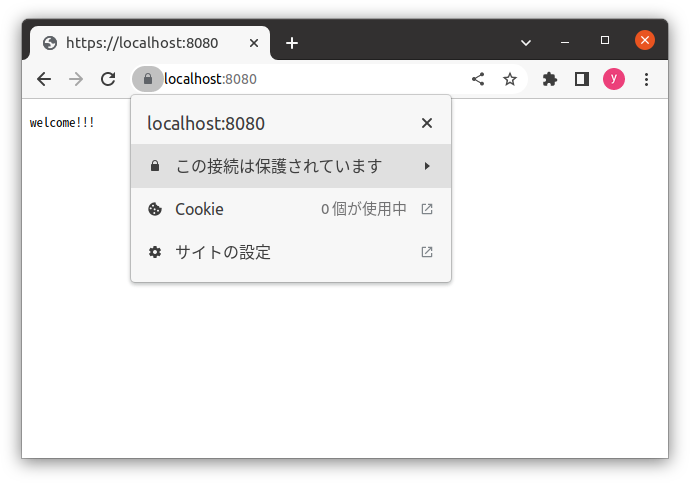
chromeで https://localhost:8080 に接続して「welcome!!!」が表示されて「この接続は保護されています」と出ているのでOKそうです。
rustプログラムはdockerコンテナで動かしていて、ホストの8080番ポートとコンテナの8080番ポートを対応させているのでlocalhost:8080にアクセスしています。
curlで接続
curlコマンドでhttps接続するときは --cacert オプションで認証局証明書を指定すれば接続できます。
$ curl https://localhost:8080 --cacert rootCA.pem
welcome!!!
postmanで接続
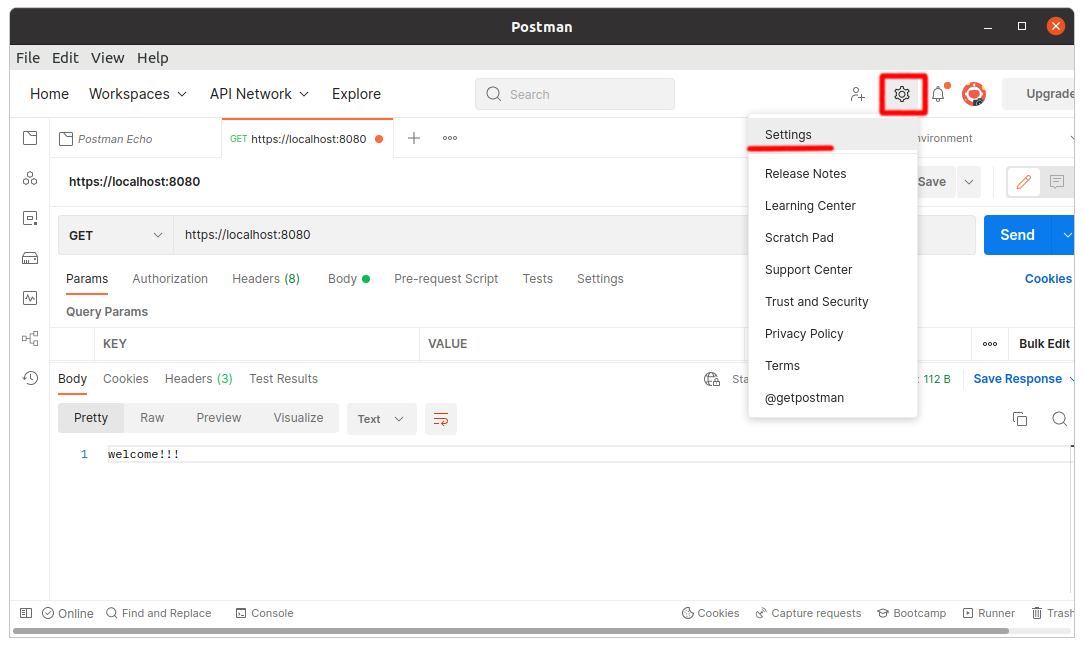
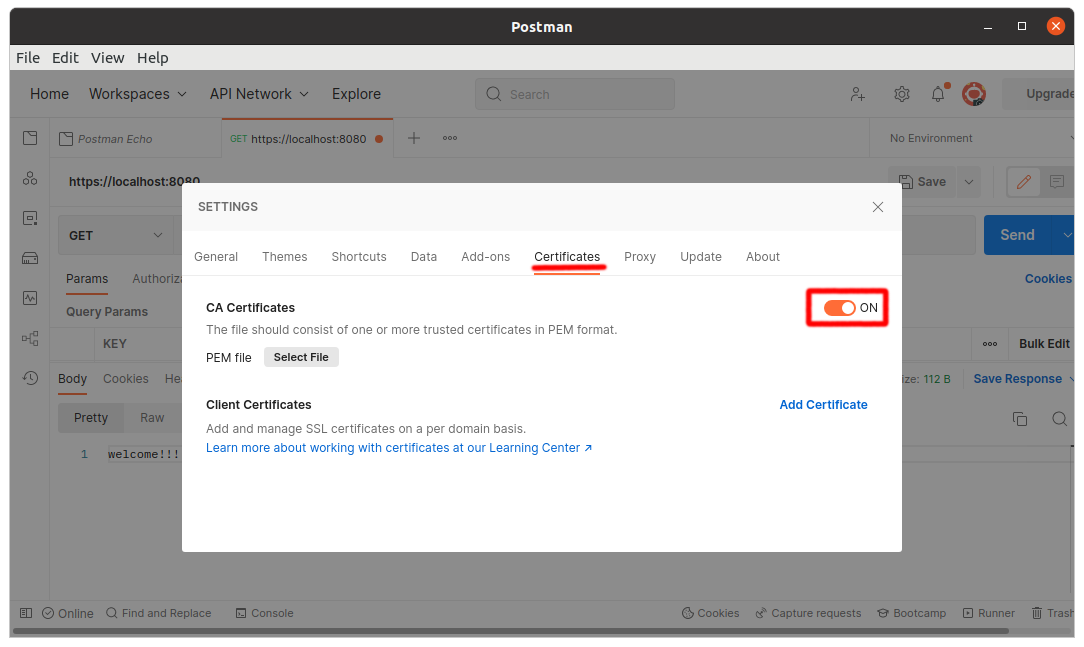
postmanでhttps接続する場合もpostmanに認証局証明書を登録します。メニュー-->Settingsと進んでCertificatesタブの CA CertificatesをONにします。 PEM fileに rootCA.pem を指定します。この状態でGETメソッドで https://localhost:8080 にアクセスすると「welcome!!!」が返ってくるのでOKそうです。

