はじめに
iOS16から使えるようになったTransferableを実装することでドラッグアンドドロップの実装が簡単になったようなので、調べて見ました。
環境
Xcode15.4
iOS16 ~
内容
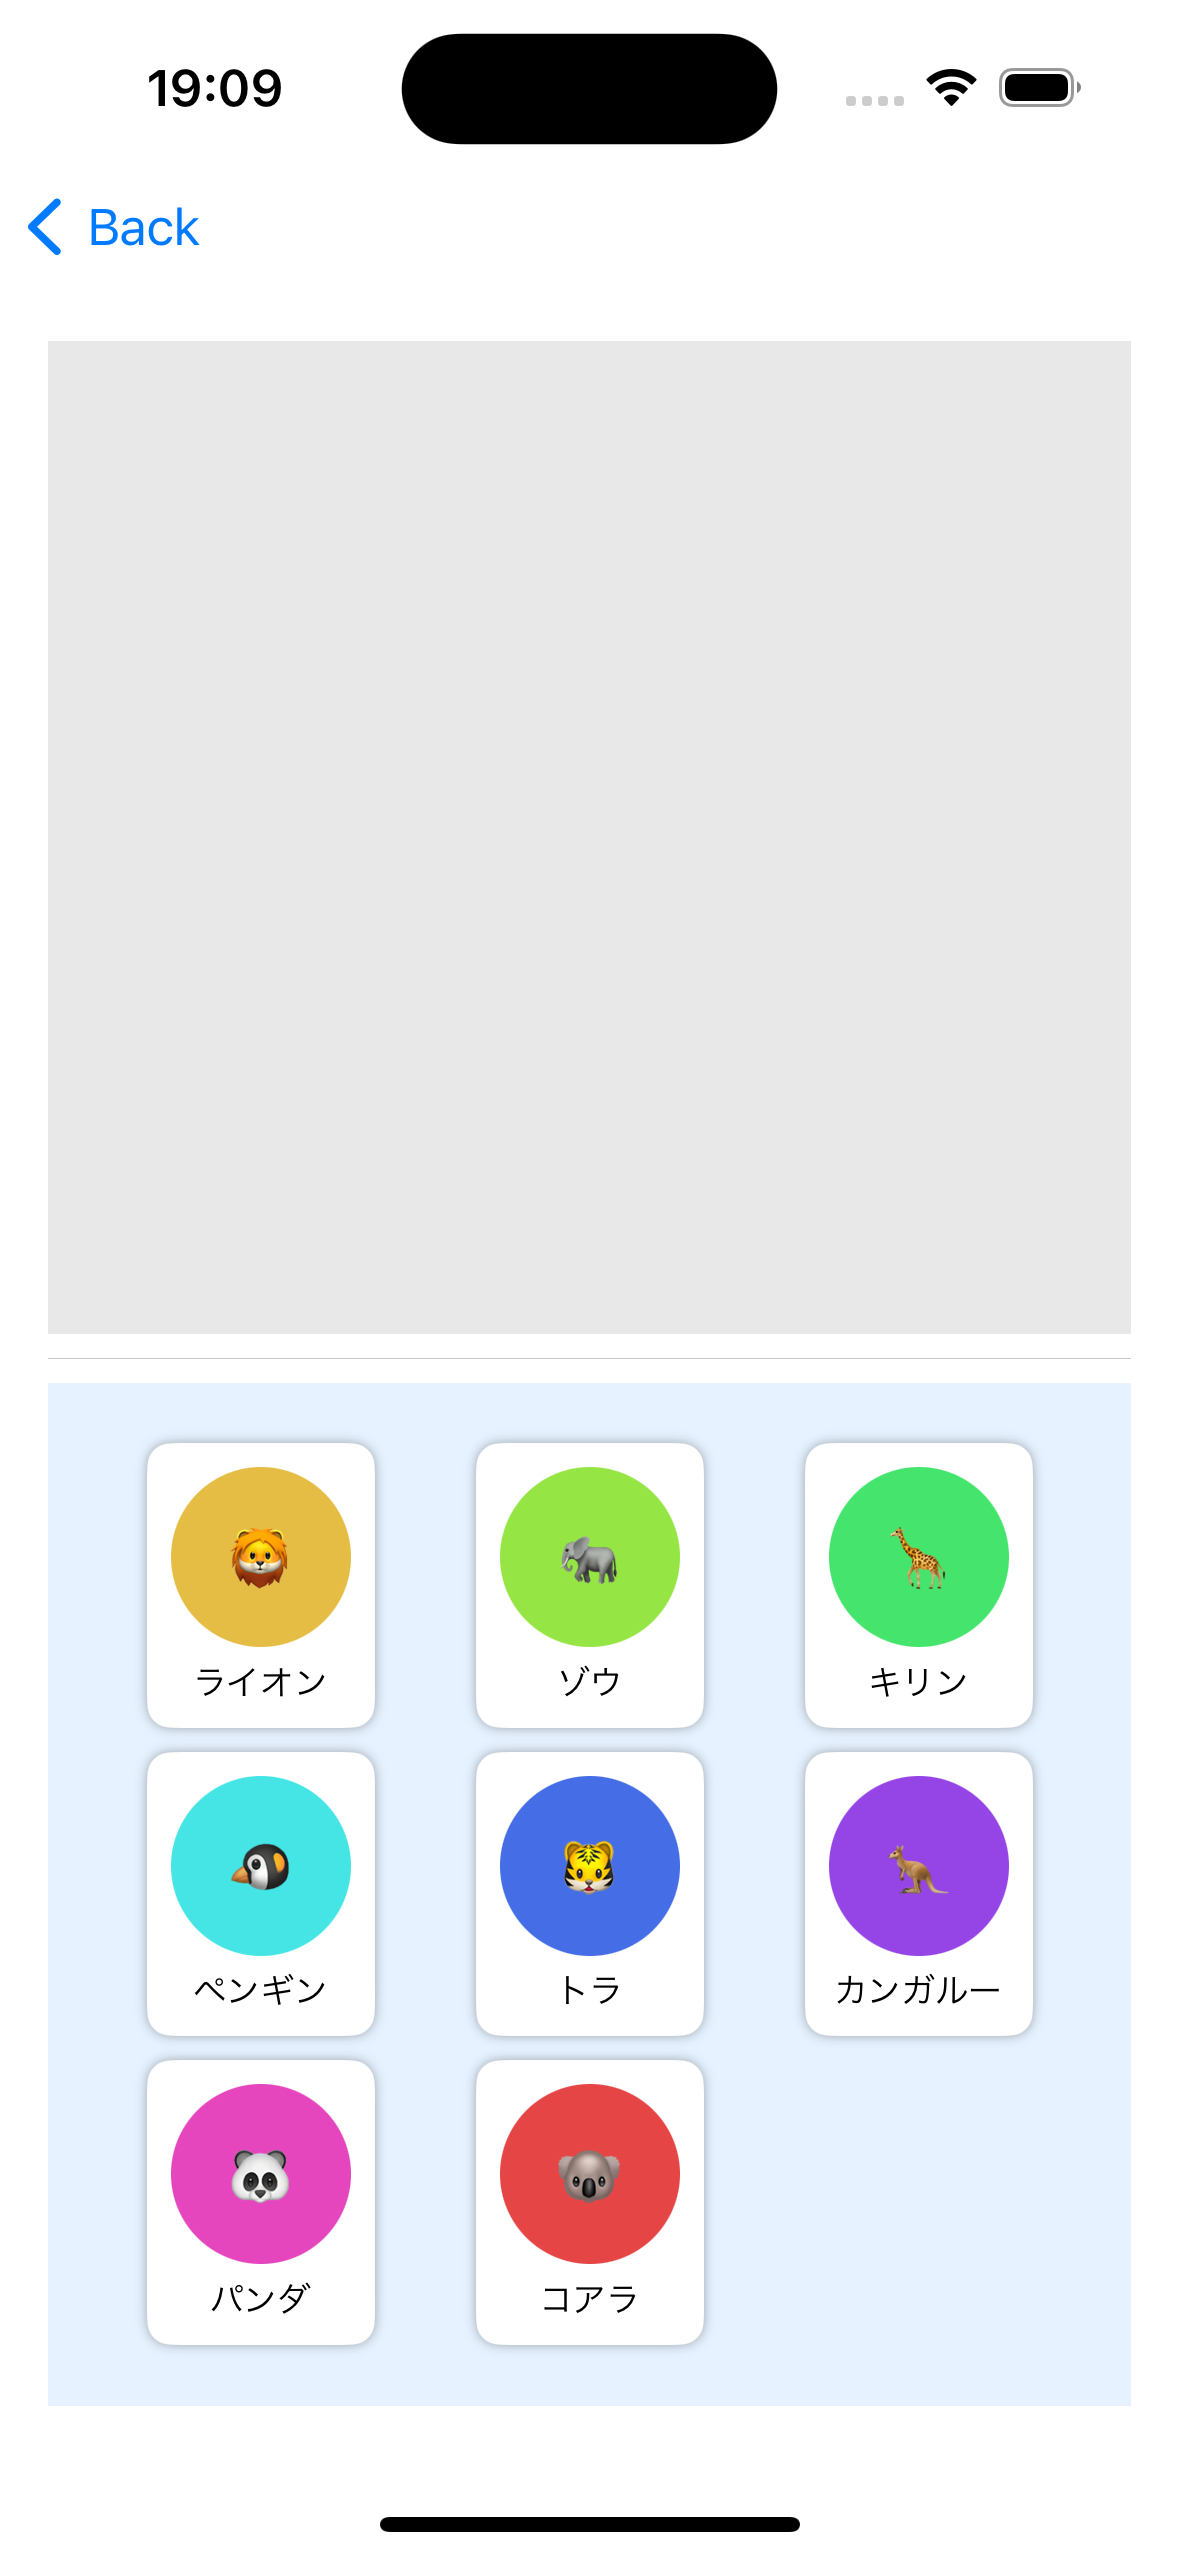
画面に二つの領域を設定して、動物のアイコンが書かれたカードを自由にドラッグして移動できるように実装しました。
また、ドロップできる領域に入ったら赤い枠を表示するようにしました。
SwiftUIでのドラッグアンドドロップの実装には以下3つの要素の理解が必要です。
-
Transferable
オブジェクトをドラッグアンドドロップ操作で転送可能にするためのプロトコル。Transferableに準拠することで、オブジェクトはシステム全体で一貫した方法で転送されることが保証される。 -
draggable(_:preview:)
Viewをドラッグ可能にする。プレビューパラメータを使用して、ドラッグ中に表示されるカスタムプレビューを定義することもできる。 -
dropDestination(for:action:isTargeted:)
Viewをドロップ先として設定する。ドロップされたアイテムの処理方法と、ドロップターゲットがアクティブかどうかを示すフィードバックも受け取れる。
struct DragAndDropView: View {
    @State private var topAnimals: [Animal] = []
    @State private var bottomAnimals: [Animal] = Animal.sampleAnimals

    @State private var isDropTargetedOnTOp = false
    @State private var isDropTargetedOnBottom = false

    var body: some View {
        VStack {
            LazyVGrid(columns: [GridItem(.adaptive(minimum: 80))]) {
                ForEach(topAnimals, id: \.id) { animal in
                    AnimalView(animal: animal)
                        .draggable(animal) {
                            AnimalView(animal: animal)
                                .bold()
                                .foregroundStyle(Color.red)
                        }
                }
            }
            .padding(20)
            .frame(maxWidth: .infinity, maxHeight: .infinity)
            .background(Color.gray.opacity(0.2))
            .border(.red, width: isDropTargetedOnTOp ? 10 : .zero)
            .dropDestination(for: Animal.self) { droppedAnimals, _ in
                moveAnimals(droppedAnimals, from: &bottomAnimals, to: &topAnimals)
                return true
            } isTargeted: {
                isDropTargetedOnTOp = $0
            }

            Divider()

            LazyVGrid(columns: [GridItem(.adaptive(minimum: 80))]) {
                ForEach(bottomAnimals, id: \.id) { animal in
                    AnimalView(animal: animal)
                        .draggable(animal) {
                            AnimalView(animal: animal)
                                .bold()
                                .foregroundStyle(Color.red)
                        }
                }
            }
            .padding(20)
            .frame(maxWidth: .infinity, maxHeight: .infinity)
            .background(Color.blue.opacity(0.1))
            .border(.red, width: isDropTargetedOnBottom ? 10 : .zero)
            .dropDestination(for: Animal.self) { droppedAnimals, _ in
                moveAnimals(droppedAnimals, from: &topAnimals, to: &bottomAnimals)
                return true
            } isTargeted: {
                isDropTargetedOnBottom = $0
            }
        }
        .padding()
    }

    private struct AnimalView: View {
        let animal: Animal

        var body: some View {
            VStack {
                Circle()
                    .fill(animal.animalColor)
                    .frame(width: 60, height: 60)
                    .overlay(Text(Animal.getAnimalIcon(for: animal.name)))
                Text(animal.name)
                    .font(.caption)
            }
            .padding(8)
            .background(Color.white)
            .cornerRadius(8)
            .shadow(radius: 2)
        }
    }

    private func moveAnimals(_ animals: [Animal], from source: inout [Animal], to destination: inout [Animal]) {
        for animal in animals {
            if let index = source.firstIndex(where: { $0.id == animal.id }) {
                source.remove(at: index)
                destination.append(animal)
            }
        }
    }
}
struct Animal: Codable, Transferable, Identifiable {
    let id: UUID
    let colorIndex: Int
    let name: String

    init(id: UUID = UUID(), colorIndex: Int, name: String) {
        self.id = id
        self.colorIndex = colorIndex
        self.name = name
    }

    static var transferRepresentation: some TransferRepresentation {
        CodableRepresentation(for: Animal.self, contentType: .data)
    }
}
ドラッグするアイテムをTransferableに準拠させるには、transferRepresentationを実装してCodableRepresentationな値を返す必要があります。その際contentTypeを指定する必要があります。
今回は.dataを使いましたが、カスタムUTTypeを追加することもできます。
Viewに.draggable(animal)をつけるだけでもドラッグすることはできます。
ドラッグしている間にViewを変えたい場合は、previewにViewを追加します。
この実装ではドラッグ中のタイトルを変えています。
AnimalView(animal: animal)
    .draggable(animal) {
        AnimalView(animal: animal)
            .bold()
            .foregroundStyle(Color.red)
    }
ドロップ対象のViewに.dropDestinationをつけるとアイテムをドロップすることができます。
isTargetedを使うことでドラッグ中にドロップ可能かどうかをUIでフィードバックすることができます。
    .dropDestination(for: Animal.self) { droppedAnimals, _ in
        moveAnimals(droppedAnimals, from: &bottomAnimals, to: &topAnimals)
        return true
    } isTargeted: {
        isDropTargetedOnTOp = $0
    }

おわりに
Transferableを使うことで2つの異なるアプリ間でもドラッグアンドドロップでアイテムを動かすことができるようです。アプリ間移動が別で調べてみようかと思います。
ちなみに、TransferableはPhotosPickerでも使っていました。こちらの記事はPhotosPickerの使い方をまとめたものです。
参考


