はじめに
iOSのアプリ開発においてDebug, Release以外に開発環境としてStagingを設定したく、
こちらの記事を参考にやってみました
環境
Xcode 14.0
内容
Stagingを定義する
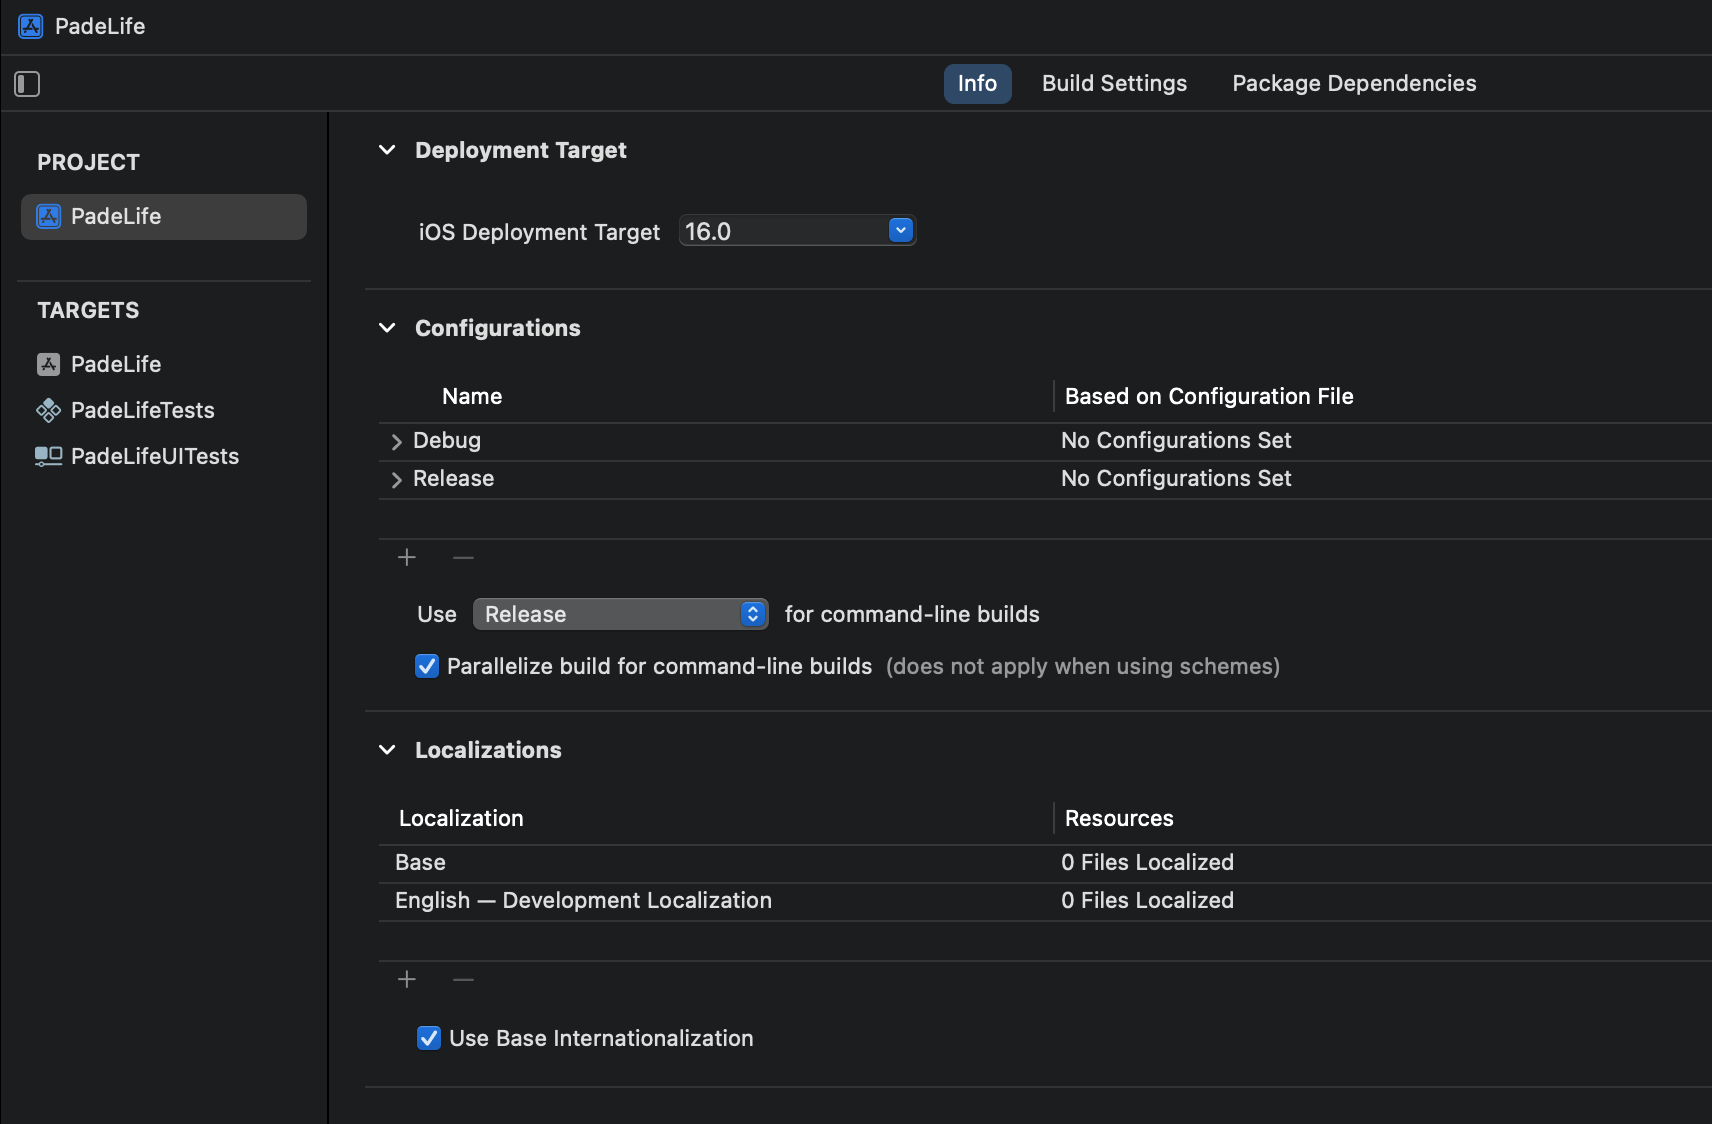
InfoのConfigurationsの+から追加
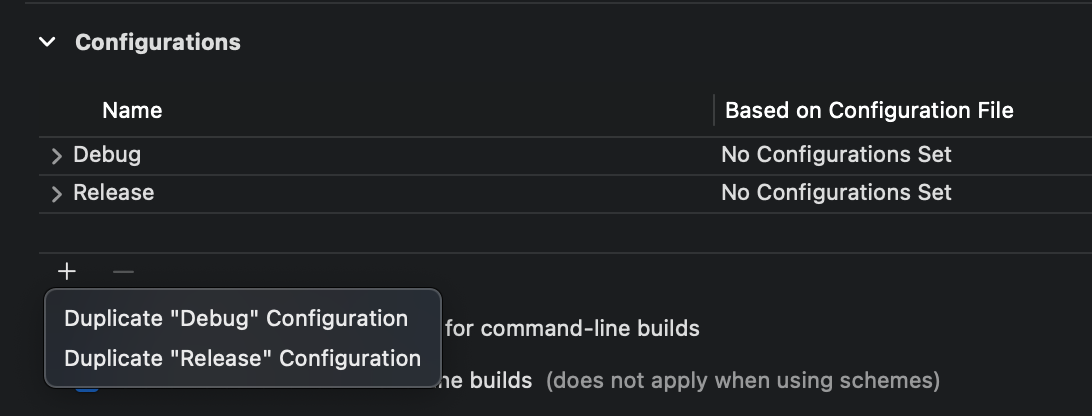
Depulicate "Debug" Configurationを選択
複製したものをStagingに変更

Build Settingを修正する
Preprocessor Macrosの値を修正
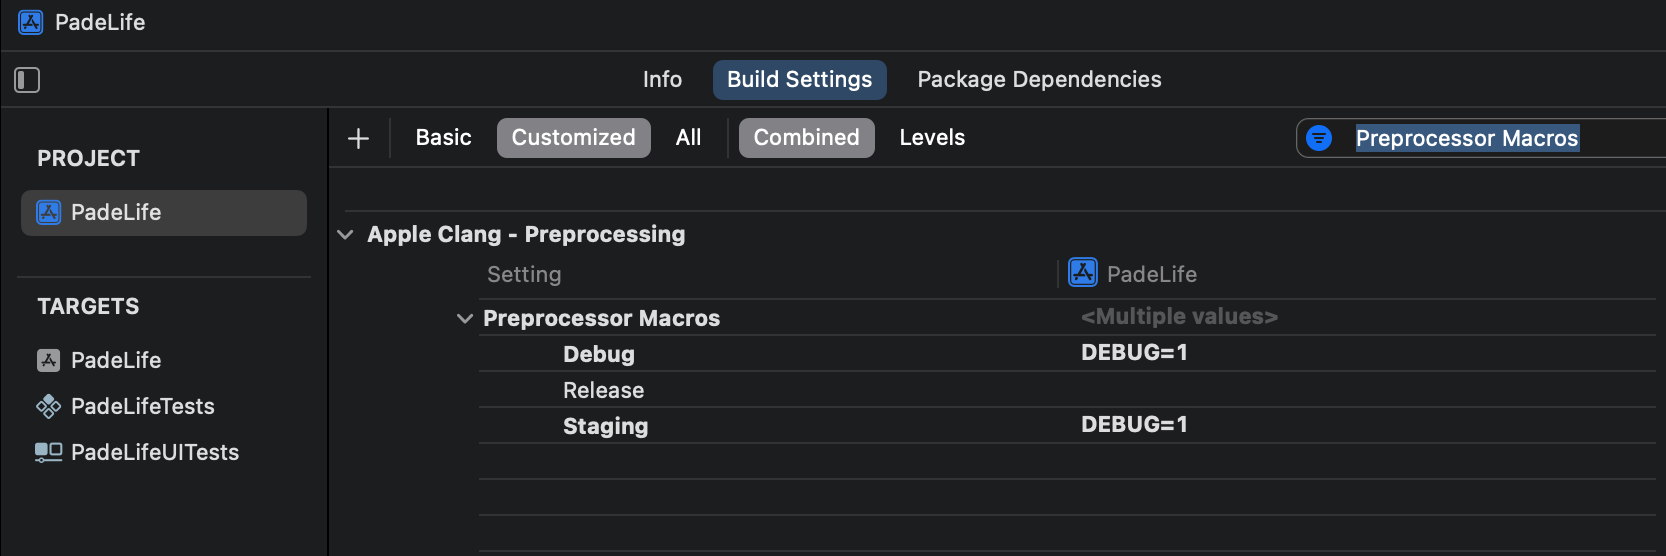
Stagingの値が複製した時の値DEBUG=1となっているのでSTAGING=1にする

User Definedで各環境ごとの値を設定する
+からAdd User-Defined Settingを追加
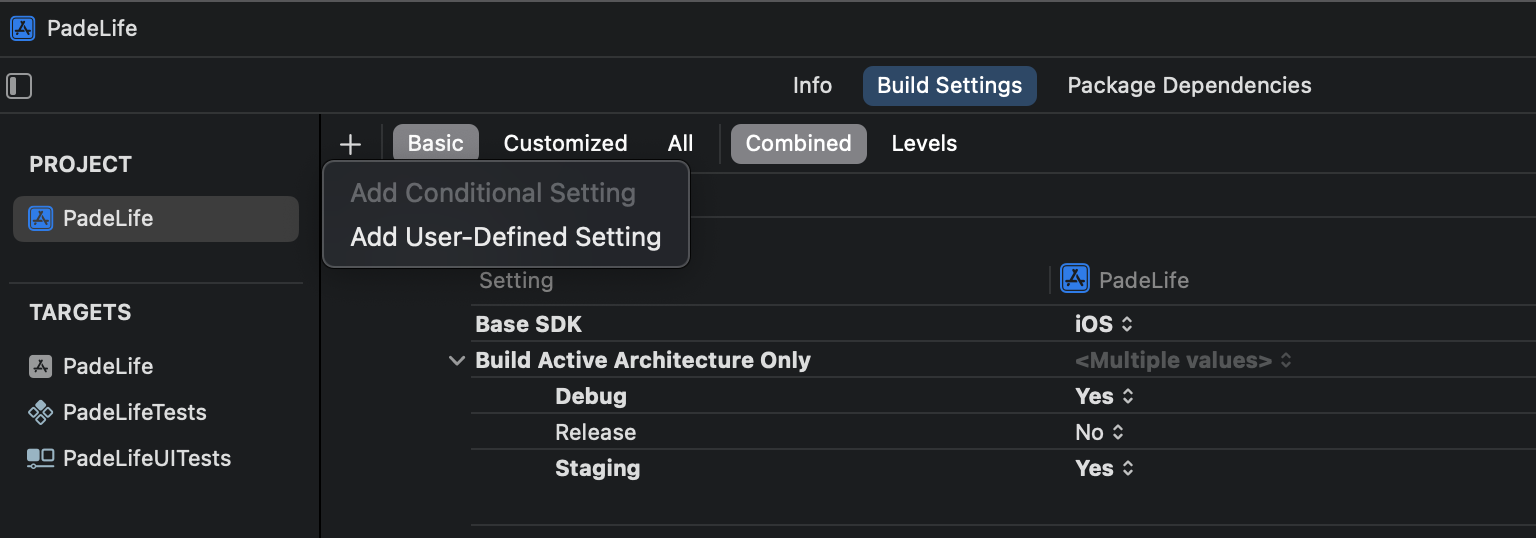
NEW_SETTINGが追加されるので、適当な値を入れていく

環境ごとの値を定義

Info.plistで定義する
InfoタブからCustom iOS Target Propertiesを開き、+から新規追加
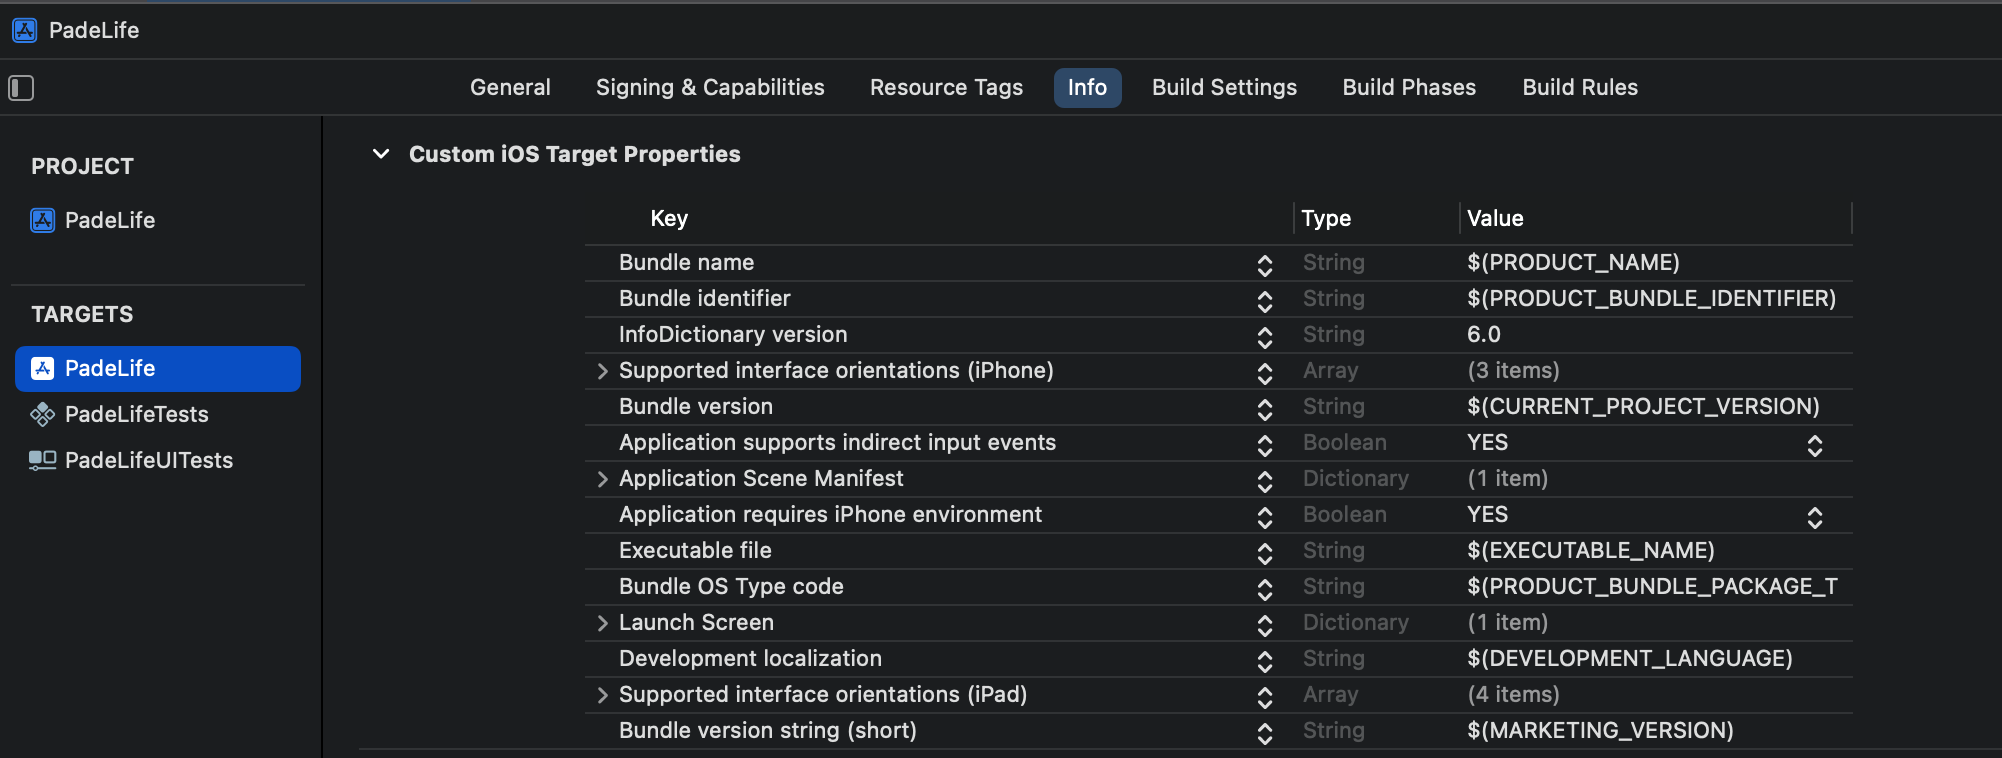
$(User-Definedで設定した値)を定義し、適当な名前をつけておく

Infoタブから定義した値が消えて、Info.plistが作られる

コードからは以下のような形で環境ごとの値を使える
Bundle.main.object(forInfoDictionaryKey: "appNameSetting") as! String
Schemeを追加する
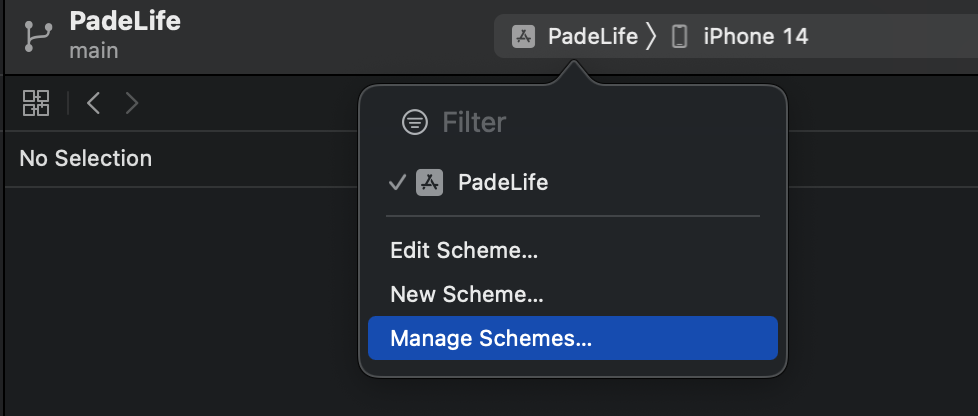
Manage Schemesから追加
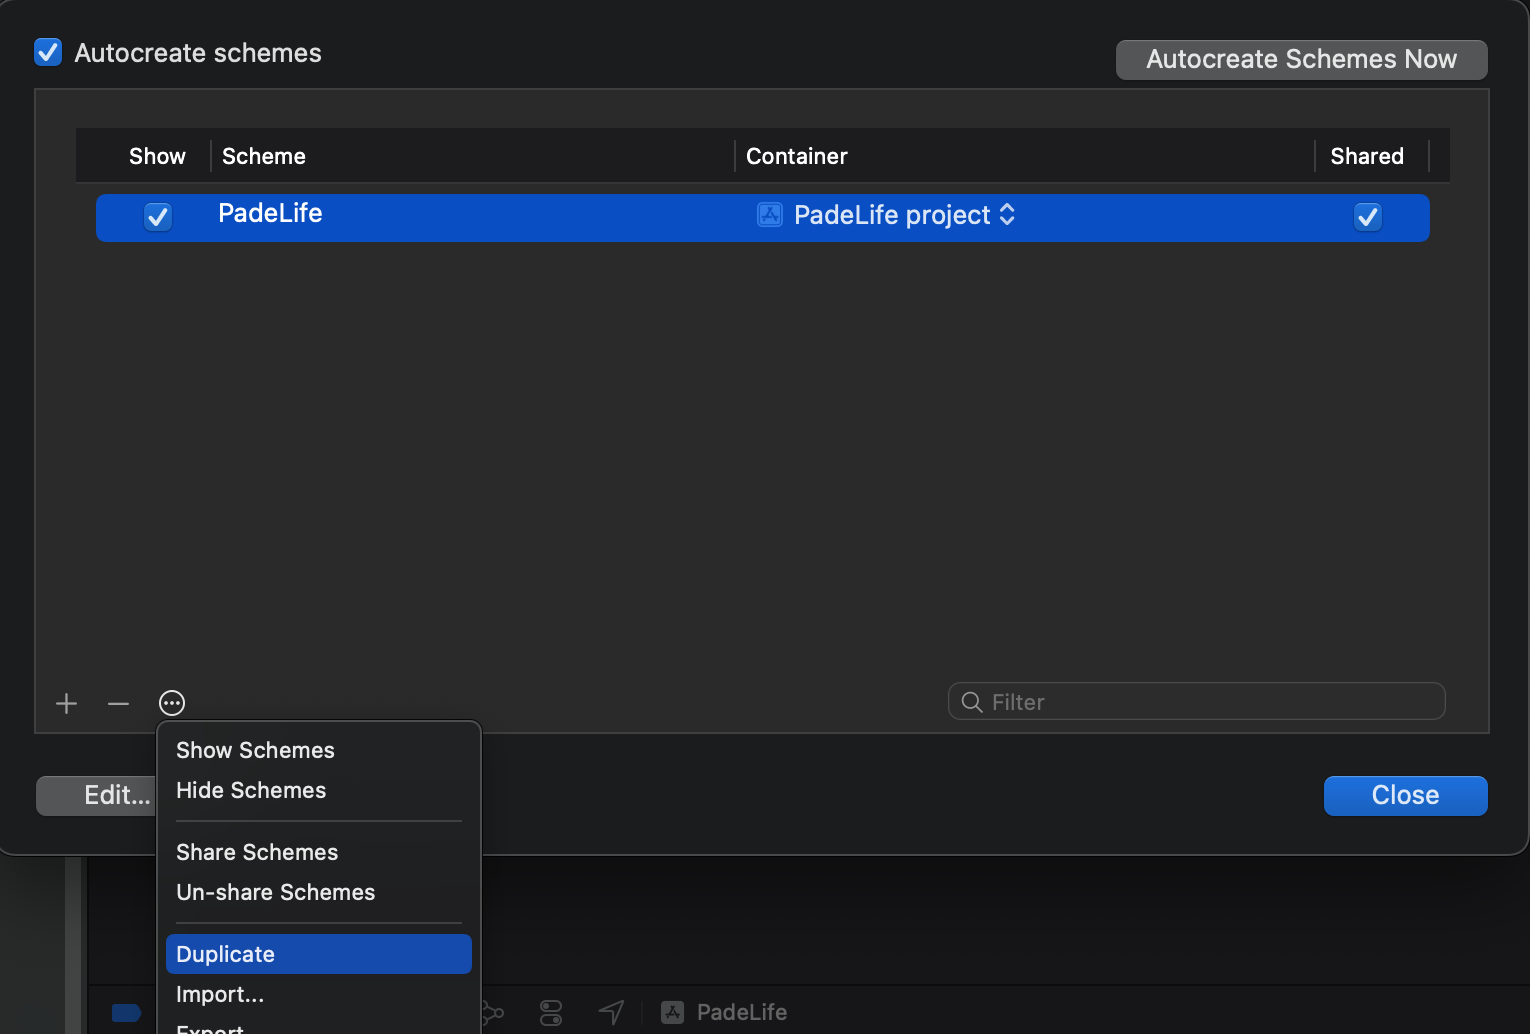
既存のものをDuplicateする
Build ConfigurationからStagingを選び、適当な名前と設定をしていく
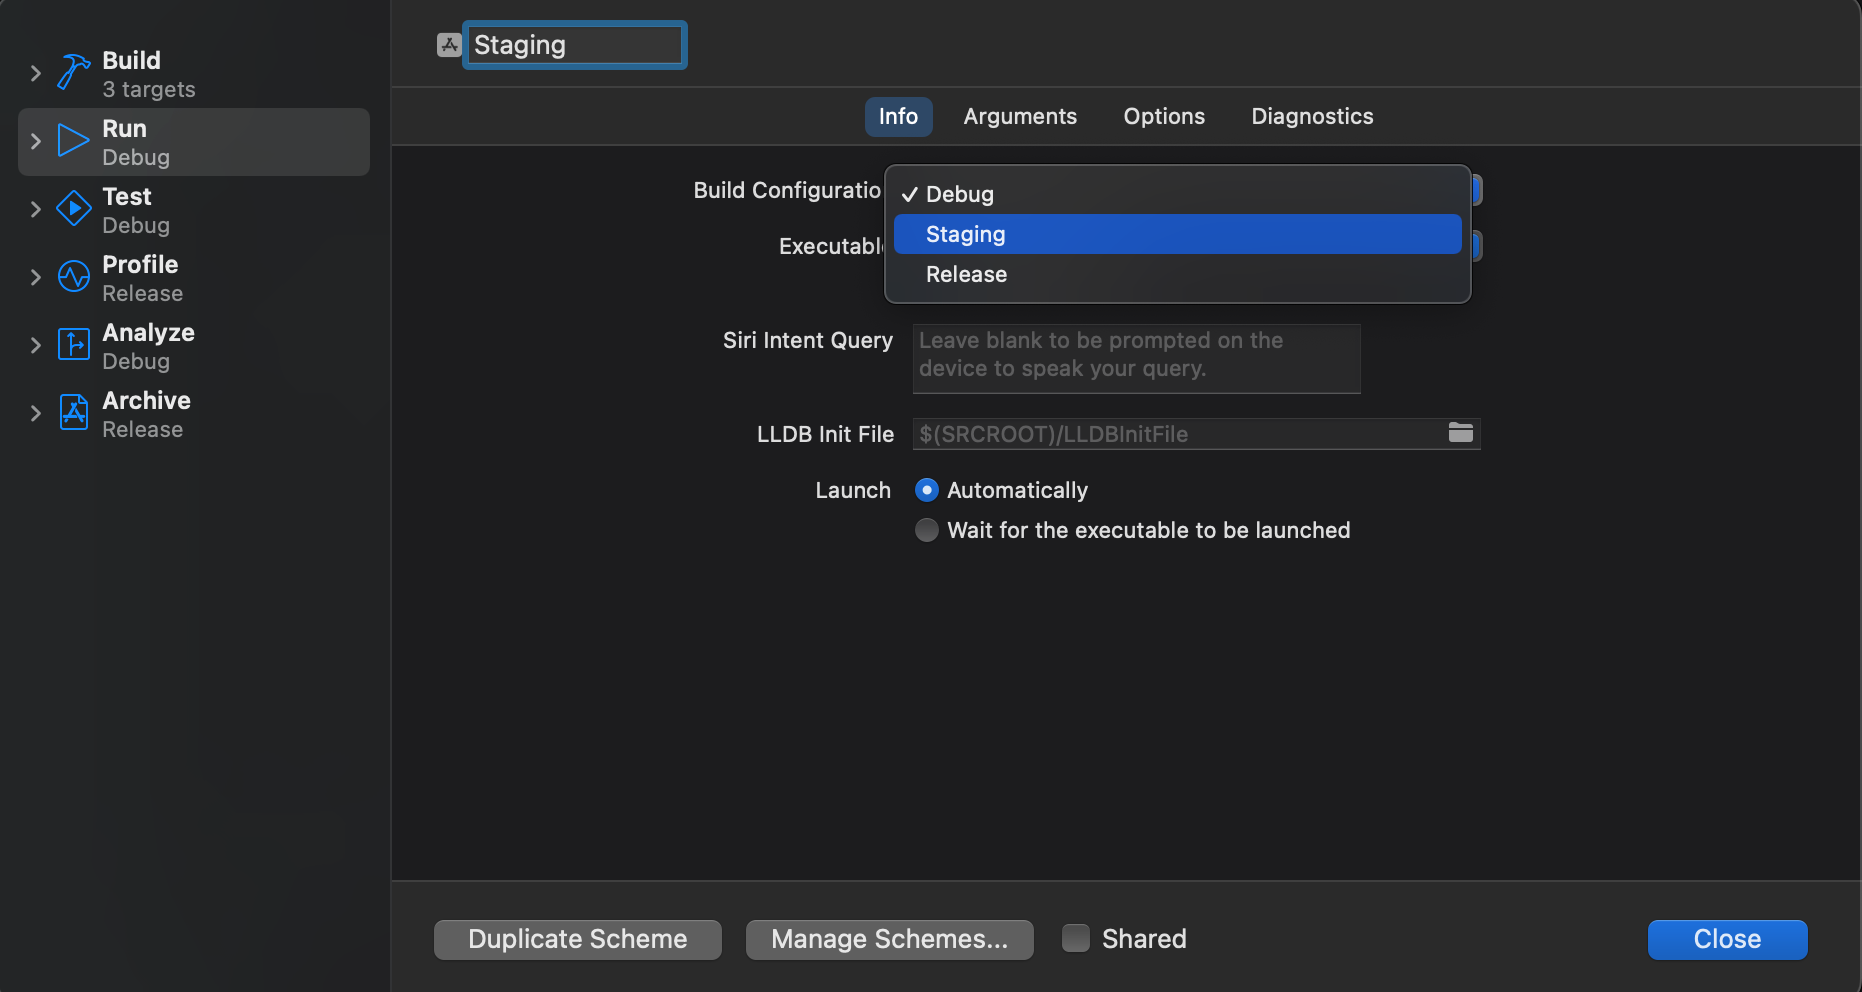
Schemeをクリックすると後から名前を変更することができる
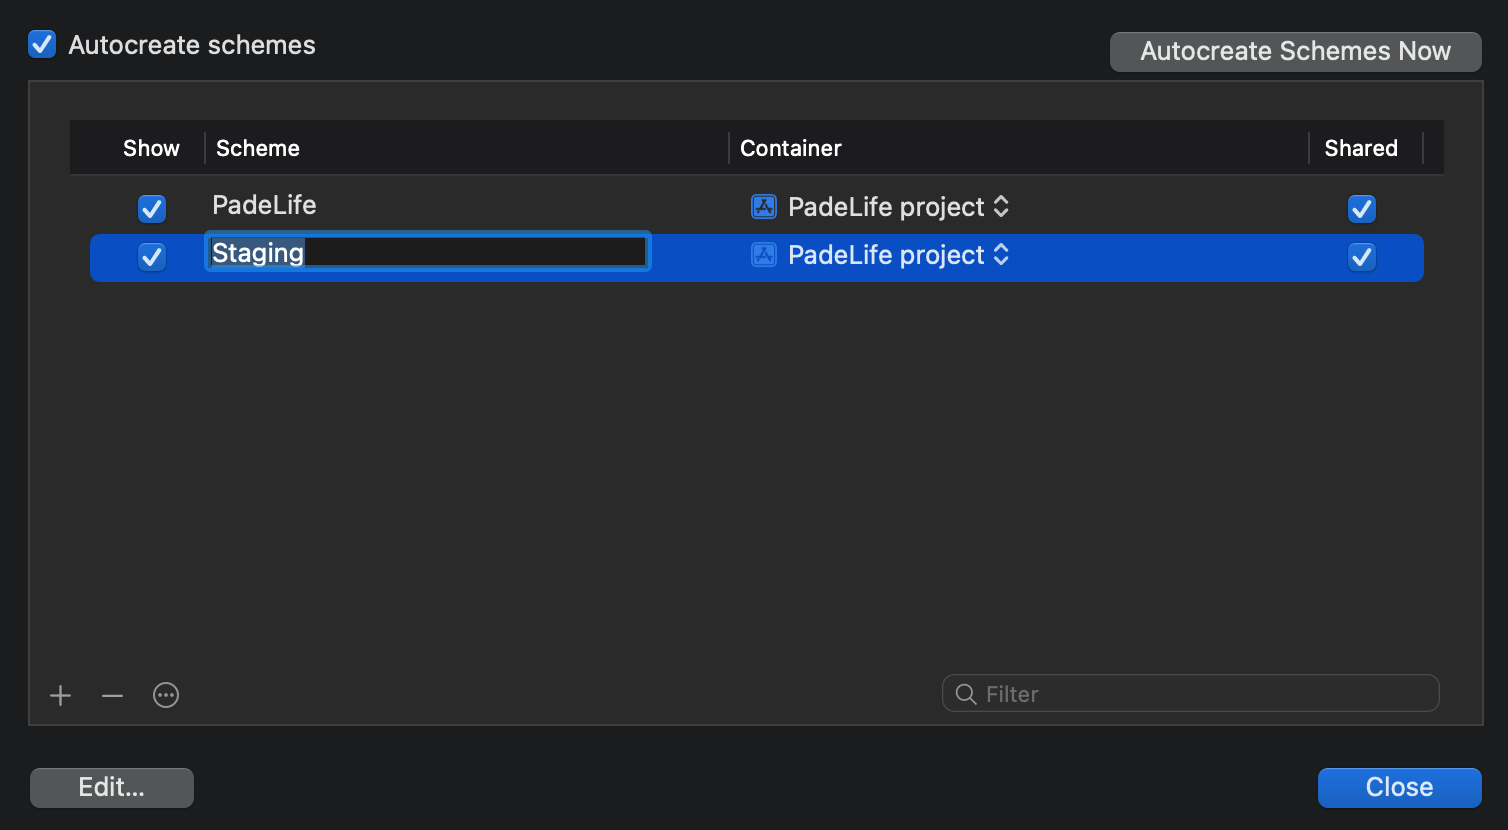
Sharedについてはこちらの記事を見て理解できました。
Bundle Identifierを環境ごとに分ける
User-DefinedにBUNDLE_ID_SUFFIXという名前で.debugと.stagingを定義

Build SettingsでProduct Bundle Identifierを検索

Bundle Identifierの末尾に${BUNDLE_ID_SUFFIX}を追加する

アプリアイコンを環境ごとに分ける
TargetのAsset Catalog CompilerのPrimary App Icon Set Nameを修正
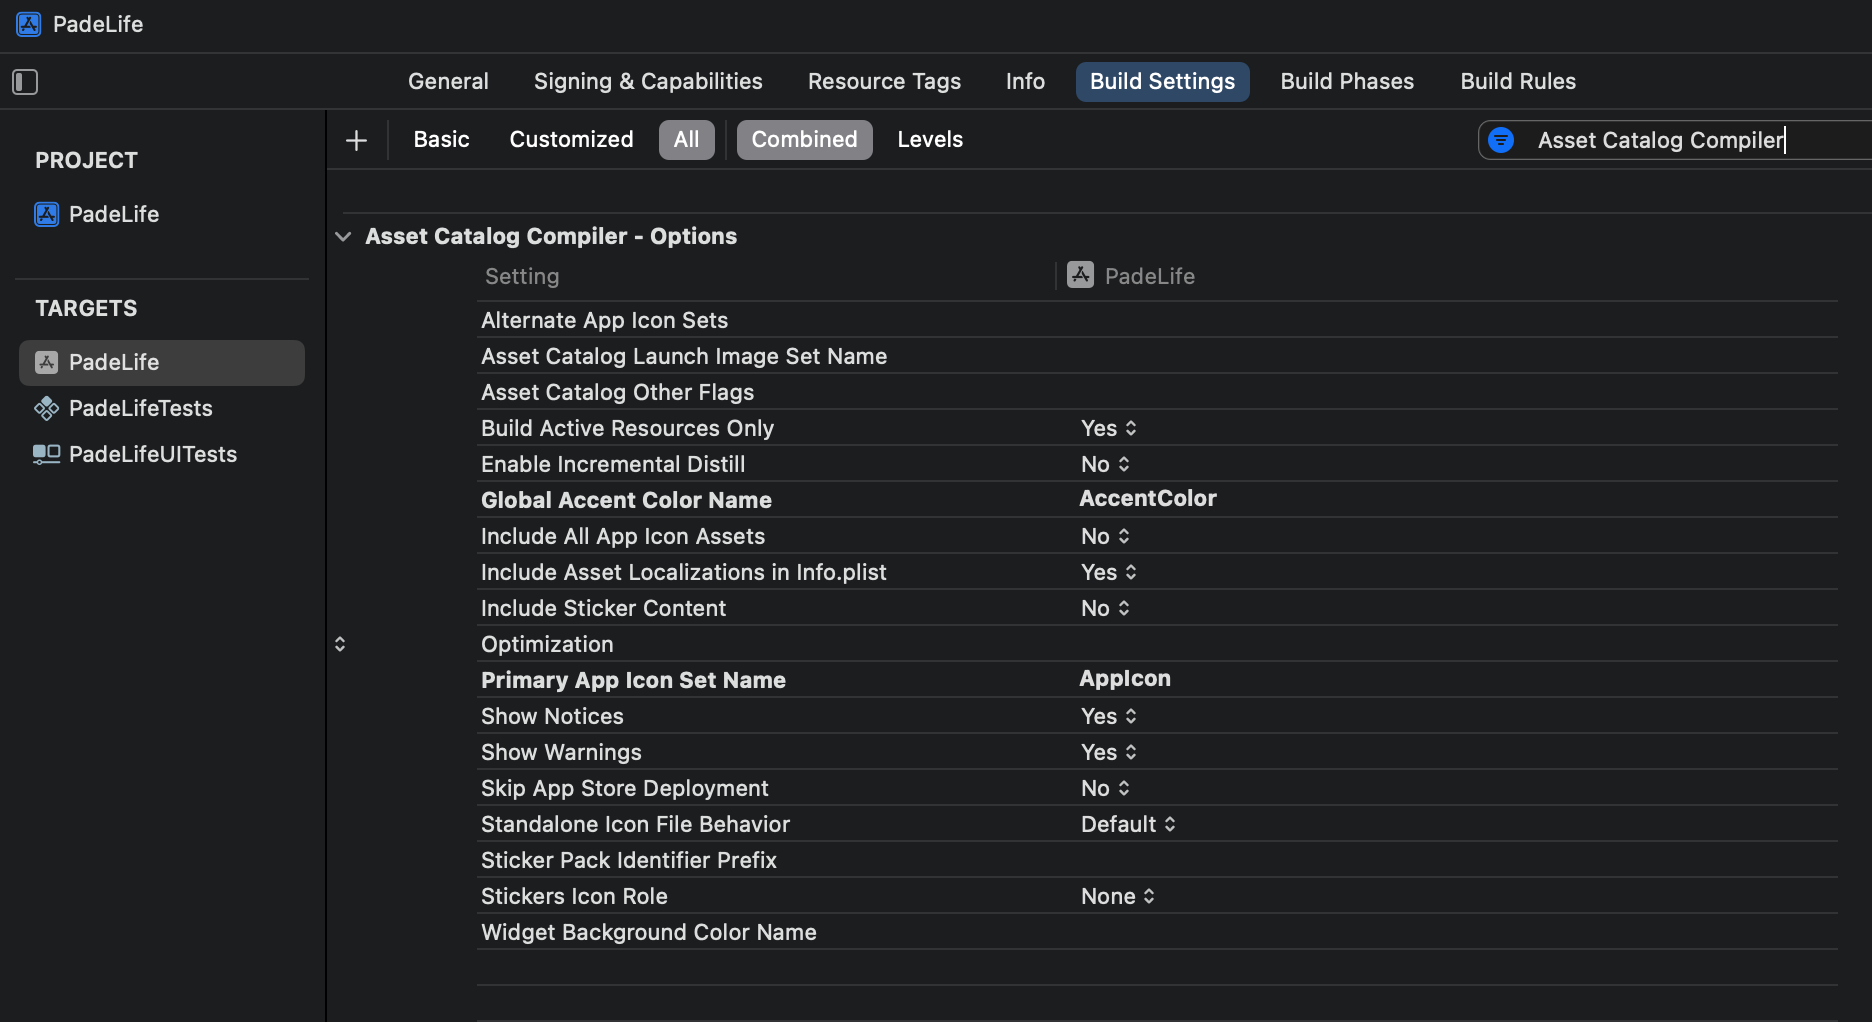
AppIconの末尾に${BUNDLE_ID_SUFFIX}を付ける

この値と同じIconを用意すると環境ごとにアイコンが変わるようになる
アプリ名を環境ごとに分ける
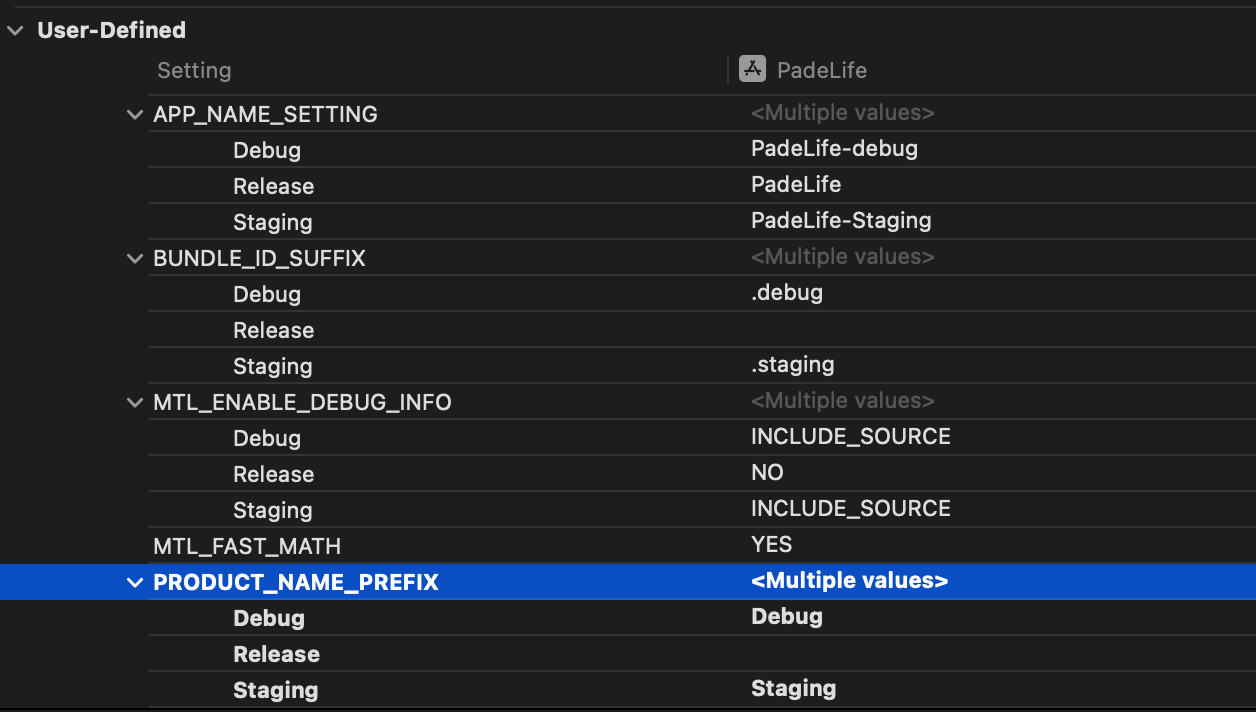
User-DefinedにPRODUCT_NAME_PREFIXという名前でDebugとStagingを定義
TargetのProduct Nameを修正する
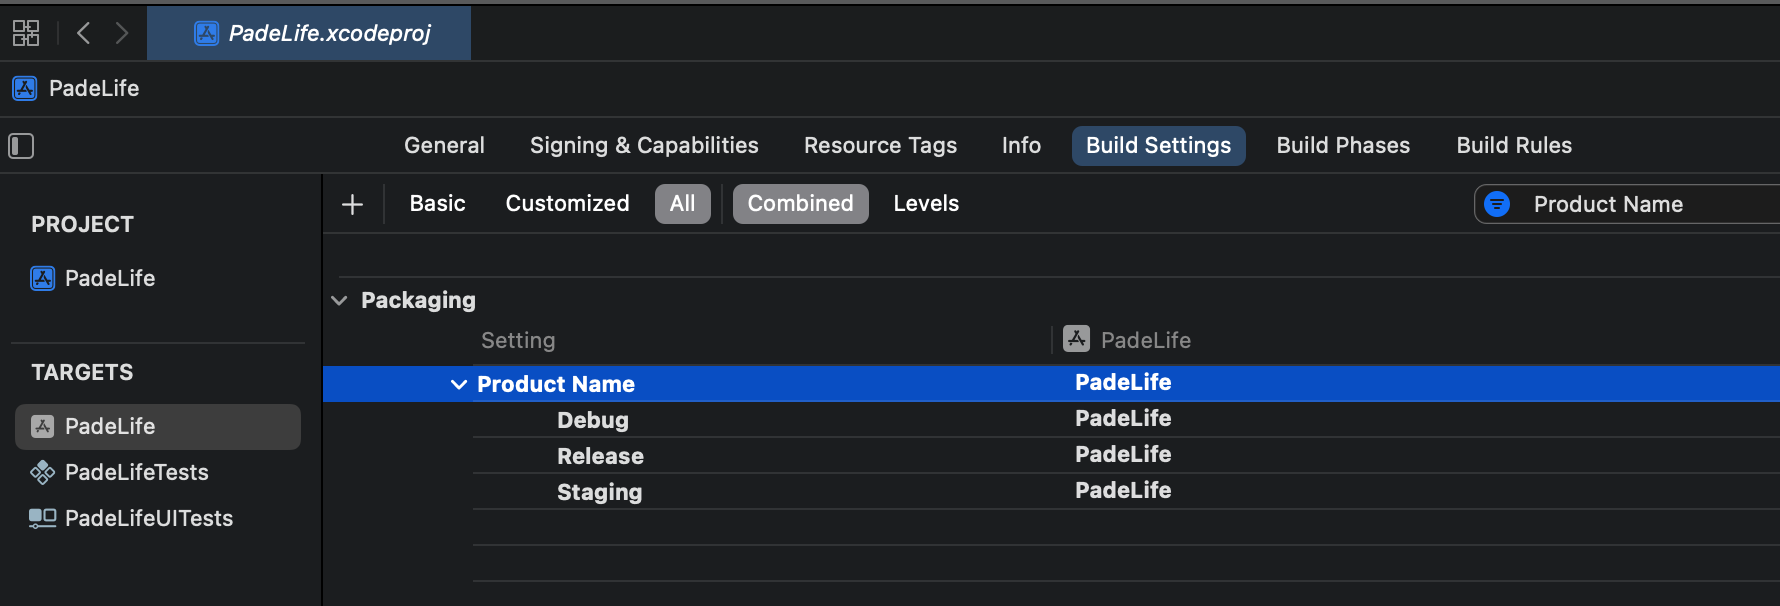
${TARGET_NAME}の前に${PRODUCT_NAME_PREFIX}を付ける

おまけ: Firebaseを環境ごとに分ける
こちらの記事を参考にやってみました
やり方はいくつかあるようですが、個人的に1番わかりやすく感じたので、こちらの実装方法にしました
class AppDelegate: NSObject, UIApplicationDelegate {
    func application(_ application: UIApplication,
                     didFinishLaunchingWithOptions launchOptions: [UIApplication.LaunchOptionsKey : Any]? = nil) -> Bool {
#if RELEASE
        let resource = "GoogleService-Info"
#elseif STAGING
        let resource = "GoogleService-Info-stg"
#else
        let resource = "GoogleService-Info-stg"
#endif

        if let filePath = Bundle.main.path(forResource: resource, ofType: "plist") {
            guard let options = FirebaseOptions(contentsOfFile: filePath) else {
                assert(false, "Could not load config file.")
            }
            FirebaseApp.configure(options: options)
        } else {
            FirebaseApp.configure()
        }
        return true
    }
}
おわりに
参考にさせてもらった記事がとてもわかりやすく、大変助かりました
参考