はじめに
本記事は、Implementing Modern Collection Viewsのサンプルコードを見ていきながら内容を整理し、その後『リストセルにお気に入りボタンを追加する』実装までをまとめたものです。

実装部分は、こちらへ
Implementing Modern Collection Viewsの導入部分は👇の記事でまとめました。
環境
Xcode 13.3
Swift 5.6
整理
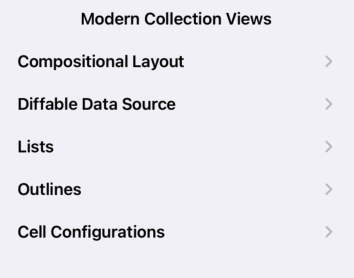
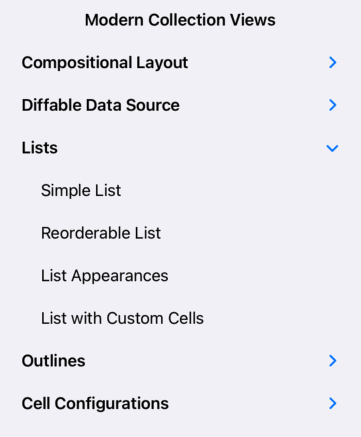
サンプルアプリを起動するとテーマごとのリストが確認できます。
今回はListsの中のList with Custom Cellsを見てきます。


データ部分
private enum Section: Hashable {
    case main
}

private struct Category: Hashable {
    let icon: UIImage?
    let name: String?

    static let music = Category(icon: UIImage(systemName: "music.mic"), name: "Music")
    static let transportation = Category(icon: UIImage(systemName: "car"), name: "Transportation")
    static let weather = Category(icon: UIImage(systemName: "cloud.rain"), name: "Weather")
}

private struct Item: Hashable {
    let category: Category
    let image: UIImage?
    let title: String?
    let description: String?
    init(category: Category, imageName: String? = nil, title: String? = nil, description: String? = nil) {
        self.category = category
        if let systemName = imageName {
            self.image = UIImage(systemName: systemName)
        } else {
            self.image = nil
        }
        self.title = title
        self.description = description
    }
    private let identifier = UUID()

    static let all = [
        Item(category: .music, imageName: "headphones", title: "Headphones",
             description: "A portable pair of earphones that are used to listen to music and other forms of audio."),
        Item(category: .music, imageName: "hifispeaker.fill", title: "Loudspeaker",
             description: "A device used to reproduce sound by converting electrical impulses into audio waves."),
        Item(category: .transportation, imageName: "airplane", title: "Plane",
             description: "A commercial airliner used for long distance travel."),
        Item(category: .transportation, imageName: "tram.fill", title: "Tram",
             description: "A trolley car used as public transport in cities."),
        Item(category: .transportation, imageName: "car.fill", title: "Car",
             description: "A personal vehicle with four wheels that is able to carry a small number of people."),
        Item(category: .weather, imageName: "hurricane", title: "Hurricane",
             description: "A tropical cyclone in the Caribbean with violent wind."),
        Item(category: .weather, imageName: "tornado", title: "Tornado",
             description: "A destructive vortex of swirling violent winds that advances beneath a large storm system."),
        Item(category: .weather, imageName: "tropicalstorm", title: "Tropical Storm",
             description: "A localized, intense low-pressure system, forming over tropical oceans."),
        Item(category: .weather, imageName: "snow", title: "Snow",
             description: "Atmospheric water vapor frozen into ice crystals falling in light flakes.")
    ]
}
データはCategoryとItemに分かれていて、Categoryにはイメージとタイトル、Itemにはカテゴリ、イメージ、タイトル、説明文を持つ構成になっています。
fileprivate extension UIConfigurationStateCustomKey {
    static let item = UIConfigurationStateCustomKey("com.apple.ItemListCell.item")
}

private extension UICellConfigurationState {
    var item: Item? {
        set { self[.item] = newValue }
        get { return self[.item] as? Item }
    }
}
カスタムキーを定義、UICellConfigurationStateにカスタムセルの状態を持たせておく。
コレクションビューの部分
class CustomCellListViewController: UIViewController {

    private var dataSource: UICollectionViewDiffableDataSource<Section, Item>! = nil
    private var collectionView: UICollectionView! = nil

    override func viewDidLoad() {
        super.viewDidLoad()
        navigationItem.title = "List with Custom Cells"
        configureHierarchy()
        configureDataSource()
    }
}

extension CustomCellListViewController {
    private func createLayout() -> UICollectionViewLayout {
        let config = UICollectionLayoutListConfiguration(appearance: .plain)
        return UICollectionViewCompositionalLayout.list(using: config)
    }
}

extension CustomCellListViewController {
    private func configureHierarchy() {
        collectionView = UICollectionView(frame: view.bounds, collectionViewLayout: createLayout())
        collectionView.autoresizingMask = [.flexibleWidth, .flexibleHeight]
        view.addSubview(collectionView)
        collectionView.delegate = self
    }

    /// - Tag: CellRegistration
    private func configureDataSource() {
        let cellRegistration = UICollectionView.CellRegistration<CustomListCell, Item> { (cell, indexPath, item) in
            cell.updateWithItem(item)
            cell.accessories = [.disclosureIndicator()]
        }

        dataSource = UICollectionViewDiffableDataSource<Section, Item>(collectionView: collectionView) {
            (collectionView: UICollectionView, indexPath: IndexPath, item: Item) -> UICollectionViewCell? in
            return collectionView.dequeueConfiguredReusableCell(using: cellRegistration, for: indexPath, item: item)
        }

        // initial data
        var snapshot = NSDiffableDataSourceSnapshot<Section, Item>()
        snapshot.appendSections([.main])
        snapshot.appendItems(Item.all)
        dataSource.apply(snapshot, animatingDifferences: false)
    }
}
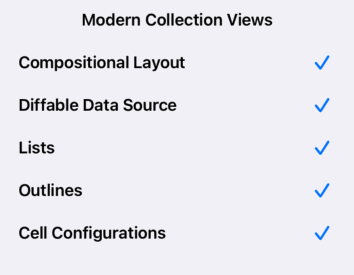
cell.accessories = [.disclosureIndicator()]の部分はオプションで変更可能です。以下デフォルトでの見た目です。パラメータで色々変えられるので詳しくは公式ドキュメントへ(リンク付けました)

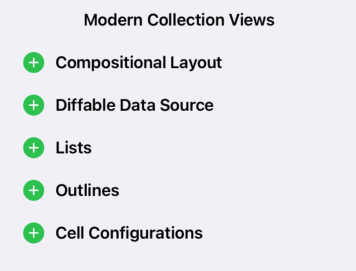

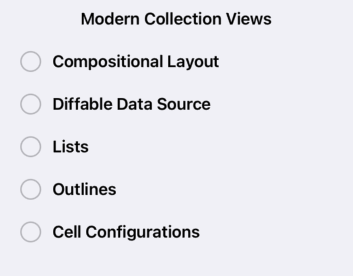

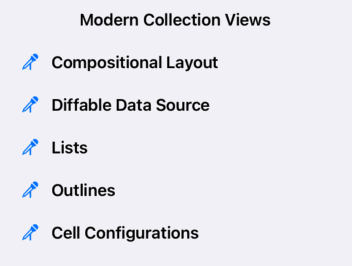
複数追加することもできました
cell.accessories = [.checkmark(), .outlineDisclosure(), .disclosureIndicator(), .multiselect(displayed: .always), .label(text: "テスト"), .insert(displayed: .always),.reorder(displayed: .always), .delete(displayed: .always),.customView(configuration: .init(customView: image, placement: .leading(displayed: .always)))]

多すぎてタイトルが見えなくなってしましたが。。。。
ただし、同じもの、例えば[.checkmark(), .checkmark()]はできません。
これだけでも色々表示できますが、今回のサンプルでは(さらにカスタマイズしたい場合は)カスタムセルを作っています。
カスタムセルの部分
private class ItemListCell: UICollectionViewListCell {
    private var item: Item? = nil

    func updateWithItem(_ newItem: Item) {
        guard item != newItem else { return }
        item = newItem
        setNeedsUpdateConfiguration()
    }

    override var configurationState: UICellConfigurationState {
        var state = super.configurationState
        state.item = self.item
        return state
    }
}
このItemListCellは、セルが表示しているアイテムを保持するプロパティを持つ抽象クラスで、サブクラスが設定を更新するときに使用し、セルの設定状態に追加されます。
private class CustomListCell: ItemListCell {

    private func defaultListContentConfiguration() -> UIListContentConfiguration { return .subtitleCell() }
    private lazy var listContentView = UIListContentView(configuration: defaultListContentConfiguration())

    private let categoryIconView = UIImageView()
    private let categoryLabel = UILabel()
    private var customViewConstraints: (categoryLabelLeading: NSLayoutConstraint,
                                        categoryLabelTrailing: NSLayoutConstraint,
                                        categoryIconTrailing: NSLayoutConstraint)?

    private func setupViewsIfNeeded() {
        // We only need to do anything if we haven't already setup the views and created constraints.
        guard customViewConstraints == nil else { return }

        contentView.addSubview(listContentView)
        contentView.addSubview(categoryLabel)
        contentView.addSubview(categoryIconView)
        listContentView.translatesAutoresizingMaskIntoConstraints = false
        let defaultHorizontalCompressionResistance = listContentView.contentCompressionResistancePriority(for: .horizontal)
        listContentView.setContentCompressionResistancePriority(defaultHorizontalCompressionResistance - 1, for: .horizontal)
        categoryLabel.translatesAutoresizingMaskIntoConstraints = false
        categoryIconView.translatesAutoresizingMaskIntoConstraints = false
        let constraints = (
            categoryLabelLeading: categoryLabel.leadingAnchor.constraint(greaterThanOrEqualTo: listContentView.trailingAnchor),
            categoryLabelTrailing: categoryIconView.leadingAnchor.constraint(equalTo: categoryLabel.trailingAnchor),
            categoryIconTrailing: contentView.trailingAnchor.constraint(equalTo: categoryIconView.trailingAnchor)
        )
        NSLayoutConstraint.activate([
            listContentView.topAnchor.constraint(equalTo: contentView.topAnchor),
            listContentView.bottomAnchor.constraint(equalTo: contentView.bottomAnchor),
            listContentView.leadingAnchor.constraint(equalTo: contentView.leadingAnchor),
            categoryLabel.centerYAnchor.constraint(equalTo: contentView.centerYAnchor),
            categoryIconView.centerYAnchor.constraint(equalTo: contentView.centerYAnchor),
            constraints.categoryLabelLeading,
            constraints.categoryLabelTrailing,
            constraints.categoryIconTrailing
        ])
        customViewConstraints = constraints
    }

    private var separatorConstraint: NSLayoutConstraint?
    private func updateSeparatorConstraint() {
        guard let textLayoutGuide = listContentView.textLayoutGuide else { return }
        if let existingConstraint = separatorConstraint, existingConstraint.isActive {
            return
        }
        let constraint = separatorLayoutGuide.leadingAnchor.constraint(equalTo: textLayoutGuide.leadingAnchor)
        constraint.isActive = true
        separatorConstraint = constraint
    }

    /// - Tag: UpdateConfiguration
    override func updateConfiguration(using state: UICellConfigurationState) {
        setupViewsIfNeeded()

        // Configure the list content configuration and apply that to the list content view.
        var content = defaultListContentConfiguration().updated(for: state)
        content.imageProperties.preferredSymbolConfiguration = .init(font: content.textProperties.font, scale: .large)
        content.image = state.item?.image
        content.text = state.item?.title
        content.secondaryText = state.item?.description
        content.axesPreservingSuperviewLayoutMargins = []
        listContentView.configuration = content

        // Get the list value cell configuration for the current state, which we'll use to obtain the system default
        // styling and metrics to copy to our custom views.
        let valueConfiguration = UIListContentConfiguration.valueCell().updated(for: state)

        // Configure custom image view for the category icon, copying some of the styling from the value cell configuration.
        categoryIconView.image = state.item?.category.icon
        categoryIconView.tintColor = valueConfiguration.imageProperties.resolvedTintColor(for: tintColor)
        categoryIconView.preferredSymbolConfiguration = .init(font: valueConfiguration.secondaryTextProperties.font, scale: .small)

        // Configure custom label for the category name, copying some of the styling from the value cell configuration.
        categoryLabel.text = state.item?.category.name
        categoryLabel.textColor = valueConfiguration.secondaryTextProperties.resolvedColor()
        categoryLabel.font = valueConfiguration.secondaryTextProperties.font
        categoryLabel.adjustsFontForContentSizeCategory = valueConfiguration.secondaryTextProperties.adjustsFontForContentSizeCategory

        // Update some of the constraints for our custom views using the system default metrics from the configurations.
        customViewConstraints?.categoryLabelLeading.constant = content.directionalLayoutMargins.trailing
        customViewConstraints?.categoryLabelTrailing.constant = valueConfiguration.textToSecondaryTextHorizontalPadding
        customViewConstraints?.categoryIconTrailing.constant = content.directionalLayoutMargins.trailing
        updateSeparatorConstraint()
    }
}
これで見た目がこうなる👇

カスタマイズ部分はcategoryLabelとcategoryIconViewだけなので、UIListContentConfigurationから変更できるものだけで要件を満たせる場合はその方が良さそう。。。
ちなみにカスタマイズ不要な場合は、
        let cellRegistration = UICollectionView.CellRegistration<CustomListCell, Item> { (cell, indexPath, item) in
            cell.updateWithItem(item)
            cell.accessories = [.disclosureIndicator()]
        }
の部分を
        let cellRegistration = UICollectionView.CellRegistration<UICollectionViewListCell, Item> { (cell, indexPath, item) in
            var contentConfiguration = UIListContentConfiguration.subtitleCell()
            contentConfiguration.imageProperties.preferredSymbolConfiguration = .init(font: contentConfiguration.textProperties.font, scale: .large)
            contentConfiguration.image = item.image
            contentConfiguration.text = item.title
            contentConfiguration.secondaryText = item.description
            contentConfiguration.axesPreservingSuperviewLayoutMargins = []

            cell.contentConfiguration = contentConfiguration
            cell.accessories = [.disclosureIndicator()]
        }
とすることでカスタムセルの実装は不要になる
見た目はこんな👇

実装
リストセルの左端にお気に入りマーク⭐️ を配置し、タップするとお気に入り追加or解除ができるものを作りたく
上記で整理した内容を踏まえて実装しました。
結果、.customView(configuration:)にボタンを入れ込むことで実現できました👏
        let cellRegistration = UICollectionView.CellRegistration<UICollectionViewListCell, LessonItem> { cell, indexPath, baseLesson in
            var contentConfiguration = cell.defaultContentConfiguration()
            contentConfiguration.text = baseLesson.title
            cell.contentConfiguration = contentConfiguration

            if let lesson = baseLesson.baseLesson.isLesson() {
                // ここから
                let favoriteAction = UIAction(image: lesson.favorite ? UIImage(systemName: "star.fill") : UIImage(systemName: "star"),
                                              handler: { [weak self] _ in
                    guard let self = self else { return }
                    // ここにデータ処理を追加する
                })
                let favoriteButton = UIButton(primaryAction: favoriteAction)
                favoriteButton.tintColor = lesson.favorite ? .systemYellow : .lightGray

                let favoriteAccessory = UICellAccessory.CustomViewConfiguration(
                    customView: favoriteButton,
                    placement: .leading(displayed: .always)
                )
                cell.accessories = [.customView(configuration: favoriteAccessory)]
                // ここまで
            }

            cell.backgroundConfiguration = UIBackgroundConfiguration.clear()
        }

おわりに
簡単な実装を大げさに長々書いてしましたが、整理も大切。
引き続きModern Collection Viewのドキュメントやサンプルコード見ていきたいと思います。
参考