はじめに
こちらの画像の拡大表示ができるライブラリを使ってみました。
環境
Xcode 13.3
Swift 5.6
内容
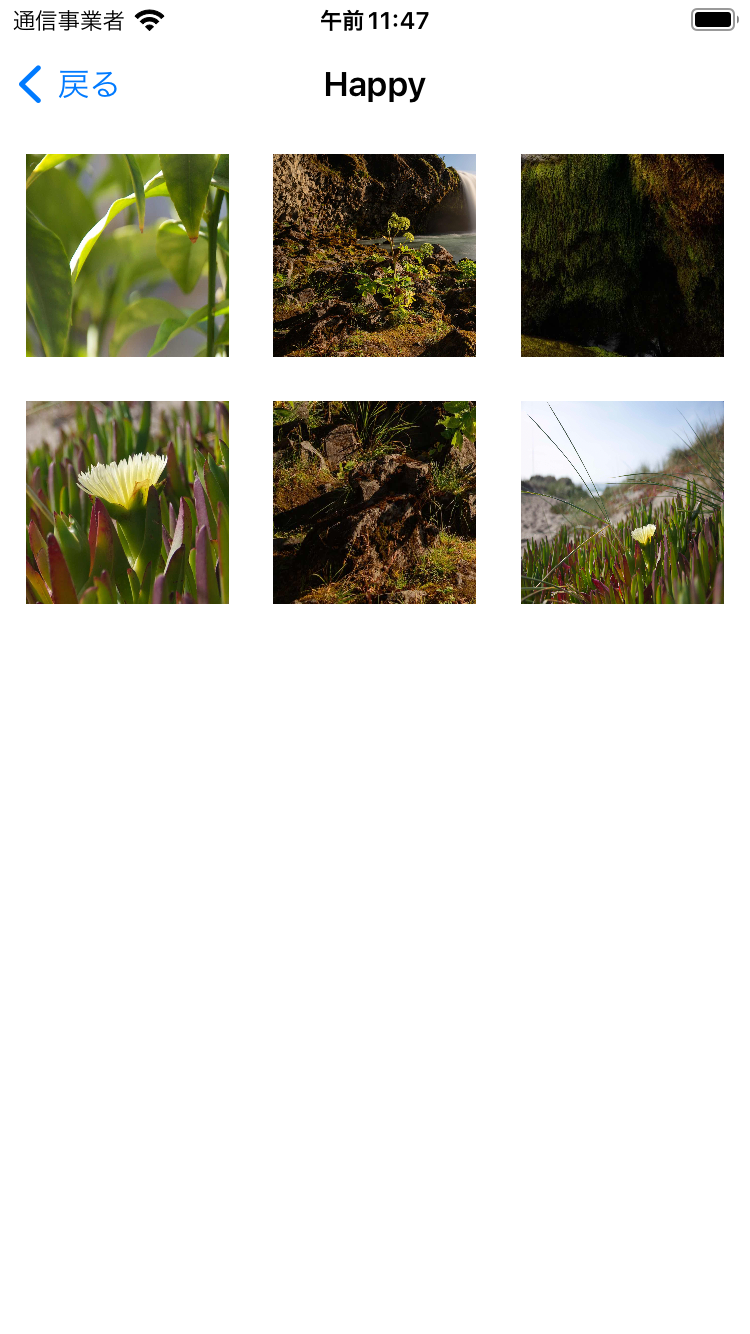
このような写真一覧で画像をタップすると拡大表示する実装をライブラリを使ってやっていきたいと思いました。

まずは、ライブラリのインストール。
Cocoapodsで最新バージョン6.0.0を入れたところバグがあり動きませんでした。
以下のようにmasterブランチを取り込んだら動きます。(今後メンテされるのかは分かりません。。。)
pod 'ImageViewer', :git => 'https://github.com/Krisiacik/ImageViewer', :branch => 'master'
実装
import ImageViewer

class MainViewController: UIViewController {
    @IBOutlet weak var collectionView: UICollectionView!
    override func viewDidLoad() {
        super.viewDidLoad()
        bind()
    }

    private func bind() {
        collectionView.rx.itemSelected
            .subscribe(onNext: { [unowned self] indexPath in
                let viewController = GalleryViewController(startIndex: 0, itemsDataSource: self, configuration: [ .deleteButtonMode(.none), .thumbnailsButtonMode(.none)])
                self.presentImageGallery(viewController)
            })
            .disposed(by: disposeBag)
    }
}

extension MainViewController: GalleryItemsDataSource {
    func itemCount() -> Int {
        return viewModel.selectedImage.value != nil ? 1 : 0
    }

    func provideGalleryItem(_ index: Int) -> GalleryItem {
        return GalleryItem.image { $0(self.viewModel.selectedImage.value) }
    }
}

class MainViewModel {
    private(set) var galleryImage = BehaviorRelay<UIImage?>(value: nil)
}
関係するところだけです(RxSwiftを使った実装でわかりにくいかもしれませんが、、、)
セルをタップしたタイミングで GalleryViewControllerを作ってpresentImageGalleryで表示します。
その際に、GalleryItemsDataSourceを実装する必要がありますので、
func itemCount() -> Int-
func provideGalleryItem(_ index: Int) -> GalleryItem
の必須メソッドを実装しておきます。
GalleryItemsDataSourceを実装したらGalleryViewControllerのイニシャライザでitemsDataSource: selfとします。
startIndexは複数画像管理する場合はindexを渡してあげますが、今回は一枚だけ表示できれば良いので、index: 0としています。
GalleryViewController
GalleryViewController(
    startIndex: Int,
    itemsDataSource: GalleryItemsDataSource,
    itemsDelegate: GalleryItemsDelegate? = nil,
    displacedViewsDataSource: GalleryDisplacedViewsDataSource? = nil,
    configuration: GalleryConfiguration = []
)
GalleryItem
GalleryItemは写真・動画で変わります。(※customもあります)
// 写真
GalleryItem.image { $0(UIImage?) }
// 動画
GalleryItem.video(fetchPreviewImageBlock: { $0(UIImage?) },
    videoURL: URL (string: "http://video")!)
GalleryItemの中身
public typealias ImageCompletion = (UIImage?) -> Void
public typealias FetchImageBlock = (@escaping ImageCompletion) -> Void
public typealias ItemViewControllerBlock = (_ index: Int, _ itemCount: Int, _ fetchImageBlock: FetchImageBlock, _ configuration: GalleryConfiguration, _ isInitialController: Bool) -> UIViewController

public enum GalleryItem {

    case image(fetchImageBlock: FetchImageBlock)
    case video(fetchPreviewImageBlock: FetchImageBlock, videoURL: URL)
    case custom(fetchImageBlock: FetchImageBlock, itemViewControllerBlock: ItemViewControllerBlock)
}
画像も非同期で表示できるみたいなので、(別のライブラリのコードも含んでいてわかりにくいですが)こんな形でもいけました。
    func provideGalleryItem(_ index: Int) -> GalleryItem {
        return GalleryItem.image { [weak self] imageCompletion in
            guard let self = self else { return }
            _ = PINRemoteImageManager.shared().downloadImage(with: URL(string: self.viewModel.photoListSubject.value[index].photoURL)!) { result in
                guard let image = result.image else { return }
                imageCompletion(image)
            }
        }
    }
GalleryConfigurationItem
GalleryViewControllerのイニシャライザでGalleryConfigurationItemを設定することで、画面表示のオプション設定をすることができます。
configuration: [ .deleteButtonMode(.none), .thumbnailsButtonMode(.none)])にするとバツボタン表示だけになります。
細かいオプションは、👇
GalleryConfigurationItem
public enum GalleryConfigurationItem {
public enum GalleryConfigurationItem {

    /// アイテムリストの最初と最後でページングを停止するか、"carousel"のようなモードで無限にページングすることを可能にします。
    case pagingMode(GalleryPagingMode)

    /// ページング時の画像間の距離(領域の幅)を指定します。
    case imageDividerWidth(CGFloat)

    ///閉じるボタンの種類を設定するオプションです。
    case closeButtonMode(ButtonMode)

    ///サムネイル画面内の閉じるボタンの種類を設定するためのオプションです。
    case seeAllCloseButtonMode(ButtonMode) //サムネイル画面内の閉じるボタンの種類を設定するオプション。

    ///サムネイルボタンの種類を設定するオプションです。
    case thumbnailsButtonMode(ButtonMode) //サムネイルボタンの種類を設定するオプション。

    //OptionでDeleteボタンの種類を設定します。
    case deleteButtonMode(ButtonMode) //削除ボタンの種類を設定するオプション。

    /// Close ボタンのレイアウト動作。
    case closeLayout(ButtonLayout)

    /// サムネイル画面内での閉じるボタンのレイアウト動作。
    case seeAllCloseLayout(ButtonLayout) /// サムネイル画面内の閉じるボタンのレイアウト動作。

    /// サムネイルボタンのレイアウト動作。
    case thumbnailsLayout(ButtonLayout)

    /// Delete ボタンのレイアウト動作。
    case deleteLayout(ButtonLayout)

    /// スピナーは、画像ページに移動しても、画像自体がまだロードされているときに表示されます。
    case spinnerStyle(UIActivityIndicatorView.Style)

    /// スピナーのティントカラーを指定します。
    case spinnerColor(UIColor)

    /// オプションのヘッダービューのためのレイアウト動作。
    case headerViewLayout(HeaderLayout) /// オプションのヘッダービューのレイアウト動作。

    /// オプションのフッタービューのためのレイアウト動作。
    case footerViewLayout(FooterLayout)

    /// ギャラリー表示中のステータスバーの表示/非表示を設定します。
    case statusBarHidden(Bool)

    /// 起動時に、クローズボタン、ヘッダービュー、フッタービューの表示/非表示を設定する。これらの3つのビューの可視性は、ギャラリーエリアの任意の場所をシングルタップすることで切り替わります。この設定は、Galleryに対してグローバルです。
    case hideDecorationViewsOnLaunch(Bool)

    ///シングルタップによる装飾ビューの非表示をオン/オフします。
    case toggleDecorationViewsBySingleTap(Bool)

    ///長押しでアイテムビューを表示するアクティビティビューコントローラを追加できるようにする。
    case activityViewByLongPress(Bool)

    /// ギャラリーの初期表示スタイルの種類を選択できるようにする
    case presentationStyle(GalleryPresentationStyle)

    /// 画像の最大倍率を設定できるようにする
    case maximumZoomScale(CGFloat)

    ///アイテムがダブルタップされ、ScaleToAspectFitとScaleToAspectFillのサイズ間で遷移するときのアニメーションの時間を設定します。
    case doubleTapToZoomDuration(TimeInterval)

    ///Galleryが提示されているときのオーバーレイのブラーレイヤーコンポーネントの遷移時間。
    case blurPresentDuration(TimeInterval)

    ///開始の遅延。Galleryが提示されているとき、オーバーレイのブラーレイヤーコンポーネントの遷移のための
    case blurPresentDelay(TimeInterval)

    ///遷移の持続時間。Galleryが提示されているとき、オーバーレイのカラーレイヤーコンポーネントのための
    case colorPresentDuration(TimeInterval)

    ///開始の遅延。Galleryが提示されているとき、オーバーレイのカラーレイヤーコンポーネントの遷移のための
    case colorPresentDelay(TimeInterval)

    ///Gallery表示時のデコレーションビューの遷移(フェードイン)の開始を遅延させる。
    case decorationViewsPresentDelay(TimeInterval)

    ///Galleryが解除されたときのオーバーレイのブラーレイヤーコンポーネントの遷移時間です。
    case blurDismissDuration(TimeInterval)

    ///Transition delay.Galleryが解散される時のオーバーレイのブラーレイヤーコンポーネントのための
    case blurDismissDelay(TimeInterval)

    ///遷移時間。Galleryが却下されるとき、オーバーレイのカラーレイヤーコンポーネントのための
    case colorDismissDuration(TimeInterval)

    ///Transition delay.Galleryが解除される時のオーバーレイのカラーレイヤーコンポーネントのための
    case colorDismissDelay(TimeInterval)

    ///Transition duration for the item.Galleryが表示/解除されている間、フェードイン/フェードアウト効果がアイテムのためにグローバルに使用されるとき、
    case itemFadeDuration(TimeInterval)

    ///デコレーションビューがシングルタップ後にフェードイン/フェードアウトする場合の遷移時間。
    case decorationViewsFadeDuration(TimeInterval)

    //デバイスの回転後のアニメーションの再レイアウトの時間。
    case rotationDuration(TimeInterval)

    ///デバイス回転後のアニメーション再レイアウトの時間。
    case rotationDuration(TimeInterval)

    /// ギャラリー表示時のディスプレイスメント効果の持続時間.
    case displacementDuration(TimeInterval)

    /// ギャラリーが取り除かれる時の変位効果の持続時間.
    case reverseDisplacementDuration(TimeInterval)

    /// ギャラリーが解散しているときの変位効果の持続時間。
    case reverseDisplacementDuration(TimeInterval)

    ///問題は、画像 1 が変位し(ギャラリーが表示され)、それが「キャンバスを出た」ために親キャンバスで欠落し、キャンバスがその内容をオーバーレイ レイヤーを通してにじませていることです。しかし、別の画像に移動してギャラリーを閉じると、その別の画像が(逆変位を使って)戻されます。これは逆変位なので少し奇妙に見えますが、 実は親キャンバスにすでに存在しているのに対して、 元画像はまだそこにありません。このようなずらされた表示を管理する意味のある方法はありません。この設定により元画像はそのままに、 ずらし効果を利用できるようになり、この問題を回避できます。
    ケース displacementKeepOriginalInPlace(Bool)

    ///最も一般的な、変位遷移のタイミングカーブを提供します。
    case displacementTimingCurve(UIView.AnimationCurve)

    ///変位遷移が終了したときのバネを任意に設定することができます。
    case displacementTransitionStyle(GalleryDisplacementStyle)

    /// 画像を逆変位させるには、画面上の親ビューフレームに表示されていなければなりません。そうでなければ、画面の枠外までアニメーションを行うことになるため、逆変位アニメーションを行う意味がありません。しかし、画面上の画像のごく一部しか見えないようなエッジケースもあり、そのような場合に逆変位させることは望ましくなく、また視覚的にも好ましくないかもしれません。この問題に対処するために、与えられたマージンによって小さくなり、親フレームの中央に配置される有効な領域を定義することができます。たとえば、20 という値を設定すると、逆変位された画像は親フレームの内側にある矩形内になければならず、親フレームに対する四方のマージンは 20 ポイントであることを意味します。
    case displacementInsetMargin(CGFloat)

    ///画像が変位(ギャラリーが表示されている)、回転、およびインタラクティブに削除されたときに主に表示されるオーバーレイ層のベースカラーを指定します。
    case overlayColor(UIColor)

    ///オーバーレイのブラーレイヤーの白黒スケールでの全体的なトーンを選択することができます。
    case overlayBlurStyle(UIBlurEffect.Style) //オーバーレイの不透明度を指定します。

    /// ディスプレースメント効果が終了し、ギャラリーが完全に表示されたときのオーバーレイ レイヤーの不透明度を指定します。有効な値は 0 から 1 で、1 は完全な不透明、すなわちオーバーレイ レイヤーは完全に不透明で、0 は完全に透明で事実上見えない状態です。
    case overlayBlurOpacity(CGFloat)

    /// ディスプレースメント効果が終了し、ギャラリーが完全に表示されたときの、オーバーレイ層の不透明度。有効な値は 0 から 1 で、1 は完全な不透明、すなわち、オーバーレイ層は完全に不透明で、0 は完全に透明で、事実上見えない状態です。
    case overlayColorOpacity(CGFloat)

    /// 画像が元の位置に戻らず,スワイプから離脱するパスを継続するために必要な最小速度.この速度は、1 秒あたりのスカラー単位で、この例では、1 秒あたりの画面上のポイントを表します。親指が画面上を移動し、最終的に持ち上げられるとき、それは経路に沿って移動し、速度は持ち上げられる前の最後の1000ミリ秒の間に移動した点の数を表します。
    case swipeToDismissThresholdVelocity(CGFloat)

    ///スワイプの方向を決定し、それを解除するか、または完全に無効にすることができます。
    case swipeToDismissMode(GallerySwipeToDismissMode)

    ///Allows to set rotation support support with relation to rotation in the hosting app.
    case rotationMode(GalleryRotationMode)

    ///ビデオプレーヤーが自動的に次のビデオの再生を継続することを許可する。
    case continuePlayVideoOnEnd(Bool)

    ///Allows auto play video after gallery presented.
    case videoAutoPlay(Bool)

    /// ビデオコントロールの色
    case videoControlsColor(UIColor)
}

public enum GalleryRotationMode {

    ///ギャラリーは、アプリケーションでサポートされている方向に回転します。
    case applicationBased

    ///ギャラリーはアプリケーションの回転設定に関係なく回転する。
    case always
}

public enum ButtonMode {

    case none
    case builtIn /// 標準の閉じる、またはサムネイルボタン。
    case custom(UIButton)
}

public enum GalleryPagingMode {
    /// 0からNまでの画像をページングできるようにし、最初または最後の画像に到達したら、水平方向のスワイプで終了するようにします。
    case standard
    /// 0 から N までの画像をページ送りし、再び 0 から N までの画像をループさせます。
    case carousel
}

public enum GalleryDisplacementStyle {

    case normal
    case springBounce(CGFloat)
}

public enum GalleryPresentationStyle {

    case fade
    case displacement
}

public struct GallerySwipeToDismissMode: OptionSet {

    public init(rawValue: Int) { self.rawValue = rawValue }
    public let rawValue: Int

    public static let never      = GallerySwipeToDismissMode(rawValue: 0)
    public static let horizontal = GallerySwipeToDismissMode(rawValue: 1 << 0)
    public static let vertical   = GallerySwipeToDismissMode(rawValue: 1 << 1)
    public static let always: GallerySwipeToDismissMode = [ .horizontal, .vertical ]
}
GalleryDisplacedViewsDataSource
画像表示の際の拡大アニメーションをつけたい場合は、GalleryDisplacedViewsDataSourceを実装して、GalleryViewControllerのイニシャライズ時に displacedViewsDataSource: selfとしますが、この実装はなくてもOKです。
GalleryViewController
GalleryViewController(
    startIndex: Int,
    itemsDataSource: GalleryItemsDataSource,
    itemsDelegate: GalleryItemsDelegate? = nil,
    displacedViewsDataSource: GalleryDisplacedViewsDataSource? = nil,
    configuration: GalleryConfiguration = []
)
extension MainViewController: GalleryDisplacedViewsDataSource {
    func provideDisplacementItem(atIndex index: Int) -> DisplaceableView? {
        return UIImageView(image: viewModel.galleryImages.value[index].image!)
    }
}

extension UIImageView: DisplaceableView {}
ギャラリービューとして画像をページスクロールで表示する場合
本来の使い方は、こちらだと思います。
import ImageViewer

class MainViewController: UIViewController {
    @IBOutlet weak var collectionView: UICollectionView!
    override func viewDidLoad() {
        super.viewDidLoad()
        bind()
    }

    private func bind() {
        collectionView.rx.itemSelected
            .subscribe(onNext: { [unowned self] indexPath in
                let viewController = GalleryViewController(startIndex: indexPath.row, itemsDataSource: self, configuration: [ .deleteButtonMode(.none), .thumbnailsButtonMode(.none)])
                self.presentImageGallery(viewController)
            })
            .disposed(by: disposeBag)
    }
}

extension MainViewController: GalleryItemsDataSource {
    func itemCount() -> Int {
        return viewModel.galleryImage.value.count
    }

    func provideGalleryItem(_ index: Int) -> GalleryItem {
        return GalleryItem.image { $0(self.viewModel.galleryImage.value[index].image) }
    }
}
-
startIndexにindexを渡す -
func itemCount() -> Intでリストの数を返す -
func provideGalleryItem(_ index: Int) -> GalleryItem対象の画像を返す
ようにすれば拡大した状態で次の画像へページスクロールできるようになります。
おわりに
今後のメンテ状況には不安もありますが、今のところ動きました。
参考