こちらの記事は「山陰 Advent Calendar 2022」14日目の記事です
概要
AWS Amplify + Next.js の構築、デプロイ方法を紹介したいと思います。
今回は以下の流れでそれぞれ利用方法を紹介しようと思います。
- Next.jsのアプリを作成(サンプル利用)
- AWS Amplify へデプロイ
作業開始
私が実行した環境は以下の通りです。
$ node -v
v16.14.0
$ npm -v
8.5.3
$ npx -v
8.5.3
$ amplify --version
9.2.1
インストール方法 参考
node.js ダウンロード
https://nodejs.org/ja/download/
Install the Amplify CLI
https://docs.amplify.aws/cli/start/install/
1. Next.js の設定
Next.jsのサンプルアプリケーションの作成
今回は Next.js で準備されているブログの examples を利用してアプリケーションを作ります。
-e blog で利用する examples を指定しています。
nexjs-blog がアプリ名(任意)になります。
$ npx create-next-app --ts -e blog nextjs-blog

# 以下出力
Need to install the following packages:
  create-next-app
Ok to proceed? (y) y
Creating a new Next.js app in /path/to/nextjs-blog.

...

Success! Created nextjs-blog at /path/to/nextjs-blog
Inside that directory, you can run several commands:

  yarn dev
    Starts the development server.

  yarn build
    Builds the app for production.

  yarn start
    Runs the built app in production mode.

We suggest that you begin by typing:

  cd nextjs-blog
  yarn dev

A new version of `create-next-app` is available!
You can update by running: yarn global add create-next-app
動作確認
$ cd nextjs-blog
$ npm dev run
ブラウザから http://localhost:3000 へアクセスし、こちらの デモ(公式) のように表示されればOKです。
備考
今回は一番シンプルな blog を利用しましたが、他にも便利そうな例が多数ありますので、色々と試してみると面白いと思います。
https://github.com/vercel/next.js/tree/canary/examples
2. ホスティング(AWS Amplify)の設定
ローカルで操作確認したブログアプリケーションを AWS Amplify のホスティング機能を利用して公開します。
今回はGithubを利用して git push でデプロイができるように設定していきます。
Githubの設定
Githubにリポジトリーを作成後、 git push をしてコードを最新にしておきます。
$ git remote add origin [url]
$ git push origin main
Amplifyの設定
アプリケーションルートで以下のコマンドを実行し、AmplifyのアプリケーションをAWS上に作成します。
基本的にはすべてデフォルトのままで問題ありません。
一点、AWS Profile は適宜それぞれの環境に合わせて選択してください。(Access Keyを利用して選択も可能です)
途中 Help improve Amplify CLI by sharing non sensitive configurations on failures (y/N)と聞かれる場合は No を選択します。
amplify init

Note: It is recommended to run this command from the root of your app directory
? Enter a name for the project nextjsblog
The following configuration will be applied:

Project information
| Name: nextjsblog
| Environment: dev
| Default editor: Visual Studio Code
| App type: javascript
| Javascript framework: react
| Source Directory Path: src
| Distribution Directory Path: build
| Build Command: npm run-script build
| Start Command: npm run-script start

? Initialize the project with the above configuration? Yes
Using default provider  awscloudformation
? Select the authentication method you want to use: AWS profile

For more information on AWS Profiles, see:
https://docs.aws.amazon.com/cli/latest/userguide/cli-configure-profiles.html

# 以下 CloudFormation の実行ログが出力されます。

...

✅ Initialized your environment successfully.

Your project has been successfully initialized and connected to the cloud!

Some next steps:
"amplify status" will show you what you've added already and if it's locally configured or deployed
"amplify add <category>" will allow you to add features like user login or a backend API
"amplify push" will build all your local backend resources and provision it in the cloud
"amplify console" to open the Amplify Console and view your project status
"amplify publish" will build all your local backend and frontend resources (if you have hosting category added) and provision it in the cloud

Pro tip:
Try "amplify add api" to create a backend API and then "amplify push" to deploy everything
マネージメントコンソールから設定
Amplify init の実行が終わったら AWS マネージメントコンソール にログインし、Amplify にアクセスし、以下の設定を実行していきます。
から以下の手順でGithubと連携させます。
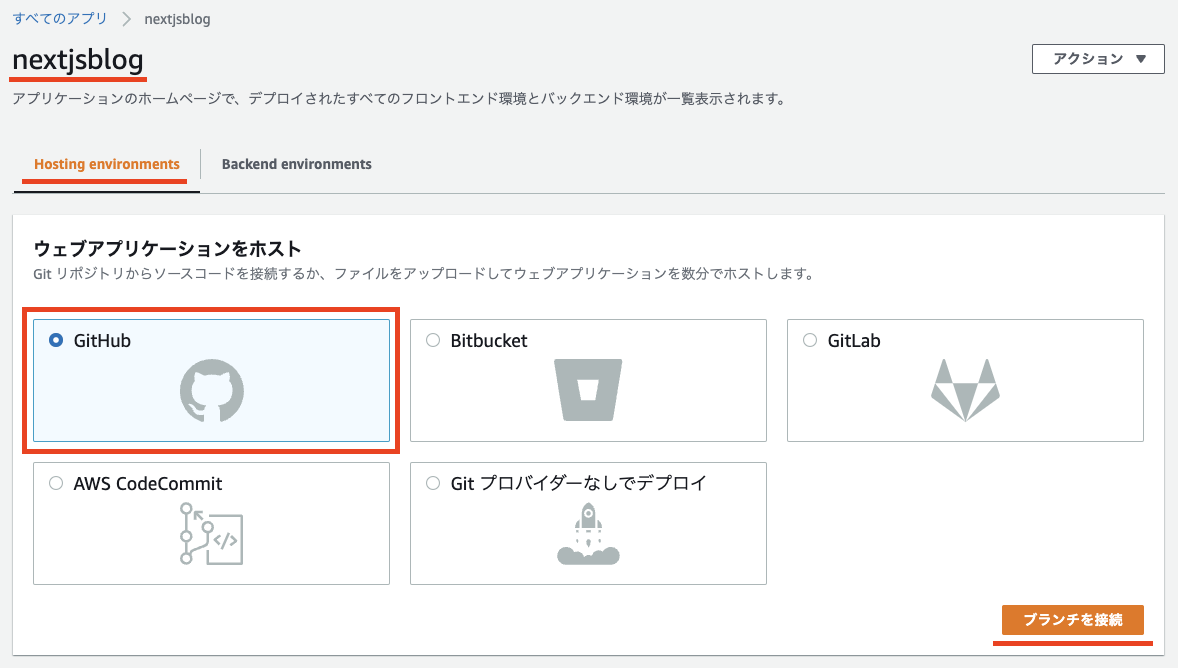
Amplify の画面に移動したら先ほど作成したアプリケーションの詳細を表示します。
Hosting environments のタブを開いて Github を選択したら「ブランチを接続」をクリックします。
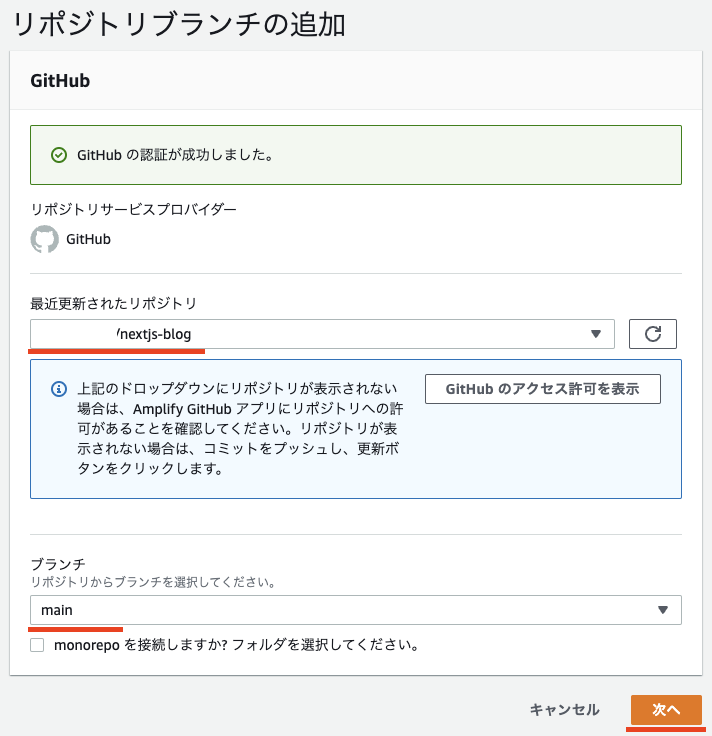
リポジトリとブランチを選択して「次へ」をクリックします。
注)Githubの接続を求められる場合は、ダイアログに従って許可をしてください。
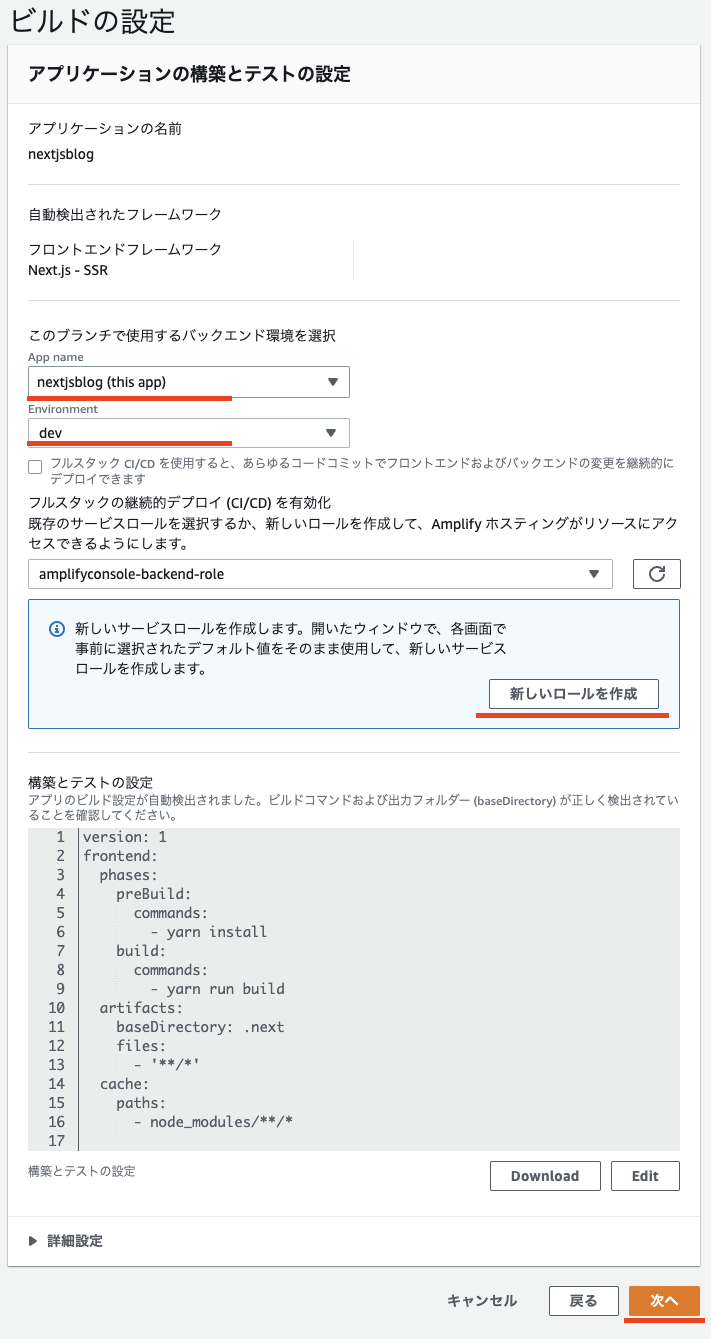
AppName, Environment を選択します。
Amplifyを使ったことがない人はここで「新しいロールを作成」をクリックし、新規にロールの作成が必要です。
作成はダイアログに従って作成してください。
作成したロールを選択後に「次へ」をクリックします。
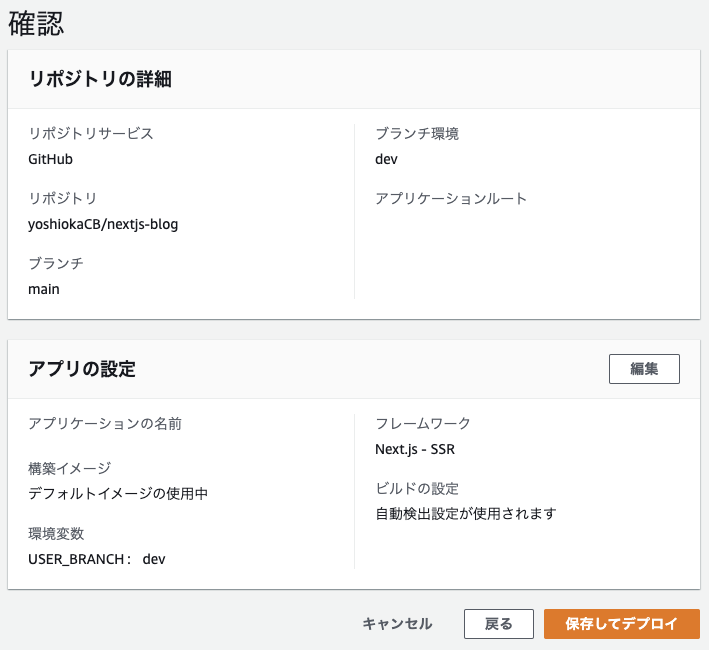
確認して問題なければ「保存してデプロイ」をクリックします。
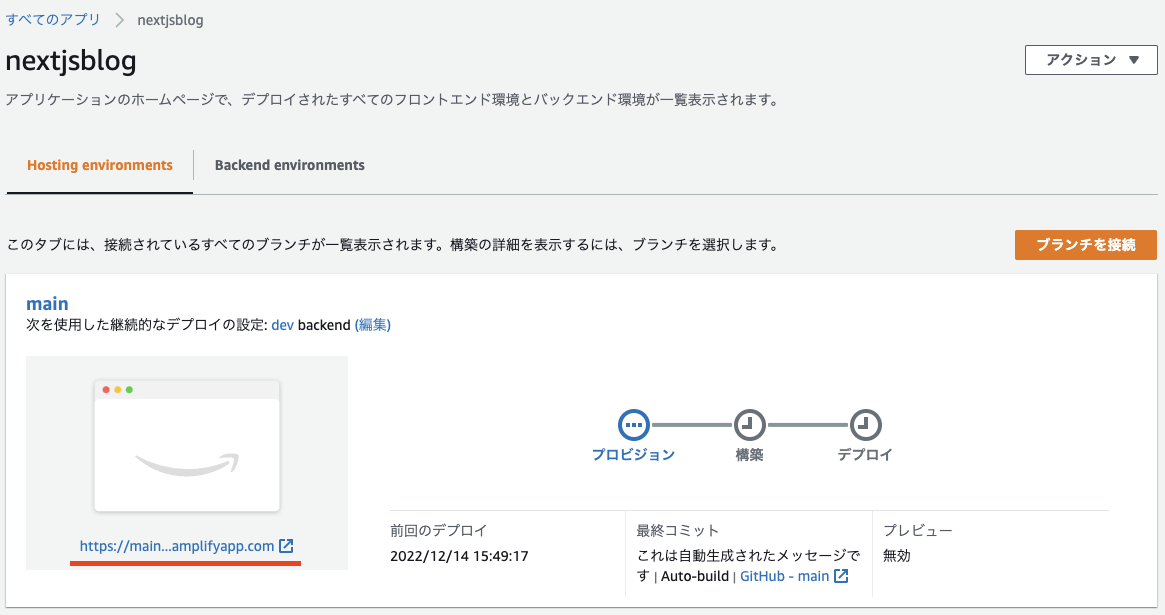
こちらの画面が表示されたらデプロイが終わるのを待ちます。
デプロイが完了したら、左下のURLにアクセスしてサイトを確認してください。
ローカルで表示したサイトと同じサイトが表示されていれば設定完了です。
更新作業
./pages/posts/ に markdown のファイルを追加して、記事を投稿してみます。
以下サンプルです。
---
title: アドベントカレンダーのブログです。
date: 2022/12/14
description: Amplify x Next.js の利用方法です。
tag: web development
author: Me
---

# Blog

blog sample.
blog sample.
blog sample.
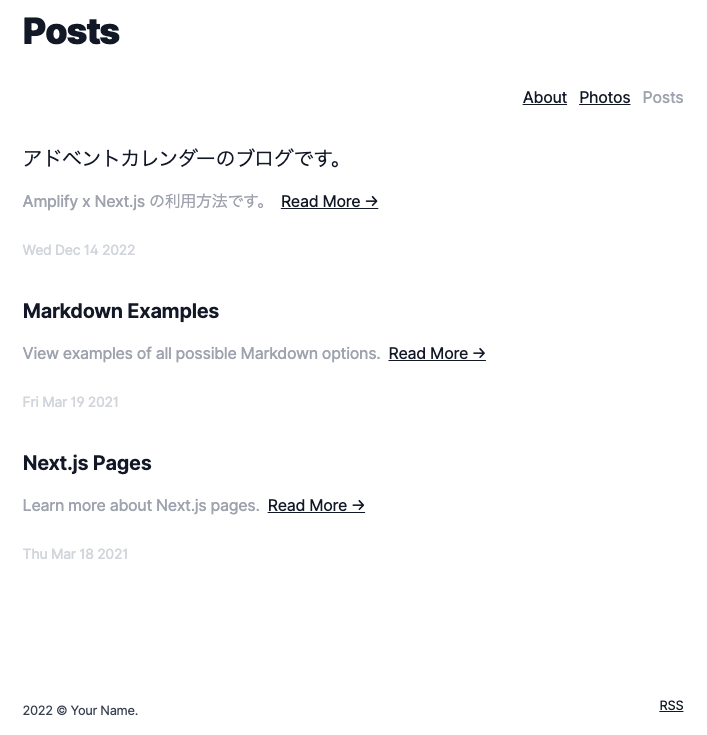
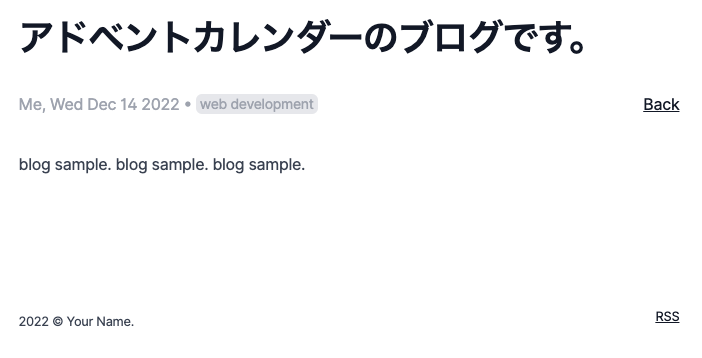
ローカルで確認して以下のように一覧画面と詳細ページが追加されていることを確認します。
一覧ページ
詳細ページ
確認できましたら、コミットして Github にプッシュします。
$ git add .
$ git commit -m 'Added Posts.'
$ git push origin main
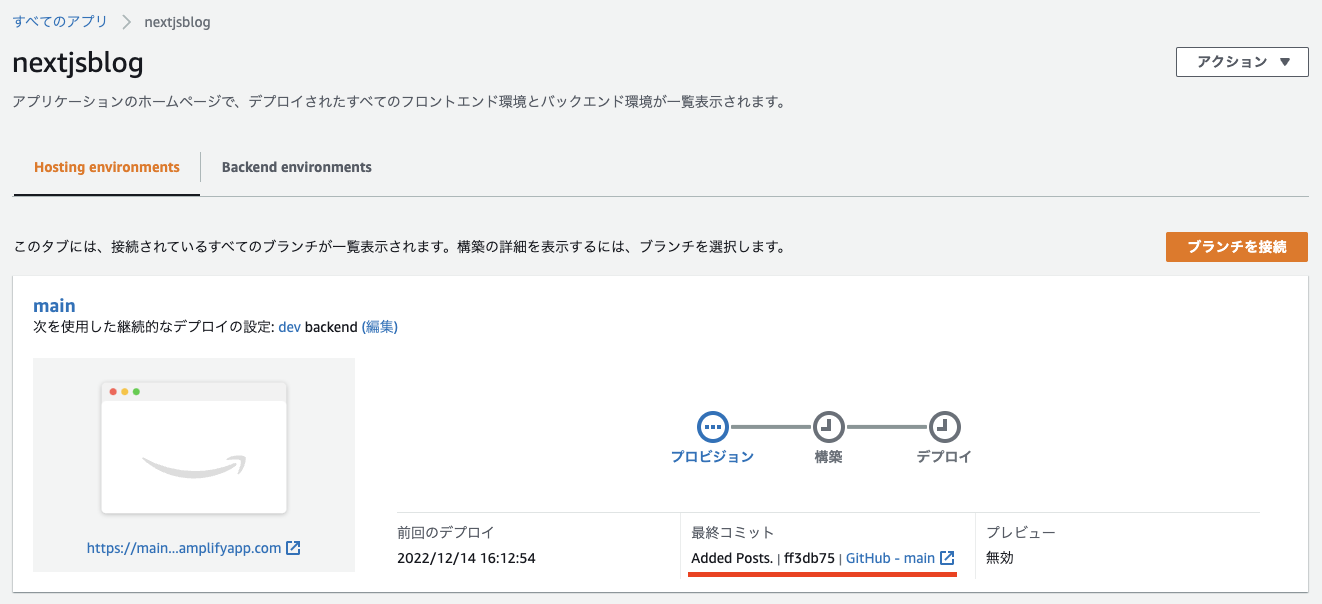
プッシュすると自動でAmplifyでPipelineが実行されデプロイされます。
先ほどのコミットが反映されていることを確認します。
デプロイが完了したら先ほどと同じく、左下のURLにアクセスしてサイトを確認してください。
以上、簡単でしたがAWS Amplify を利用して Next.js で作成したアプリケーションの作成方法をご紹介させていただきました。
まとめ
今回ご紹介した AWS Amplify サーバーレスのサービスとなっており、使った分だけ書きされる料金体系になっています。
あまりアクセスのないサイトであれば、月数百円で運用が可能です。(無料枠など含めると100円もかからないかもしれません)
なるべくお金をかけずにちょっとしたアプリケーションを公開したい場合にはとてもおすすめです。
皆さんももし良ければ、こちらの記事を参考にAmplify + Next.js(or React)の利用を検討してみてはいかがでしょうか。
参考
Next.js
https://nextjs.org/
Amplify
https://docs.amplify.aws/
AWS Amplify
https://aws.amazon.com/jp/amplify/