iPhoneXが新しく登場しましたが、従来の実装ではちゃんと全画面表示にならなかったり、逆にiPhoneXのSafeAreaからはみ出してしまう画面が出てくると思います。
その例と修正方法をいくつかまとめたいと思います。
deprecatedになった topLayoutGuide と bottomLayoutGuide
topLayoutGuide と bottomLayoutGuide がdeprecatedになってしまいましたが、Xcode9では safeAreaLayoutGuide に制約を貼ることになります。
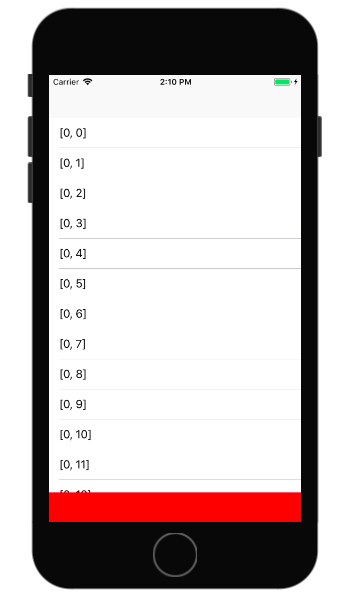
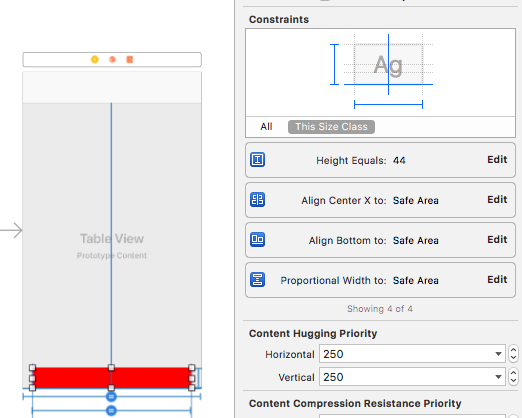
では今まで topLayoutGuide と bottomLayoutGuideに貼っていた制約はXcode9でどうなるのかというと
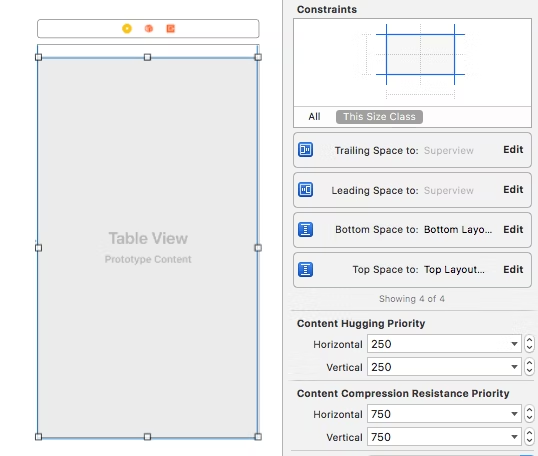 Xcode8でつけた制約がそのまま貼られています。
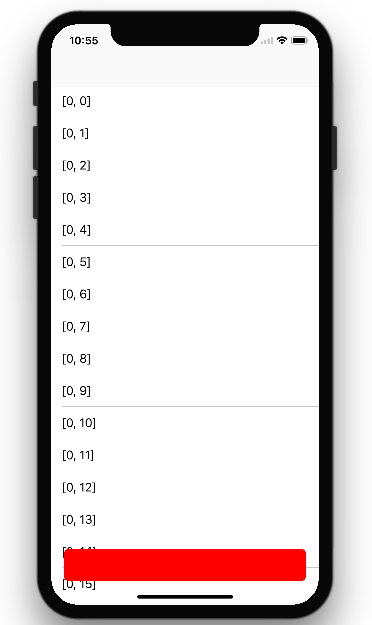
そしてそれをiPhoneXで起動するとどうなるのか?
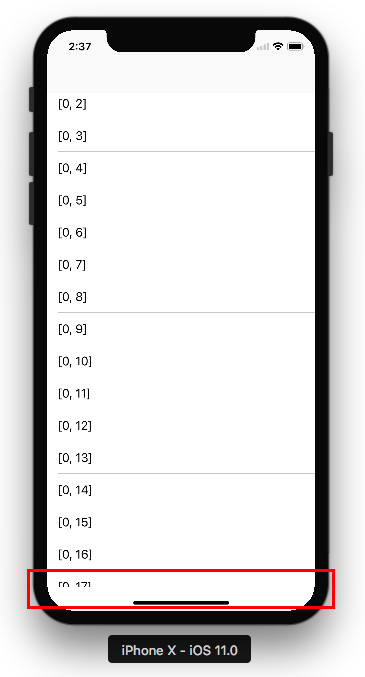
こうなります。
テーブルビューのコンテンツが下まで表示されず、SafeAreaで切られた見た目になっています。
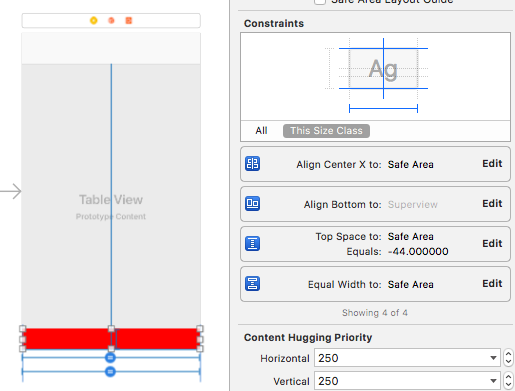
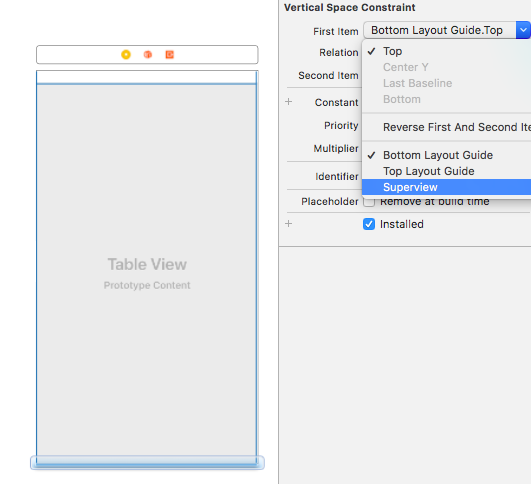
これをbottomをsuperViewに対して貼るように修正するとちゃんと下までスクロールするようになります。
ちなみにHuman Interface Guidelineに以下のように書いてありますが、テーブルビューを使う場合、UITableViewControllerを使えば勝手に全画面表示表示になってくれるので自分で意識する必要はありません。
Most apps that use standard, system-provided UI elements like navigation bars, tables, and collections automatically adapt to the device's new form factor. Background materials extend to the edges of the display and UI elements are appropriately inset and positioned.
コードで実装する場合
AutoLayoutを使わずframeを用いて以下のように書いて実装していた場合はiPhoneXでも全画面で表示されます。
let tableView = UITableView()

override func viewDidLoad() {
    super.viewDidLoad()
    tableView.delegate = self
    tableView.dataSource = self
    view.addSubview(tableView)
}

override func viewDidLayoutSubviews() {
    super.viewDidLayoutSubviews()
    tableView.frame = view.bounds
}
ただし、ボタンをテーブルビューの下に配置して以下のようなUIを実装していた場合、iPhoneXではボタンがSafeAreaからはみ出してしまいます。
override func viewDidLayoutSubviews() {
    super.viewDidLayoutSubviews()
    button.frame = CGRect(x: 0, y: view.frame.height - button.frame.height, width: view.frame.width, height:44)

    var tableFrame = view.bounds
    tableFrame.size.height -= button.frame.height
    tableView.frame = tableFrame

}
これはSafeAreaを意識した実装に直す必要があります。
iOS11から登場した safeAreaInsets を使えばそのビューのSafeAreaのInsetsを取れるのでこの値を加味して計算すればちゃんとSafeArea内に収める事ができます。
override func viewDidLayoutSubviews() {

    button.frame = CGRect(x: 0, y: view.frame.height - button.frame.height - view.safeAreaInsets.bottom, width: view.frame.width, height:44)

    var tableFrame = view.bounds
    tableFrame.size.height = button.frame.origin.y
    tableView.frame = tableFrame
}
またAutoLayoutを使う場合は、iOS11から新たに追加した constraintEqualToSystemSpacingBelow を使っても簡単に実装ができます。
let safeArea = view.safeAreaLayoutGuide
NSLayoutConstraint.activate([
    // ボタンの制約
    button.centerXAnchor.constraintEqualToSystemSpacingAfter(view.centerXAnchor, multiplier: 1.0),
    button.widthAnchor.constraint(equalTo: view.widthAnchor, multiplier: 1.0),
    button.heightAnchor.constraint(equalToConstant: 44),
    safeArea.bottomAnchor.constraintEqualToSystemSpacingBelow(button.bottomAnchor, multiplier: 1.0),
    // テーブルビューの制約
    safeArea.topAnchor.constraintEqualToSystemSpacingBelow(tableView.topAnchor, multiplier: 1.0),
    safeArea.leadingAnchor.constraintEqualToSystemSpacingAfter(tableView.leadingAnchor, multiplier: 1.0),
    tableView.widthAnchor.constraint(equalTo: view.widthAnchor, multiplier: 1.0),
    tableView.bottomAnchor.constraintEqualToSystemSpacingBelow(button.topAnchor, multiplier: 1.0)
])
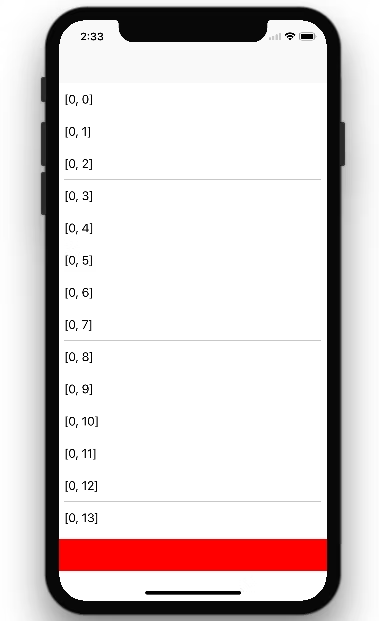
ただし、これだと結局全画面になってないし、これが見た目的にアリなのかはちょっと疑問ですね。
ボタンをフローティングにしてテーブルビューは下までスクロールするとか、ボタンの高さを広げたデザインにしてもいいかもしれません。
まとめ
所感としては、1画面をedge-to-edge対応するには制約を付け替えるくらいでそんなに時間はかからなそうですが、画面がたくさんあるとめんどくさそうです。
また、画面によってはデザインの再考の必要性もありそうなので、他のアプリが同対応していくのかもちょっと気になります。
