はじめに
【Flutter】Firebase Authenticationを使ってログイン/ユーザー登録画面を作成する(その5)の続きです。
前回はパスワードリセット画面を実装しました。
今回は入力フィールドのデコレーションとバリデーションチェックの実装を行なっていきます。
引き続きVSCodeのMac版を利用していますので、AndroidStudio利用の方は適宜読み替えて行ってみてください。
更新履歴
2024.1.27 初回投稿
2024.9.14 コード一部修正
fontawesomeアイコンパッケージのインストール
- ログイン,パスワードフィールドがフィールドだけでは少しわかりづらいので、アイコンをつけようと思います。今回はfontawesomeアイコンパッケージを入れます。
% flutter pub add font_awesome_flutter - lib>main.dartを開いて、fontawesomeパッケージのimportを追記します
import 'package:firebase_auth/firebase_auth.dart'; import 'package:firebase_core/firebase_core.dart'; import 'firebase_options.dart'; import 'package:font_awesome_flutter/font_awesome_flutter.dart';//←ここを追加する。 - 以下の様に「decoration: const InputDecoration(labelText: 'メールアドレス'),」を変更します。
前回までのコード(修正前)↓(まずはメールアドレス部分のみ)<中略> @override Widget build(BuildContext context) { return Scaffold( body: Center( child: Container( padding: const EdgeInsets.all(24), child: Column( mainAxisAlignment: MainAxisAlignment.center, children: <Widget>[ // メールアドレス入力 TextFormField( decoration: const InputDecoration(labelText: 'メールアドレス'),//←ここを変更 onChanged: (String value) { setState(() { email = value; }); }, ), // パスワード入力 TextFormField( decoration: const InputDecoration(labelText: 'パスワード'), obscureText: true, onChanged: (String value) { setState(() { password = value; }); }, ), <中略>// メールアドレス入力 TextFormField( // decoration: const InputDecoration(labelText: 'メールアドレス'), decoration: InputDecoration( labelText: 'メールアドレス', labelStyle: TextStyle( color: Colors.black, fontSize: 16, ), hintText: 'xxxxx.xxxxx@xxxx.xxx', hintStyle: TextStyle( color: Colors.grey[500], fontSize: 12, fontWeight: FontWeight.w400, fontStyle: FontStyle.normal, ), icon: Icon( FontAwesomeIcons.solidEnvelope, color: Colors.black, ), counterText: '${email.length}', counterStyle: TextStyle( color: Colors.black, ), enabledBorder: UnderlineInputBorder( borderSide: BorderSide( color: Colors.black, ), ), focusedBorder: UnderlineInputBorder( borderSide: BorderSide( color: Colors.black, ), ), border: UnderlineInputBorder( borderSide: BorderSide( color: Colors.black, ), ), errorStyle: TextStyle( color: Colors.red, ), ), onChanged: (String value) { setState(() { email = value; }); }, ), - 同様にパスワードフィールドも変更します。
// パスワード入力
  TextFormField(
    // decoration: const InputDecoration(labelText: 'パスワード'),
    decoration: InputDecoration(
      labelText: 'パスワード',
      labelStyle: TextStyle(
        color: Colors.black,
        fontSize: 16,
      ),
      hintText: 'パスワード(英数記号6文字以上30文字以内)',
      hintStyle: TextStyle(
        color: Colors.grey[500],
        fontSize: 12,
        fontWeight: FontWeight.w400,
        fontStyle: FontStyle.normal,
      ),
      icon: Icon(
        FontAwesomeIcons.lock,
        color: Colors.black,
      ),
      counterText: '${password.length}',
      counterStyle: TextStyle(
        color: Colors.black,
      ),
      enabledBorder: UnderlineInputBorder(
        borderSide: BorderSide(
          color: Colors.black,
        ),
      ),
      focusedBorder: UnderlineInputBorder(
        borderSide: BorderSide(
          color: Colors.black,
        ),
      ),
      border: UnderlineInputBorder(
        borderSide: BorderSide(
          color: Colors.black,
        ),
      ),
      errorStyle: TextStyle(
        color: Colors.red,
      ),
    ),
    obscureText: true,
    onChanged: (String value) {
      setState(() {
        password = value;
      });
    },
  ),
解説
- labelText:テキストフィールドのタイトルです。ここでは「メールアドレス」「パスワード」としています。
- labelStyle:タイトルのテキストスタイル(フォントサイズや色)を設定します。
- hintText:iOSアプリでいうPlaceholderです。入力すべき形式などを記載します。
- icon:ここではFontAwesomeIconを使ってメールアイコンなどを設定しています。
- counterStyle:文字数を表示するためのスタイルです。(文字数表示しない場合は不要です)
- enabledBorder:利用可能なテキストフィールドのボーダースタイルです。
- focusedBorder:テキストフィールドにフォーカスが当たった時に変わるボーダースタイルです。
- border: UnderlineInputBorder:ボーダースタイルです。
- errorStyle:エラー表示時のテキストスタイルです。
- obscureText:パスワードを非表示にします。
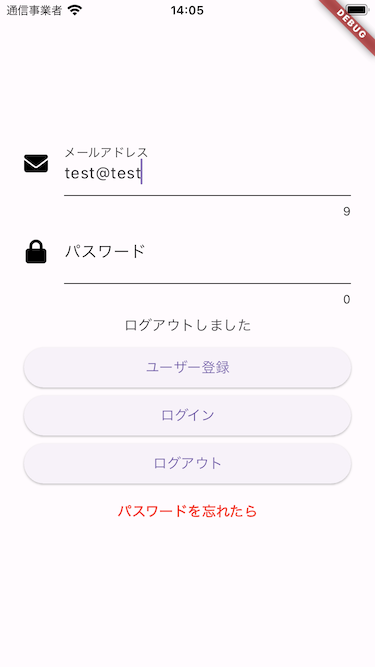
ここまでの画像
次にバリデーションチェックの実装です。
- バリデーションチェック実装結構大変なので「email_validator」パッケージを使います。
- email_validatorパッケージをインストールします。
% flutter pub add email_validator - 次に一旦、メールアドレスのバリデーションチェックを入れてみます。
<略>
errorStyle: TextStyle(
    color: Colors.red,
  ),
),
//ここから
autovalidateMode: AutovalidateMode.onUserInteraction,
validator: (value) {
  if ((value == null) || !EmailValidator.validate(value)) {
    return 'Emailが不正です';
  }
  return null;
},
//ここまで
onChanged: (String value) {
  setState(() {
    email = value;
  });
},
<略>
- autovalidateMode: AutovalidateMode.onUserInteraction ユーザーが入力中バリデーションチェックするモードです
- validator: ここでバリデーションチェックします。
- ここまでの画像

- その他のバリデーションチェックを実装したいのですが、今でも冗長&長いので、バリデーションチェック用のクラスを作って、実装に追加したいと思います。
validation.dartimport 'package:email_validator/email_validator.dart'; class ValidationCheck { String? userNameLengthCheck(String value) { if (value.isEmpty) { return 'ユーザー名を入力してください。'; } if (value.length < 2) { return 'ユーザー名は2文字以上でお願いします。'; } if (20 < value.length) { return 'ユーザー名は20文字以下でお願いします。'; } return null; } String? emailAddressCheck(String value) { if (value.isEmpty) { return 'メールアドレスを入力して下さい。'; } if (!EmailValidator.validate(value)) { return '正しい形式で入力下さい。'; } return null; } String? passwordCheck(String value) { if (value.isEmpty) { return 'パスワードを入力してください'; } if (value.length < 6) { return '6文字以上でお願いします。'; } if (30 < value.length) { return '30文字以下でお願いします。'; } if (!RegExp(r'^[a-zA-Z0-9.!*+?/-]+$').hasMatch(value)) { return '英数字記号(.!*+?/-)でお願いします。'; } return null; } bool siginInCheck( String userName, String mailAddress, String password, bool termsChecked) { if (userNameLengthCheck(userName) == null && emailAddressCheck(mailAddress) == null && passwordCheck(password) == null) { return true; } return false; } bool loginCheck(String mailAddress, String password) { if (emailAddressCheck(mailAddress) == null && passwordCheck(password) == null) { return true; } return false; } } - 「class _LoginPageState extends State {」の下に以下を追加します。
class _LoginPageState extends State<LoginPage> { // メッセージ表示用 String infoText = ''; // 入力したメールアドレス・パスワード String email = ''; String password = ''; final ValidationCheck _validationCheck = ValidationCheck();//←ここを追加 - 先ほどのメールアドレス部分のバリデーションチェック部分を修正します。
↓
validator: (value) { if ((value == null) || !EmailValidator.validate(value)) { return 'Emailが不正です'; } },validator: (value) { return _validationCheck.emailAddressCheck(value!); }, - パスワードにもバリデーションチェックを入れます。
obscureText: true, //ここから autovalidateMode: AutovalidateMode.onUserInteraction, validator: (value) { return _validationCheck.passwordCheck(value!); }, //ここまで onChanged: (String value) { setState(() { password = value; }); }, - ここまでの画像

次はユーザー登録/ログイン画面切り替えまでいきたいと思います。
参考サイト
https://zenn.dev/astrologian/articles/5723d0596b8ec1
https://qiita.com/yass97/items/898ba38af1d90669fd1f