はじめに
本記事は https://tech-blog.yoshikiohashi.dev/posts/start-gatsby-blog-tableofcontent のクロスポスト記事になります。
この記事はGatsbyというヘッドレスCMS技術で構成されています。今回は「エンジニア初心者でもできる」を前提に以下の構成で記事を作成していこうと思います。
- Gatsby始めるまで
- GatsbyにShare機能、OGPタグをつける
- タグ機能、カテゴリ機能をつける(基礎編)
- タグ機能、カテゴリ機能をつける(応用編)
- GatsbyにTableOfContents(目次)をつける
- DarkModeをつける
内容
前回はタグ一覧と記事一覧のコンポーネントを同時に出すGrapuQLクエリーの応用まで行いました。
今回はブログで欠かせないTableOfContents(目次)の実装方法のご紹介です。全く難しくないのでササッと行きましょう!

クエリー
超簡単です。記事を取得しているクエリーにtableOfContentsを付け足すだけです。エディタで結果を確認してみましょう。
  query PostBySlug($slug: String!) {
    markdownRemark(fields: { slug: { eq: $slug } }) {
      id
      html
      fields {
        slug
        tagSlugs
      }
      frontmatter {
        date
        description
        tags
        title
        socialImage
      }
      tableOfContents
    }
  }
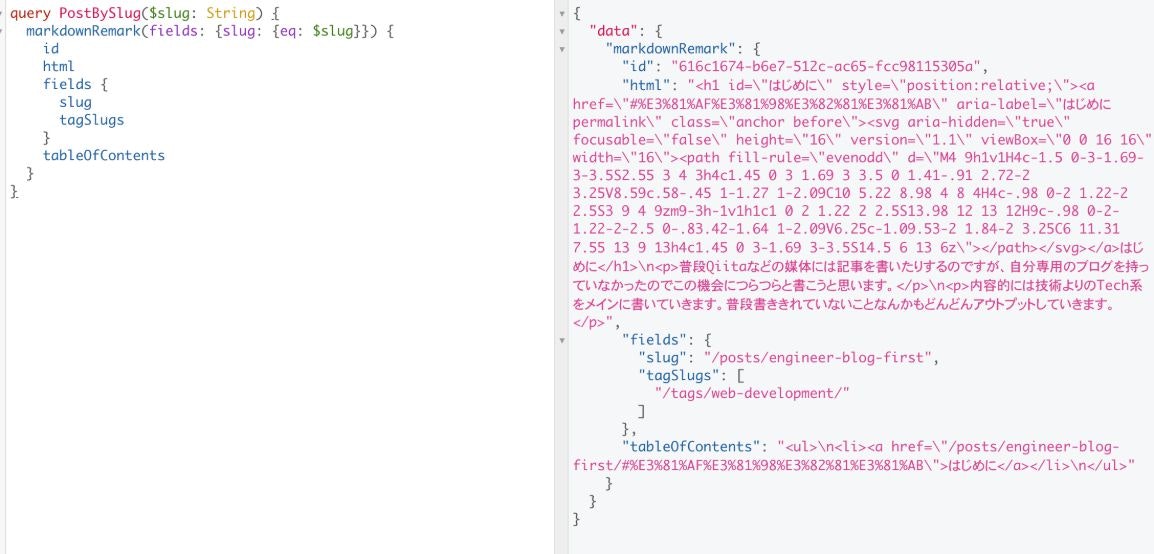
このようにHTML形式のデータを取得することができました。あとは表示するだけです。
コンポーネント作成
TOCを表示するコンポーネントつくりです。
ちなみになぜコンポーネントにするのか?理由は単純で
- 使い回しがしやすい
- CSSの設定を限定的にできる
- パーツを好きなところに配置しやすくなる
からです。パーツ1つ1つの依存度を下げていきましょう。
下のように**dangerouslySetInnerHTML={{ __html: tableOfContents }}**に先程取得したHTMLデータを流し込みましょう。(CSSの設定はお好みで設定してください)
const Toc = ({ tableOfContents, gridArea }: Props) => (
  <div className={styles.toc} dangerouslySetInnerHTML={{ __html: tableOfContents }} />
);

export default Toc;
まとめ
いかがだったでしょうか?
他にもgatsby-remark-tocなどのライブラリがあるみたいですが、私個人としてはこちらの方がシンプルで簡潔だと考えています。それでは次回の記事で。