前提条件
- Xcodeセットアップ済み
- Apple Developer Program(有料)登録済み
- Google Firebase登録済み
Xcodeでプロジェクトを作成する
- Xcodeを起動する
- Create New Project...
- Multi Pratform > App > Next
- Project Name: RemotePushSample(例) > Next
- Source Control: チェック外す(任意) > Create
- プロジェクトができる
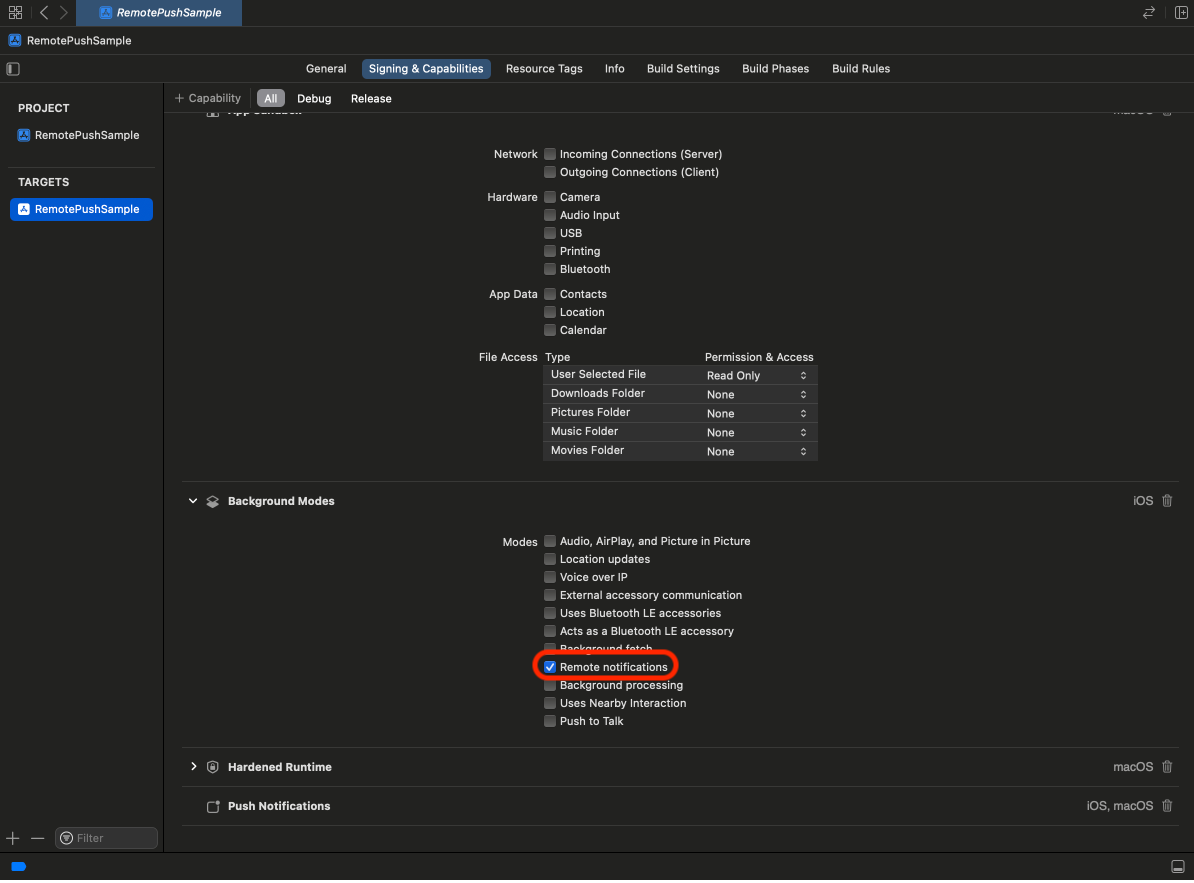
Remote Notificationを有効にする
- RemotePushSample(TARGETS) > Signing & Capabilities
- +Capabilityをクリック
- Push Notificationsを選択
- もう一度、+Capabilityをクリック
- Background Modesを選択
- Background ModesのRemote notificationsをチェックする
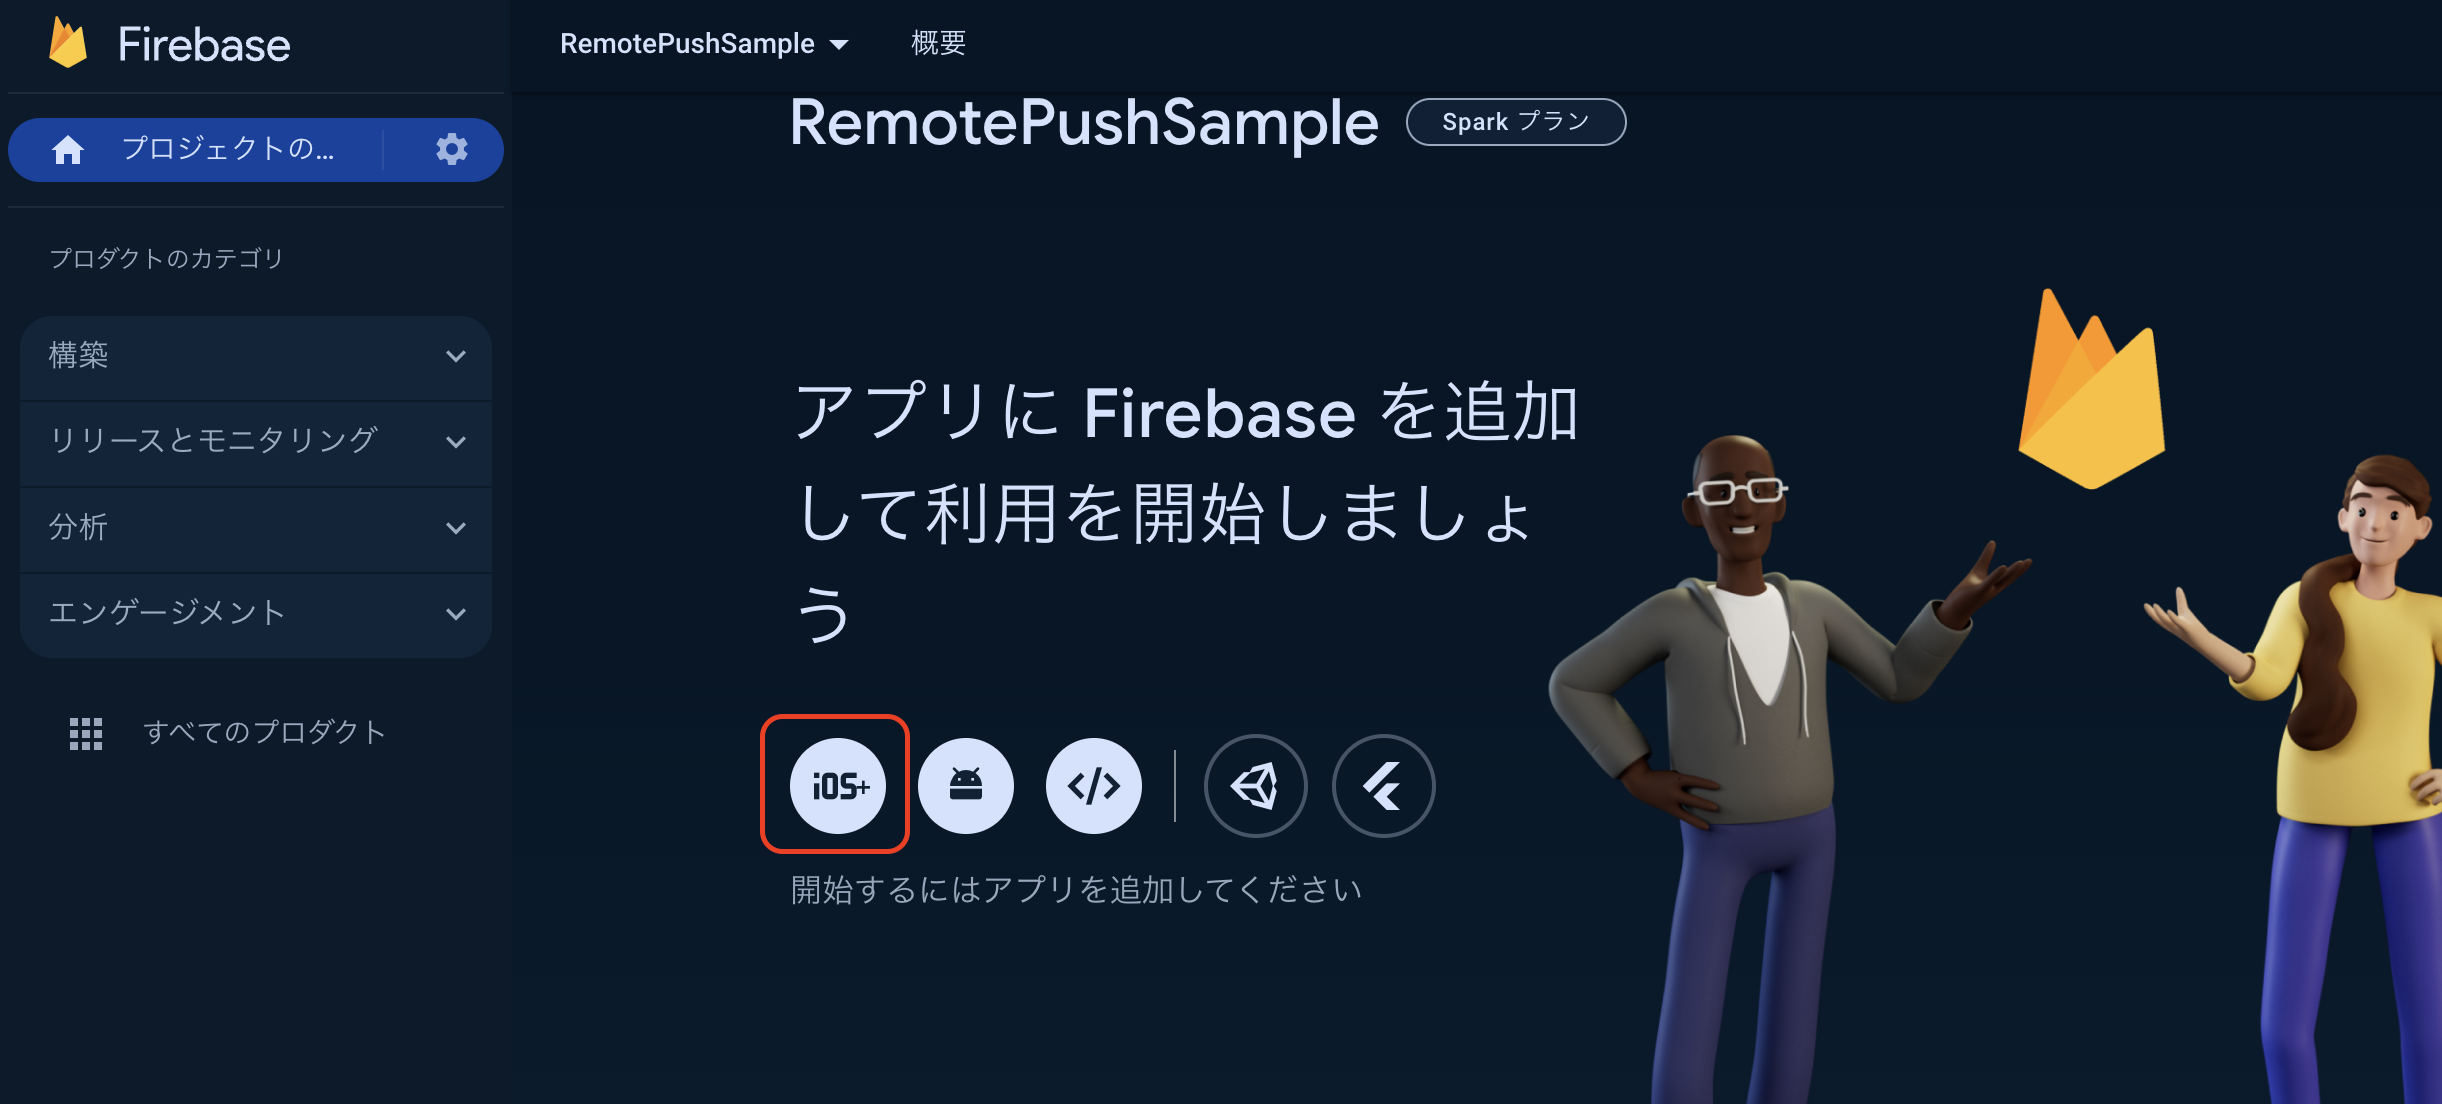
Firebaseでプロジェクトを作成する
- Firebaseを開く
- プロジェクトを追加
- プロジェクト名:RemotePushSample(例) > 続行
- アナリティクスのチェック外す(任意) > 続行
- プロジェクトが作成されました > 続行
- iOS+を選択
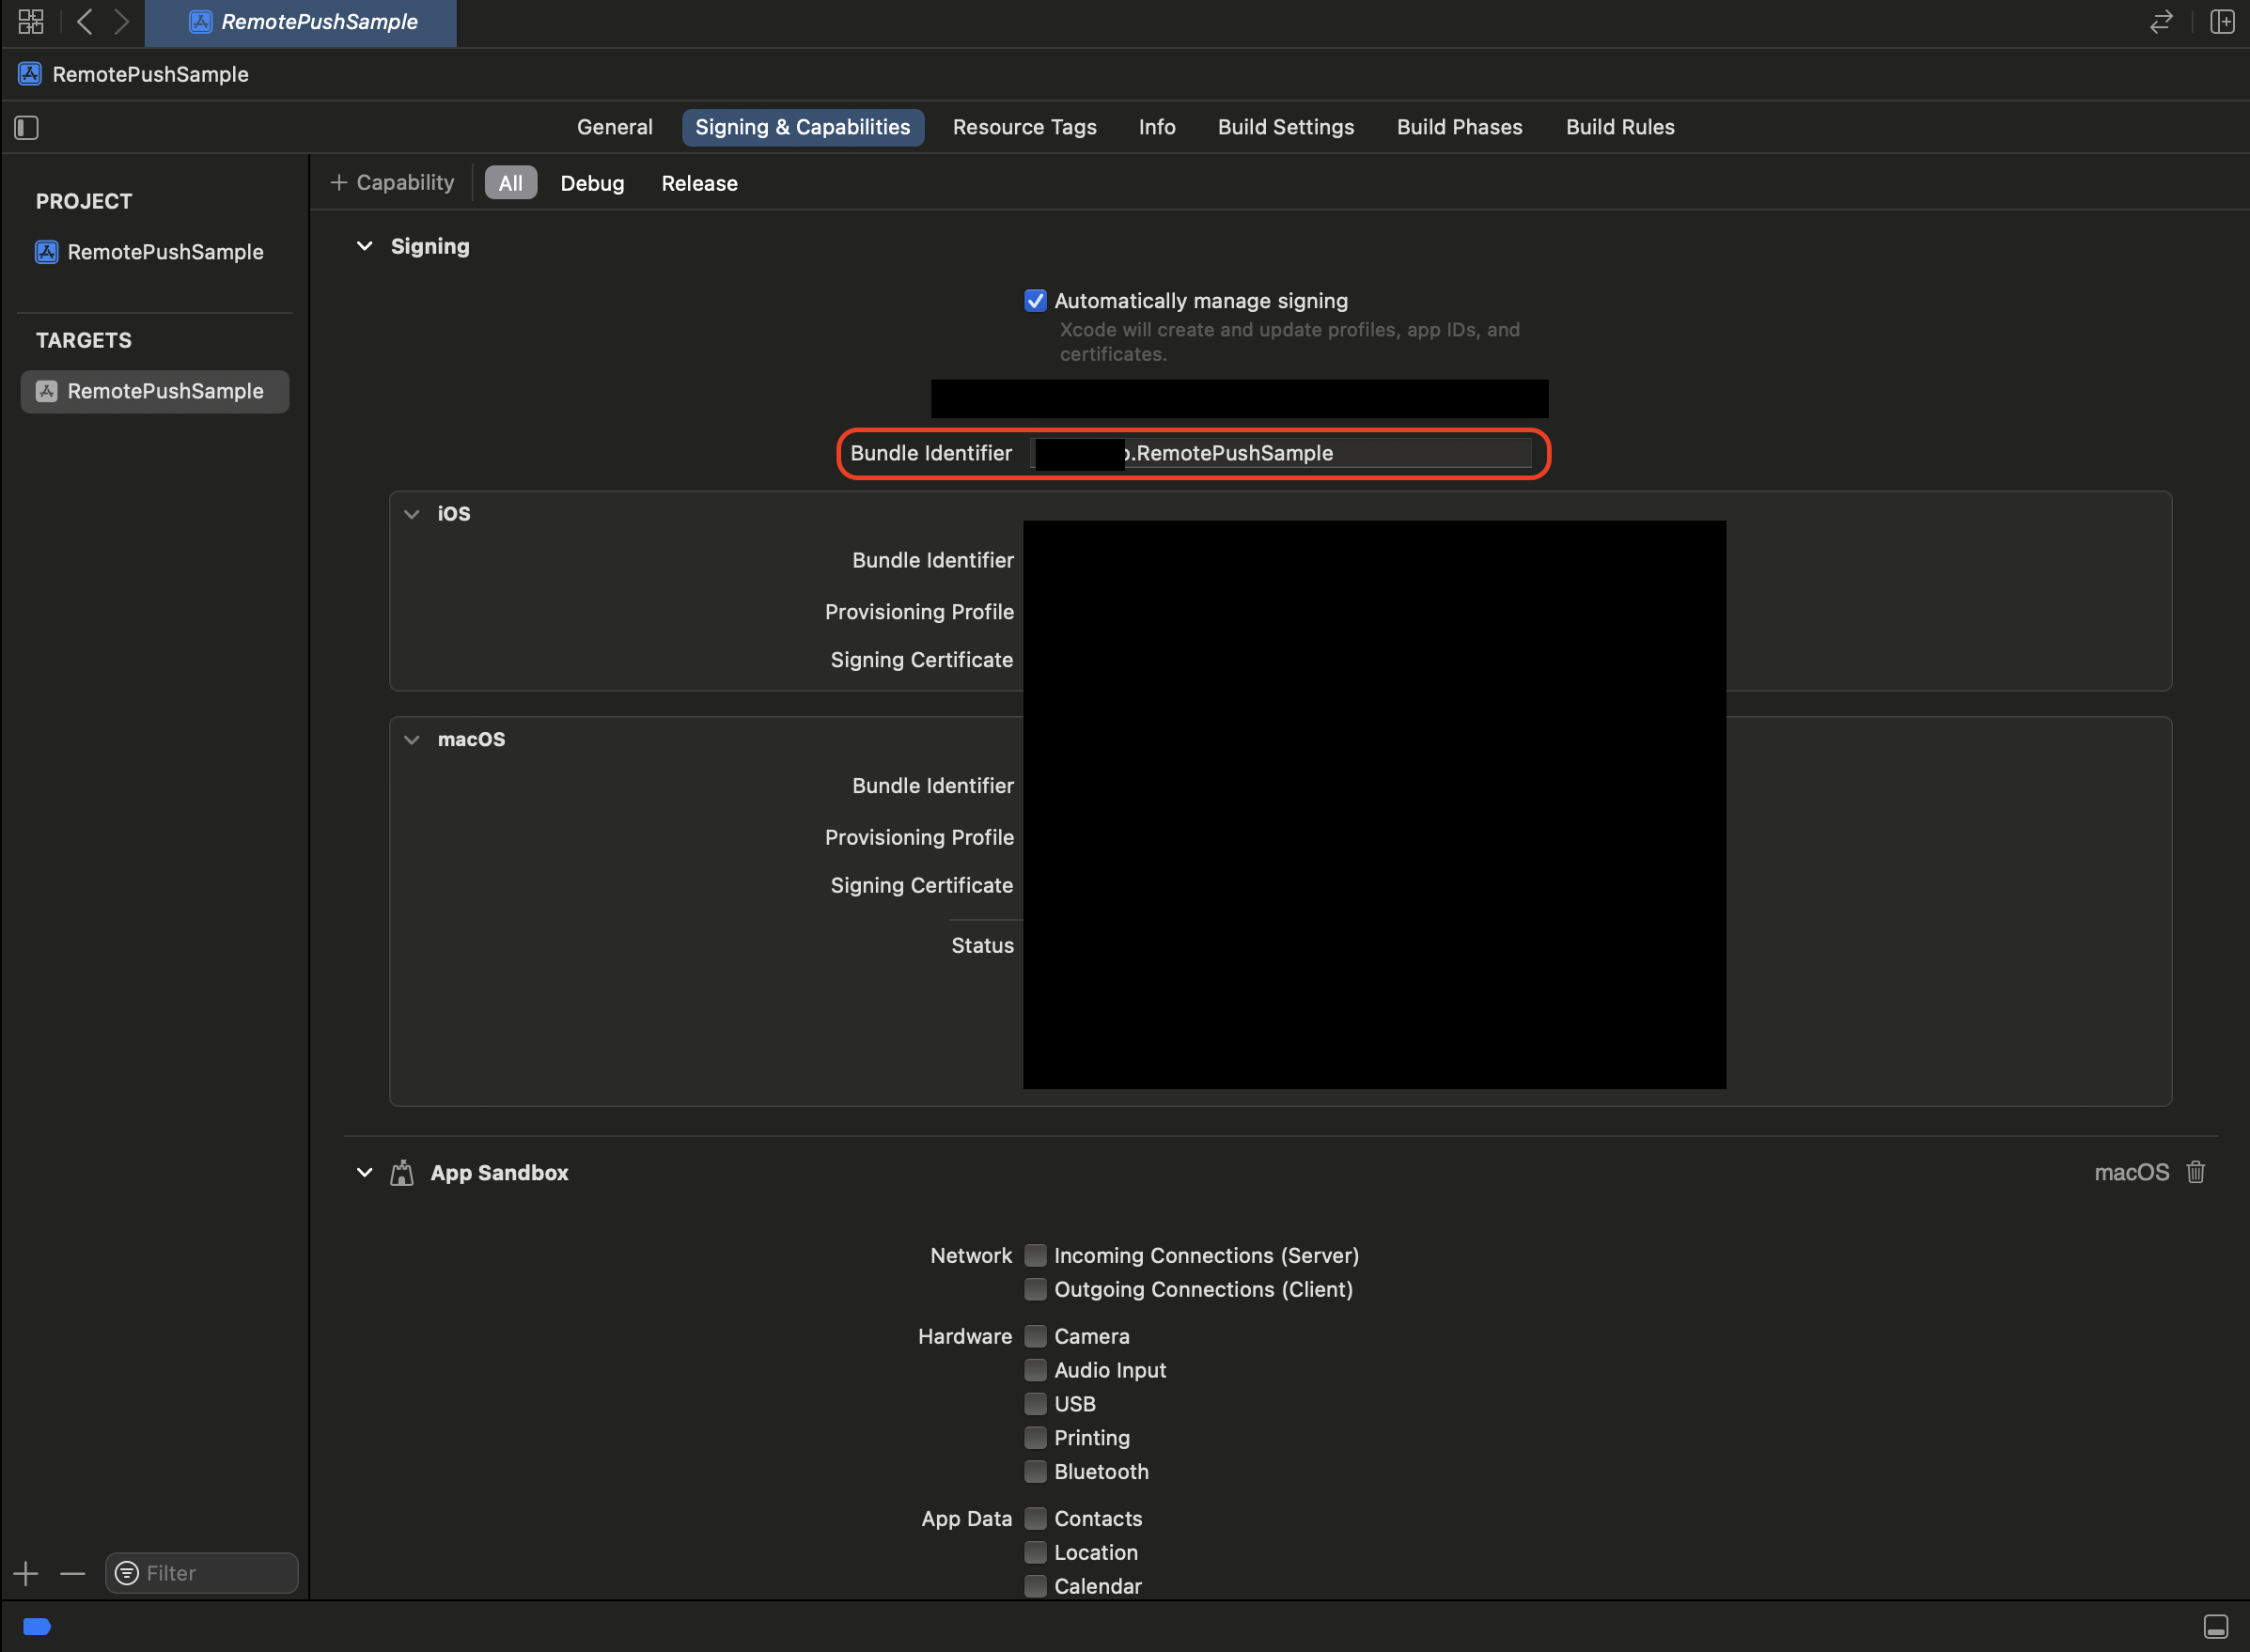
- AppleバンドルID: 以下で確認できる > アプリを登録
- GoogleService-Info.plistをダウンロード
- もう左上の×で閉じてOK
Firebase SDKをインポートする
- Xcodeに戻る
- File > Add Package Dependencies...
- 右上の検索欄に https://github.com/firebase/firebase-ios-sdk と入力
- firebase-ios-sdkを選択 > Add Package
- FirebaseMessagingのみ選択 > Add Package
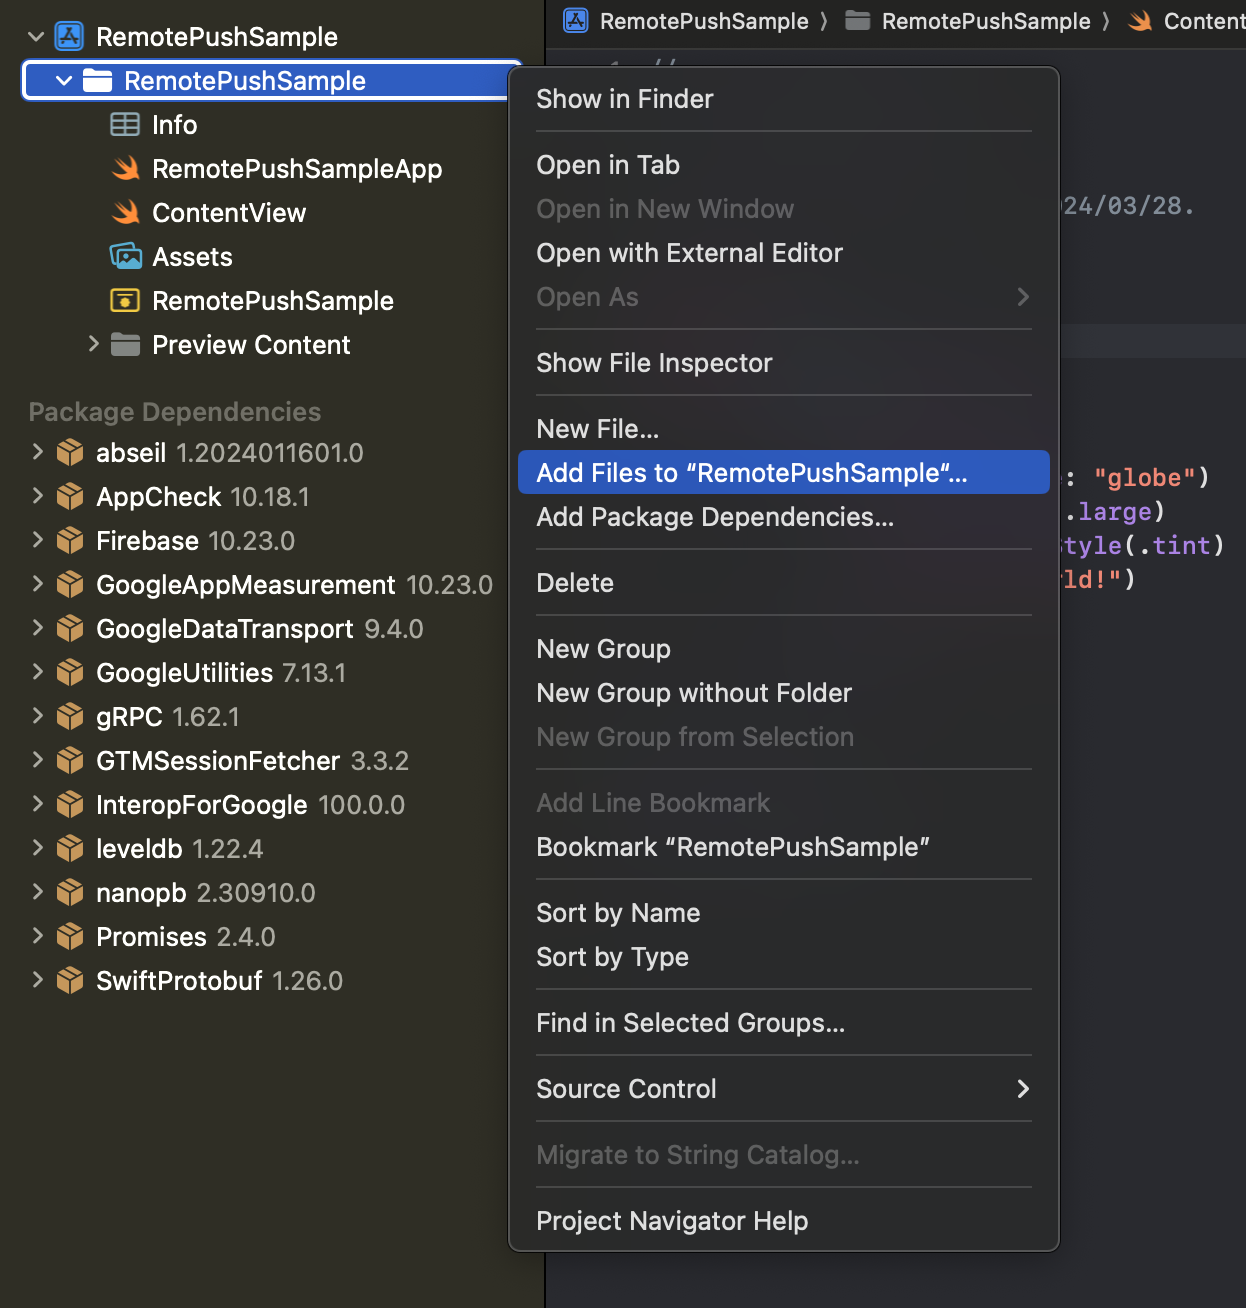
- RemotePushSampleフォルダを右クリック > Add Files to "RemotePushSample"...
- ダウンロードしたGoogleService-Info.plistを選択 > Add
- RemotePushSample(TARGETS) > Infoに以下を追加
・FirebaseAppDelegateProxyEnabled Boolean -> NO
コーディング
RemotePushSampleApp.swift
import SwiftUI
import FirebaseCore
import FirebaseMessaging

class AppDelegate: NSObject, UIApplicationDelegate {
    func application(
        _ application: UIApplication,
        didFinishLaunchingWithOptions launchOptions: [UIApplication.LaunchOptionsKey: Any]? = nil
    ) -> Bool {
        // 初期処理
        FirebaseApp.configure()
        Messaging.messaging().delegate = self
        UNUserNotificationCenter.current().delegate = self

        // プッシュ通知の許可要求(初回起動時のみ)
        let authOptions: UNAuthorizationOptions = [.alert, .badge, .sound]
        UNUserNotificationCenter.current().requestAuthorization(
            options: authOptions,
            completionHandler: { _, _ in }
        )
        application.registerForRemoteNotifications()
        return true
    }

    // テスト通知に必要なFCMトークンを出力する
    func application(_ application: UIApplication,
                      didRegisterForRemoteNotificationsWithDeviceToken deviceToken: Data) {
        Messaging.messaging().apnsToken = deviceToken
        Messaging.messaging().token { token, error in
          if let error = error {
            print("Error fetching FCM registration token: \(error)")
          } else if let token = token {
            print("FCM registration token: \(token)")
          }
        }
    }
}
extension AppDelegate: MessagingDelegate {}
extension AppDelegate: UNUserNotificationCenterDelegate {}

@main
struct RemotePushSampleApp: App {
    @UIApplicationDelegateAdaptor var delegate: AppDelegate
    var body: some Scene {
        WindowGroup {
            ContentView()
        }
    }
}
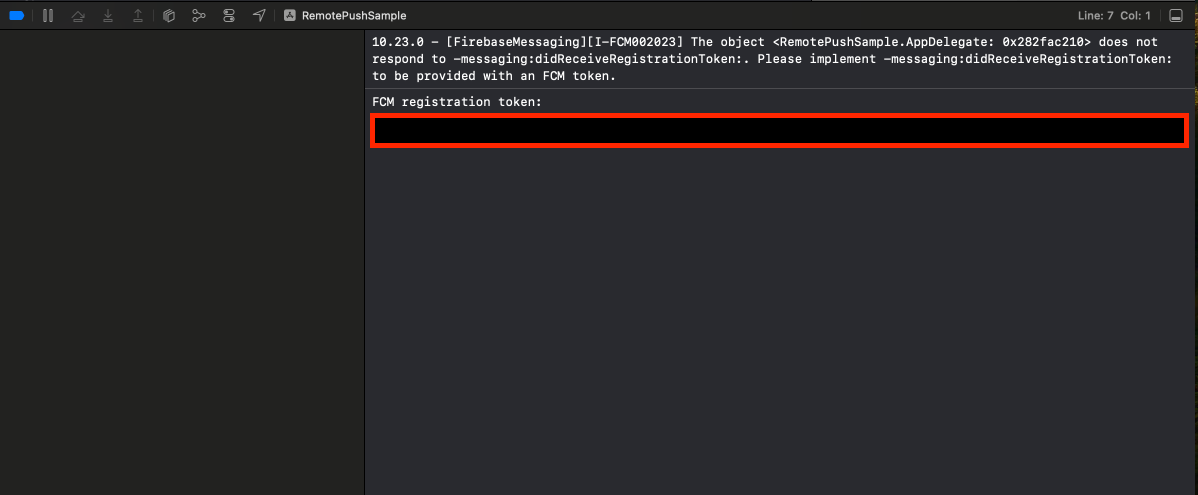
実機で起動してFCMトークンを確認
- 実機を選択してビルド→実行
- 通知を許可しておく
- 起動後、コンソールを見るとtokenが出力されているので控える
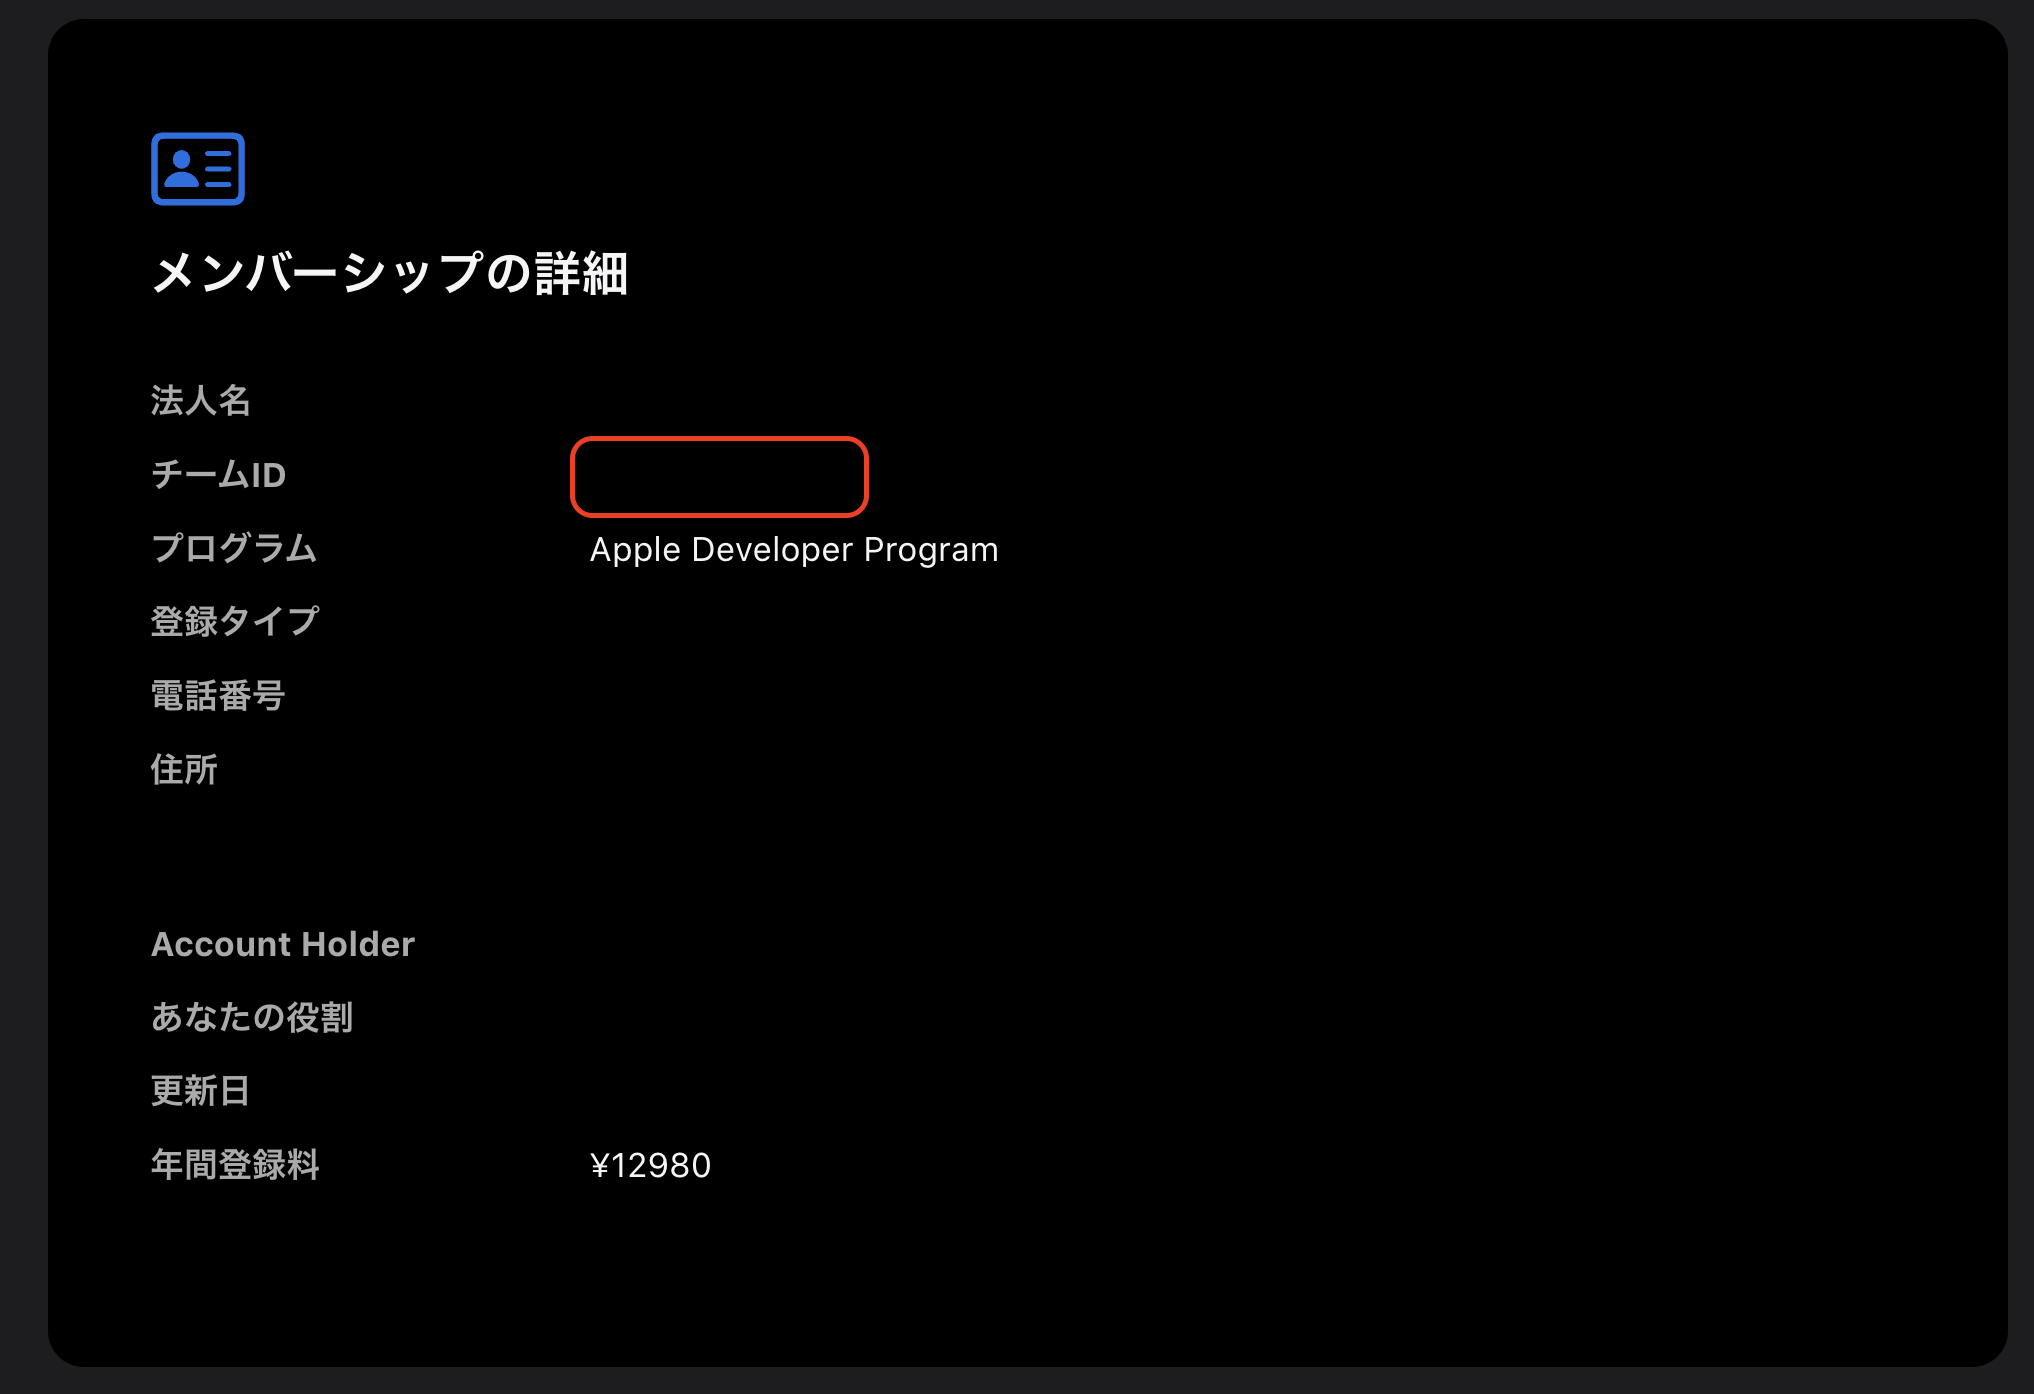
APNs認証キーを作成する
- Apple Developer > Certificates, Identifiers & Profiles > Keys
- +ボタンをクリック
- Key Name: RemotePushSample(例)
- Apple Push Notifications service (APNs)をチェックする
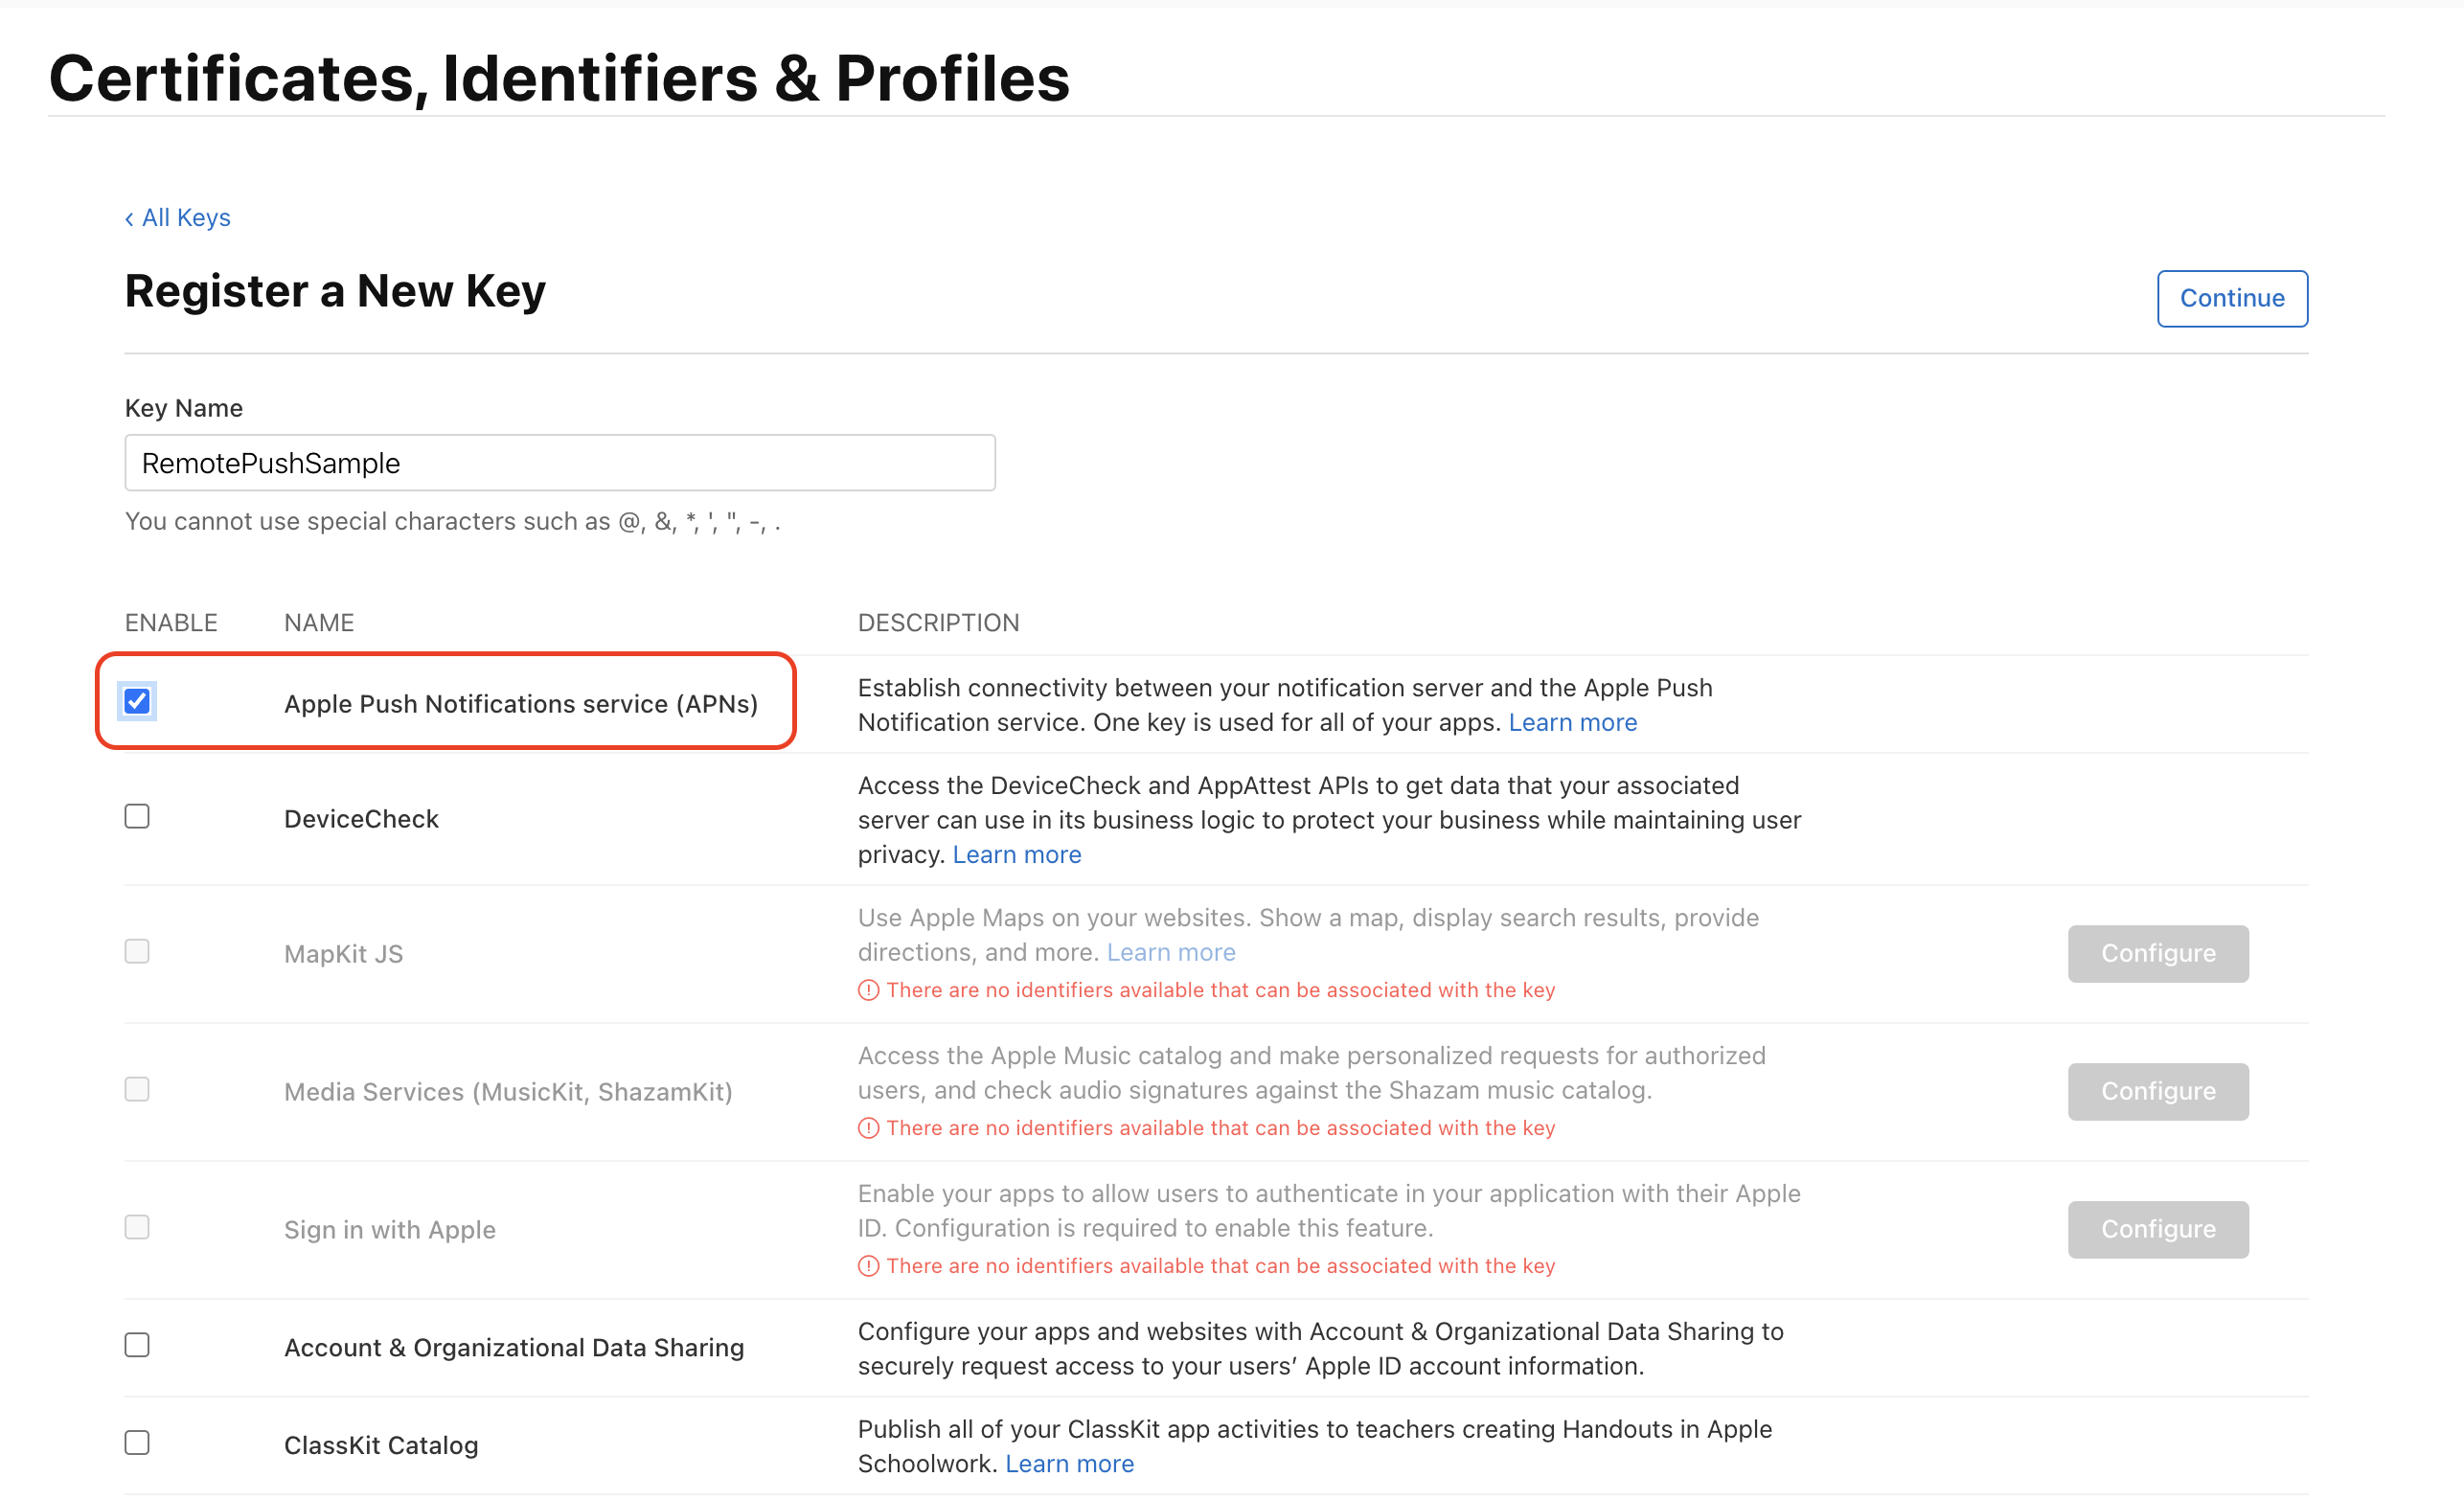
- Continue > Register
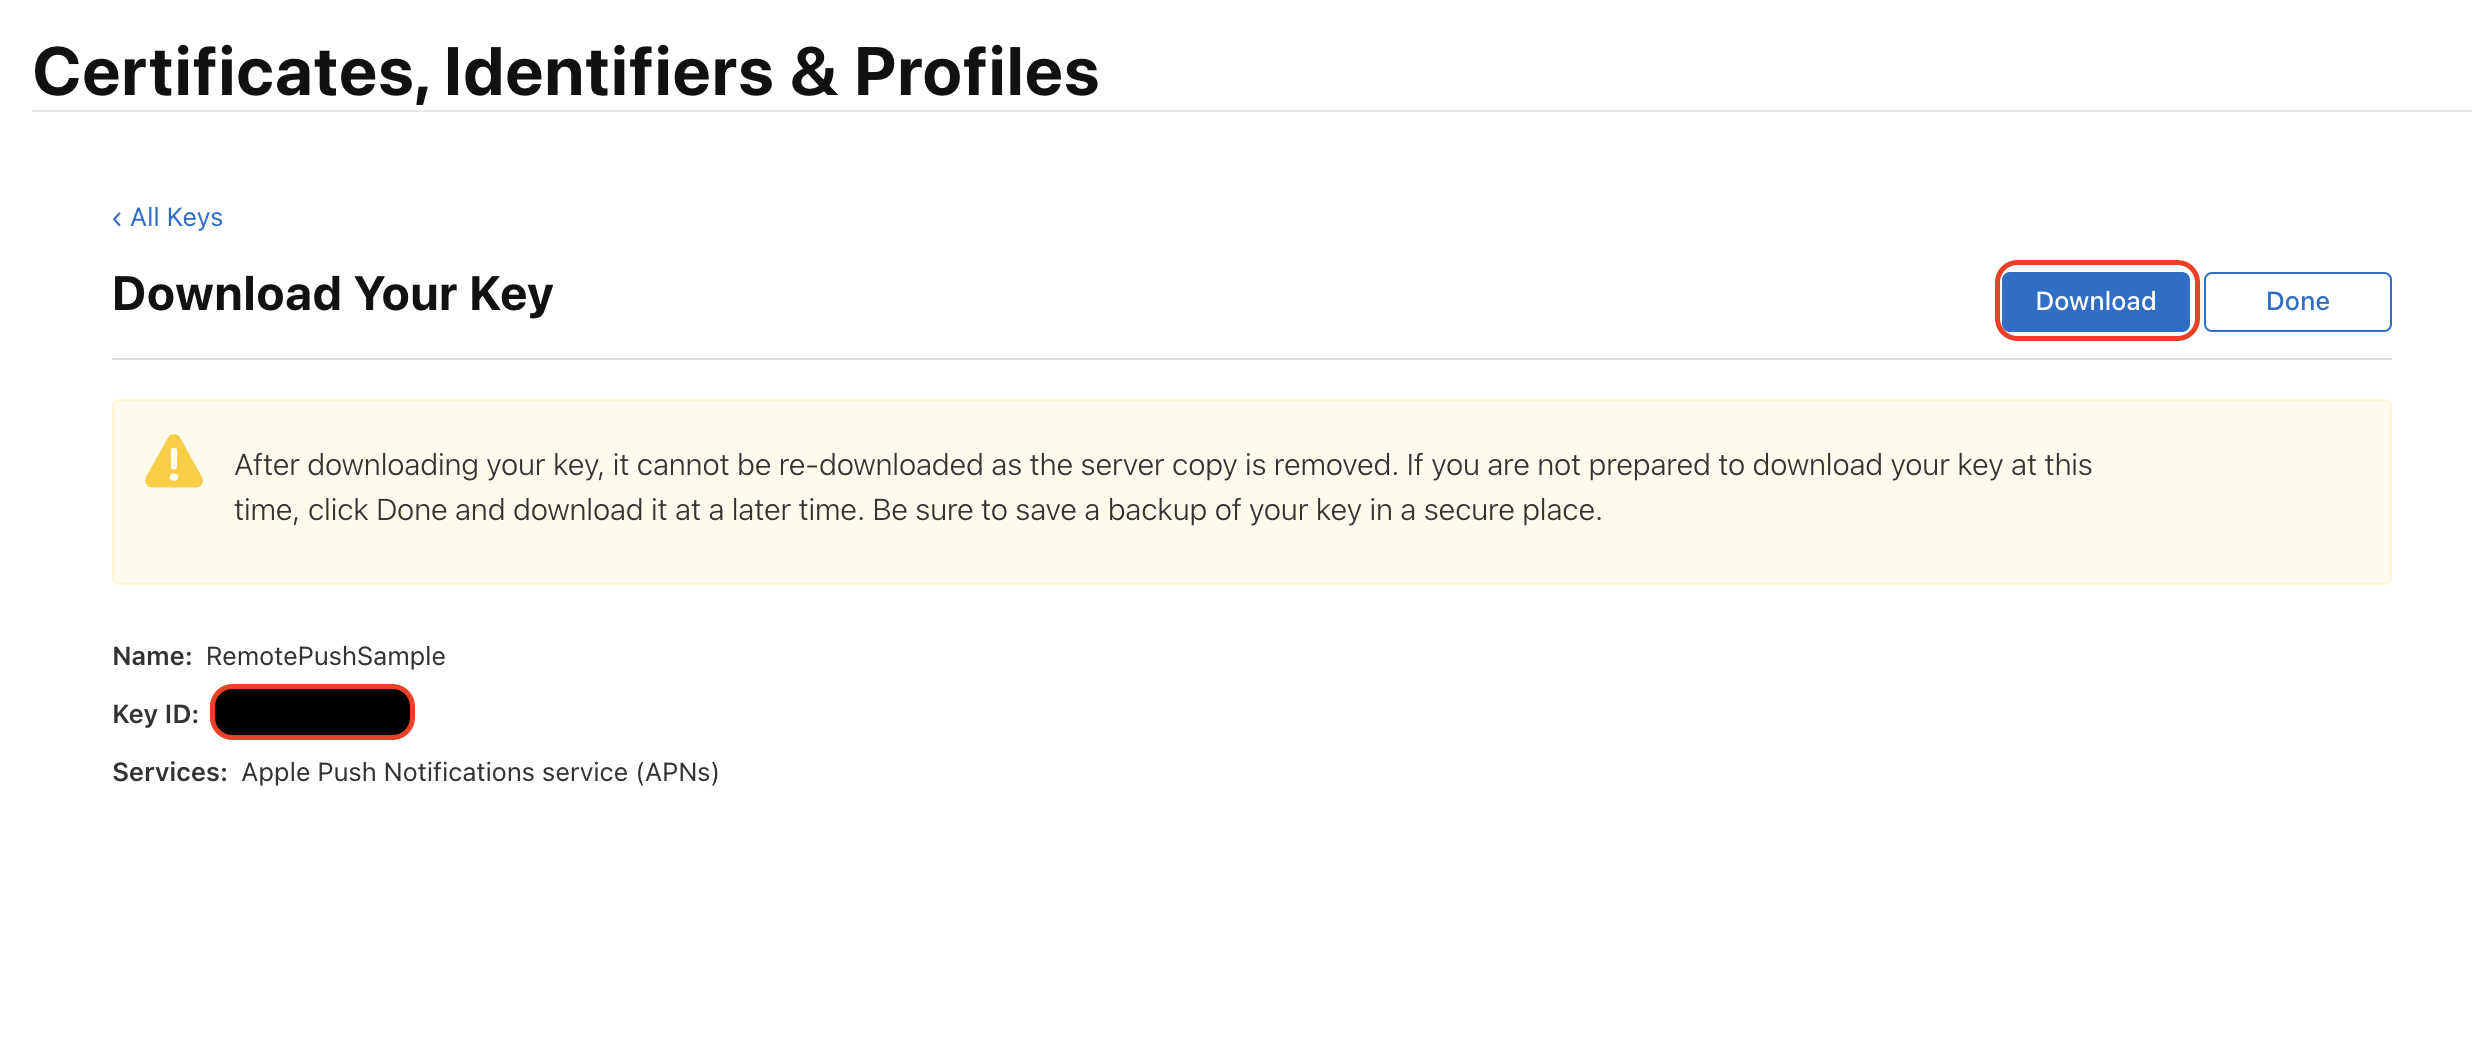
- 認証ファイル(.p8)をダウンロードし、Key IDを控える
Firebaseに認証キーをアップロードする
- 設定アイコン > プロジェクトの設定
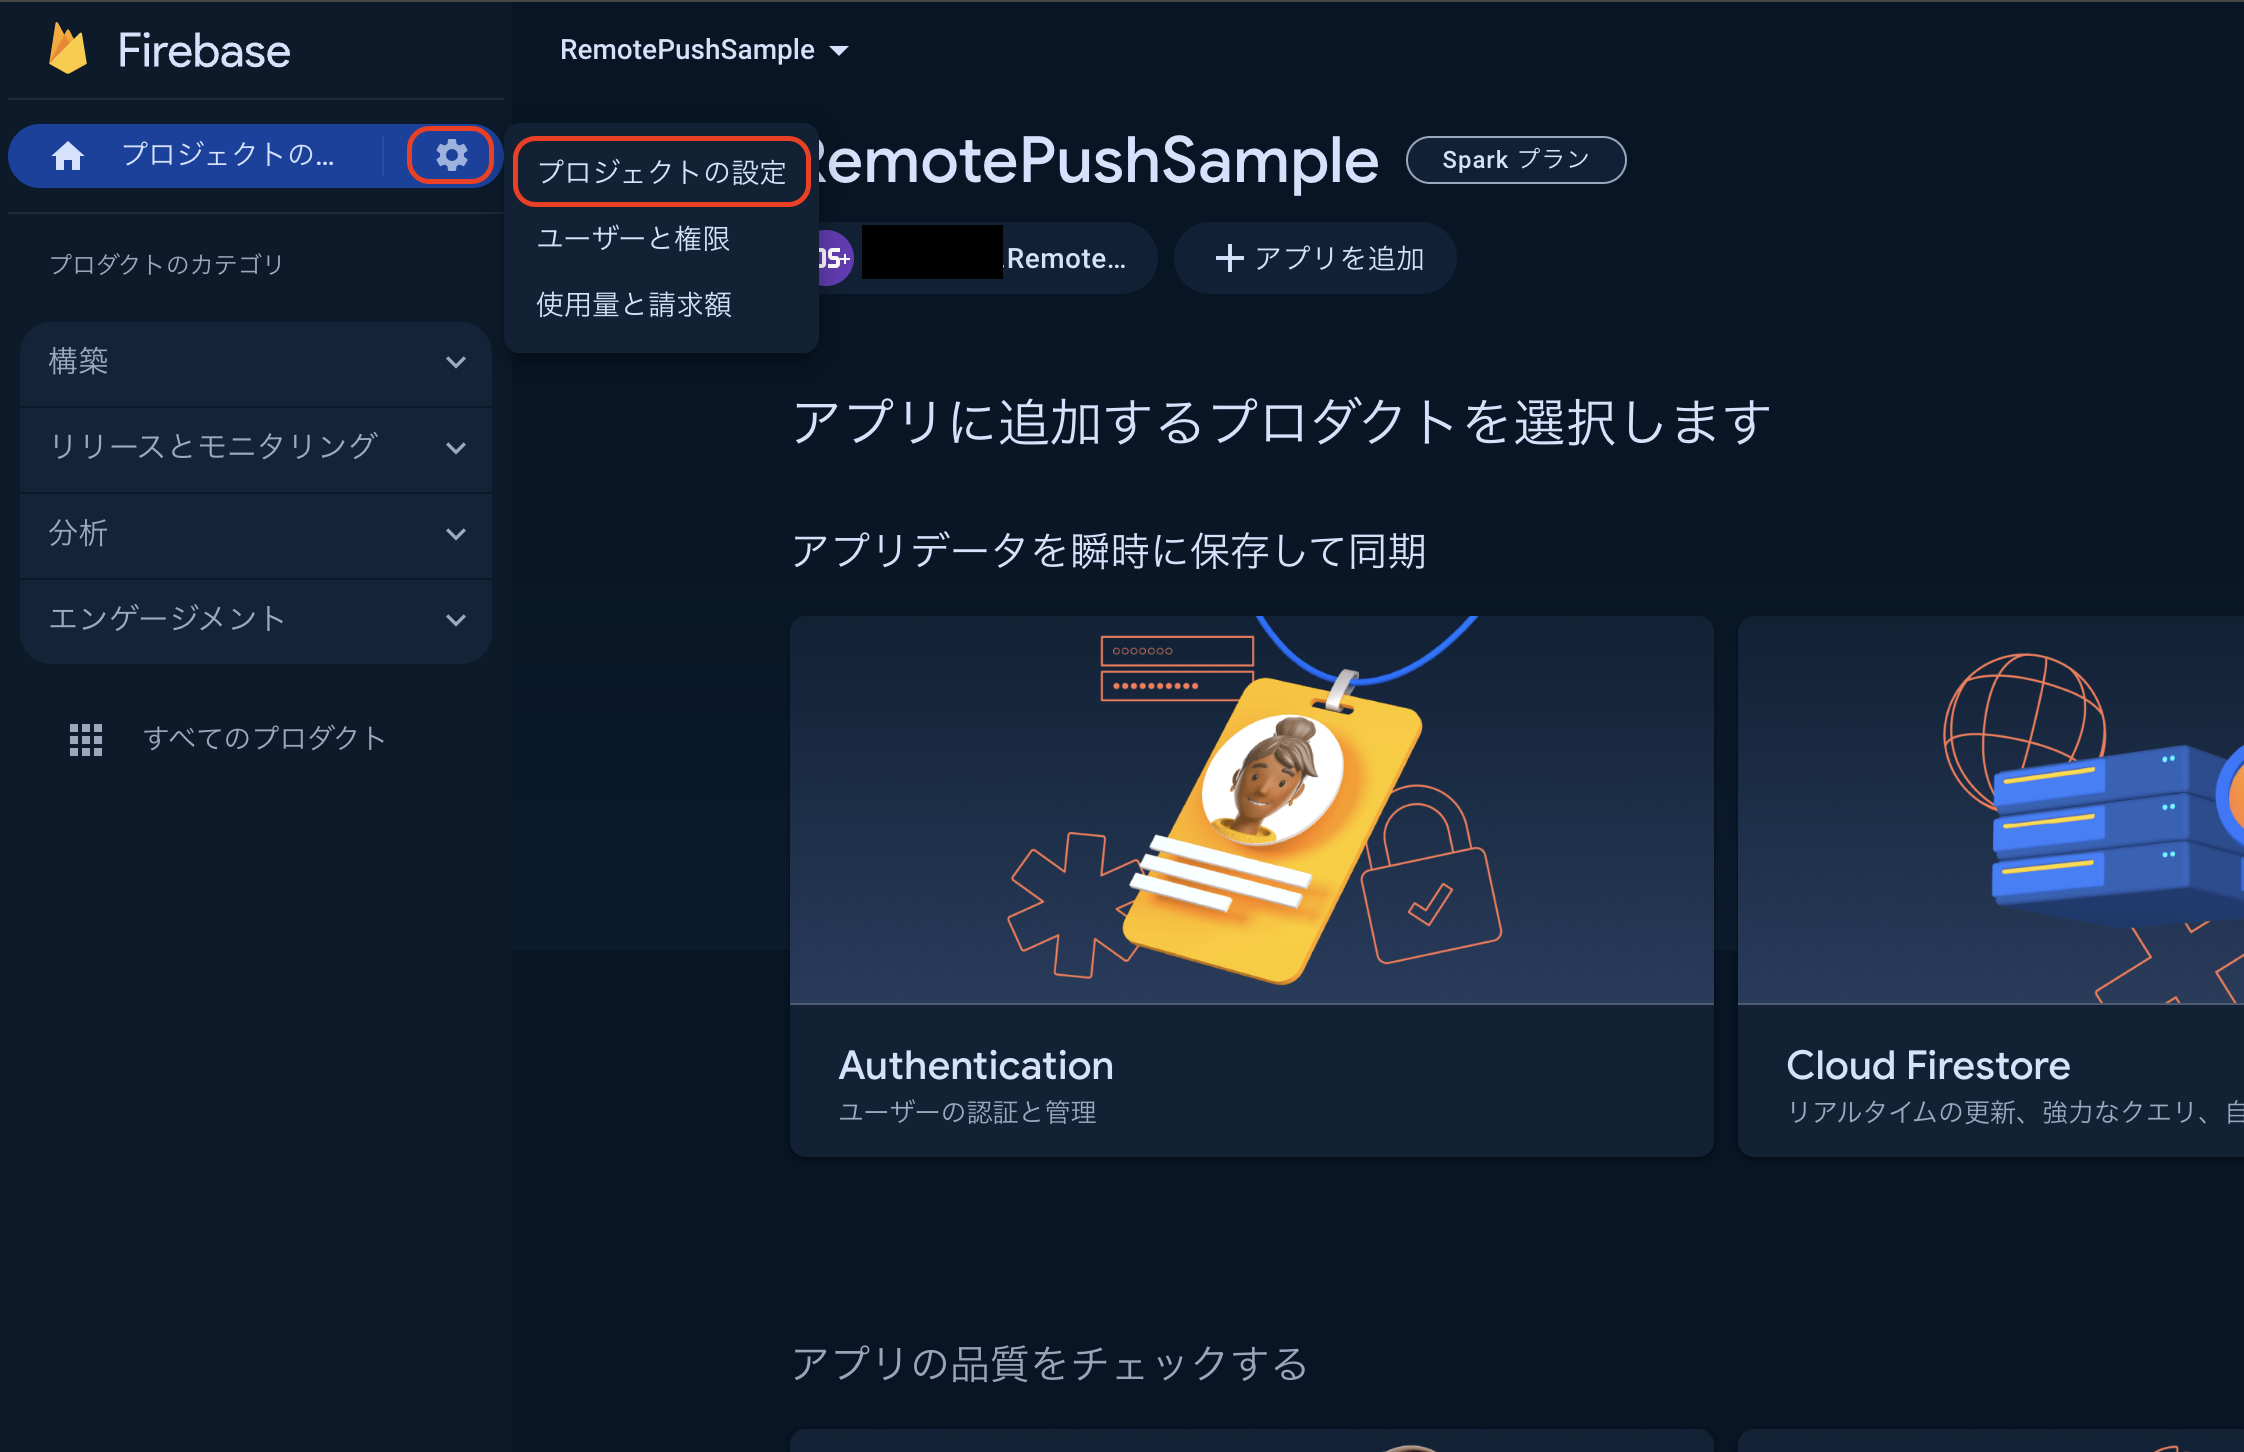
- Cloud Messaging > Apple アプリの構成 > APNs 認証キーをアップロード
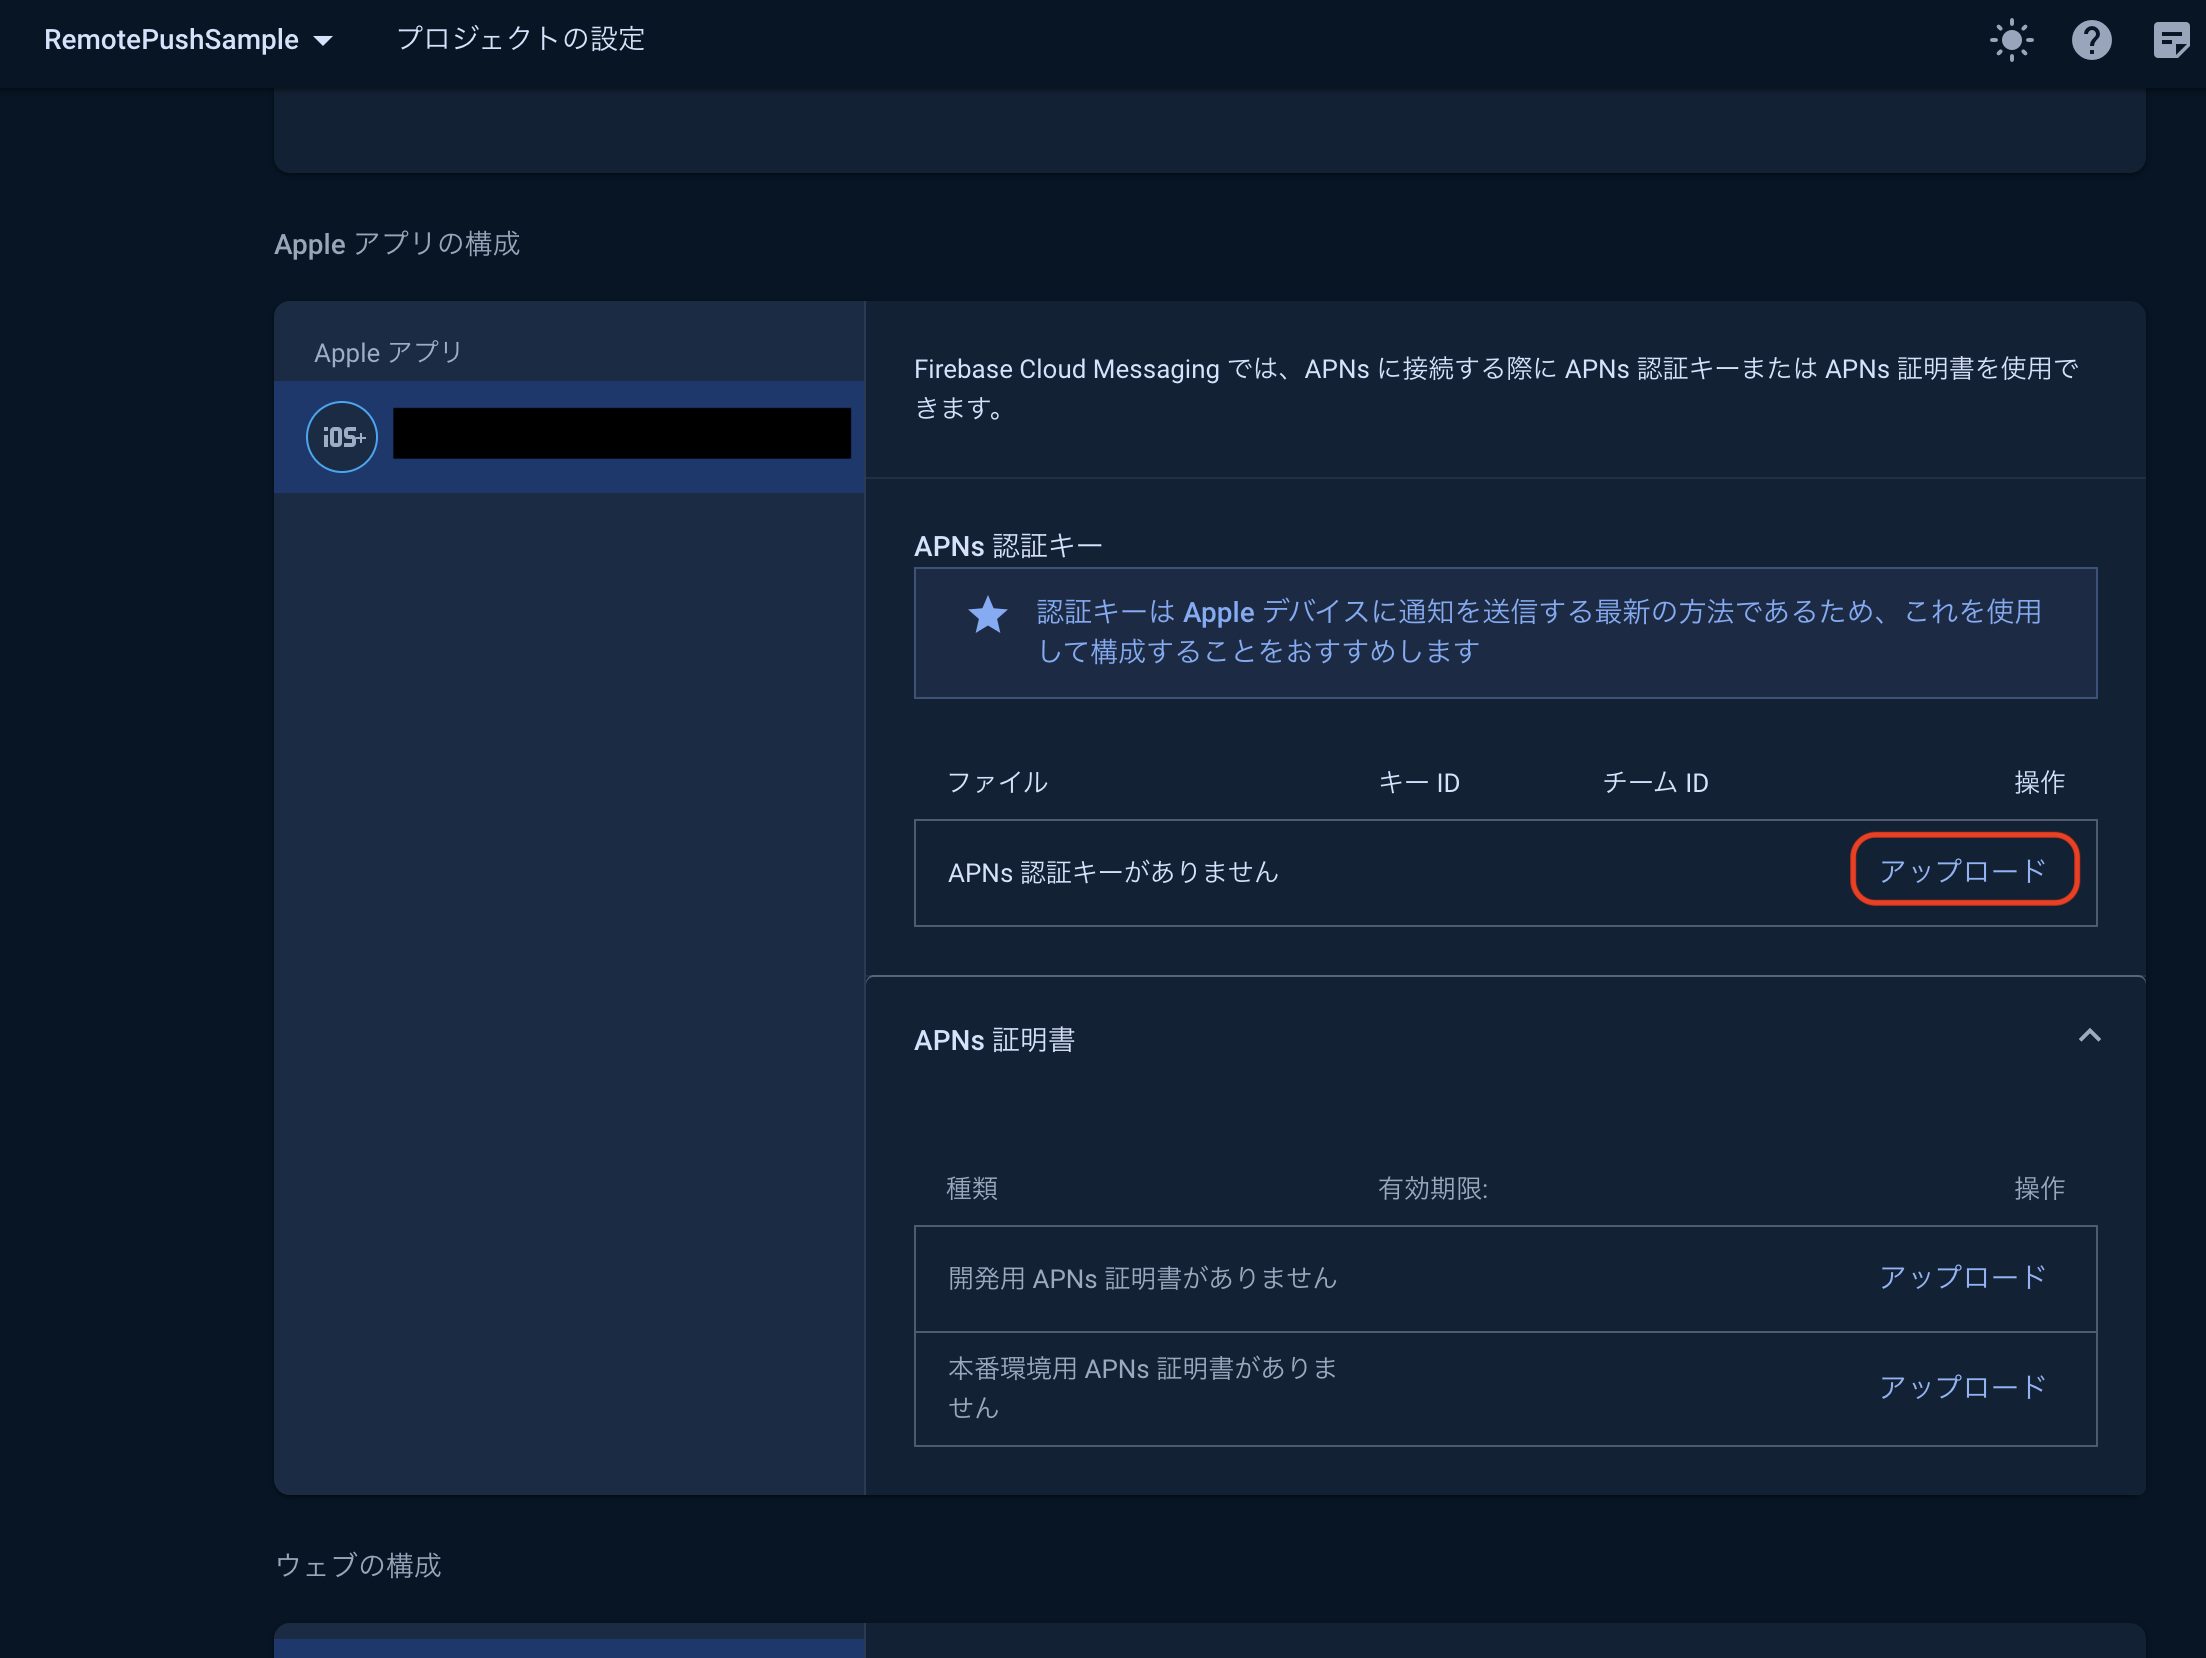
- APNs認証キー: ダウンロードした.p8ファイル
- キーID: 認証キー作成時に控えたKey ID
- チームID: Apple Developerで確認
- アップロード
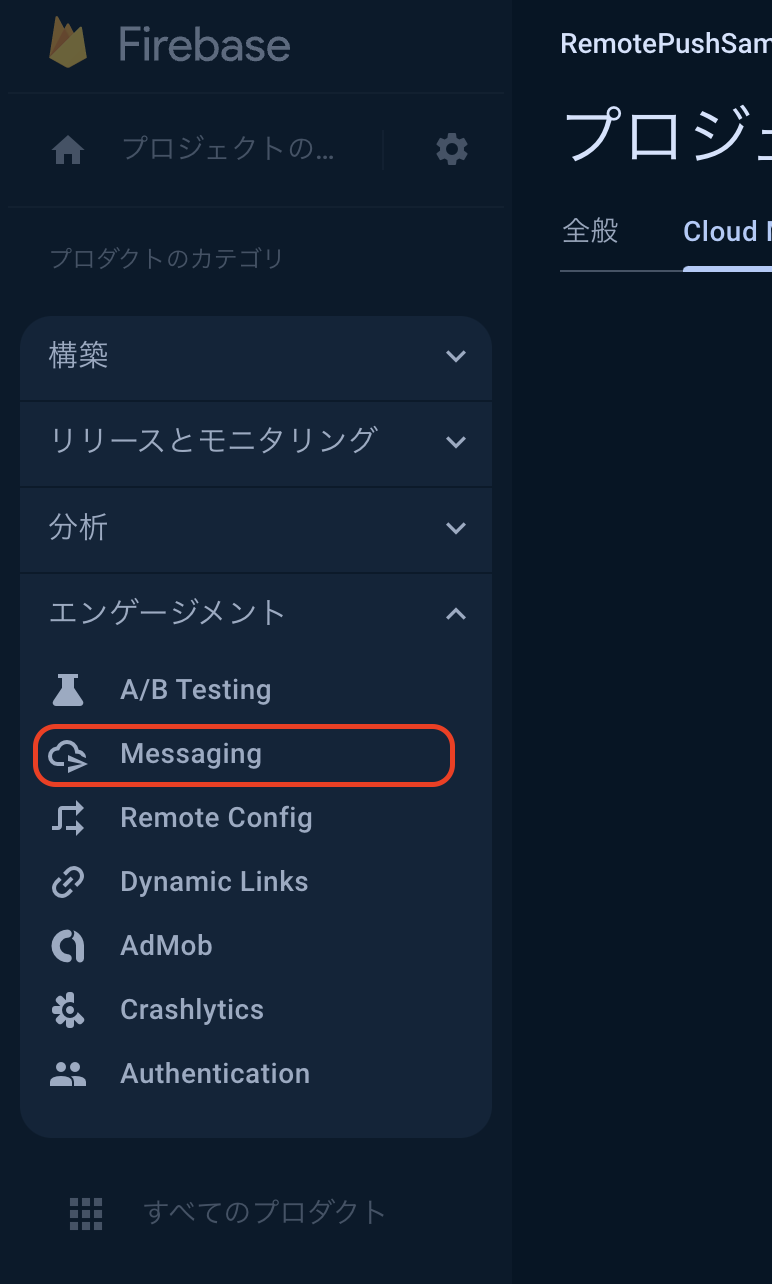
Firebaseで通知を送信
- 左のタブ > エンゲージメント > Messaging
- 最初のキャンペーンを作成
- Firebase Notification メッセージ > 作成
- 通知のタイトル: テスト通知(例)
- 通知テキスト: これはテストです。(例)
- テストメッセージを送信
- Xcodeのコンソールで控えたFCMトークンを入力 > + > テスト
- テストデバイスに通知が送信されることを確認する
- 次へ > ターゲット: アプリを選択する
- 次へ > スケジュール設定: 現在
- 次へ > 確認 > 公開
- 数分後、通知が来る
終わり