この記事は SAP Advent Calendar 2021 の12月10日分の記事として執筆しています。
はじめに
今回、SAP BTP Trialで利用できるサービスのなかからSAP Feature Flags Serviceを使ってみました。
Help Portalのドキュメントはこちら
Feature Flagとは?
アプリケーションを再デプロイまたは再起動せずに新しい機能を有効または無効にできます。
とあるように、「コードを書き換えることなく動的にシステムの振る舞いを変更できる」開発手法です。
アプリケーションの外部にフラグを持つことで機能のON/OFFを切り替えることができます。
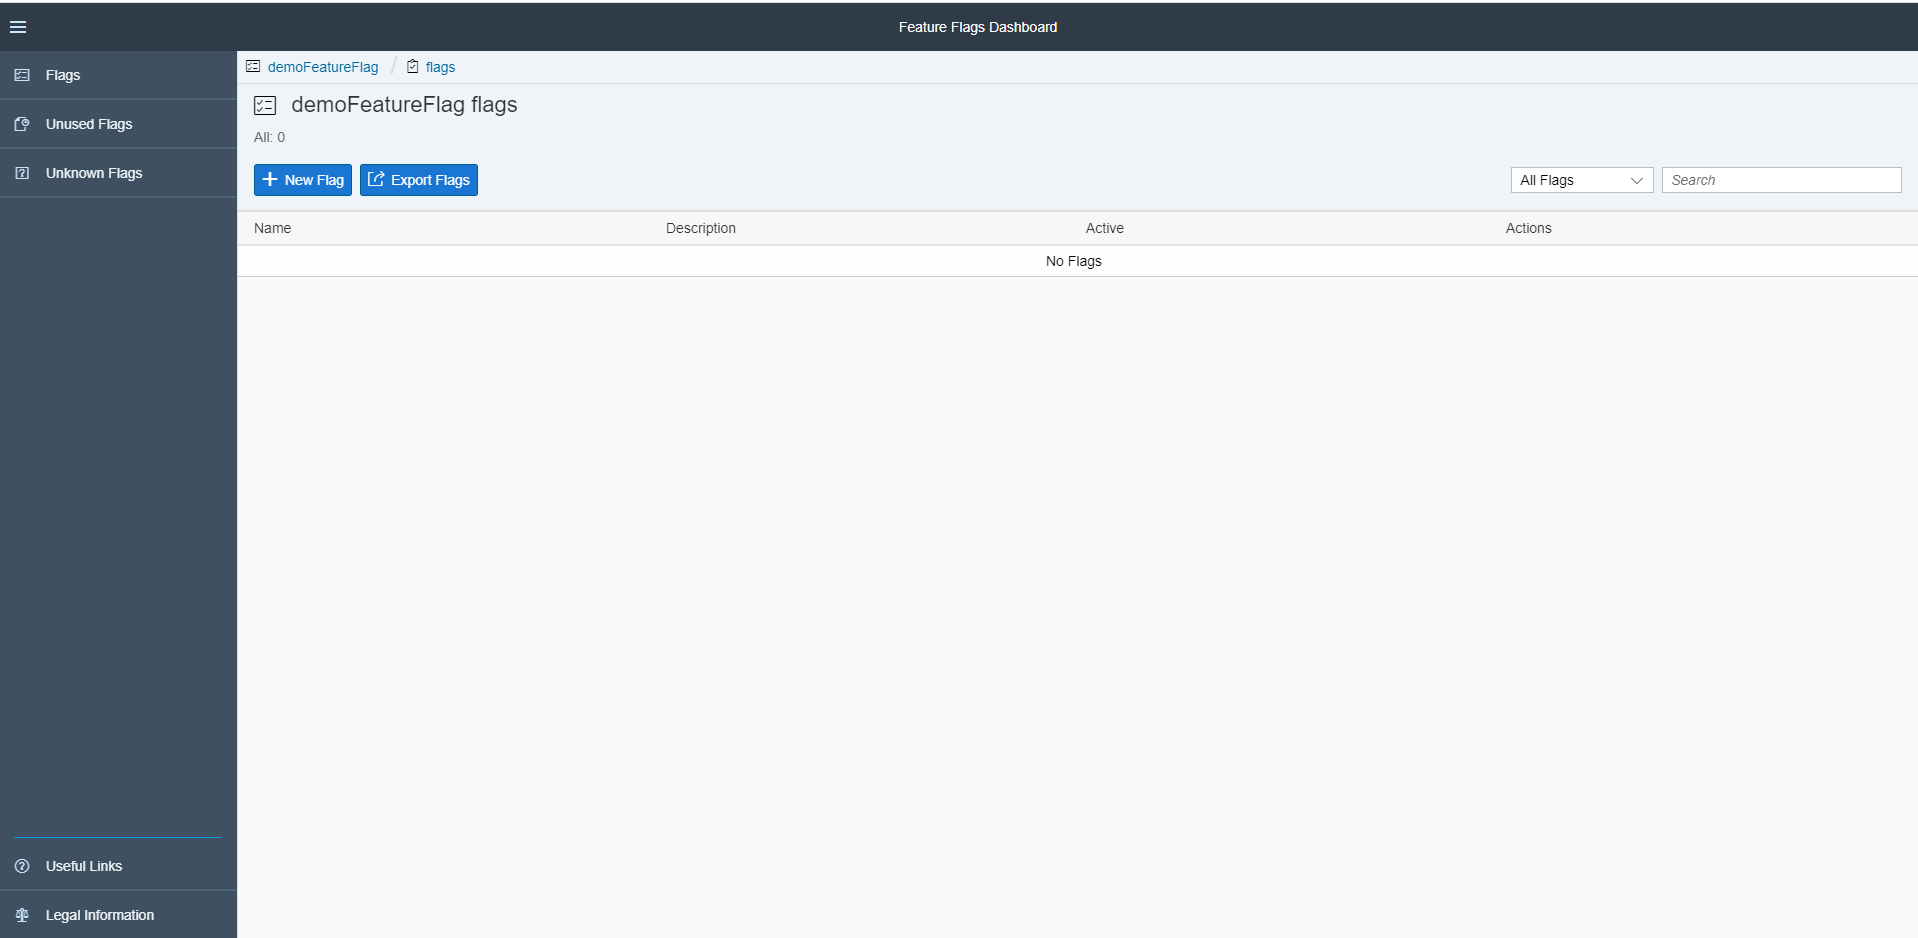
あらかじめアプリケーションからFeature Flagの状態を参照することで下図のActiveボタンを切り替えるのみで動作の変更をできるようにします。

このFeature Flagがどのように活用できるか?はこちらが参考になりました。
SAP Feature Flags Serviceを使ってみる
サービスインスタンスの作成
SAP BTP Trialで実際にSAP Feature Flags Service使ってみます
Service MarketplaceからFeature Flagsのサービスインスタンスを作成します。

今回Planはstandardを選択しています。
※2021/12時点でliteプランも選択可能です。
liteプランだと使用できるのはBoolean型のフラグのみとなりますが、
フラグのON/OFFを自由に変更可能です。
テスト用途ではliteプランを選択したほうが便利でした。
1ページ目以外は未指定のままCreateを押下します。

Createが完了したらサービスインスタンスにアクセスします。
左側メニューの「Instances and Subscriptions」からCreateしたインスタンスを確認できます。

メニューから「View Dashboard」を押下します

Feature Flags Serviceのダッシュボード画面が開くので、ここFeature Flagを作成していきます。
※認証方式を聞かれる場合はdefaultのIdpを選択してください。
Feature Flagの作成
とりあえず、「New Flag」を押下します。

フラグ作成画面へと遷移します。
作成できるフラグはBooleanとStringがあります。
※liteプランはBooleanのみ
まずはBoolean型のフラグを作成してみます。
Name Description を指定して「Save」を押下します。

フラグが作成できました。

フラグを作れたけれどこれからどうするのかと思ったら
フラグのリンクを押下すると詳細に遷移でき、詳細メニューにCode Snippetsがあります。
Code Snippetにしたがって、今回はNode.jsでFeature Flagの状態を確認するAPIを作成します。

Feature Flagを参照するAPIを作成する
// get URI for Feature Flags service instance from VCAP_SERVICES
Code Snippetの上記記載からURI・username・passwordを取得する必要があるということなので、まずはFeature Flags ServiceのインスタンスにBindするNodejsアプリケーションを作成します。
以下を参考にシンプルなNodejsアプリケーションを作成し、デプロイしました。
https://developers.sap.com/group.scp-5-node.html
const express = require('express');
const app = express();

app.get('/', function (req, res) {
  res.send('Hello World!');
});

const port = process.env.PORT || 3000;
app.listen(port, function () {
  console.log('myapp listening on port ' + port);
});
上記の通り、アクセスすると"Hello World!"を返却するAPIをデプロイします。
「demoNode」という名称でBTP上に作成しました。

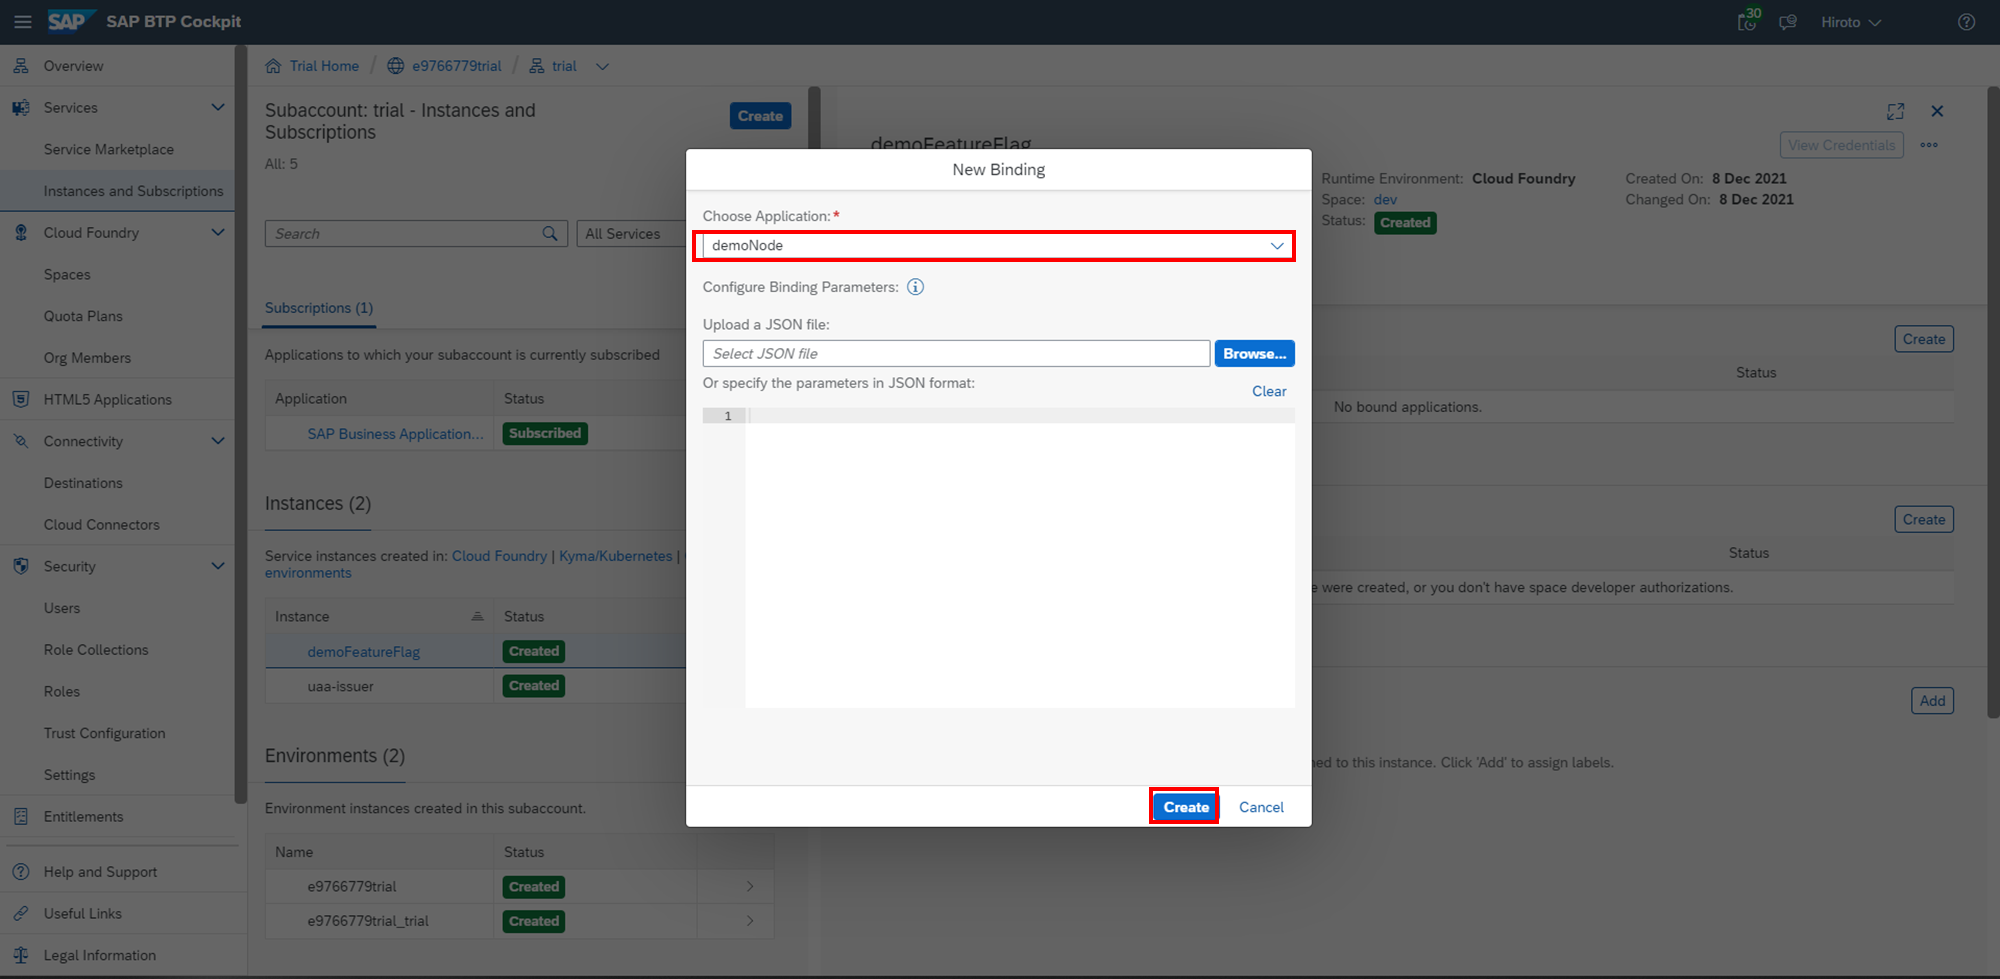
再び「Instances and Subscriptions」からサービスインスタンスにアクセスします。

「Bound Applications」の「Create」を押下し、先ほど作成したNodejsのアプリケーションに対してBindします。
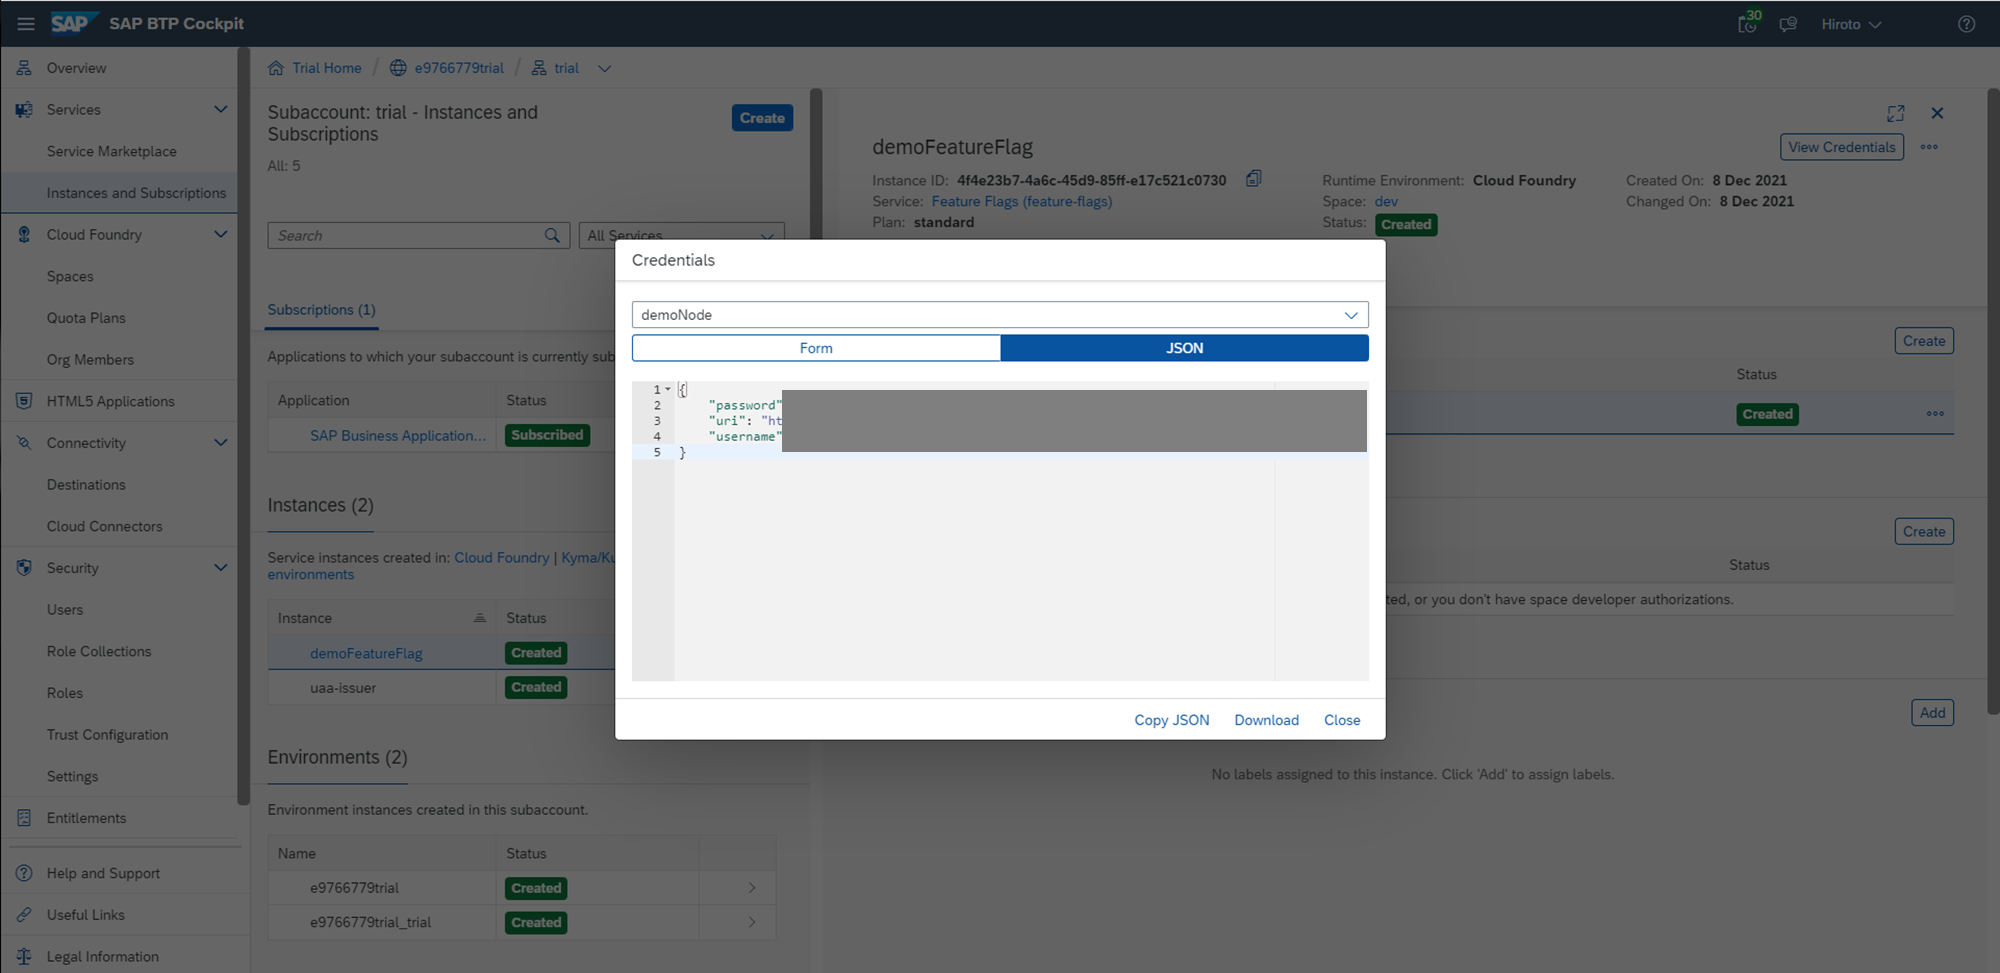
Createが終了すると、認証情報が表示できるのでこれらを使ってNodejsのアプリケーションからSAP Feature Flags Serviceに作成したフラグにアクセスします。
Code Snippetsを参考に、Feature Flagの状態を取得するAPIを作成しました。
const express = require('express');
const request = require('request');
const app = express();

let uri = "<上記で作成した認証情報のUri>" ; // get URI for Feature Flags service instance from VCAP_SERVICES
let username = "<上記で作成した認証情報のUserName>" ; // get username for Feature Flags service instance from VCAP_SERVICES
let password = "<上記で作成した認証情報のPassWord>" ; // get password for Feature Flags service instance from VCAP_SERVICES
let feature = "demoflagboolean"; // the name of the feature flag as defined in the feature flags dashboard
let evaluationUri = uri + "/api/v1/evaluate/" + feature;
//let evaluationUri = uri + "/api/v1/evaluate/" + feature + "?identifier=<tenant_ID>"; // in case of direct shipment flags, identifier is mandatory

let authorization = "Basic " + Buffer.from(username + ':' + password).toString('base64');

app.get('/feature', function (req, res) {
    let bFeature;
    request.get({
        url: evaluationUri,
        headers: {
            "Authorization": authorization
        }
    }, function(error, response, body) {
        if (error) {
            // handle error
            res.send(error)
        }
        let statusCode = response.statusCode;
        switch (statusCode) {
            case 200: // active
                // logic when the flag is active
                bFeature = true
                break;
            case 204: // inactive
                bFeature = false
                break;
            default:
                // logic when the flag is inactive
                bFeature = false
                break;
        }
        res.send({feature:bFeature})

    });
  });

app.get('/', function (req, res) {
  res.send('Hello World!');
});

const port = process.env.PORT || 8080;
app.listen(port, function () {
  console.log('myapp listening on port ' + port);
});
フラグがTRUE=activeであればHTTPステータスコードが200、
FALSE=inactiveであればHTTPステータスコードが204で返却されます。
上記のコードをデプロイし、/feature にアクセスすると以下の結果が返却されます

アクセス時点ではFeature FlagがInactive状態なので、HTTPステータスコードが204となっています。

Feature Flagの変更
次にFeature Flagを変更してみます。
「Active」を変更してから、詳細へ遷移します。

「Not Release」のステータスになっているので、「Release」ボタンを押下します

Release Featureを「Var.2」=TRUEに変更します。


「Release」を押下するとFlagが変更されます。
※一度Releaseすると変更不可です※
※liteプランの場合、Release工程が存在せず何度でも変更可能です。
もう一度、Nodejsのアプリケーションへアクセスします。
Feature Flagの変更が適用され、下記の通りHTTPステータスが200へ変更されました。

おわりに
Feature Flags Serviceを利用することでリリースすることなくシステムの挙動を変更できます。
またフラグ設定にはDirect DeliveryやPercentage Deliveryといった機能もあり、「特定のグループはフラグをONにする」といった使い方も可能です。
アプリケーションに組み込む必要があり、導入コストはそれなりに大きいことやうまく使わないとFeature Flag自体の管理が難しそうといった感覚もありますが開発手法・システムによっては非常に有用かと思います。