【Android】【初心者】Custom Viewの作り方
概要
オセロのアプリを作ってみようという思いで、オセロの初期状態のレイアウトを独自Viewで、作ってみたので、Custom Viewの作りかたのまとめという感じです。
大した内容ではないです、すみません。
基本的には、Android Developerのカスタムビュー コンポーネントの項目を参照して作成しました。
作成したレイアウト
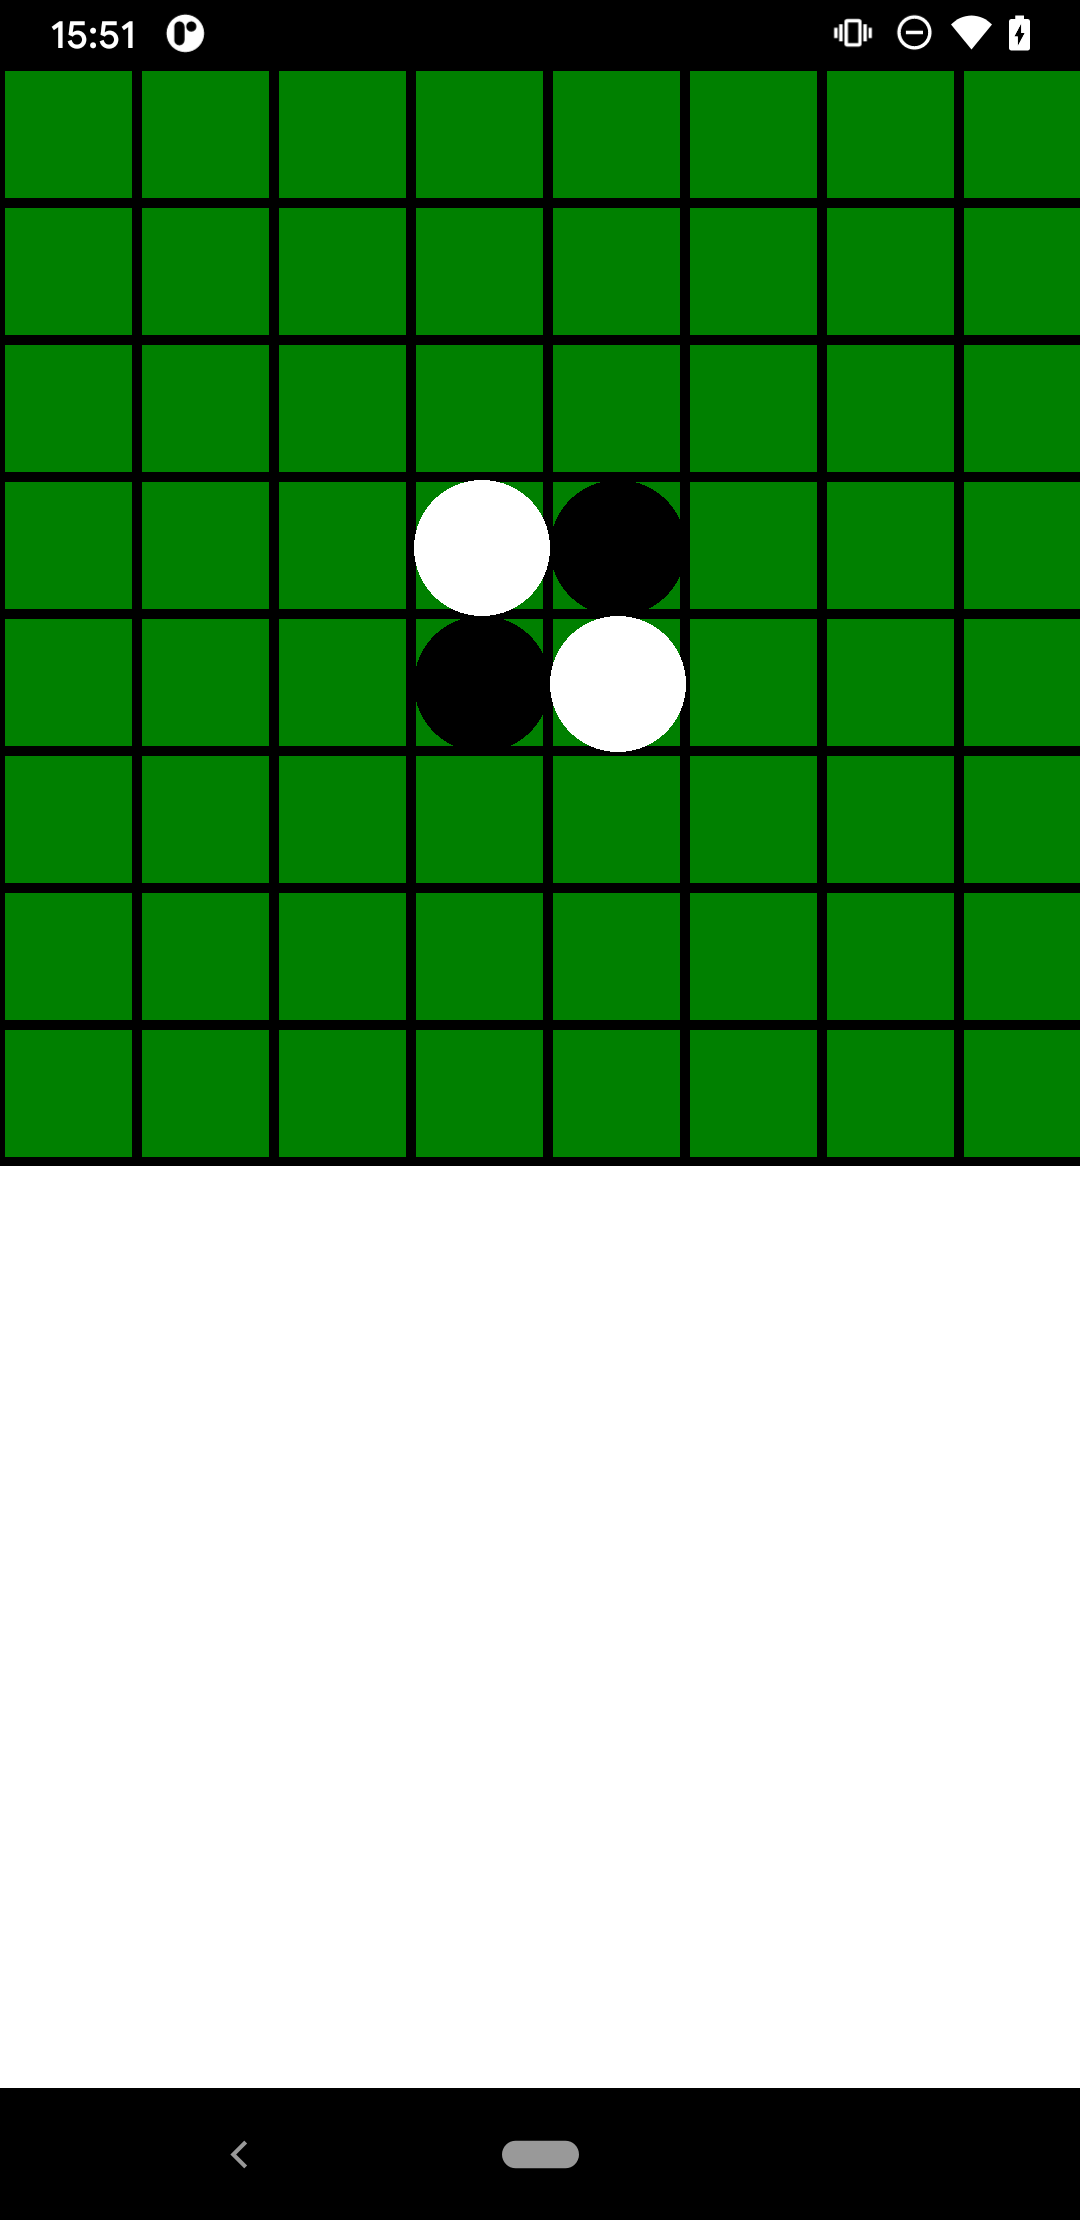
作成手順
大まかな手順としては、以下の3つでした。
- Viewを継承した独自Viewのクラスを作成
- XMLから作成したViewを取得できるように、
attrs.xmlに作成したViewのリソースを定義 - 独自Viewに描画したいもの記述していく
Viewを継承した独自Viewのクラスを作成
- Viewを継承したクラスを定義
- コンストラクタに、Contextのオブジェクトと、AttributeSetのオブジェクトを渡さないといけません。
CustomView.kt
class CustomView(context: Context, attrs: AttributeSet): View(context, attrs) {}
XMLで、作成したViewを取得できるように、attrs.xmlに作成したViewのリソースを定義
-
res/values/以下に、attrs.xmlというファイルを新規作成し、以下のように記述- Android Developerには、他にもStyleの記述とかありますが、最低限動かすのはこれで十分です。
attrs.xml
 <resources>
     <!--   作成したクラス名  -->
     <declare-styleable name="CustomView">
     </declare-styleable>
</resources>
- ActivityなどのXMLで、作成したViewを記述する
activity_sample.xml
<androidx.constraintlayout.widget.ConstraintLayout xmlns:android="http://schemas.android.com/apk/res/android"
    xmlns:app="http://schemas.android.com/apk/res-auto"
    xmlns:tools="http://schemas.android.com/tools"
    android:layout_width="match_parent"
    android:layout_height="match_parent"
    tools:context=".SampleActivity">

    // 作成したクラスを記述
    <com.sample.app.CustomView
        app:layout_constraintStart_toStartOf="parent"
        app:layout_constraintTop_toTopOf="parent"/>

</androidx.constraintlayout.widget.ConstraintLayout>
独自Viewに描画したいものを記述していく
最後に、独自Viewに描画したいものを記述する処理についてです。
描画処理の記述は、作成したViewを継承したクラスCustomView.ktのonDrawというメソッドに色々と記述していきます。
- 作成したViewクラスで、
onDrawをオーバーライド
CustomView.kt
class CustomView(context: Context, attrs: AttributeSet): View(context, attrs) {
  // onDrawをオーバーライド
  override fun onDraw(canvas: Canvas?) {
    super.onDraw(canvas)
  }
}
-
onDrawで何かを描画するのに、重要な登場人物
- Canvas
- 描画するメソッドを持つクラス
- 例えば、線を描画する
drawLine()、円を描画するdrawCircle
- Paint
- 描画する際のスタイルや、フォントなどを定義する
- 例えば、線を太くする
strokeWidth
- Canvas
-
例: 線の描画や、円の描画
CustomView.kt
class CustomView(context: Context, attrs: AttributeSet): View(context, attrs) {

  // Paintなどのオブジェクト作成は、onDrawでやらない方が良いとのこと
  // パフォーマンスに影響を及ぼして、描画に時間がかかってしまう場合があるようです。
  init {
    // 線の太さを、10Fに設定したPaint
    // これを、drawLineなどに設定すると、設定された状態で、線が描画される。
    val paint = Paint().apply {
       strokeWidth = 10F
       style = Paint.Style.STROKE
    }
  }

  override fun onDraw(canvas: Canvas) {
    super.onDraw(canvas)

    // 線を描画
    // 始点(x, y)と終点(x, y)とPaintオブジェクトを渡すことで描画できる
    canvas?.drawLine(startX: Float, startY: Float, endX: Float, endY: Float, paint: Paint)

    // 円を描画
    // 中心(x, y)と半径、Paintオブジェクトを渡すことで描画できる
    canvas?.drawCircle(cx: Float, cy: Float, radius: Float, paint:Paint)
  }
}