大阪でRailsを中心に学習している薬剤師エンジニア(初学者)こと、ヨマ(@yoma_2003)です!
Ajaxを用いてメモ帳の様なアプリをフォームで作る方法をまとめます。
※おことわり※
断定口調でまとめますが、初学者であるため間違い等あればご指摘頂けると嬉しいです。
はじめに
やりたいこと
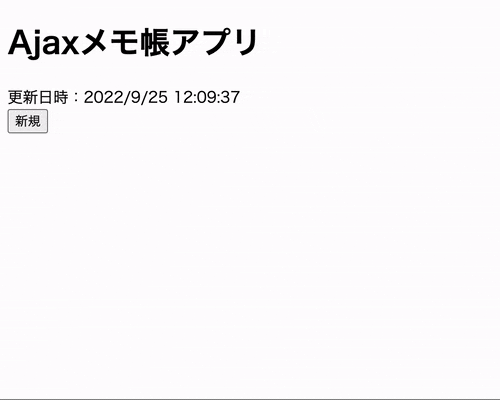
以下の様な自動更新機能のあるメモ帳(追加・削除できる)アプリを作りたい。
アプリの要件
具体的には以下の様な要件を満たすアプリを作成します。
- ページ遷移がない(index.htmlのみ)
- フォームに入力すると、自動で更新される
- 新規ボタンを押すと、フォームが追加される
- 削除ボタンを押すと、フォームが削除される
- 操作後に更新日時が更新される
本記事のポイント
・データ更新処理
・フォーム削除処理
・フォーム追加処理
上記の3点をAjaxを用いて実装するにあたり、わかりにくかった2点を中心にまとめます。
-
Ajaxを用いてPUT、DELETE、POSTリクエストを送信する方法 -
FormDataオブジェクトを自分で定義してcsrfトークンを埋め込む方法
バックエンド実装(前提)
モデル
class Post < ApplicationRecord
end
データベース
| Column | Type |
|---|---|
| text | string |
ルーティング
Rails.application.routes.draw do
  root 'posts#index'
  resources :posts, only: [:create, :update, :destroy]
end
コントローラー
class PostsController < ApplicationController
  def index
    @posts = Post.all.order("id DESC")
  end

  def create
    new_post = Post.create(post_params)
    render json: { new_post: new_post }
  end

  def update
    post = Post.find(params[:id])
    post.update(post_params)
  end

  def destroy
    post = Post.find(params[:id])
    post.destroy
  end

  private
  def post_params
    params.require(:post).permit(:text)
  end
end
フロントエンド実装(前提)
ビュー
<%= javascript_pack_tag "update-form", "new-form", "delete-form", "update-time" %>

<h1>Ajaxメモ帳アプリ</h1>
<div id="last_update">更新日時:</div>
<button id="new_btn">新規</button>
<div id="texts">
  <% unless @posts.count == 0 %>
    <% @posts.each do |post| %>
      <%= form_with model:post, data: post.id do |f| %>
        <%= f.label :text, "No.#{post.id}" %>
        <%= f.text_area :text, class: "text_input"%>
        <button class="delete_btn">削除</button>
      <% end %>
    <% end %>
  <% end %>
</div>
Ajaxの実装ポイント
1. Ajaxを用いてPUT、DELETE、POSTリクエストを送信する方法
ページ遷移をせずにデータ更新、フォームの追加・削除する機能を作成するためには、Ajaxを用いて各種リクエストを送信する処理を実装します。
const form = document.querySelectorAll(".post_form");  //フォーム要素を取得
const formId = form.getAttribute("data");  //フォームのIDを取得 (カスタムデータ属性で定義しておく)
const formData = new FormData(form);  //フォームデータからFormDataオブジェクトを作成
const XHR = new XMLHttpRequest();
XHR.open("PUT", `/posts/${formId}`, true);  //updateアクションへのPUTリクエストを定義
XHR.send(formData);  //リクエストを送信
XHR.open("DELETE", `/posts/${formId}`, true);  //destroyアクションへのDELETEリクエストを定義
XHR.send(formData);  //リクエストを送信
XHR.open("POST", `/posts`, true);  //createアクションへのPOSTリクエストを定義
XHR.send(formData);  //リクエストを送信
2. FormDataオブジェクトを自分で定義してcsrfトークンを埋め込む方法
新規ボタンクリックで新規データを保存したい場合、フォームデータからFormDataオブジェクトを作成できないため、自分でFormDataオブジェクトを定義します。
この際、Railsのコントローラーでそのパラメーターを受け取れるようにするには、CSRF対策のcsrfトークンをパラメーター内に含める必要があります。
FormDataオブジェクトを自分で作成する例
newBtn.addEventListener("click", () => {
  const csrfToken = document.querySelector("meta[name='csrf-token']").content;  //csrfトークンを取得
  const formData = new FormData();  //空のFormオブジェクトを作成
  formData.set("authenticity_token", `${csrfToken}`);  //csrfトークンをFormDataにセット
  formData.set("post[text]","");  //空のデータをFormDataにセット

  //以下Ajax処理
  const XHR = new XMLHttpRequest();
  XHR.open("POST", `/posts`, true);
  XHR.responseType = "json";
  XHR.send(formData);
  ・・・
-
csrfトークンとは、リクエスト送信のたびに真正性を確認するための一意のトークンのこと。リクエストを捏造して認証済みユーザーを装うCSRF攻撃から保護するための仕組み。
フォームデータからFormDataオブジェクトを作成した場合は、以下の様にパラメーターにcsrfトークンが含まれるため、コントローラーでパラメーターを受け取る事ができます。
フォームデータからFormDataオブジェクトを作成してリクエスト送信した場合のパラメーター
pry(#<PostsController>)> params
=> <ActionController::Parameters {
  "_method"=>"patch",
  "authenticity_token"=>"9KVGa3jp5Q0qmKDsG9Hxrb6zjy9Se9ORlCA8yqs8+dwc7bE3y5md3j1B19lmpjRqLXLP5PTTP0rQuHY69PRa9A==",
  #↑自分で定義したFormDataオブジェクトにもこの部分(csrfトークン)を含める必要がある。
  "post"=><ActionController::Parameters {"text"=>"aaa"} permitted: false>,
  "controller"=>"posts",
  "action"=>"update",
  "id"=>"118"
  } permitted: false>
このcsrfトークンはapplicationビューの記載にて生成されているため、JSを用いてHTMLから取得し、FormDataオブジェクトにセットします。
ビューにて生成されるcsrfトークン
<!DOCTYPE html>
<html>
  <head>
    <title>AjaxApp</title>
    <%= csrf_meta_tags %>
    <%# ↑この記述で生成されている %>
    ・・・
生成されたcsrfトークン
<head>
  <title>AjaxApp</title>
  <meta name="csrf-param" content="authenticity_token">
  <meta name="csrf-token" content="hBYghOWyAU4IG3aFzV59TFGR5nqmX7YSiej1ezscMIJsXtfYVsJ5nR/CAbCwKbiLwlCmsQD3WsnNcL+LZNSTqg==">
  <!--↑これを取得したい-->
  ・・・
JSでcsrfトークンを取得し、FormDataオブジェクトにセットします。
const csrfToken = document.querySelector("meta[name='csrf-token']").content;
const formData = new FormData();
formData.set("authenticity_token", `${csrfToken}`);
参考
JS処理の実装
上記のポイントを踏まえ、以下4つの処理をJSで実装します。
- データ更新処理
- 削除ボタン処理
- 新規ボタン処理
- 更新日時処理
データ更新処理(JS)
フォーム入力後、「フォーム外をクリックした時」「入力状態のままページ遷移した時」に、該当データを更新する処理
import { updateData } from "./update-data";

const updateForm = () => {
  const textInputs = document.querySelectorAll(".text_input");
  textInputs.forEach((textInput) => {
    textInput.addEventListener("blur", () => {  //フォームからブラーした時
      updateData(textInput);  //データ更新処理
    });
    textInput.addEventListener("focus", () => {  //フォームがフォーカスした時
      window.addEventListener("beforeunload", () => {  //ページ遷移イベント前
        updateData(textInput);  //データ更新処理
      });
    });
  });
}

window.addEventListener("load", updateForm);
Ajaxを用いてPUTリクエストを送信する処理
import { updateTime } from "./update-time";

const updateData = (textInput) => {
  const form = textInput.parentElement;
  const formId = form.getAttribute("data");
  const formData = new FormData(form);
  const XHR = new XMLHttpRequest();
  XHR.open("PUT", `/posts/${formId}`, true);
  XHR.send(formData);
  updateTime();
};

export { updateData };
削除ボタン処理(JS)
「削除ボタンを押した時」に、該当データを削除する処理
import { deleteData } from "./delete-data";

const deleteForm = () => {
  const deleteBtns = document.querySelectorAll(".delete_btn");
  deleteBtns.forEach((deleteBtn) => {
    deleteBtn.addEventListener("click", () => { //削除ボタンをクリックした時
      deleteData(deleteBtn);  //データ削除処理
    });
  });
};

window.addEventListener("load", deleteForm);
Ajaxを用いてDELETEリクエストを送信する処理
import { updateTime } from "./update-time";

const deleteData = (deleteBtn) => {
  const form = deleteBtn.parentElement;
  const formId = form.getAttribute("data");
  const formData = new FormData(form);
  const XHR = new XMLHttpRequest();
  XHR.open("DELETE", `/posts/${formId}`, true);
  XHR.send(formData);
  XHR.onload = () => {
    form.remove();
    updateTime();
  };
}

export { deleteData };
新規ボタン処理(JS)
「新規ボタンを押した時」の処理は以下の2つに別れます。
- 空データをデータベースに登録し、新規フォームを追加する処理
- 新規フォームに対して「データ更新処理」「削除ボタン処理」を埋め込む処理
空データを登録する理由
追加するフォームに更新機能をもたせるためには、紐づくデータを先に登録しておく必要があるため。
新規フォームに対して「データ更新処理」「削除ボタン処理」を埋め込む理由
新規フォームに対してそれぞれ処理を埋め込まなければ、既存の処理と干渉してエラーが生じるため。
※新規フォーム追加時には既存フォームと区別できるクラス名(new・・・等)をつけます。
import { deleteData } from "./delete-data";
import { updateData } from "./update-data";
import { updateTime } from "./update-time";

const newForm = () => {
  const newBtn = document.getElementById("new_btn");
  newBtn.addEventListener("click", () => {

    //空データを作成し、POSTリクエストを送信する処理
    const csrfToken = document.querySelector("meta[name='csrf-token']").content;
    const formData = new FormData();
    formData.set("authenticity_token", `${csrfToken}`);
    formData.set("post[text]","");
    const XHR = new XMLHttpRequest();
    XHR.open("POST", `/posts`, true);
    XHR.responseType = "json";
    XHR.send(formData);

    //登録した空データを受け取り、新規フォームを追加する処理
    XHR.onload = () => {
      const newPost = XHR.response.new_post;
      const html =
        `<form data="${newPost.id}" action="/posts/${newPost.id}" accept-charset="UTF-8" data-remote="true" method="post">
          <input type="hidden" name="_method" value="patch">
          <input type="hidden" name="authenticity_token" value="${csrfToken}">
          <label for="post_text">No.${newPost.id}</label>
          <textarea class="new_text_input_${newPost.id}" name="post[text]" id="post_text"></textarea>
          <button class="new_delete_btn_${newPost.id}">削除</button>
        </form>`;
      const texts = document.getElementById("texts");
      texts.insertAdjacentHTML("afterbegin", html);

      updateNewForm(newPost.id);
      deleteNewForm(newPost.id);
      updateTime();
    };
  });

  //新規フォームに対しての「データ更新処理」
  const updateNewForm = (newPostId) => {
    const newTextInput = document.querySelector(`.new_text_input_${newPostId}`);
    newTextInput.addEventListener("blur", () => {
      updateData(newTextInput);
    });
    newTextInput.addEventListener("focus", () => {
      window.addEventListener("beforeunload", () => {
        updateData(newTextInput);
      });
    });
  };

  //新規フォームに対しての「削除ボタン処理」
  const deleteNewForm = (newPostId) => {
    const newDeleteBtn = document.querySelector(`.new_delete_btn_${newPostId}`);
    newDeleteBtn.addEventListener("click", () => {
      deleteData(newDeleteBtn);
    });
  };
};

window.addEventListener("load", newForm);
更新日時処理(JS)
データが更新された事がわかるよう更新日時を表示させます。
const updateTime = () => {
  const now = new Date();
  const localTime = now.toLocaleString();
  const lastUpdate = document.getElementById("last_update");
  const html = `更新日時:${localTime}`;
  lastUpdate.innerHTML = html;
};

export { updateTime };
おわりに
正直もっといい方法があるかもしれませんが、初めてのアプリ制作にて思考錯誤した方法を紹介させて頂きました。