概要
1次元のセルオートマトンのシミュレーションを実装して、ルール0~ルール255を観察してみました。
例えば、ルール18を選択して実行すると次のようなパターンが得られます。選択するルールによってパターンは様々で、実行してみるまでは予測しにくいです。初期状態(1行目)の状態によって、描かれるパターンも移り変わるので初期状態をランダムにして実行する楽しみもあります。
次のパターンは、左側が1行目を中央に1セルで、右側が1行目をランダムな状態で実行した例です。


初等セルオートマトンとは
初等セルオートマトン(Elementary Cell Automaton)は、セルオートマトンの中で最も単純なシミュレーションです。これは、0または1のセルを横一列に並べ、各セルの次の状態をルールによって決定する1次元のモデルです。通常、各セルの次の状態は、自分と両隣のセル、合計3つのセルの状態に基づいて決定されます。
3つのセルの状態は、2^3=8通りのパターンが考えられます。ルールはこれら8つのパターンに対して決められており、例えば"001"のパターンでは中央のセルが"1"になる、"010"のパターンでも中央のセルが"1"になる、というように定義されます。
セルが次世代で1または0のどちらの状態になるかを決定するため、ルールの組み合わせは2^8=256通り存在します。これら256種類のセルオートマトンは、一般にウルフラムが考案した0から255までのルール番号で参照され、ウルフラム・コードと呼ばれます。この256種類のセルオートマトンは、いくつかの論文で研究・比較されています。
ルールの決定方法
現在の状態:111 110 101 100 011 010 001 000
↓
次の状態(中央):0 0 0 1 1 1 1 0
$2^7・0+2^6・0+2^5・0+2^4・1+2^3・1+2^2・1+2^1・1+2^0・0$
$2^4・1+2^3・1+2^2・1+2^1・1 = 16+8+4+2 = 30$
現在の状態:111 110 101 100 011 010 001 000
↓
次の状態(中央):0 1 1 0 1 1 1 0
$2^7・0+2^6・1+2^5・1+2^4・0+2^3・1+2^2・1+2^1・1+2^0・0$
$2^6・1+2^5・1+2^3・1+2^2・1+2^1・1 = 64+32+8+4+2 = 110$
シミュレーション
初等セルオートマトンのシミュレーションを行い、その結果を画像として保存し、
最終的にPDFにまとめるPythonスクリプトを含んでいます。
スクリプト構成
-
eca_simulation.py: 初等セルオートマトンのシミュレーションを行うモジュールです。ルール番号に基づいてセルの状態を更新し、シミュレーション結果を画像として保存します. -
main.py: シミュレーションを実行し、画像を生成し、最終的にPDFにまとめるメインスクリプトです。
import os
from random import randint
import matplotlib.pyplot as plt

class Rule:
    def __init__(self, rule_no):
        self.rule_no = rule_no
        self.rule = self._init_rule(rule_no)

    def _init_rule(self, rule_no):
        R = 8
        rule = [0 for _ in range(R)]
        for i in range(R):
            rule[i] = rule_no % 2
            rule_no //= 2
        return rule

    def apply(self, left, center, right):
        return self.rule[right * 4 + center * 2 + left]


class CellularAutomaton:
    def __init__(self, size=50, is_rand=False):
        self.size = size
        self.is_rand = is_rand
        self.ca, self.current_state = self._init_eca(size, is_rand)

    def _init_eca(self, size, is_rand):
        ca = [randint(0, 1) for _ in range(size)] if is_rand else [0] * size
        if not is_rand:
            ca[size // 2] = 1
        current_state = [[0] * size for _ in range(size)]
        current_state[0] = ca[::-1]
        return ca, current_state

    def update(self, rule):
        size = len(self.ca)
        next_ca = [0] * size
        for i in range(size):
            left = self.ca[i - 1]
            center = self.ca[i]
            right = self.ca[(i + 1) % size]
            next_ca[i] = rule.apply(left, center, right)
        self.ca = next_ca

    def run(self, rule, max_t):
        for t in range(1, max_t):
            self.update(rule)
            self.current_state[t] = self.ca[::-1]

    def get_current_state(self):
        return self.current_state


class ECAPlotter:
    @staticmethod
    def plot_and_save(current_state, rule_no, save_path):
        os.makedirs(save_path, exist_ok=True)
        fig, ax = plt.subplots()
        ax.imshow(current_state, cmap='binary')
        ax.set_title(f"Rule: {rule_no}")
        plt.savefig(os.path.join(save_path, f'Rule{rule_no}.png'))
        plt.close()
import os
from eca_simulation import Rule, CellularAutomaton, ECAPlotter
from eca_pdf import create_pdf_with_flexible_grid
from tqdm import tqdm

def simulate_and_save_images(is_rand, max_t, output_folder):
    for rule_no in tqdm(range(256), desc="Processing rules"):
        rule = Rule(rule_no)
        automaton = CellularAutomaton(size=50, is_rand=is_rand)
        automaton.run(rule, max_t)
        current_state = automaton.get_current_state()
        ECAPlotter.plot_and_save(current_state, rule_no, output_folder)

def main():
    is_rand = False  # 初期状態のフラグ
    max_t = 50  # 最大ステップ数
    base_folder = 'eca_results'

    # フォルダとPDFの名前を設定
    if is_rand:
        output_folder = f"{base_folder}_rand"
        output_pdf = f"{base_folder}_rand.pdf"
    else:
        output_folder = base_folder
        output_pdf = f"{base_folder}.pdf"

    # シミュレーションと画像保存
    simulate_and_save_images(is_rand, max_t, output_folder)

    # 画像をPDFにまとめる
    per_page = 8  # 1ページに配置する画像の数
    rows = 4      # グリッドの行数
    cols = 2      # グリッドの列数
    create_pdf_with_flexible_grid(output_folder, output_pdf, per_page, rows, cols)

if __name__ == "__main__":
    main()
実行結果
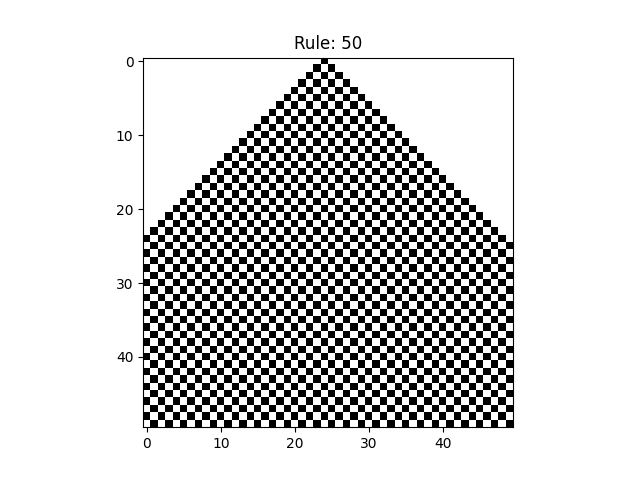
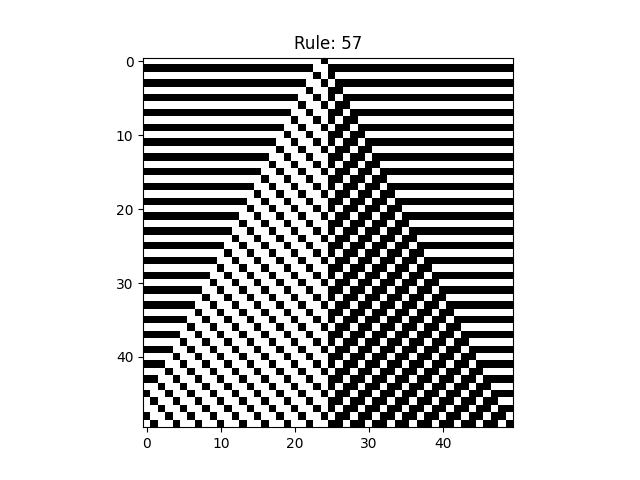
興味深いパターンの例です。
ルール30

ルール50

ルール57

ルール110
