この記事について
この記事ではGCPのVisionAPIを難しいことをすっ飛ばして使ってみる方法について書いています。
初めてでも、画像の通りにすれば使えます。
参考ページ
Google Vision API
https://cloud.google.com/vision/docs/ocr/?hl=ja
(Google Cloud SDKをインストールせずに行けました。pipでgoogle-cloud-visionを入れたおかげ?)
作業準備
Windows10
Python 3.7のインストール
GCPアカウントの作成
読み取りたい画像の準備
作業開始
ライブラリのインストール
最初にGoogle Vision APIのライブラリを取得します。
以下のコマンドを入力します。
pip install --upgrade google-cloud-vision
インストールが出来たらテストを行います。
Pythonを開いて
from google.cloud import vision
を実行します。
これでエラーが出なければ大丈夫です。
もしできていなければ
Python 3.7.7 (default, May 6 2020, 11:45:54) [MSC v.1916 64 bit (AMD64)] :: Anaconda, Inc. on win32
Type "help", "copyright", "credits" or "license" for more information.
>>> from google.cloud import vision
Traceback (most recent call last):
File "", line 1, in
ImportError: cannot import name 'vision' from 'google.cloud' (unknown location)
と表示されます。
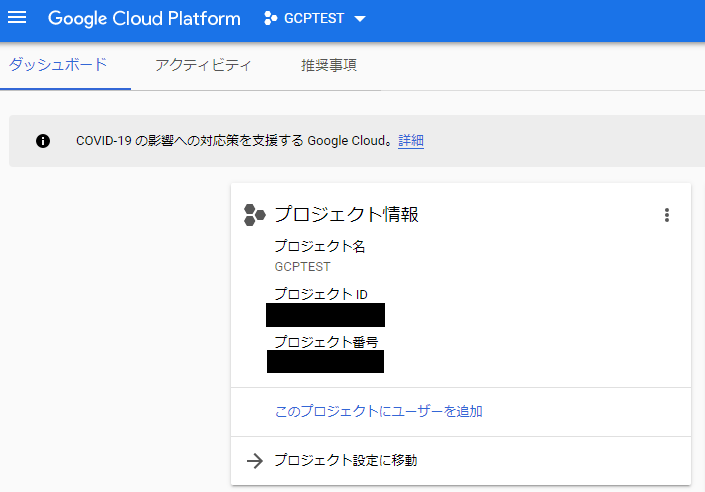
GCPプロジェクトの作成
今回は新規でGCPプロジェクトを立てます。

新しいプロジェクトを押します。
プロジェクト名などはわかりやすい名前で適当に作成してください。
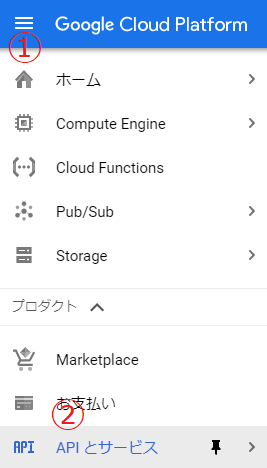
APIの有効化
プロジェクトを作成したら次にVision APIを有効にします。
画像の番号の順番でクリックしてください。

検索窓に「google vision api」と入力します。
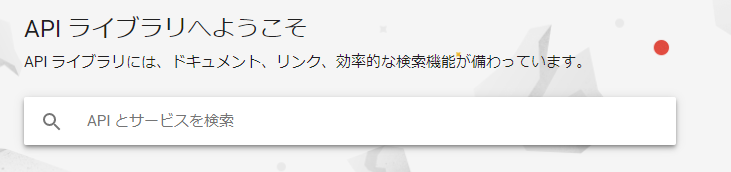
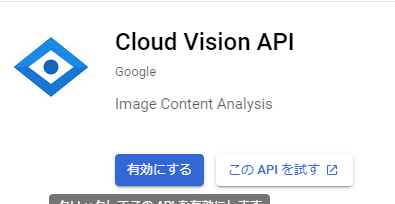
表示された項目をクリックします。

有効にするボタンをクリックします。
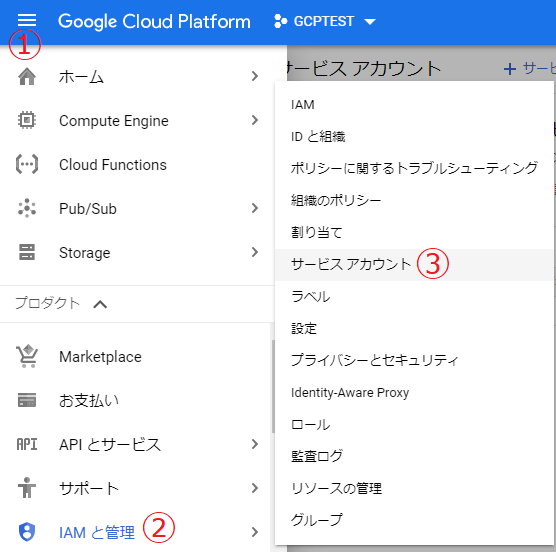
サービスアカウントの作成
画像の番号の通りに選択します。

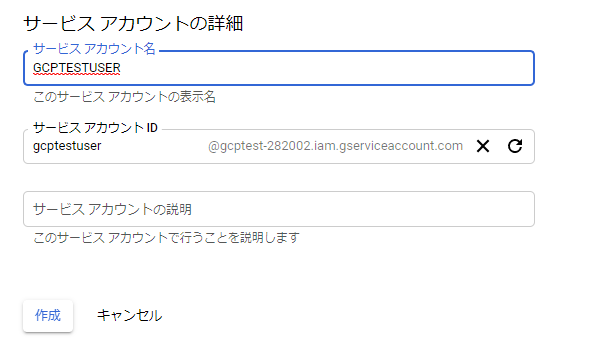
適当なサービスアカウント名を入力します。
IDは自動的に入力されますので、そのままで大丈夫です。
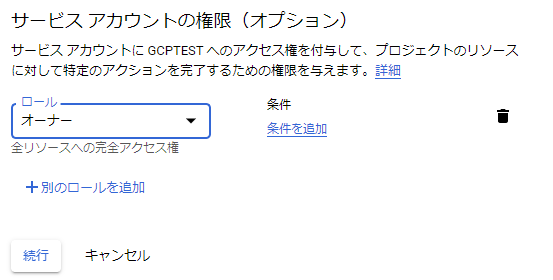
適当なロールを選択してください。
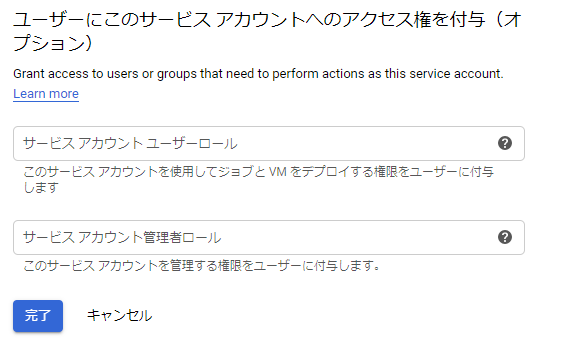
次の画面はそのまま完了します。
サービスアカウントが追加されました。

操作の をクリックして、「鍵を作成」を選択します。

JSONを選択して完了ボタンを押します。
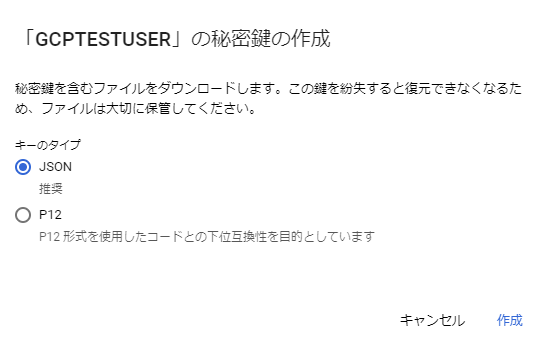
ダウンロードしたファイルを任意の場所に移動します。
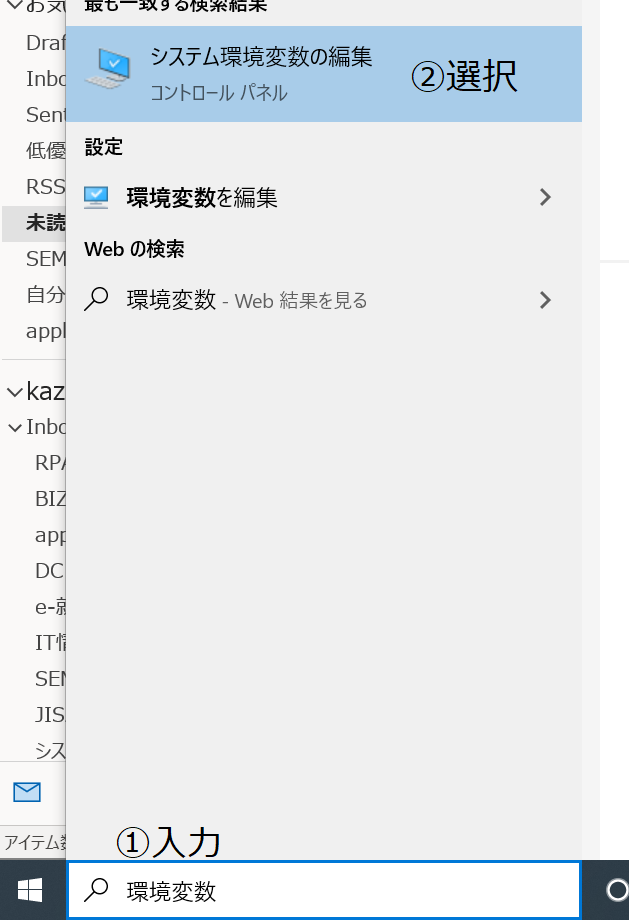
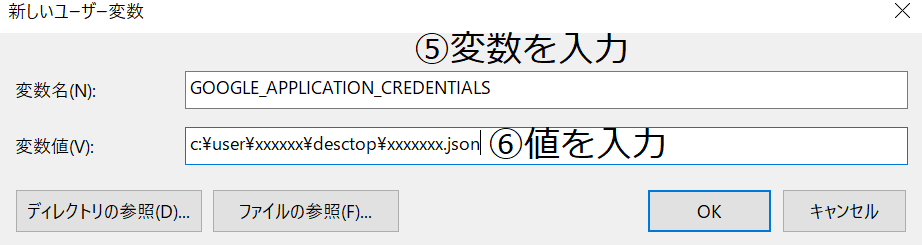
環境変数の設定
環境変数の設定を行います。
変数:GOOGLE_APPLICATION_CREDENTIALS
値 :ダウンロードしたjsonファイルの場所と名前(例:c:\user\xxxxxx\desctop\xxxxxxx.json)
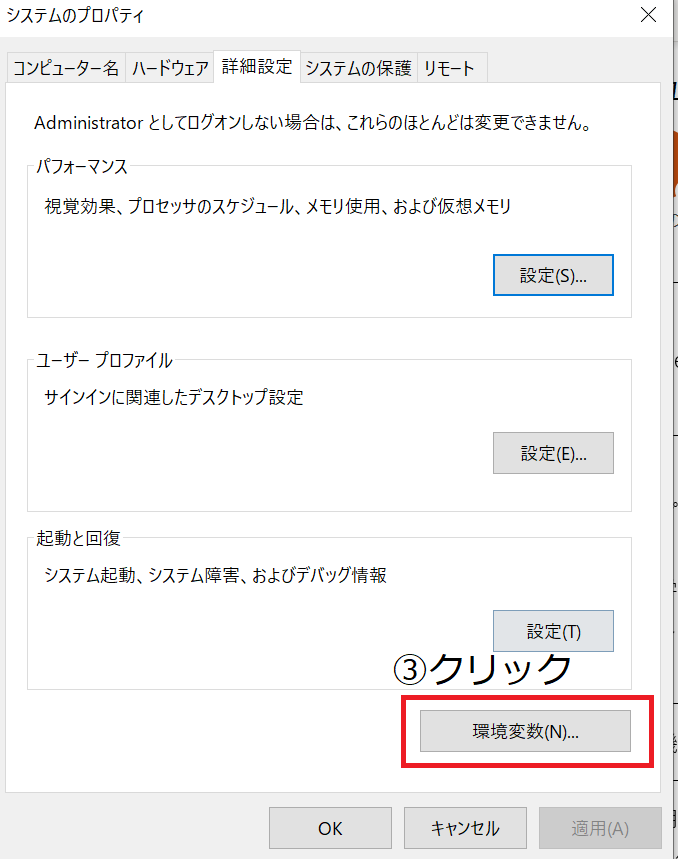
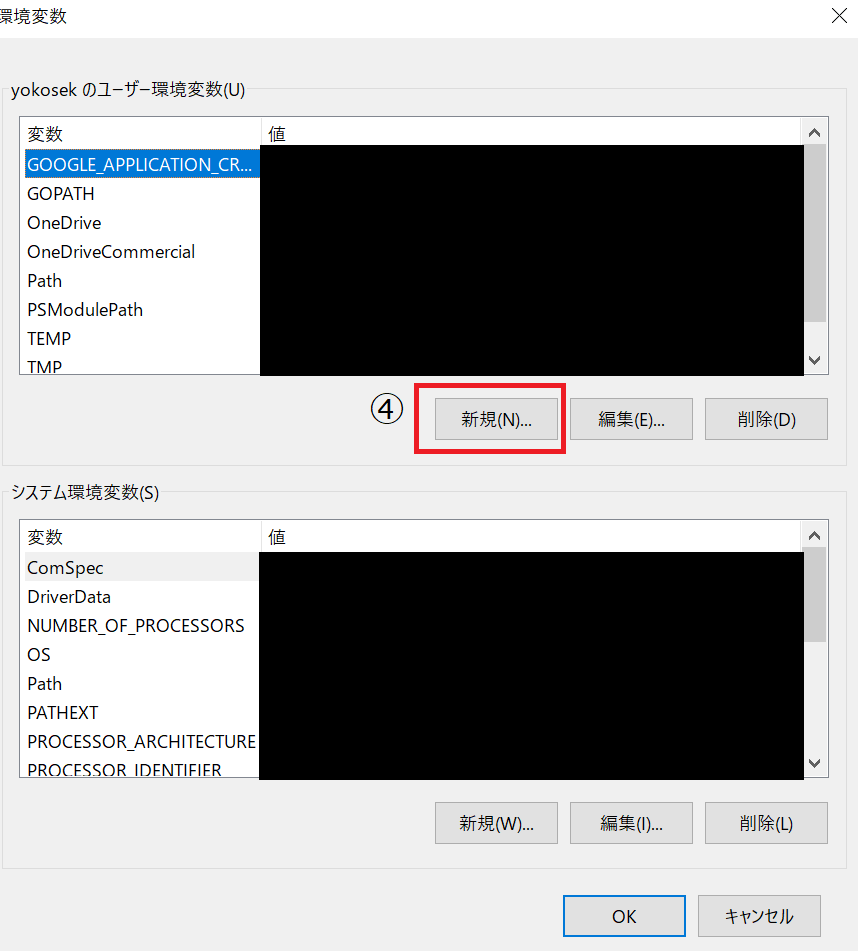
以下設定手順です。
画像内の番号通りに進めます。
ソースコード
Githubから持ってきたソースコードを変更します。
"""Detects text in the file."""
from google.cloud import vision
import io
client = vision.ImageAnnotatorClient()

# [START vision_python_migration_text_detection]
path = "C:\\Users\\xxxx\\Desktop\\gcptest\\xxxxx.png"
with io.open(path, 'rb') as image_file:
    content = image_file.read()

image = vision.types.Image(content=content)

response = client.text_detection(image=image)
texts = response.text_annotations
print('Texts:')

for text in texts:
    print('\n"{}"'.format(text.description))

    vertices = (['({},{})'.format(vertex.x, vertex.y)
                for vertex in text.bounding_poly.vertices])

    print('bounds: {}'.format(','.join(vertices)))

if response.error.message:
    raise Exception(
        '{}\nFor more info on error messages, check: '
        'https://cloud.google.com/apis/design/errors'.format(
            response.error.message))
ソースコード内の7行目の「path = "C:\Users\xxxx\Desktop\gcptest\xxxxx.png"」の部分を変更することで画像を変更できます。
例として以下の画像を使用します。
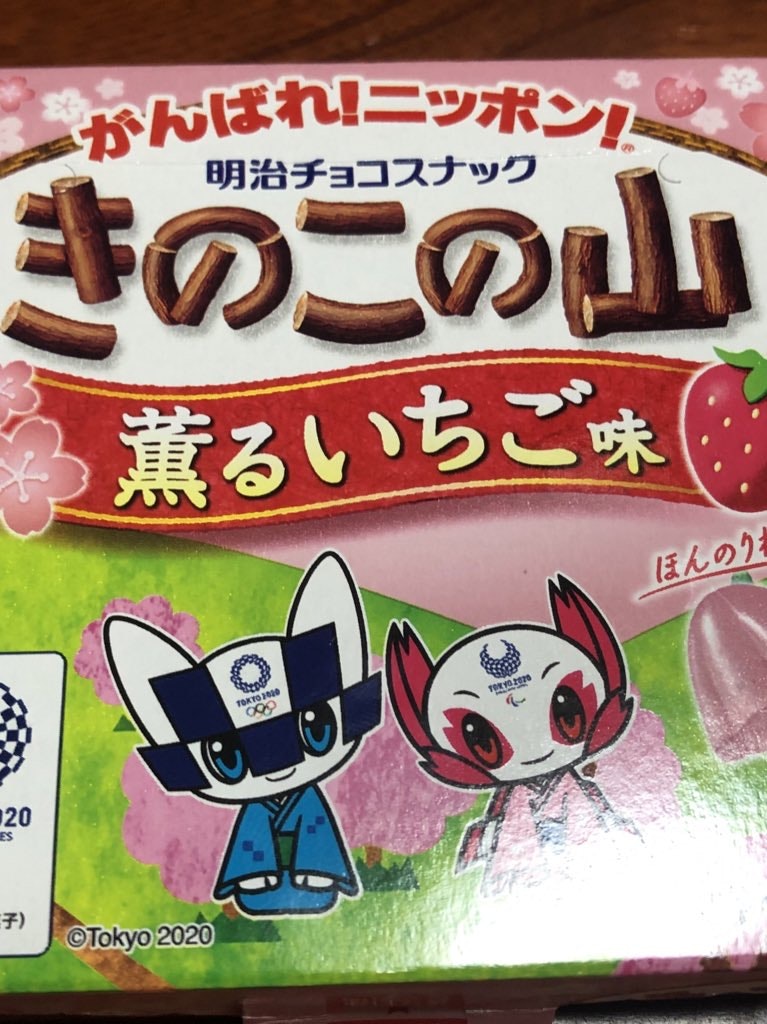
出力結果
"かんばれニッポン
明治チョコスナック
きのこの山
薫るいちご味
ほんの
TOKTO 0
20
ES
子)
©Tokyo 2020
"
bounds: (1,66),(745,66),(745,954),(1,954)
"かんばれ"
bounds: (72,80),(351,73),(353,152),(74,159)
"ニッポン"
bounds: (353,73),(619,66),(621,145),(355,152)
"明治"
bounds: (208,151),(305,150),(305,190),(208,191)
"チョコ"
bounds: (307,151),(405,150),(405,189),(307,190)
"スナック"
bounds: (394,156),(535,155),(535,184),(394,185)
"きのこ"
bounds: (33,167),(471,157),(475,354),(37,364)
"の"
bounds: (473,157),(569,155),(573,352),(477,354)
"山"
bounds: (571,155),(735,151),(739,348),(575,352)
"薫る"
bounds: (131,403),(314,390),(322,502),(139,516)
"いちご"
bounds: (315,390),(596,370),(604,482),(323,503)
"味"
bounds: (598,370),(671,365),(679,476),(606,482)
"ほんの"
bounds: (637,551),(736,527),(745,564),(646,588)
"TOKTO"
bounds: (236,697),(260,690),(263,701),(239,708)
"0"
bounds: (262,691),(277,687),(280,696),(265,701)
"20"
bounds: (1,804),(34,804),(34,829),(1,829)
"ES"
bounds: (1,828),(16,828),(16,844),(1,844)
"子"
bounds: (1,910),(18,910),(18,932),(1,932)
")"
bounds: (19,912),(24,912),(24,927),(19,927)
"©Tokyo"
bounds: (72,924),(150,921),(151,951),(73,954)
"2020"
bounds: (157,921),(210,919),(211,949),(158,951)
さすがきのこの山