目次
formikとyupについて
formikは、Reactでよく使われる入力支援ライブラリです。
私が携わったプロジェクトでは、フォーム入力項目の値保持のために使用していました。
yupは、バリデーション用ライブラリ。formikのみでもバリデーションを実装できるようですが、JavaScriptでスキーマ(データ構造)を定義するためのライブラリである、ということらしいです。
つまり、バリデーションを定義体で宣言し利用できるということでしょう。
※Part9ということになっていますが、Part5くらいの位置付けですね。
React入門全部書き終えたら入れ替えたいと思います。
インストール
Part2の環境設定を終えたら、プロジェクトディレクトリで下記を実行しformikをインストール
npm i formik
yupをインストール
yarn add yup
上記2つは
yarn add formik yup
でもいいみたいですね。
コーディング(formik)
import React, {useState, useLayoutEffect} from 'react';
import { useFormik } from 'formik';

export const FormikTest: React.FC = () => {
    // formikの定義
    const formik = useFormik({
      // 初期値の定義
      initialValues: {
        id: 'yokowake',
        pwd: '',
      },
      // サブミット時の処理を記述
      onSubmit: (values) => {
        console.log('form data', values);
      },
    });

    /** レンダー部分 */
    return (
      <div>
        <form>
          <div>
            <label htmlFor="id">Id</label>
            <input
              type="text"
              id="id"
              name="id"
              onChange={formik.handleChange}
              value={formik.values.id}
            />
          </div>
          <div>
            <label htmlFor="pwd">Pwd</label>
            <input
              type="text"
              id="pwd"
              name="pwd"
              onChange={formik.handleChange}
              value={formik.values.pwd}
            />
          </div>

          <button onClick={() => formik.handleSubmit()}>Submit</button>
        </form>
      </div>
    );
};

export default FormikTest;
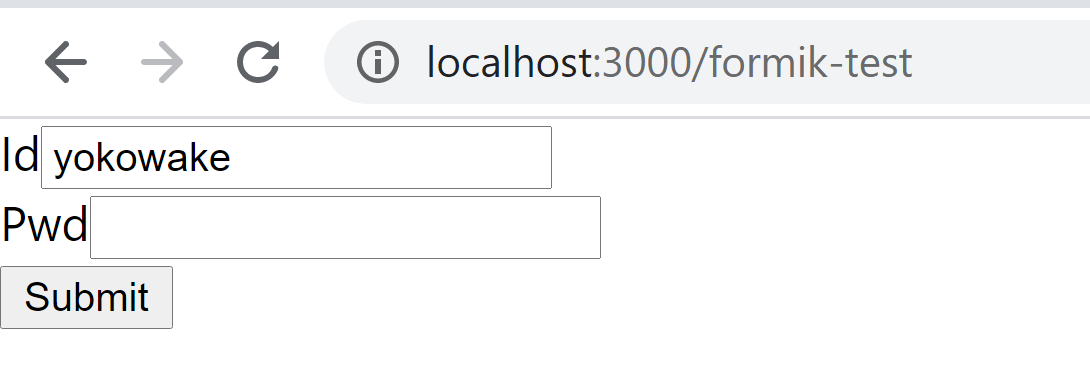
以下でアクセスすると、初期値が表示されていますね。
また、Submitボタンクリックするとコンソールに入力値が出力されていることが確認できると思います。
localhost:3000/formik-test
コーディング(yup)
上記ソースに加え、バリデーションを実装してみます。
import React, {useState, useLayoutEffect} from 'react';
import { useFormik } from 'formik';
import * as Yup from "yup";  // yupをimport

export const FormikTest: React.FC = () => {

  // ★☆★☆入力チェックスキーマ
  const validationSchema =
    Yup.object({
      id: Yup.string()
        .required("idは必須項目です"),
      pwd: Yup.string().required("パスワードは必須項目です")
    });

  // formik定義
  const formik = useFormik({
      // 初期値の定義
      initialValues: {
        id: 'yokowake',
        pwd: '',
      },
      // ★☆★☆バリデーション定義
      validationSchema,
      // サブミット時の処理を記述
      onSubmit: (values) => {
        alert('form data : ' + JSON.stringify(values))
      },
    });

    /** レンダー部分 */
    return (
      <div>
        <form onSubmit={formik.handleSubmit}>
          <div>
            <label htmlFor="id">Id</label>
            <input
              type="text"
              id="id"
              name="id"
              onChange={formik.handleChange}
              value={formik.values.id}
            />
            {/* ★☆★☆エラー表示 */}
            {formik.touched.id && formik.errors.id ? (
              <div className="error">
                <span style={{color: 'red'}}>{formik.errors.id}</span>
              </div>
            ) : null}
          </div>
          <div>
            <label htmlFor="pwd">Pwd</label>
            <input
              type="text"
              id="pwd"
              name="pwd"
              onChange={formik.handleChange}
              value={formik.values.pwd}
            />
            {/* ★☆★☆エラー表示 */}
            {formik.touched.pwd && formik.errors.pwd ? (
              <div className="error">
                <span style={{color: 'red'}}>{formik.errors.pwd}</span>
              </div>
            ) : null}
          </div>
          {/* サブミットボタン */}
          <button onClick={() => formik.handleSubmit()}>Submit</button>
        </form>
      </div>
    );
};

export default FormikTest;
formikの定義とnameプロパティを一致させて実装します。
動作確認してみてください。
必須チェックが実装できたことが確認できると思います。
必須チェック以外にも桁数チェックなどを実際は実装していくかと思います。
属性チェックなども。
詳しくはyupなどでググってみてください。
以上
