Serverless Frameworkに入門した時の忘備録。
扱う内容
- serverlessのいいところ
- serverlessのインストール
- プロジェクト作成 ~ ローカル実行 ~ デプロイのチュートリアル
- HTTP API作成
- requirements.txtで外部ライブラリインストール
-
numpyとかinstallしたい時の注意点も。
-
- レイヤーの生成・使用
- エラー関連
対象読者
- aws-cliの設定が終わってる
- AWS Lambdaについて知見がある
Serverless Frameworkのいいところ
- deployが簡単
- インフラのコード化が可能
- プラグインが豊富(warmupのプラグインなど)
詳細は、以下の記事等を見てもらえればと思います。
https://www.wantedly.com/companies/forstartups/post_articles/279817
serverlessのインストール
Serverless FrameworkはNode.jsのcliツール。
npmからインストール。
npm install -g serverless
sls -v # serverlessが正しくインストールされたか、バージョン確認する。
プロジェクト作成 ~ ローカル実行 ~ デプロイまで
1 : プロジェクトを作成。
# sls create --template <テンプレート> -p <プロジェクト名>
sls create --template aws-python3 -p test-sls

cd test-sls # プロジェクト内に移動
tree -a . # 生成ファイルを確認。
# test-sls
# ├── .gitignore
# ├── handler.py
# └── serverless.yml
ファイルの中身は以下のようになっています。
import json

def hello(event, context):
    body = {
        "message": "Go Serverless v1.0! Your function executed successfully!",
        "input": event
    }

    response = {
        "statusCode": 200,
        "body": json.dumps(body)
    }

    return response

    # Use this code if you don't use the http event with the LAMBDA-PROXY
    # integration
    """
    return {
        "message": "Go Serverless v1.0! Your function executed successfully!",
        "event": event
    }
    """
# コメントは記載してない。
service: test-sls
provider:
  name: aws
  runtime: python3.7

functions:
  hello:
    handler: handler.hello
ローカルで実行
# ローカルで実行する
sls invoke local --function hello
> {
    "statusCode": 200,
    "body": "{\"message\": \"Go Serverless v1.0! Your function executed successfully!\", \"input\": {}}"
}

# eventにデータを渡したい際は、'--data'を使用する。
sls invoke local --function hello --data "event arguments"
> {
    "statusCode": 200,
    "body": "{\"message\": \"Go Serverless v1.0! Your function executed successfully!\", \"input\": \"event arguments\"}"
}
--functionで指定するのは、serverless.ymlのfunctionsに記載されたfunction。
デプロイ
sls deploy -v # -v optionでログが出力される
sls invoke --function hello # AWS上での実行
削除
削除も超絶簡単。
sls remove -v
HTTP API作成
# predict functionを追加してみる
functions:
  predict:
    handler: handler.predict
    events:
      - http:
          path: "test-sls/users/predict"
          method: get
  hello:
    handler: handler.hello
ひとまずこれでdeployしてみる。
sls deploy
> ... # デプロイ後にリソース名、endpointなども表示される。
> Serverless: Stack update finished...
Service Information
service: test-sls
stage: dev
region: ap-northeast-1
stack: test-sls-dev
resources: 12
api keys:
  None
endpoints:
  GET - https://d8yq8u80ec.execute-api.ap-northeast-1.amazonaws.com/dev/test-sls/users/predict
functions:
  hello: test-sls-dev-hello
layers:
  None
serverlessは内部的にAWS Lambda アプリケーションを利用しているようで、
以下のようにアプリケーションから使用リソースを俯瞰できる。
AWS Lambda アプリケーションはLambda関連のリソースをまとめて管理し、CI/CDしやすくしたもの。
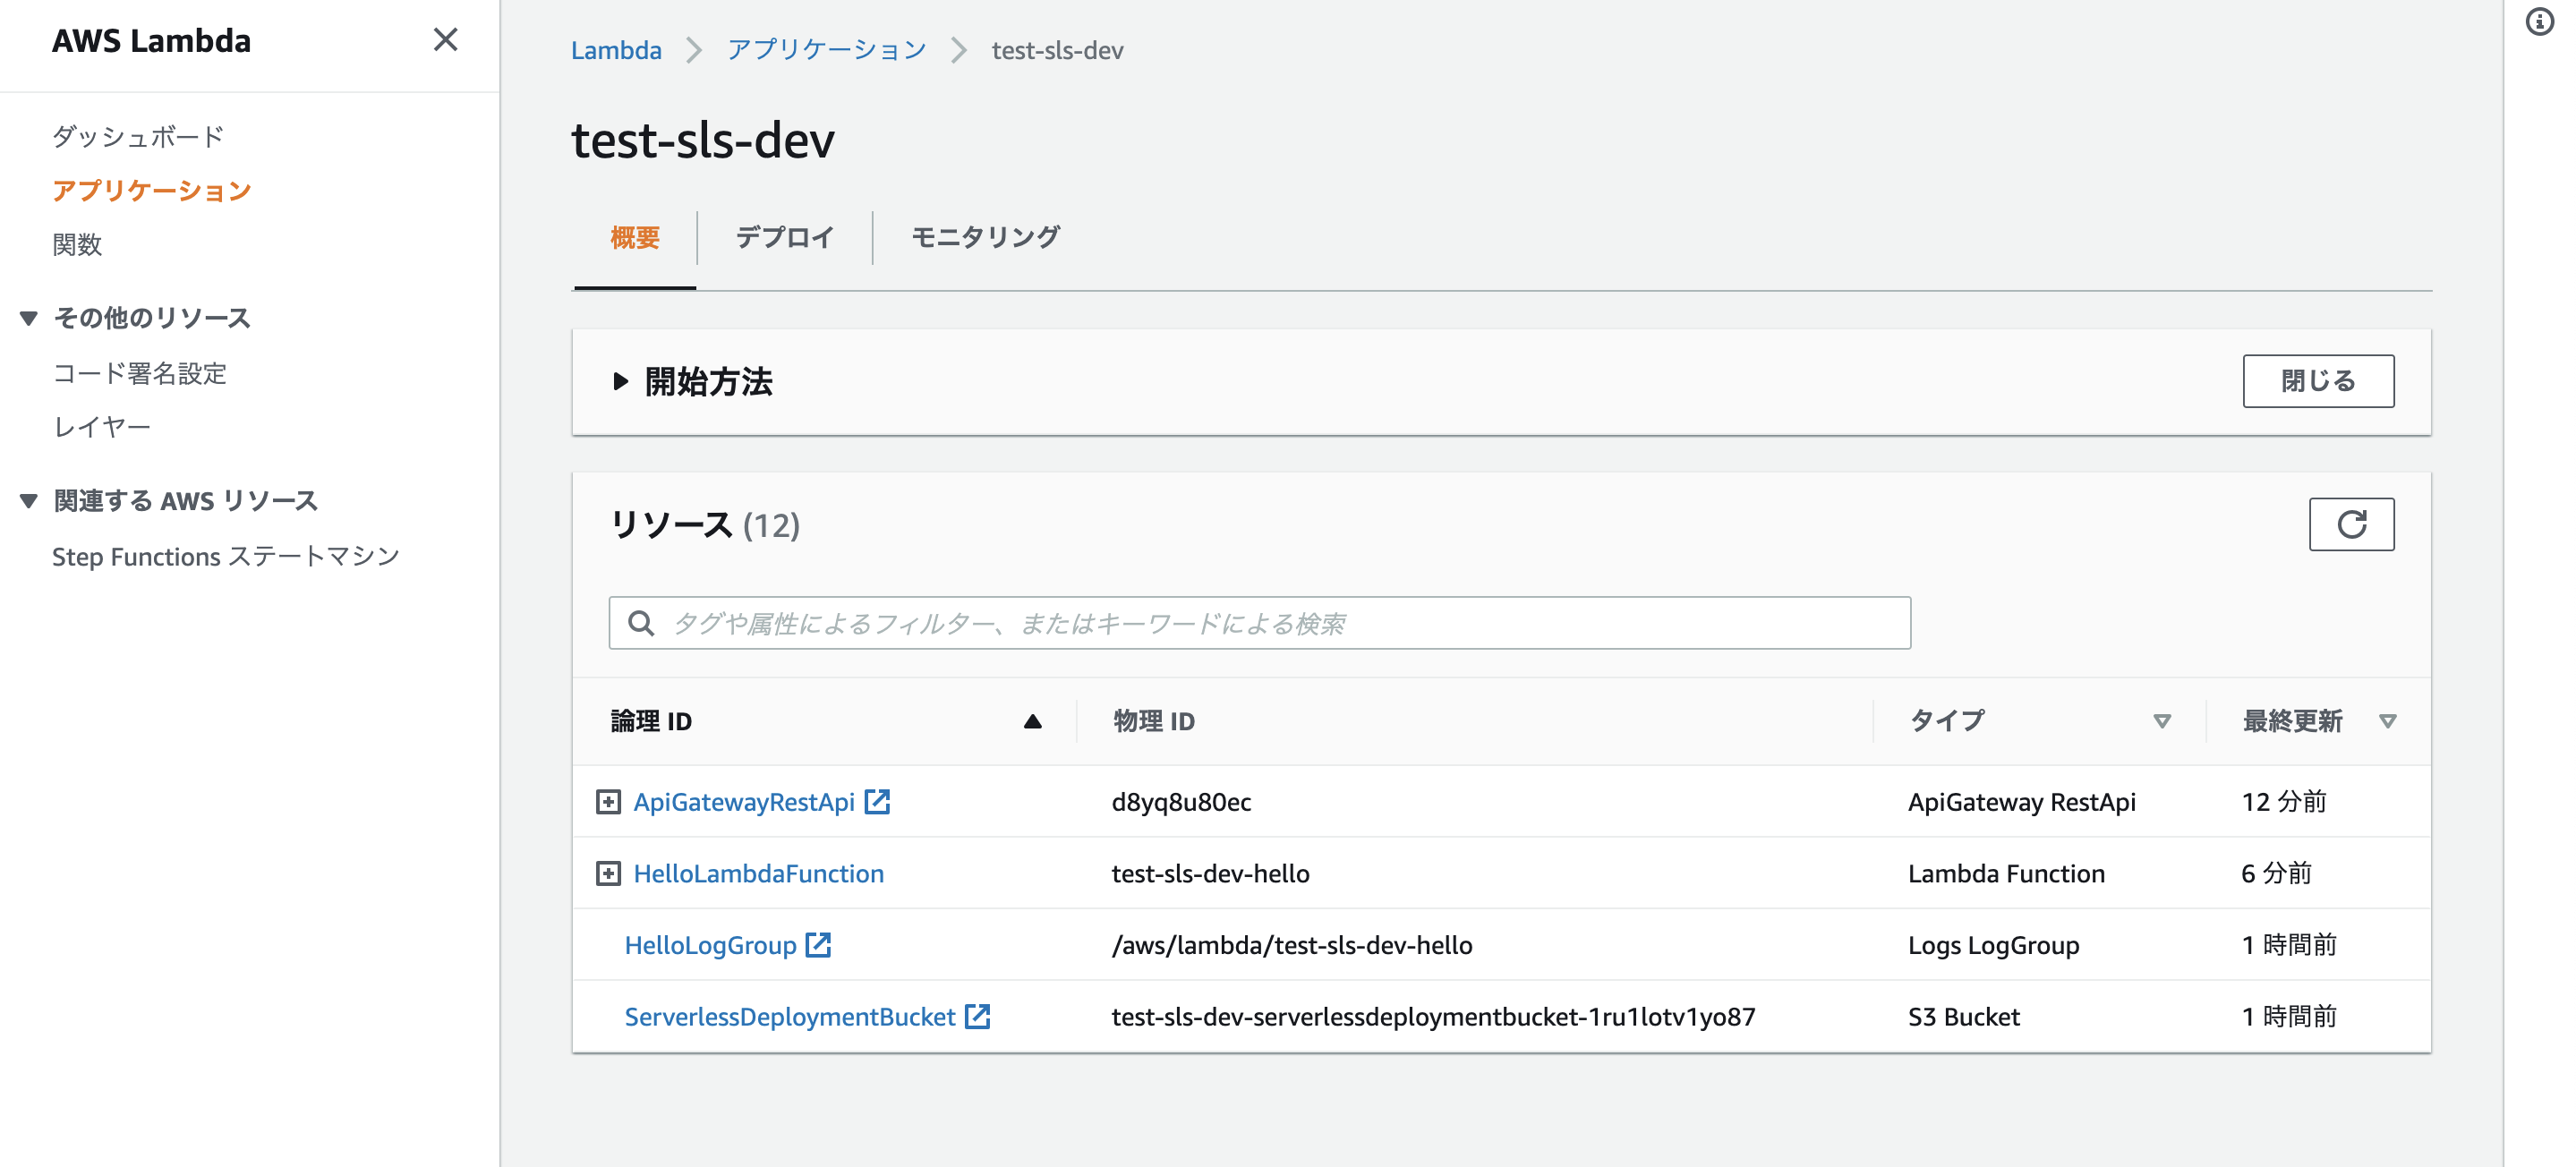
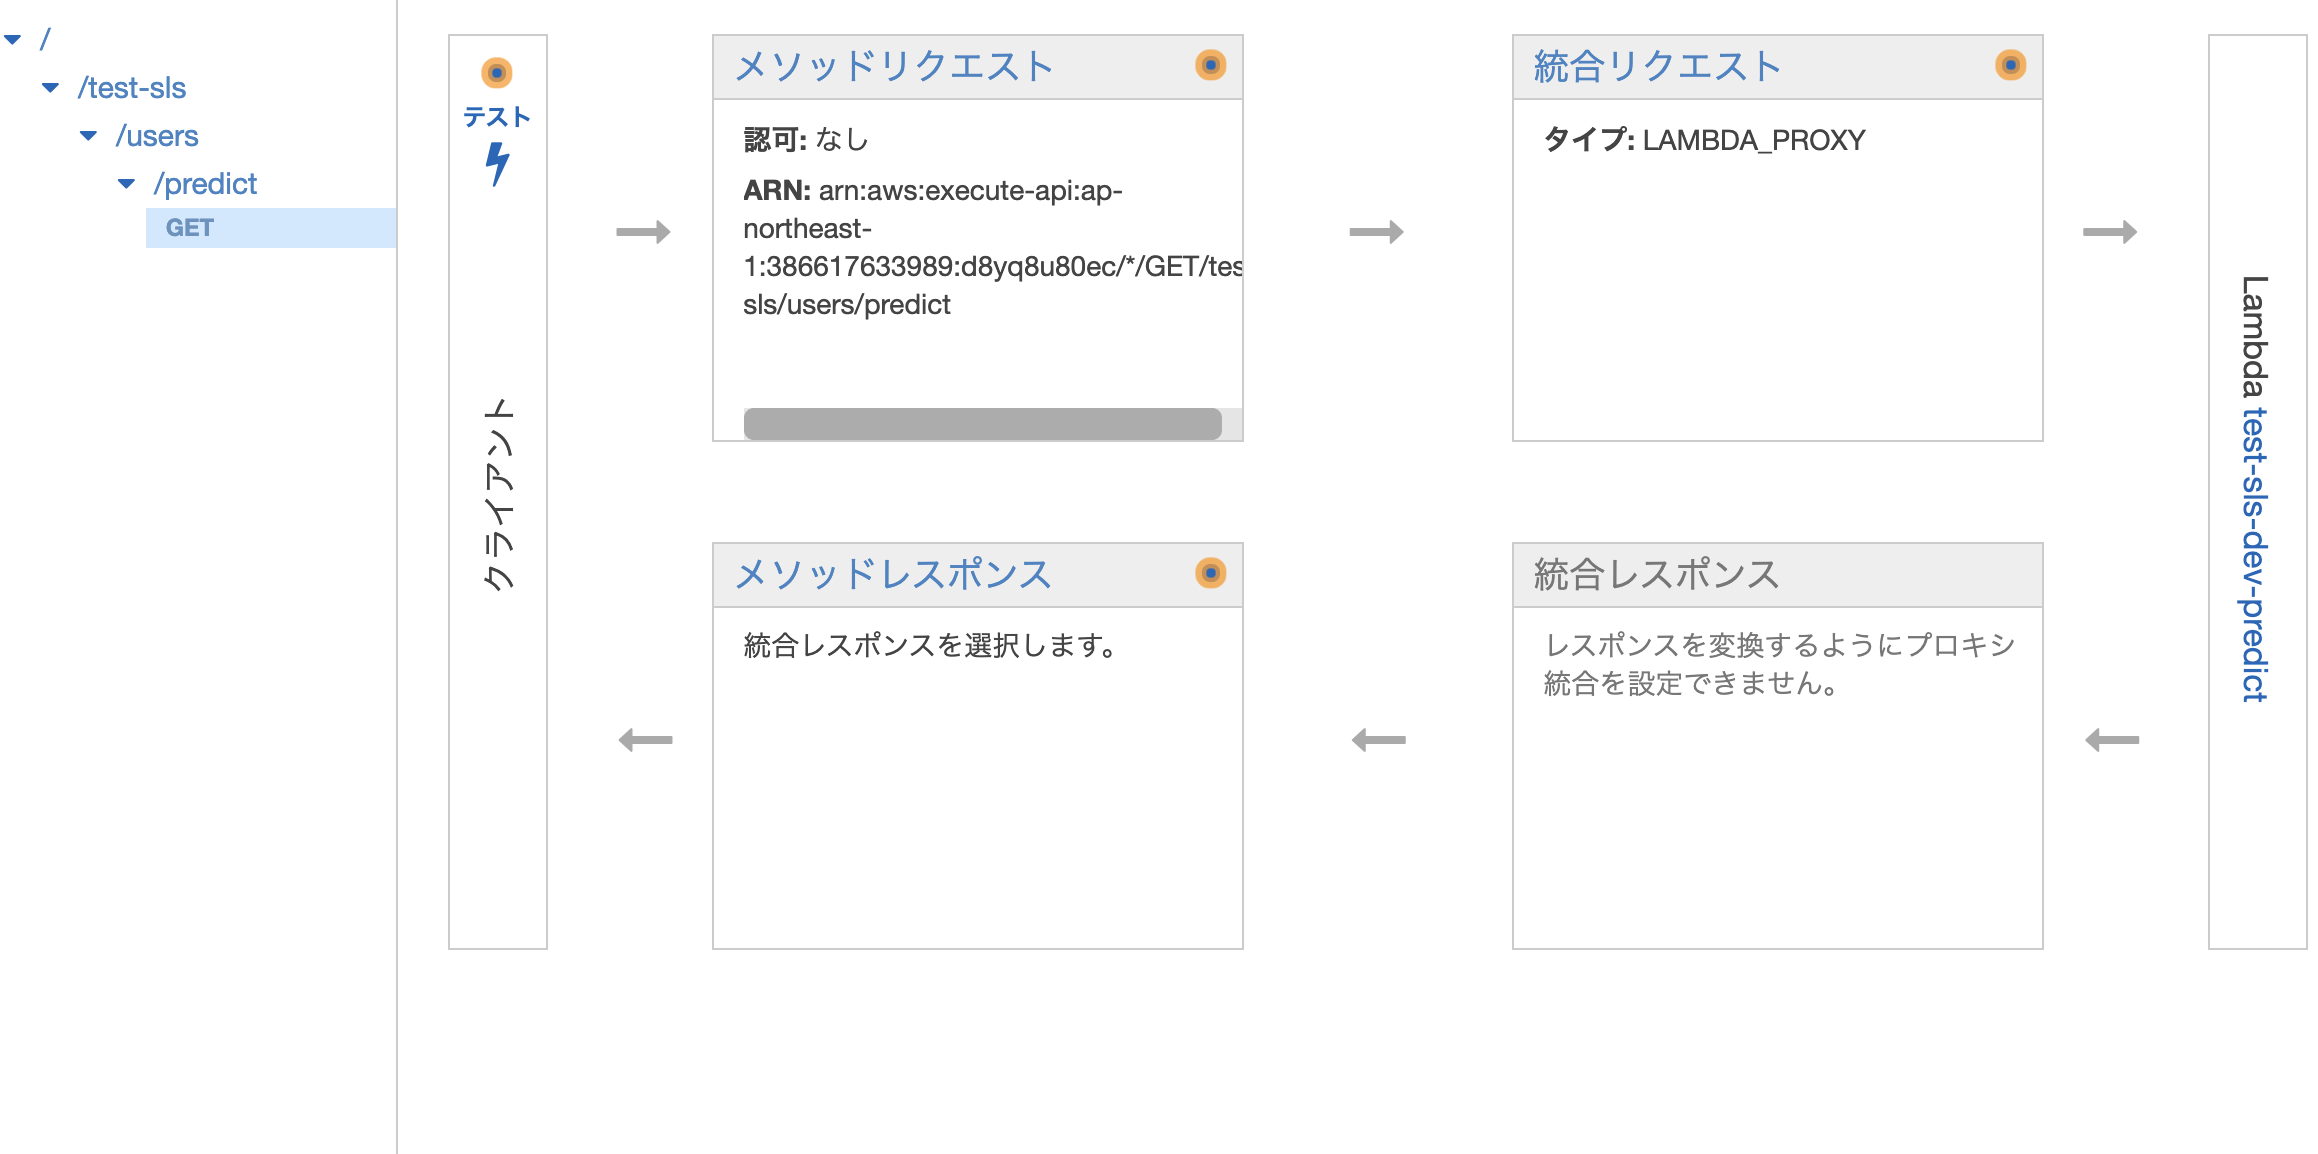
API Gatewayにはdev-test-slsというリソースが作成される。
urlはpathで定義したものがそのまま使用される。
LAMDA_PROXYが使用されるので、入力となるeventsは注意。
requirements.txtで外部ライブラリインストール
serverless-python-requirementsというプラグインを入れる。
sls plugin install -n serverless-python-requirements

ls . # package.jsonが作成される。pluginはここで管理される。
> __pycache__/       node_modules/      package.json
handler.py         package-lock.json  serverless.yml
{
  "name": "test-sls",
  "description": "",
  "version": "0.1.0",
  "devDependencies": {
    "serverless-python-requirements": "^5.1.1"
  }
}
# pluginに追加
plugins:
  - serverless-python-requirements

# 毎回のビルド時間短縮
custom:
  pythonRequirements:
    dockerizePip: non-linux # numpyとかinstallしたいなら必須。
    slim: true # __pycache__とかいらないものを消してくれる。
    zip: true  # scipyとか大きいモジュールをzip化してくれる。
    useDownloadCache: true # デプロイ時、pipライブラリをキャッシュして使う。
    useStaticCache: true
    layer: # dockerlizePip
      name: ${self:provider.stage}-requirementLayer
      description: Python requirements lambda layer
      compatibleRuntimes:
        - python3.8
レイヤーの「作成」と「使用」
ややこしそうだが、ちゃんと読み解くと結構シンプル。
コアな考え方は、**「作成」と「使用」**で分かれてること。
レイヤーの作成
必要な作業は以下の2つ。
-
pipで必要パッケージをインストール -
serverless.ymlでパッケージの場所を指定してあげる。
# layers/pandasというdirが作成され、そこにライブラリ群がダウンロードされる。
pip install -t layers/pandas pandas
tree layers -L 1
> layers/pandas
├── __pycache__
├── bin
├── dateutil
├── numpy
├── numpy-1.20.3.dist-info
├── pandas
├── pandas-1.2.4.dist-info
├── python_dateutil-2.8.1.dist-info
├── pytz
├── pytz-2021.1.dist-info
├── six-1.16.0.dist-info
└── six.py
2 : 設定ファイルに記述
layers:
  pandas: # layerの名前
    path: layers/pandas # ライブラリがあるディレクトリ
    description: layer for pandas # 説明文
    CompatibleRuntimes:
      - python3.7
これでデプロイすればいい
レイヤーの使用
使用したいfunctionsで使用したいlayerを指定するだけ。
指定方法は2つある。
- レイヤーのarnを記述
- (同じファイルでレイヤー作成してる場合)レイヤーの名前で指定。
# 方法1. レイヤーのarnを記述する
functions:
  hello:
    handler: handler.hello
    layers:
      - arn:aws:lambda:region:XXXXXX:layer:LayerName:Y

# 方法2. レイヤーの名前で指定する
# To use a layer with a function in the same service, use a CloudFormation Ref. The name of your layer in the CloudFormation template will be your layer name TitleCased (without spaces) and have LambdaLayer appended to the end. EG:
functions:
  hello:
    handler: handler.hello
    layers:
      - { Ref: PandasLambdaLayer } # 名前は<キャメルケースのレイヤー名 + LambdaLayer>
全てのfunctionでレイヤーを使用したい場合、providerでの指定も可能。
provider:
  name: aws
  runtime: python3.8
  layers:
    - arn:aws:lambda:us-east-1:xxxxxxxxxxxxx:layer:xxxxx:mylayer1
    - arn:aws:lambda:us-east-1:xxxxxxxxxxxxx:layer:xxxxx:mylayer2

functions:
  hello1:
    handler: handler.hello1
  hello2:
    handler: handler.hello2
エラー関連
TypeError: Cannot read property 'split' of undefinedが出るとき、だいたいserverlss.ymlの名前をミスっている。
テンプレート案
以下のような設定をテンプレートにしてもいいかも。
service: test-sls

# You can pin your service to only deploy with a specific Serverless version
# Check out our docs for more details
# frameworkVersion: "=X.X.X"

provider:
  name: aws
  runtime: python3.8
  stage: dev
  region: ap-northeast-1 # お好みのリージョンで
  layers:
      - { Ref: PythonRequirementsLambdaLayer }

plugins:
  - serverless-python-requirements
  # - serverless-plugin-warmup

functions:
  hello:
    handler: handler.hello
    events:
      - http: # eventsは使用用途に応じて使い分けてください。
          path: "hello"
          method: get

custom:
  pythonRequirements: # requirements.txt使う
    dockerizePip: non-linux # numpyとかinstallしたいなら必須。
    slim: true # __pycache__とかいらないものを消してくれる。
    zip: true  # scipyとか大きいモジュールをzip化してくれる。
    layer: # requirements.txtのライブラリをlayerにしてくれる。
      name: ${self:provider.stage}-requirementLayer
      description: Python requirements lambda layer
      compatibleRuntimes:
        - python3.8