やること
複数デバイスサイズでも1枚のstoryboardで横幅いっぱいで同じアスペクト比で画像を並べる
対応バージョン
- iOS8以上
セルに画像を設置
均等に、いい感じに並べる
起点となる左の画像にオートレイアウトを設定する
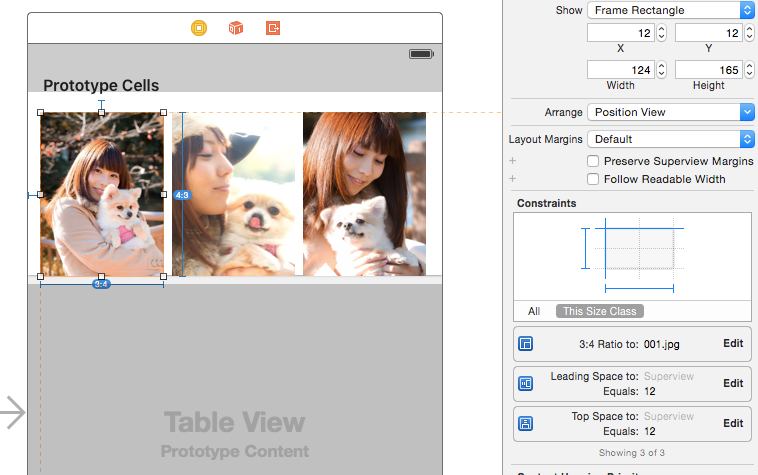
設定する条件
- Top Space 上の余白
- Leading Space 左の余白
- AspectRate 画像の比率
真ん中の画像にオートレイアウトを設定する
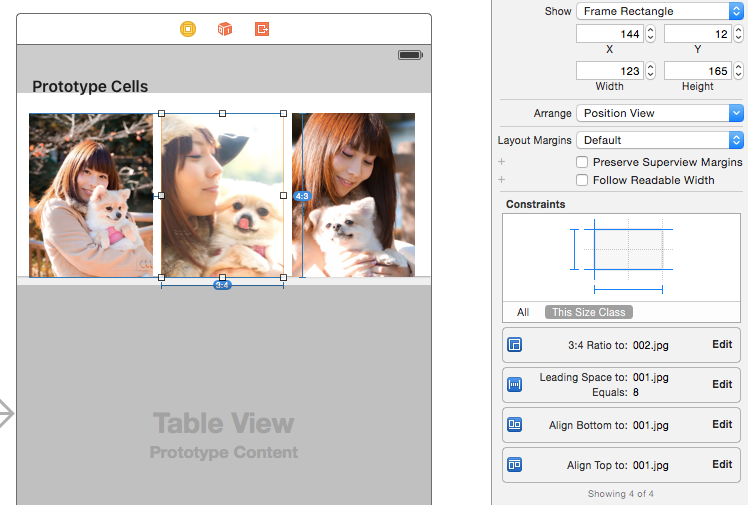
設定する条件
- Align Top 左の画像と合わせる
- Align Bottom 左の画像と合わせる
- Leading Space 左の余白
- AspectRate 画像の比率
右の画像にオートレイアウトを設定する
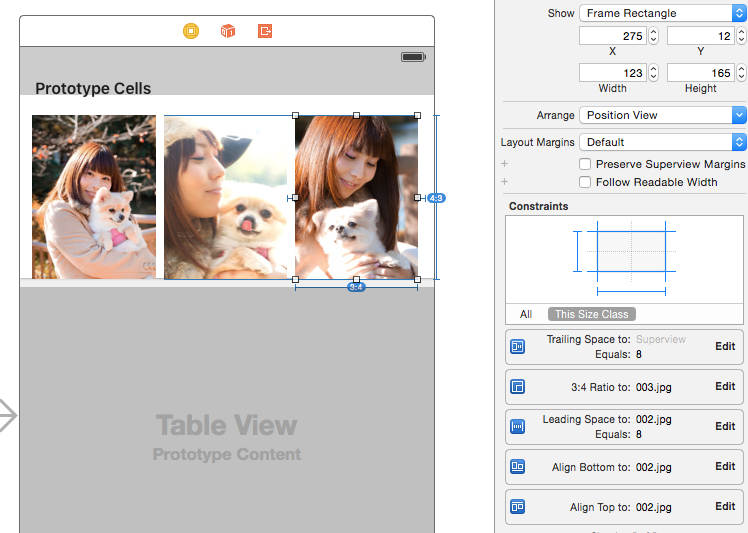
- Tailing Space 右の余白
- Align Top 左の画像と合わせる
- Align Bottom 左の画像と合わせる
- Leading Space 左の余白
- AspectRate 画像の比率
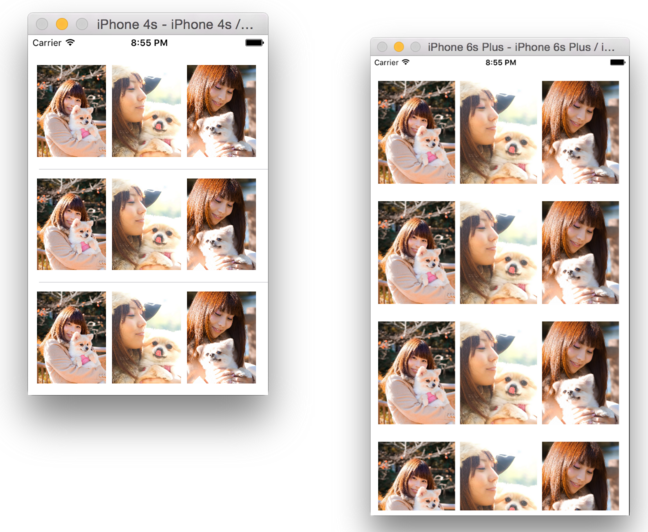
出来た(けど高さがずれてる)
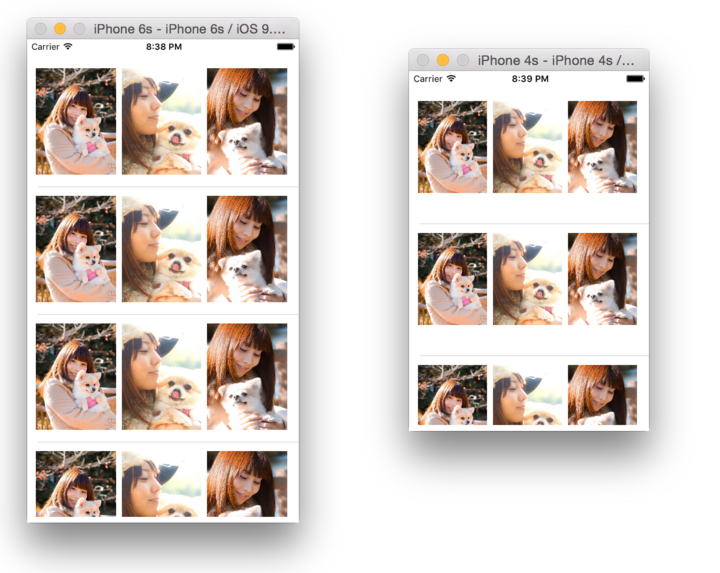
下の余白を設定する

BottomSpace この時Priorityを750(Height)にしないとトンデモナイことになる
コード側の対応
    func tableView(tableView: UITableView, estimatedHeightForRowAtIndexPath indexPath: NSIndexPath) -> CGFloat {
        return UITableViewAutomaticDimension
    }

    func tableView(tableView: UITableView, heightForRowAtIndexPath indexPath: NSIndexPath) -> CGFloat {
        return UITableViewAutomaticDimension
    }
完璧!!
おさらい
- Cellに好きにレイアウトする
- 一番下にあるオブジェクトからContentViewに対してBottomをPriority750で指定する
- delegateで
UITableViewAutomaticDimensionを返す
サンプルコード
yo1106/TableViewCellAutolayoutSample