忘れやすいのでメモメモ
1. まず確認
指定の名前タグが入っているインスタンスIDと名を取り出す。
タグに入れてあるそれらしい文字列XXXXXXを指定する。
bash
$ aws ec2 describe-instances | jq '.Reservations[].Instances[]
  | select(.Tags[].Key == "Name" and (.Tags[].Value | test("XXXXXX")))
  |  {"InstanceName":(.Tags[] | select(.Key=="Name").Value) ,"instance-id": .InstanceId}'

{
  "InstanceName": "XXXXXX-28",
  "instance-id": "i-0791d3f5e36351883"
}
{
  "InstanceName": "XXXXXX-22",
  "instance-id": "i-03c6f00bd51f7dbcd"
}
{
  "InstanceName": "XXXXXX-23",
  "instance-id": "i-0c5cf083435cb6070"
}
{
  "InstanceName": "XXXXXX-30",
  "instance-id": "i-0151fcf7f29fb0876"
}
{
  "InstanceName": "XXXXXX-25",
  "instance-id": "i-0d0360a9c2b6c8bae"
}
違うインスタンスは含まれていないようです。
2. 停止 インスタンスIDリスト作成
--cli-input-json
を使っても良いのですが、 JSONファイルを作らないと行けないので、 今回は、 --instance-ids で気楽に指定します。なので、1を修正して、
"instance-id1" "instance-id2"
の1行に変換します。
まず、インスタンスIDのみ取り出してみます。
bash
$ aws ec2 describe-instances | jq '.Reservations[].Instances[]
  | select(.Tags[].Key == "Name" and (.Tags[].Value | test("XXXXXX")))
  |  {"InstanceName":(.Tags[] | select(.Key=="Name").Value) ,"instance-id": .InstanceId}'

{
  "instance-id": "i-0791d3f5e36351883"
}
{
  "instance-id": "i-03c6f00bd51f7dbcd"
}
{
  "instance-id": "i-0c5cf083435cb6070"
}
{
  "instance-id": "i-0151fcf7f29fb0876"
}
{
  "instance-id": "i-0d0360a9c2b6c8bae"
悪くないですね。
これを、sed で IDのみ抽出します。
bash
$ aws ec2 describe-instances | jq '.Reservations[].Instances[]
  | select(.Tags[].Key == "Name" and (.Tags[].Value | test("XXXXXX")))
  |  {"instance-id": .InstanceId}' | sed -n -e 's/.*"instance-id": "\(.*\)"/\1/p'

i-0791d3f5e36351883
i-03c6f00bd51f7dbcd
i-0c5cf083435cb6070
i-0151fcf7f29fb0876
i-0d0360a9c2b6c8bae
改行が入っているので削除してスペースに変換します。
bash
$ aws ec2 describe-instances | jq '.Reservations[].Instances[]
  | select(.Tags[].Key == "Name" and (.Tags[].Value | test("XXXXXX")))
  |  {"instance-id": .InstanceId}' | sed -n -e 's/.*"instance-id": "\(.*\)"/\1/p' | tr '\n' ' '
i-0791d3f5e36351883 i-03c6f00bd51f7dbcd i-0c5cf083435cb6070 i-0151fcf7f29fb0876 i-0d0360a9c2b6c8bae
"instance-id1" "instance-id2" の形式になりました。
3. 停止コマンド発行
では、$ aws ec2 stop-instances を使いましょう。
最初は、Dry-runとか付けておくと良いでしょう。
$ aws ec2 stop-instances --dry-run --instance-ids $(2のコマンドを入れる)
次のようになります。
bash
aws ec2 stop-instances --dry-run --instance-ids $(
aws ec2 describe-instances | jq '.Reservations[].Instances[]
  | select(.Tags[].Key == "Name" and (.Tags[].Value | test("XXXXXX")))
  |  {"instance-id": .InstanceId}' | sed -n -e 's/.*"instance-id": "\(.*\)"/\1/p' | tr '\n' ' ')
こんな感じです。 2の部分を --instance-ids の後ろに $() でBashの展開を利用して指定しています。
上記のコマンドでは、 $() の部分が実行されて実際は2のインスタンスIDのリストになっています。
では、--dry-runを外します。
bash
aws ec2 stop-instances --instance-ids $(aws ec2 describe-instances | jq '.Reservations[].Instances[]
  | select(.Tags[].Key == "Name" and (.Tags[].Value | test("XXXXXX")))
  |  {"instance-id": .InstanceId}' | sed -n -e 's/.*"instance-id": "\(.*\)"/\1/p' | tr '\n' ' ')

{
    "StoppingInstances": [
        {
            "InstanceId": "i-0a011f82414e366bd",
            "CurrentState": {
                "Code": 64,
                "Name": "stopping"
            },
            "PreviousState": {
                "Code": 16,
                "Name": "running"
            }
        },
        {
            "InstanceId": "i-0528abc7952480f4c",
            "CurrentState": {
                "Code": 64,
                "Name": "stopping"
            },
            "PreviousState": {
                "Code": 16,
                "Name": "running"
            }
        },
        {
            "InstanceId": "i-0f049840b8939d681",
            "CurrentState": {
                "Code": 64,
                "Name": "stopping"
            },
            "PreviousState": {
                "Code": 16,
                "Name": "running"
            }
        },
    <<<<<中略>>>>>
    ]
}
良いようですね。コンソールでも確認します。
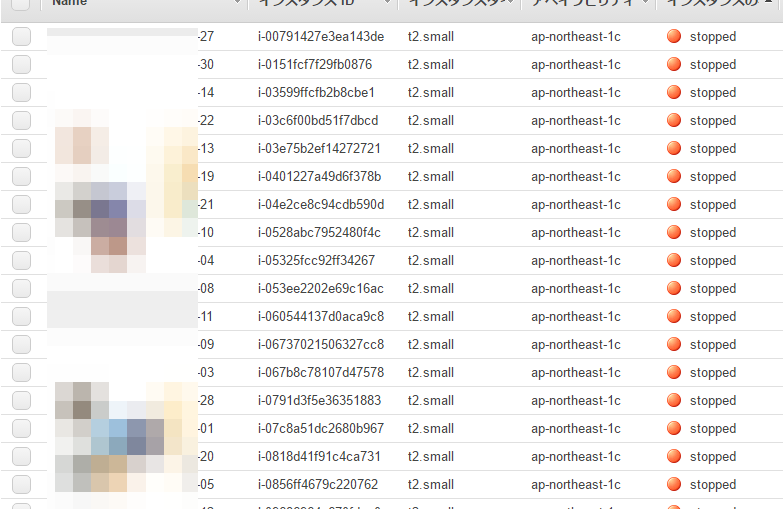
OKでした。