はじめに
Salesforce の API にアクセスするためのツールは以前は Workbench や cURL などが広く使われていた印象ですが、今年公式記事で紹介された Postman が非常に便利なので、いまさらながら本記事にて簡単な使い方を紹介します。
Explore the Salesforce APIs with a Postman Collection
準備
Postman を下記URLからダウンロードして、インストールします。
Postman
下記URLからjson形式のファイルをダウンロードします。
Salesforce APIs for Postman
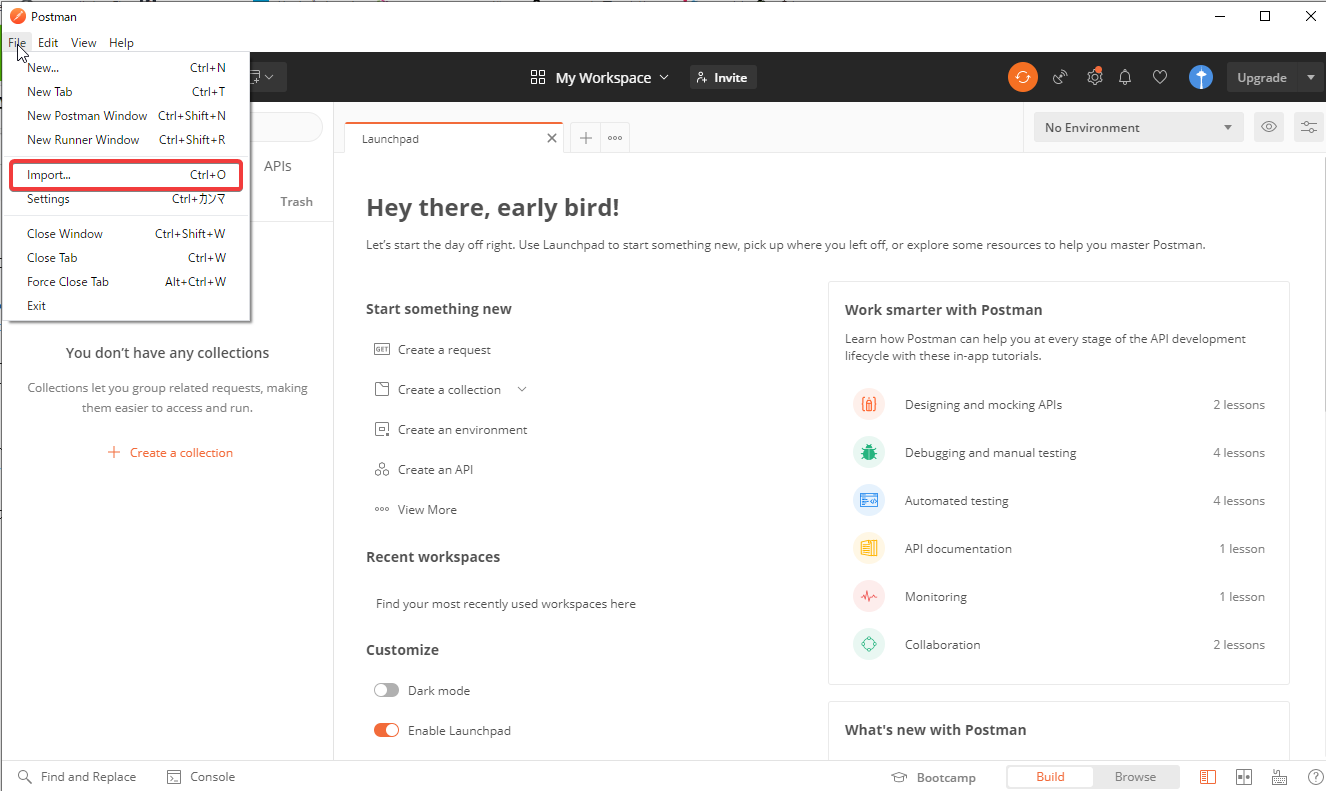
Postman を起動して、↑でダウンロードしたjsonファイルをインポートします。
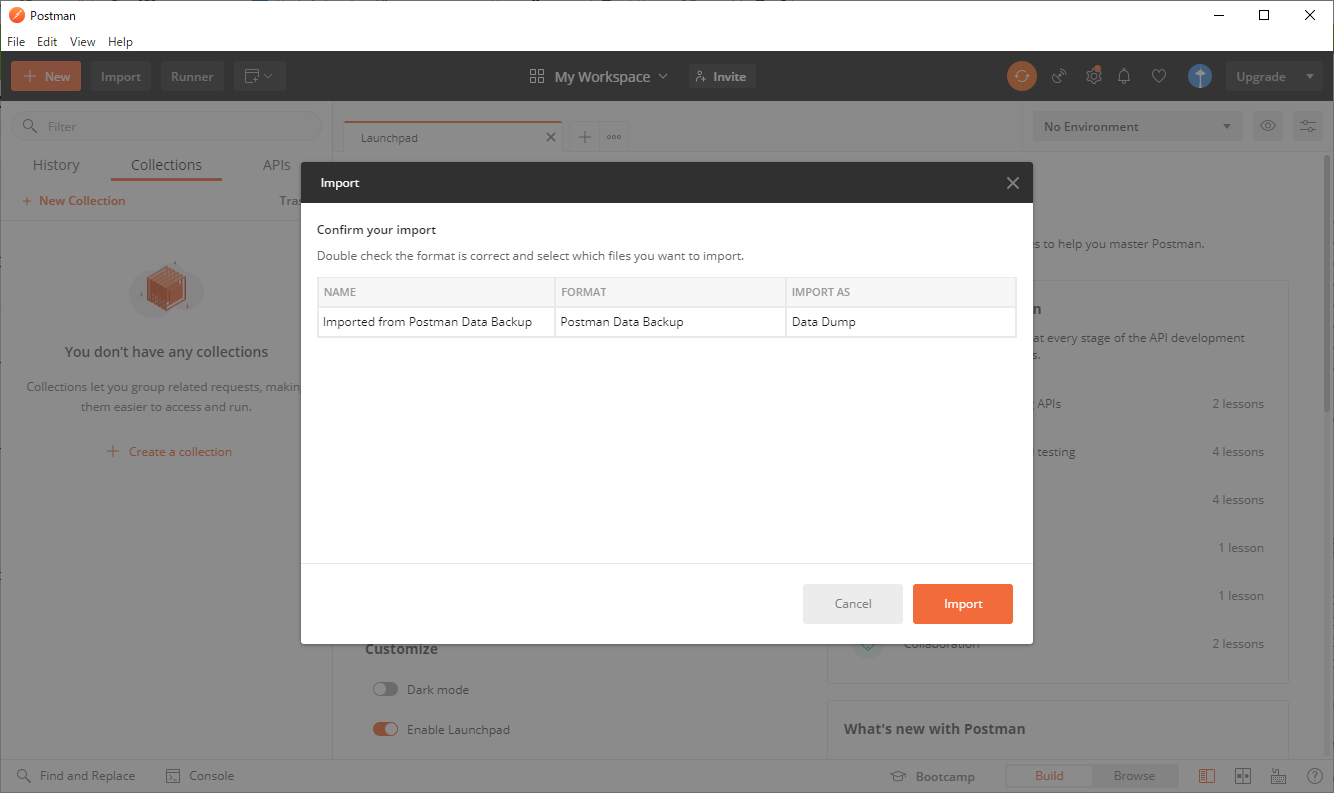
Collections タブに Salesforce APIs が追加されたことが確認できるはずです。
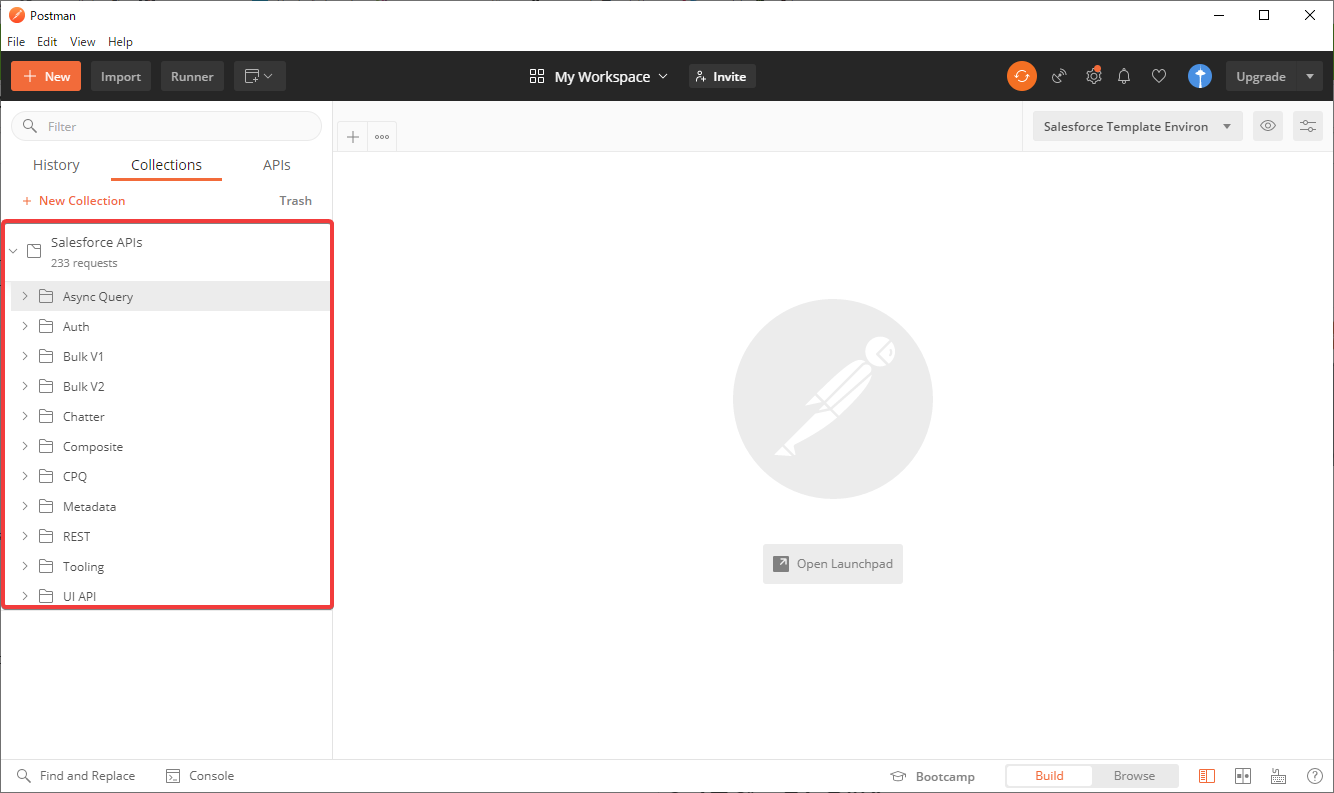
これで準備は整いました。
それでは Postman を使ってSalesforce組織にアクセスしてみましょう。
Postmanを使って Salesforce の各種 API にアクセスする
1.環境の作成
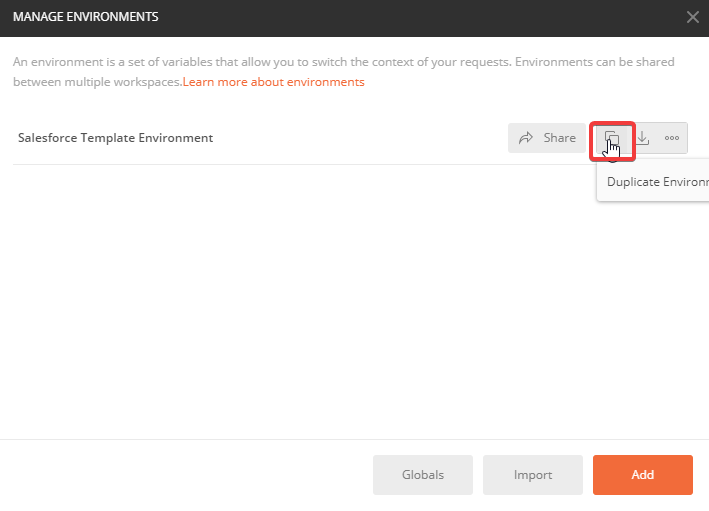
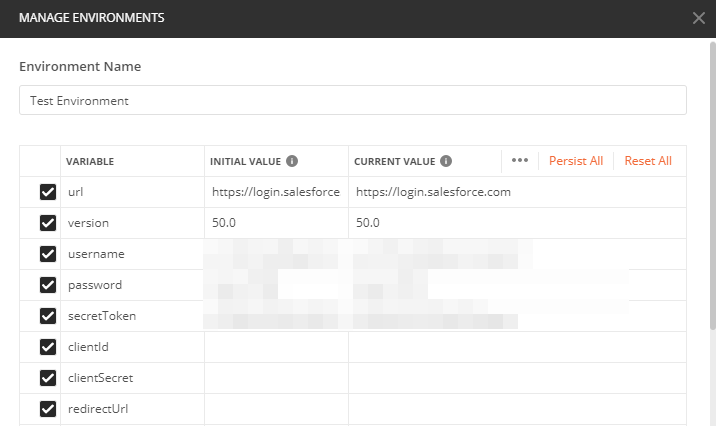
テンプレート環境(Environment)を複製して、新たに作成された環境に変数(組織のログイン情報など)を設定します。
今回は個人のデベロッパー環境にSOAPでログインするので、 url、username、password、secretToken を設定しました。
2.ログイン
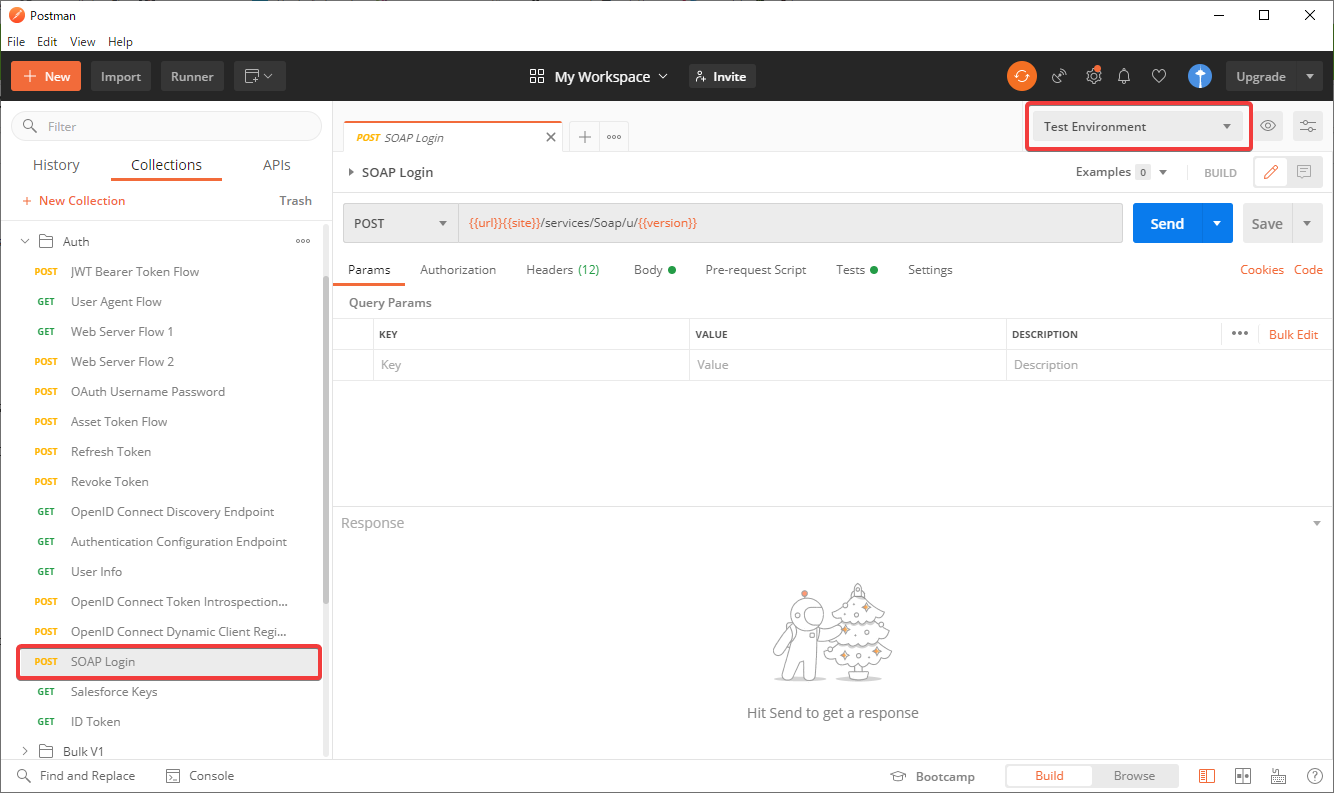
APIコレクションから SOAP Login を選んで「Send」を押すと、組織へのログインが完了します。
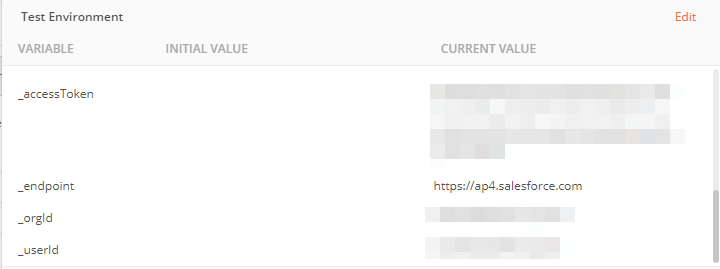
環境を開くと、_accessToken という変数にセッションIDが自動的に記録されています。これは他のAPI操作時に利用されるので、期限が切れるまで再度のログインは不要です。
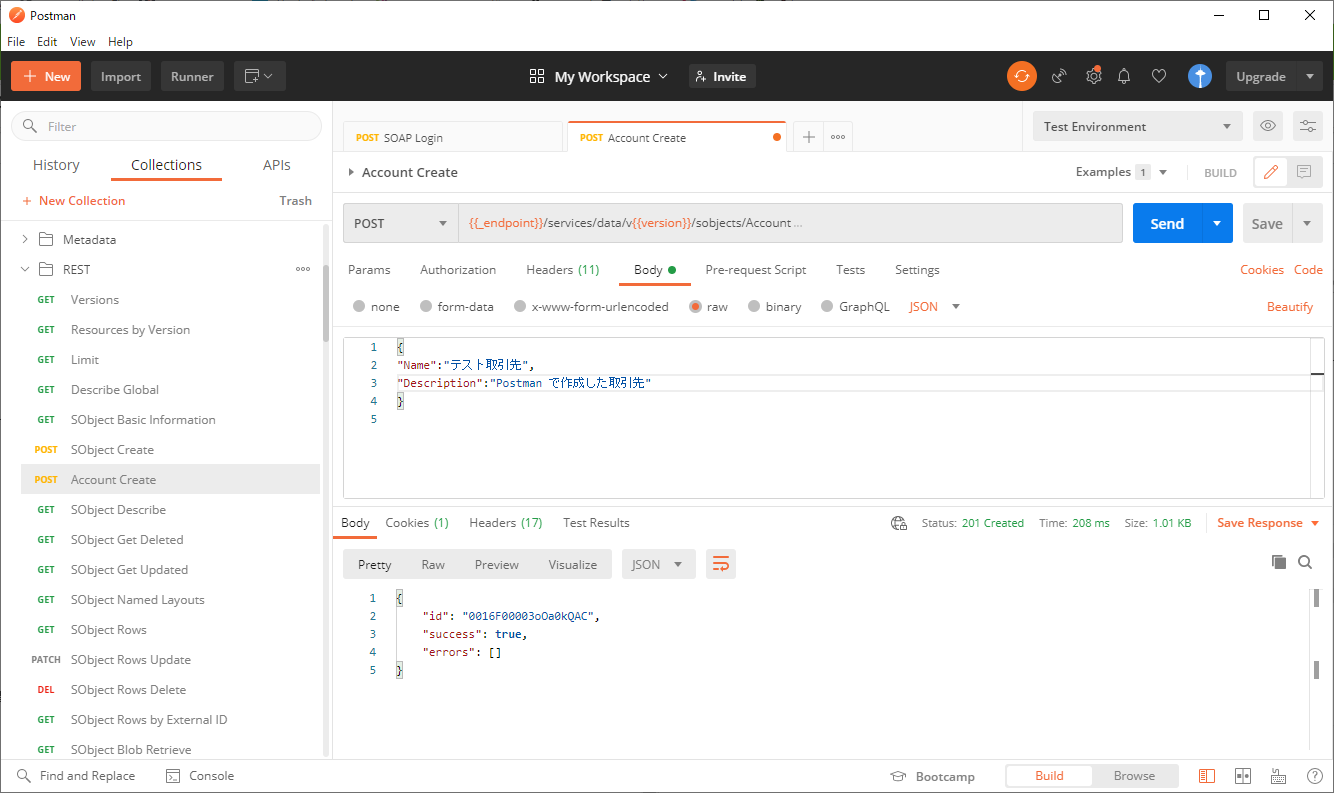
3.【使用例】取引先の作成
一例として「取引先の作成」を試してみます。
- Collection のRESTフォルダにある sObject Create を複製
- リソースのオブジェクト名を
Accountに書き換え - リクエストボディを適当に設定して「Send」
組織を確認したところ、無事取引先ができています。
他のAPI操作についてもあらかじめテンプレートが用意されているので、多少調べ物をすれば誰でもすぐに使えるようになると思います。
まとめ
Postman は Workbenchとは比較にならないほど便利なツールです。
Salesforceへのアクセス以外でも、APIクライアントとしてひたすら優秀なので、未導入であればぜひ導入をおすすめいたします。

