はじめに
Llama 2をColabで実行する時の手順。
シンプルにLlama 2を使ってみたい時とか、自分でFine-TuningしたLlama 2を動かす時なんかに。
概要
・MetaのLlama 2をColab上で動かす手順
・ステップバイステップでまとめた
手順
1.アカウントを準備する
はじめにアカウントの準備をします。
まだアカウントがなければ、下記ページからGoogle ColabとHugging Faceのアカウントを作成しておきます。
・Google Colab
・Hugging Face
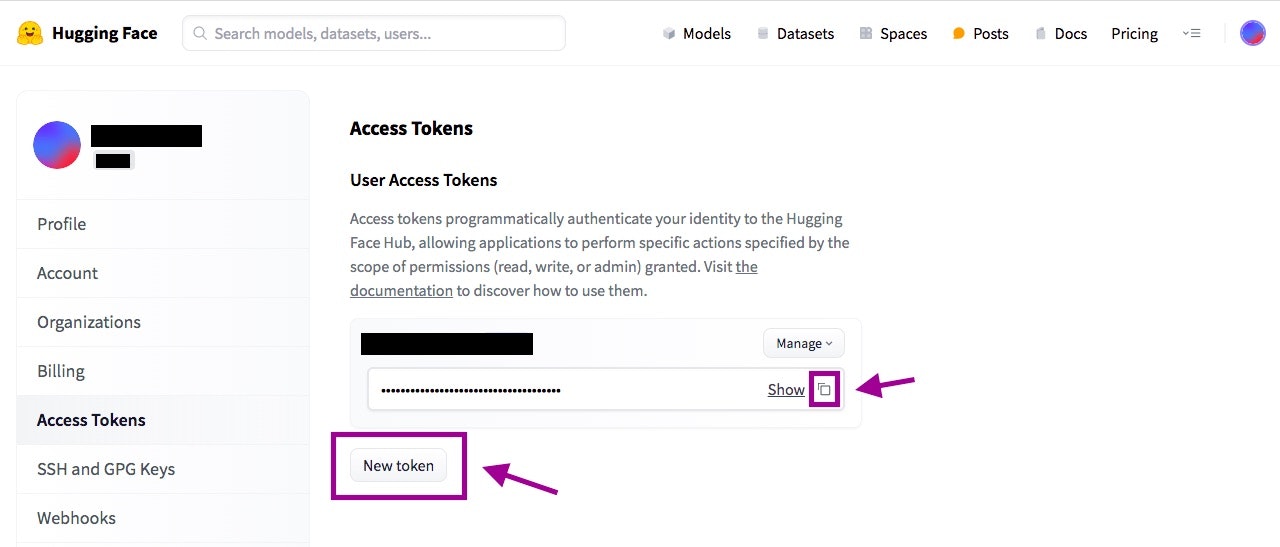
2.アクセストークンを作成する
Hugging Faceのアカウントを作成したら、Colabからアクセスするためのトークンを発行しておきます。
SettingsからAccess Tokensをひらき、New Tokenを押下。
発行されたトークンをコピーしてとっておきましょう。
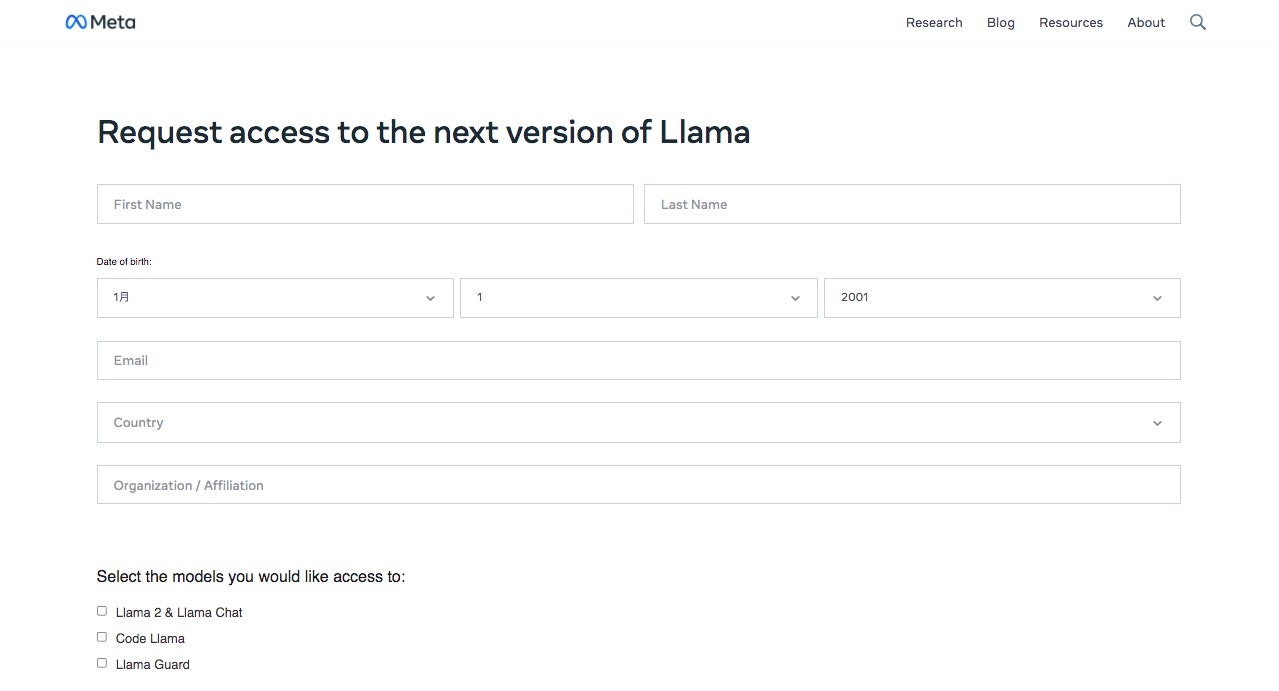
3.Llama 2の利用申請をする
次にLlama 2の利用申請をします。
下記のページをひらきます。
画面中央のDownload the Modelをクリック。
Request access to the next version of Llamaというページがひらくので、必要事項を入力して、Terms and Conditionsを確認、問題なければ画面下のAccept and Continueを押します。
「Get started with Llama2」というタイトルの、アクセス許可のメールを待ちます。
自分の時は1〜2分くらいでメールが来ました。
4.Llama 2のモデル利用申請をする
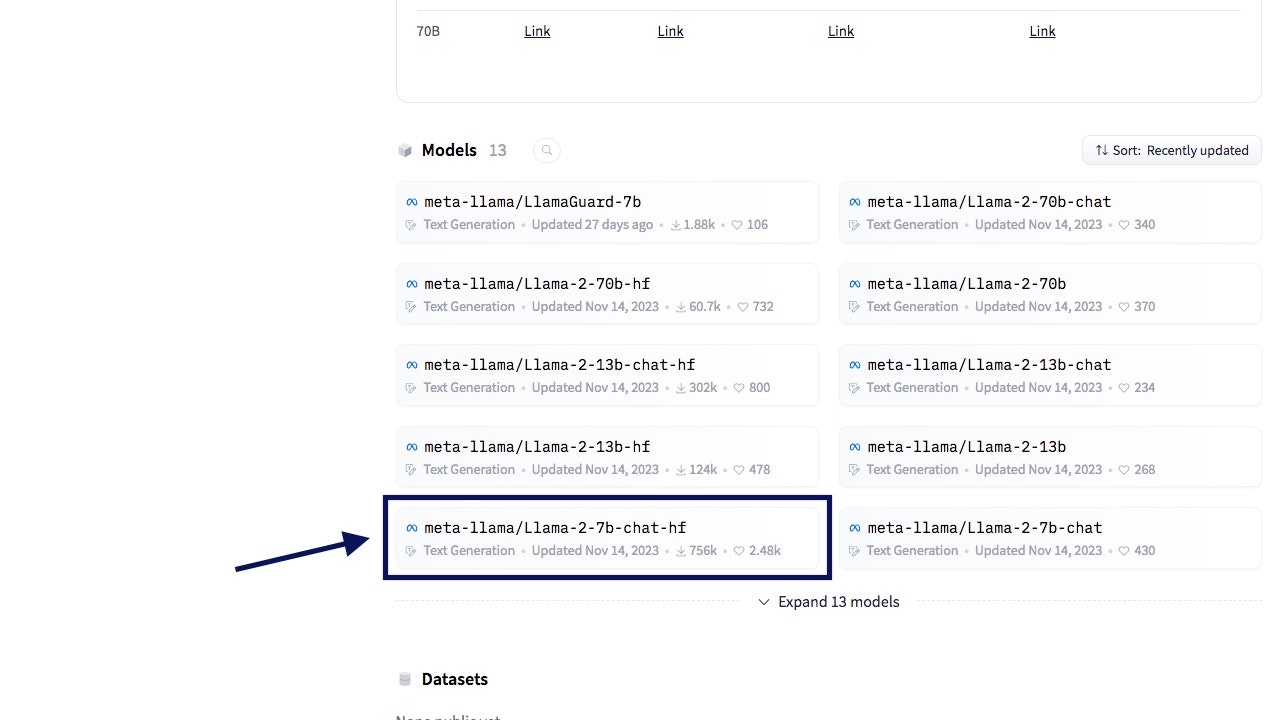
次に、Hugging Faceから今回使用するLlama 2の利用申請をします。
今回はMeta公式のLlama 2を使うので、まずは下のページをひらきます。
Modelsから使いたいモデルを選択して、モデルの詳細ページに移動します。
下ではLlama-2-7b-chat-hfを選択してます。
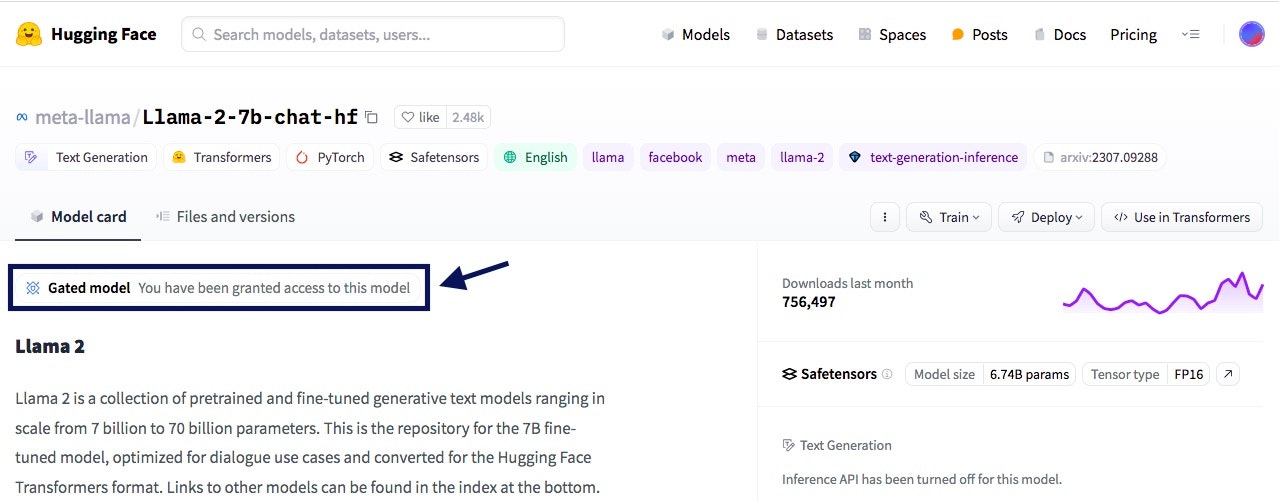
開いたページでSubmitを押下すると、Your request to access this repo has been successfully submitted, and is pending a review from the repo's authors.と表示されます。
あとは承認されるのを待ちます。
自分の環境だと、こちらも数分ほどで承認メールが届きました。
承認されると、先ほどのモデルの詳細画面にGated model You have been granted access to this modelと表示されます。
5.Llama 2を実行する
準備が整ったので、ColabからLlama 2を動かしてみます。
まずはColabで新規ノートブックを作成し、ランタイムはT4 GPUを選択します。
デフォルトだとランタイムはCPUになっていると思いますが、忘れずにT4 GPUに変更します。これを忘れるとエラーで先に進めません
あとは下記のコードを実行していくだけ。
GitHubにもソースコードをあげているのでご参考まで。
transformersやbitsandbytesなどをpip install
!pip install transformers sentencepiece accelerate bitsandbytes scipy
ライブラリのインポート
import torch
from torch import cuda,bfloat16
from transformers import AutoTokenizer,AutoModelForCausalLM
import transformers
モデルを指定する
model_id = "meta-llama/Llama-2-7b-chat-hf"
Hugging Faceのアクセストークンを指定。hf_からはじまる文字列です
token = ''
量子化
quant_config = transformers.BitsAndBytesConfig(
    load_in_4bit=True,
    bnb_4bit_quant_type='nf4',
    bnb_4bit_use_double_quant=True,
    bnb_4bit_compute_dtype=bfloat16
)
モデルの読み込み
model = transformers.AutoModelForCausalLM.from_pretrained(
    model_id,
    trust_remote_code=True,
    token=token,
    quantization_config=quant_config,
    device_map="auto"
)
トークナイザーの読み込み
tokenizer = AutoTokenizer.from_pretrained(
    model_id,
    token=token
)
パイプラインを立ち上げる
pipeline = transformers.pipeline(
    model=model,
    tokenizer=tokenizer,
    task="text-generation",
    repetition_penalty=1.1
)
回答生成させる
prompt = """USER:What is a digital SLR camera?
SYSTEM:"""
sequences = pipeline(
    prompt,
    do_sample=True,
    temperature=0.8,
    top_p=0.9,
    top_k=40,
    num_return_sequences=1,
    eos_token_id=tokenizer.eos_token_id,
    max_length=300,
)
print(sequences[0]["generated_text"])
以上です。