はじめに
これはIBM RedbooksのDeveloping Node.js Applications on IBM Cloudをなぞってみたものです。
この記事では第3章の「Creating your first Express application」に取り組んでいきます。
ExpressはNode.jsのWebフレームワークです。これを使ってWebアプリケーションの構築を早めることができます。
この記事では、ExpressフレームワークとWatson Natural Language Understandingサービスを利用してWebに掲載された記事から指定の情報を引き出します。アプリケーションに記事のURLを与えることでその筆者の情報を得ます。
必要物
- IBM Cloudアカウント
- インターネットに接続できる環境
- Google Chrome または Firefox
- OS: Linux, Mac OS または Windows
IBM Cloud上にNode.js環境を立ち上げる
まずはIBM Cloudにログインします。
すると、ダッシュボードが表示されるので、右上の「Create resource」をクリックします。
(あるいは右上の「カタログ」をクリックします。)
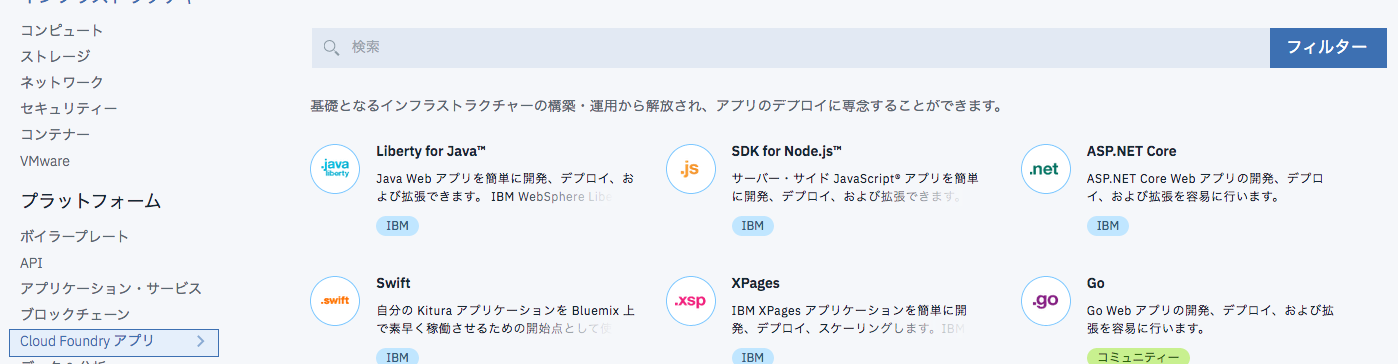
カタログに移動したら、左のメニューから「Cloud Foundryアプリ」を選ぶか検索バーに「Node.js」を入力し、「SDK for Node.js」サービスを選択します。
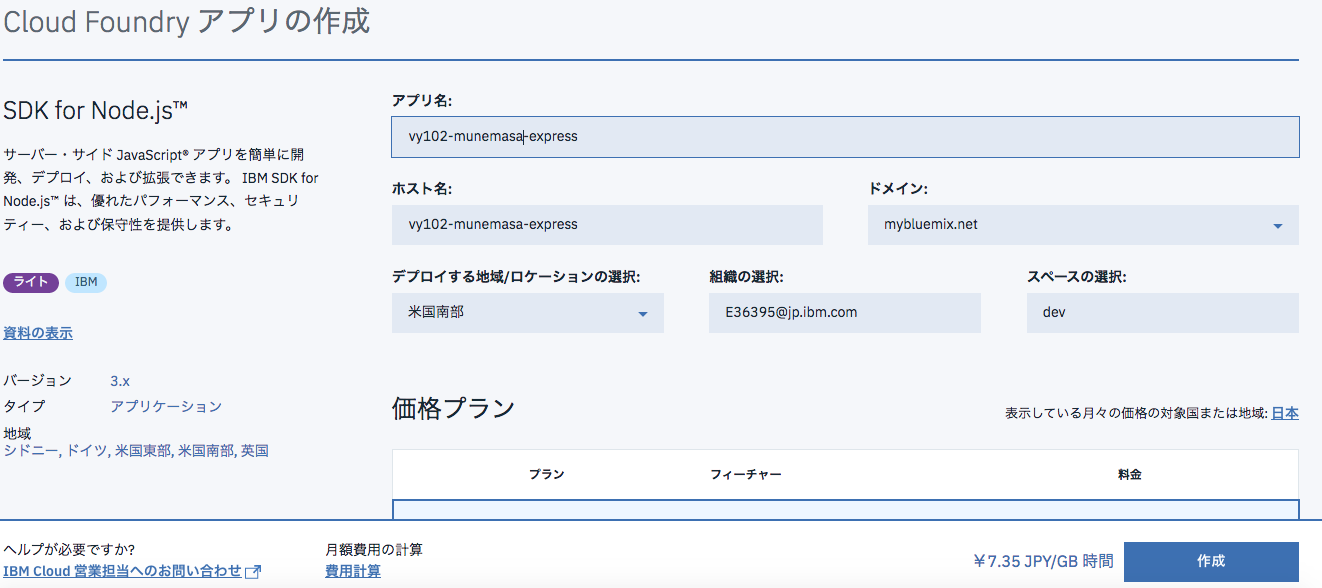
任意のアプリ名を入力し、右下の「作成」をクリックします。
このアプリ名はIBM Cloud上の他のアプリと被らないものでなくてはいけません。
サービスの利用準備ができたら、アプリ名の横の表示が緑に変わりますので、それまで数分待ちます。


Continuous Deliveryを有効化する
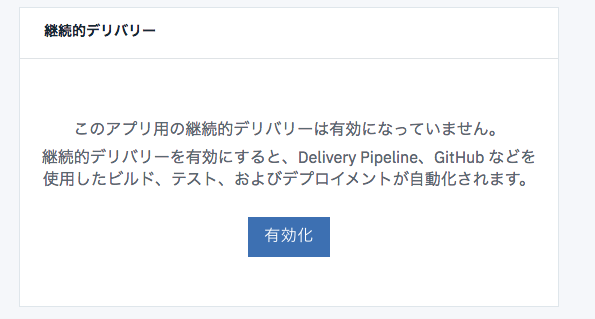
「概要」タブに移動します。
下部にある「継続的デリバリー」を「有効化」ボタンを押して有効化します。
Continuous Deliveryツールチェーンの作成画面が現れますので、「地域」と「組織」を選択します。
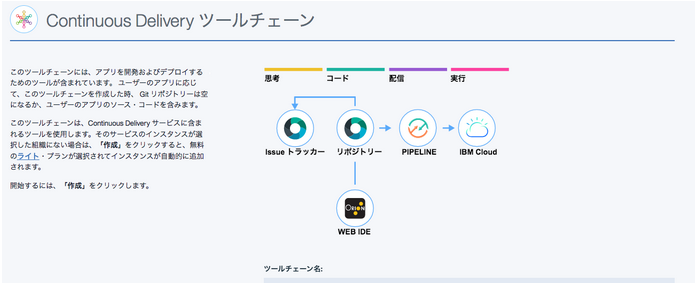
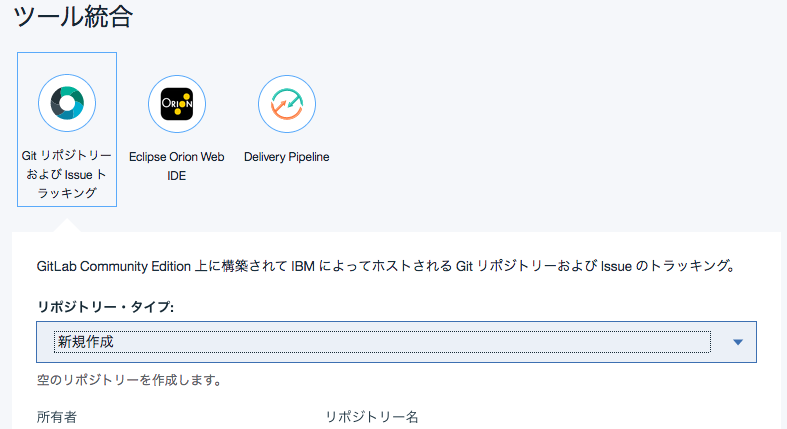
下にスクロールして、「ツール統合」欄を設定します。
「リポジトリタイプ」はデフォルトでは「クローン」が選択されていますが、この演習では「新規作成」に変更します。そのほかの設定はそのままにして「作成」をクリックします。
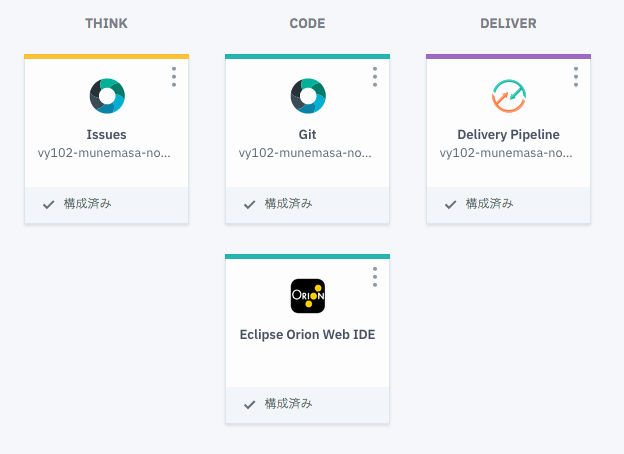
作成完了後、以下のような画面が表示されます。
ツールチェーンのEclipse Orion Web IDEをクリックします。
Expressを使ってHelloWorldアプリを作成する
ExpressはNode.jsのフレームワークです。その核となるコンポーネントを「route」と言います。
routeは、アプリケーションのエンドポイントとクライアントのリクエストへの返答を定義します。
ExpressはHTTPメソッドと対応関係を持つルーティングメソッドをサポートします。
この後の流れでは、"Hello Express!!"と返すアプリケーションを作っていきます。
左側のメニューにあるアプリ名を右クリックして、「新規作成」→「ファイル」を選択します。
ファイル名を「package.json」としてEnterを押します。

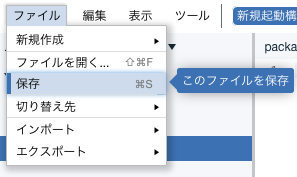
作成できたら、「ファイル」->「保存」で保存します。
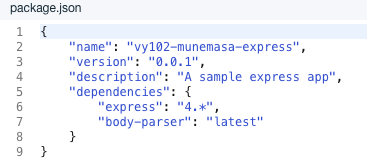
package.json内に以下のように記述します。
{
    "name": "<アプリ名>",
    "version": "0.0.1",
    "description": "A sample express app",
    "dependencies": {
        "express": "4.*"
    }
}
左側のメニューにあるアプリ名を右クリックして、「app.js」ファイルを新規作成します。
このファイルにアプリケーションのスタートポイントとなるExpressインスタンスを構築していきます。
以下のように記述します。
「GET /」は、アプリケーションのルートのリクエストを受けた時に"Hello Express!"を返します。
「POST /author」は/authorにPOSTリクエストが来た際に記事の筆者名を返します。
var port = process.env.VCAP_APP_PORT || 8080;

//Express Web Framework, and create a new express server
var express = require('express'),
	app = express();

// In case the caller calls GET to the root '/', return 'Hello Express!'.
app.get('/', function(req, res) {
    res.send('Hello Express!');
});

// In case the caller calls POST to /author, return 'Author name'
app.post('/author', function(req, res) {
    res.send('Author name');
});

// start server on the specified port and binding host
app.listen(port);
左側のメニューにあるアプリ名を右クリックして、「新規作成」→「ファイル」を選択します。
ファイル名を「manifest.yml」としてEnterを押します。
ファイルに以下のように記述します。
各項目は各々の環境に合わせて変更してください。
ホスト名は変更していなければアプリ名と同じものになっているはずです。
commandはアプリケーションがステージングされた後にapp.jsを呼び出すのに用いられます。
applications:
- path: .
memory: 256M
instances: 1
domain: mybluemix.net
name: <アプリ名>
host: <ホスト名>
disk_quota: 1024M
command: node app
ドメイン(domain)はサービス作成時のリージョンによって変更する必要があります。
米国南部 US SOUTH -> mybluemix.net
英国 UNITED KINGDOM -> eu-gb.mybluemix.net
シドニー SYDNEY -> syd.mybluemix.net
ドイツ GERMANY -> eu-de.mybluemix.net
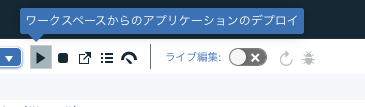
ツールバーの中に、「新規起動構成の作成」というドロップダウンがありますので、その中の「+」をクリックします。出てきた設定画面の設定を確認して、正しければ確定します。

三角形のデプロイボタンをクリックします。
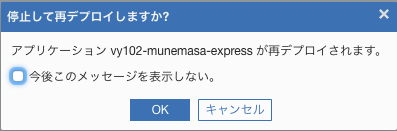
再デプロイの確認画面が出たらOKをクリックします。
デプロイをしている間は起動構成の部分が「デプロイ中」になります。
デプロイが終わったら同部分は緑の丸がつき、「実行中」と表示されます。

デプロイ終了後、ライブ編集がオフになっていることに気づくかもしれません。
ライブ編集はNode.jsアプリケーションにのみ有効です。
manifest.ymlを利用してNode.jsアプリケーションを作成していることが認識されたらライブ編集はオンになります。
(IBM Cloudライトアカウントにはライブ編集機能は適用されていません)

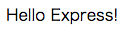
デプロイが終わったら、デプロイされたアプリケーションを開きます。

「Hello Express!」のメッセージが表示されたでしょうか?
HTMLでページを作成する
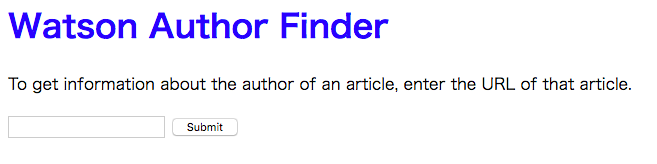
ここからはHTMLを使って、調べたい記事のURLを入力するフォームページを作っていきます。
viewsフォルダを作成し、その中にindex.htmlファイルを作成します。
以下のコードを記述します。
<html>
	<body>
	    <h1 style="color:blue;">Watson Author Finder</h1>
	    <p>To get information about the author of an article, enter the URL of that article.</p>
	    <form action="author" method="post">
	        <input type="text" name="url" />
	        <input type="submit" value="Submit" />
	    </form>
	</body>
</html>
既存のapp.jsファイルを編集してindex.htmlファイルが呼び出されるようにします。
app = express(); とある行の下に var path = require('path'); と書き足します。
app.get('/', function(req, res) { の中を res.sendFile(path.join(__dirname, 'views/index.html')); に変えてコールバック関数をアップデートします。
同部分の前のコメントを書き換えます。
// In case the caller calls GET to the root '/',
// return the content of index.html
リクエストパラメータを受け取ることができるようにするために、body-parserモジュールを加えます。
このモジュールは、データをパースしたり、req.bodyモジュール下のデータを伴うオブジェクトを引き出したりします。
var path = require('path'); という行の下に以下を加えます。
var bodyParser = require('body-parser');

//parse application/x-www-form-urlencoded
app.use(bodyParser.urlencoded({ extended: false }));
全体としては以下のようになります。
var port = process.env.VCAP_APP_PORT || 8080;

//Express Web Framework, and create a new express server
var express = require('express'),
	app = express();
var path = require('path');
var bodyParser = require('body-parser');

//parse application/x-www-form-urlencoded
app.use(bodyParser.urlencoded({ extended: false }));

// In case the caller calls GET to the root '/',
// return the content of index.html
app.get('/', function(req, res) {
	res.sendFile(path.join(__dirname, 'views/index.html'));
});

// In case the caller calls POST to /author, return 'Author name'
app.post('/author', function(req, res) {
    res.send('Author name');
});

// start server on the specified port and binding host
app.listen(port);
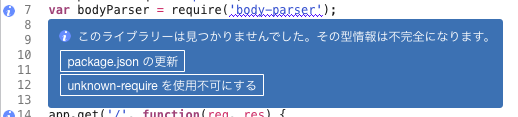
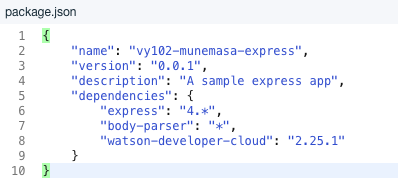
この時、body-parserモジュールがpakcage.jsonファイルで定義されていないというメッセージが出ますので、「package.jsonの更新」を押して自動で更新を行います。
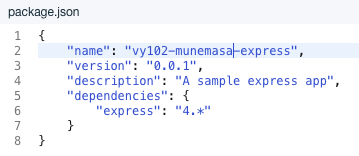
pakage.jsonを開くと、その内容が上の画像のものから下の画像のものに更新されたことがわかるでしょう。
引き続き、app.jsファイルのコールバック関数を更新していきましょう。
res.send('Author name'); の行を res.send('You called the server requesting the author of the article: ' + req.body.url); に書き換えます。
その前にあるコメントを // In case the caller calls POST to /author, return the url of the article に更新します。
Shift + Alt + Fでフォーマットしてくれるってことなんですが、Macだとどのキーになるのかよくわからなかったので断念
app.jsのコードは全体としては以下のようになります。
var port = process.env.VCAP_APP_PORT || 8080;

//Express Web Framework, and create a new express server
var express = require('express'),
	app = express();
var path = require('path');

var bodyParser = require('body-parser');

//parse application/x-www-form-urlencoded
app.use(bodyParser.urlencoded({
	extended: false
}));

// In case the caller calls GET to the root '/',
// return the content of index.html
app.get('/', function(req, res) {
	res.sendFile(path.join(__dirname, 'views/index.html'));
});

// In case the caller calls POST to /author, return the url of the article
app.post('/author', function(req, res) {
    res.send('You called the server requesting the author of the article: ' + req.body.url);
});

// start server on the specified port and binding host
app.listen(port);
routesというフォルダを新規に作成します。
routesフォルダ内にindex.jsというファイルを新規作成します。
index.jsファイルに以下のコードを記述します。
// index.js - Index route module
var express = require('express');
var router = express.Router();

//Provides utilities for dealing with directories
var path = require('path');

// Home page route
router.get('/', function (req, res) {
   res.sendFile(path.join(__dirname, '../views/index.html'));
});

module.exports = router;
author.jsというファイルをroutesフォルダ内に新規作成します。
以下のコードを記述します。
// author.js - Author route module
var express = require('express');
var router = express.Router();

router.post('/', function (req, res) {
     res.send('You called the server requesting the author of the article: ' + req.body.url);
});

module.exports = router;
再び既存のapp.jsファイルを編集していきます。
以下の記述がある行を
// In case the caller calls GET
// start server on the specified port and binding host.
下のように書き換えます。
//Routes modules
var index = require('./routes'),
    author = require('./routes/author');

//In case the caller access any URI under the root /, call index route
app.use('/', index);

//In case the caller access any URI under /author, call author route
app.use('/author', author);

// start server on the specified port and binding host
全体としては以下のようになります。
var port = process.env.VCAP_APP_PORT || 8080;

//Express Web Framework, and create a new express server
var express = require('express'),
	app = express();
var path = require('path');

var bodyParser = require('body-parser');

//parse application/x-www-form-urlencoded
app.use(bodyParser.urlencoded({
	extended: false
}));

//Routes modules
var index = require('./routes'),
    author = require('./routes/author');

//In case the caller access any URI under the root /, call index route
app.use('/', index);

//In case the caller access any URI under /author, call author route
app.use('/author', author);

// start server on the specified port and binding host
app.listen(port);
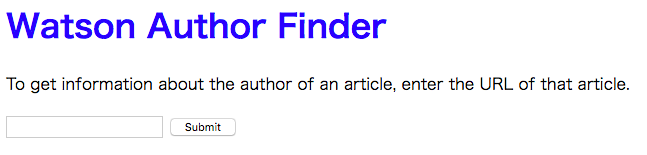
できたら、デプロイしてアプリを開きます。
下の画像のような入力ボックスが出てくるかと思います。
任意のURLを入れてSubmitを押すと、以下のように「You called the server requesting the author of the article: 」と出てくるでしょう。
ちなみに私が入れたのは、このQiita記事の原本となる英語記事です。

Watson Natural Language Serviceと連携させる
ここではWatson Natural Language Serviceを用いて記事の著者名を取得することを試みます。IBM Watson ServiceのREST APIを用いることで、自身のアプリケーションにWatsonサービスを加えることができるようになります。
Natural Language Understandingサービスでは自然言語処理を使って、プレインテキスト、HTML、パブリックURLなどのあらゆるテキストを分析します。
Node.jsでは「watson-developer-cloud」としてすでに3rdパーティモジュールとしてWatsonサービスを用いることができるようになっています。
それでは、Watsonサービスを作成中のアプリにバインドしていきましょう。
まずは、IBM Cloudの右上にある「カタログ」を押してカタログページを開きます。
左側のメニューから「Watson」を選ぶ、または検索バーに「Natural Language Understanding」と入力して、「Natural Lanaguage Understanding」サービスを選択しましょう。

サービス名の語尾についている記号を外し、サービス名を「Natural Language Understanding」としたら、「作成」をクリックします。

WatsonサービスあるいはNode.jsサービスの「接続」タブを選択し、「接続の作成」をクリックして、Node.jsとWatsonサービスをバインドします。
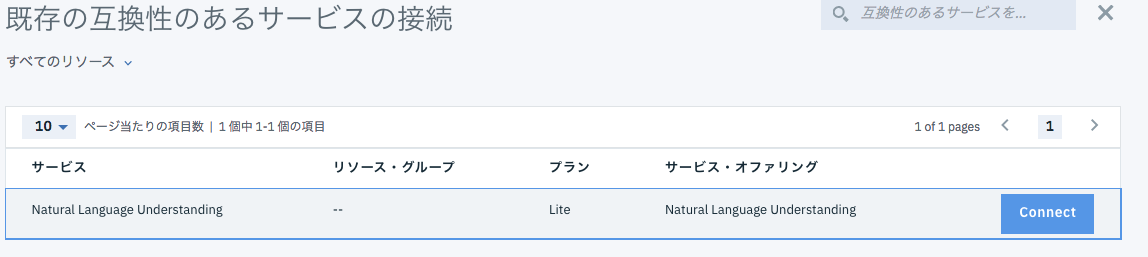
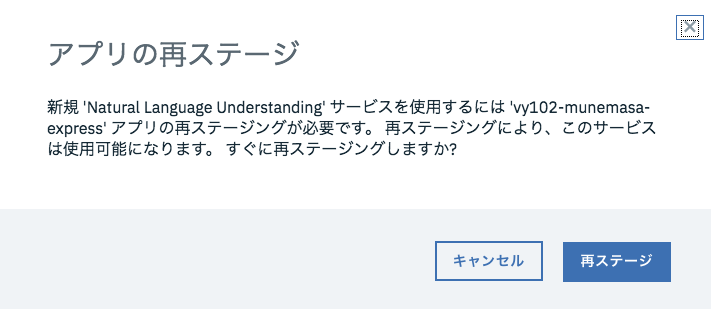
アプリの再ステージを問われるので、「再ステージ」を選択します。
完了したら、再びファイルの編集作業に戻ります。
package.jsonファイルを開きます。
dependenciesの "body-parser": "latest" を "body-parser": "*", とします。
同じくdependenciesの最下欄に「"watson-developer-cloud": "2.25.1"」と加えます。
articleServicesというモジュールを作っていきます。このモジュールはWatsonサービスと連携して、与えられたURLから著者名を引き出すという動作をするようになります。
左のメニューのアプリ名を右クリックし「services」というフォルダを新規作成します。
servicesフォルダ内に「articleServices.js」というファイルを新規作成します。
articleServices.jsファイルに以下のコードを記述します。
extractArticleAuthorNames関数はWatsonサービスを呼び出します。
// Watson Natural Language Understanding third party module
//Specify the release for the Natural Language Understanding service
var NaturalLanguageUnderstandingV1 =
require('watson-developer-cloud/natural-language-understanding/v1.js');
var natural_language_understanding = new NaturalLanguageUnderstandingV1({
	'version_date': NaturalLanguageUnderstandingV1.VERSION_DATE_2017_02_27
});
routesフォルダ内のauthor.jsファイルを開きます。
先ほどアプリを開いた際はURLが表記された部分が著者名になるように変えていきます。
上部の変数が並んだ行の下に var articleServices = require('../services/articleServices'); を加えます。
また、 res.send('You called the server requesting the author of the article: ' + req.body.url); を、次のように書き換えます。
    articleServices.extractArticleAuthorNames(req, function(err, response) {
        if (err)
            res.status(500).send('error: ' + err);
        else
            res.send(response);
    });
全体としては以下のようになります。
// author.js - Author route module
var express = require('express');
var router = express.Router();

var articleServices = require('../services/articleServices');

router.post('/', function (req, res) {
    articleServices.extractArticleAuthorNames(req, function(err, response) {
        if (err)
            res.status(500).send('error: ' + err);
        else
            res.send(response);
    });
});

module.exports = router;
アプリのデプロイと実行
これまでのデプロイ方法ではなく、GitリポジトリにPushし、自動的にIBM Cloud Delivery Pipelineにビルド・デプロイさせる方法について説明します。
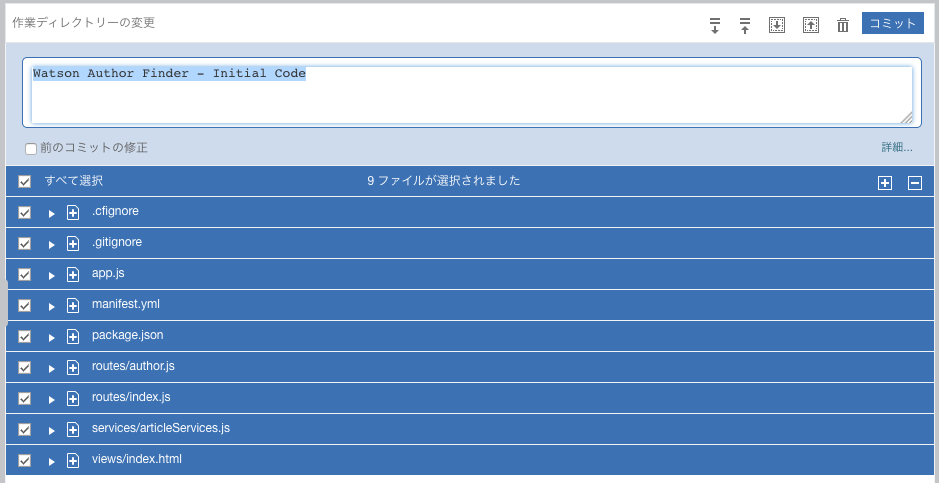
Eclipse Orion Web IDEの左側にある鉛筆マークの一つ下のGitアイコンをクリックします。

「コミットメッセージを入力」とあるテキストボックスに「Watson Author Finder - Initial Code」など任意のメッセージを入力し、右上の「コミット」をクリックします。
左部の発信欄にコミットした内容が移りますので、その右上の「プッシュ」をクリックします。
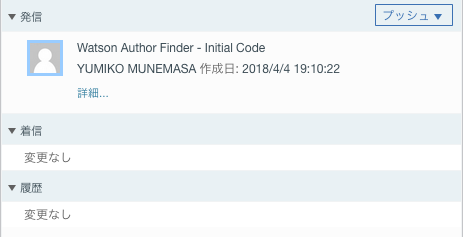
アプリケーションがGitにプッシュされると、Delivery Pipelineは自動でビルド・デプロイを行います。
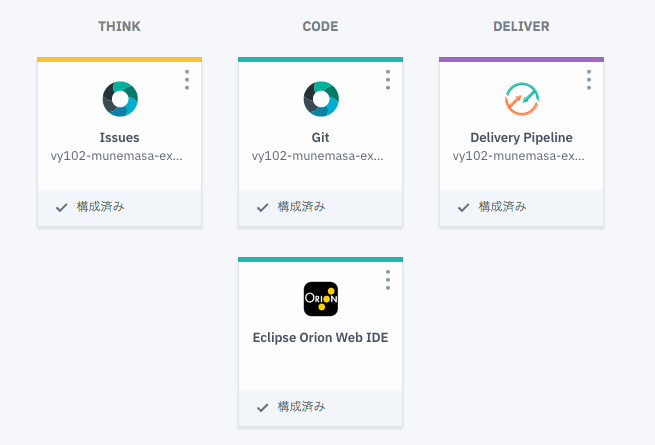
左上の矢印ボタンを押して、ツールチェーンに戻り、Deliver欄のDelivery Pipelineをクリックします。
Build StageとDeploy Stageの両方が終わるまで待ちます。失敗したら、各ステージの右上の三角ボタンを押してもう一度実行してみましょう。
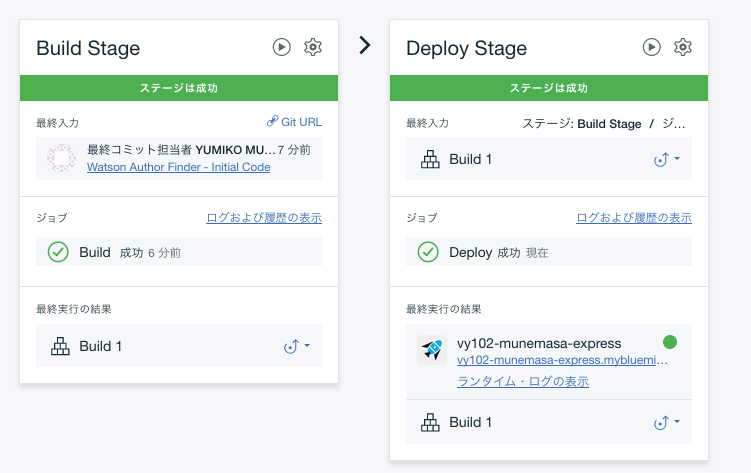
Deploy Stageの最終実行の結果欄のアプリ名のところにあるリンクを押し、アプリを立ち上げます。
以下のような画面が現れます。
確実に著者名の記録のあるリンクとして、例えば、次のリンクをテキストボックスに入力して、Submitを押します。
https://www.forbes.com/sites/alexkonrad/2016/01/29/new-ibm-watson-chief-david-kenny-talks-his-plans-for-ai-as-a-service-and-the-weather-company-sale
すると、以下のような画面が現れます。著者名が取得できていることがわかります。

おわり
今回の内容は以上です。
原本であるDeveloping Node.js Applications on IBM Cloudには続章がありますので、引き続きまとめられたらいいなと思っています。