WWDC2015のWhat's new in Notificationのセッションで、
「Silent Notificationはデフォルトで有効だ」と言われていたので驚き検証しました。
iOS8(iPhone6 Plus)で検証しています。
プッシュ通知を配信するサーバー側はニフティクラウド mobile backendを使います。
アプリの実装
ニフティクラウド mobile backendのSDKインストールは以下のようにPodfileを作成すればOKです。
target 'YOUR_APP_TARGET' do
    pod 'NCMB', :git => 'https://github.com/NIFTYCloud-mbaas/ncmb_ios.git'
end
pod installを実行するとSDKがインストールできます。
プッシュ通知用の設定としてp12形式のAPNs証明書をアップロードする必要があります。
参考:mobile backendドキュメント:SDKガイド:プッシュ通知(iOS)
- AppDelegate.m
- プッシュ通知の許可画面を表示させるUserNotificationSettignsを設定しない
- デバイストークン取得後の処理と通知を受信したときのデリゲートも実装
- (BOOL)application:(UIApplication *)application didFinishLaunchingWithOptions:(NSDictionary *)launchOptions {
    // Override point for customization after application launch.

    //SDKの初期化
    [NCMB setApplicationKey:@"YOUR_APP_KEY"
                  clientKey:@"YOUR_CLIENT_KEY"];
    /*
    UIUserNotificationType type = UIUserNotificationTypeBadge |
    UIUserNotificationTypeSound | UIUserNotificationTypeAlert;
    UIUserNotificationSettings *setting = [UIUserNotificationSettings settingsForTypes:type
                                                                            categories:nil];
    [[UIApplication sharedApplication] registerUserNotificationSettings:setting];
    */

    //デバイストークンの要求
    [[UIApplication sharedApplication] registerForRemoteNotifications];

    return YES;
}

//デバイストークンが取得できた時に呼び出されるデリゲートメソッド
-(void)application:(UIApplication *)application
didRegisterForRemoteNotificationsWithDeviceToken:(NSData *)deviceToken
{
    //NCMBInstallation作成
    NCMBInstallation *installation = [NCMBInstallation currentInstallation];
    //デバイストークンをセット
    [installation setDeviceTokenFromData:deviceToken];
    //ニフティクラウド mobile  backendのデータストアに登録
    [installation saveInBackgroundWithBlock:^(NSError *error) {
        if(!error){
            //端末情報の登録が成功した場合の処理
            NSLog(@"installation saved.");
        } else {
            //端末情報の登録が失敗した場合の処理
            NSLog(@"error:%@", error);
        }
    }];
}

//Content-availableが1のプッシュ通知が受信されたときに呼び出されるデリゲートメソッド
- (void)application:(UIApplication *)application
didReceiveRemoteNotification:(NSDictionary *)userInfo
fetchCompletionHandler:(void (^)(UIBackgroundFetchResult))completionHandler
{
    //mobile backendのコンテンツを取得
    NCMBQuery *query = [NCMBQuery queryWithClassName:@"contents"];

    [query countObjectsInBackgroundWithBlock:^(int number, NSError *error) {
        if (error){
            NSLog(@"search error:%@", error);
            completionHandler(UIBackgroundFetchResultNoData);
        } else {
            if (number > 0){
                //バッジナンバーを更新
                [[UIApplication sharedApplication] setApplicationIconBadgeNumber:number];
                //completionHandlerを呼び出す
                completionHandler(UIBackgroundFetchResultNewData);
            } else {
                completionHandler(UIBackgroundFetchResultNoData);
            }

        }
    }];
}
Silent Notificationをアプリがバックグラウンドの状態で受信したい場合は
CapabilitiesのBackground modesをONにして
Remote Notificationを有効化する必要があります。
アプリを実行してみる
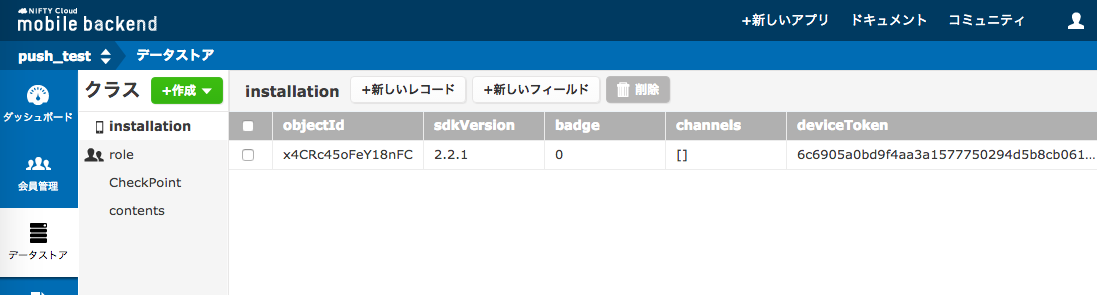
デバイストークンの取得ができてmobile backendに保存ができた!
プッシュ通知の許可画面がなくてもdeviceTokenは取得できる!
プッシュ通知を配信してみる
- プッシュ通知を配信するときの設定
- タイトルとメッセージは空白
- iOS向けに配信
- 通知音の設定も空白
- content-availableを有効にする

実行結果
上のサンプルコードでは、新しいコンテンツがあったらbadgeNumberを無理やり設定しようとしています。
そこでパーミッションが必要なようで、エラーメッセージが表示されました。
2015-08-05 16:02:04.779 PushNotificationSample[325:9402] installation saved.
2015-08-05 16:02:30.669 PushNotificationSample[325:9402] Attempting to badge the application icon but haven't received permission from the user to badge the application
しかし、決まった時間にアプリ側のコンテンツを更新するだけであれば
プッシュ通知の許可画面を出すことなく、Silent Notificationで実装ができるということです!
アプリのバックグラウンド更新を無効にされてしまうと通知を受信しても何もできないですし、
プッシュ通知は「何かをアプリのユーザーにお知らせするもの」での利用が多いので
許可画面なんて表示するのがデフォルトかもしれませんが。
豆知識でした。