1.温度センサー DS18B20
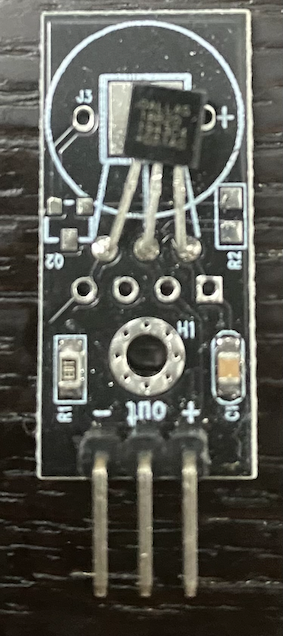
モジュール付きの温度センサDS18B20をラズパイ4モデルBにつないでみたので紹介します。内容の利用については自己責任でお願いします。
技術的なつくりはこちらを参照。
2.結線例
ラズパイ ーーーー DS18B20
5V Power ② ーーーー +
GPIO4 ⑦ ーーーー OUT
Ground(39など) ーーーー ー
3.「1-Wire」の有効化
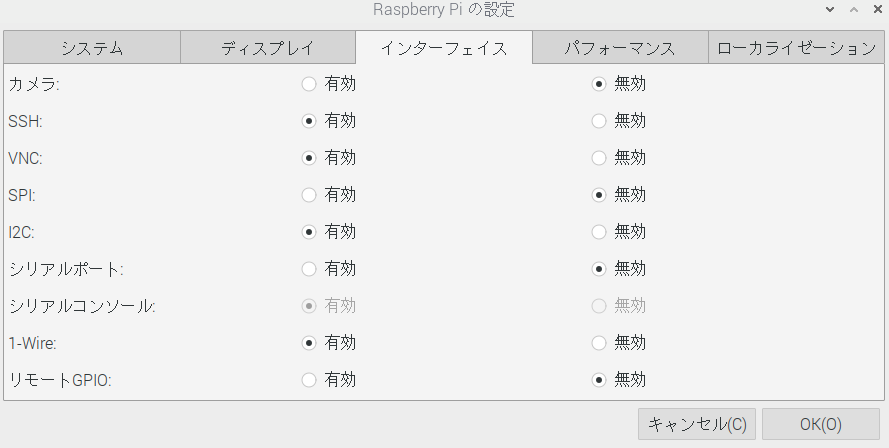
ラズパイの設定ウィンドウを開いて1-Wireを無効(デフォルト)から有効にします。
4.設定ファイルに追加の設定
/boot/config.txtファイルを開いて修正。
ターミナルから
$ sudo nano config.txt
と入力し、一番下の行が、
dtoverlay=w1-gpio
となっているのでこの行を
dtoverlay=w1-gpio,pullup=on
とします。
5.w1thermsensorモジュールのインストール
Pythonは、w1thermsensorという便利なモジュールが用意されているので、インストール。ここでpip installとしてしまうとpython 2.7のバージョンがインストールされてはまってしまうので注意が必要かもしれません。
$ sudo pip3 install w1thermsensor
このモジュールの詳細は以下。これを参考にコーディングします。
6.コード例
5秒ごとに10回、温度を測定するプログラムです。実行すると、温度が表示されると思います。
from w1thermsensor import W1ThermSensor
import time
sensor = W1ThermSensor()
for i in range(10):
    temp = sensor.get_temperature()
    print(temp)
    time.sleep(5)

