はじめに
この記事では、「人を感知したら自動で写真を撮り、画像から年齢や性別を解析してクラウド上で可視化する」という実践的なアプリケーションのつくりかたを解説します。
ショッピングモールでの客層の分析や、監視カメラなどに応用ができるはずです!
使用デバイス
- ラズパイ3
- ラズパイカメラ
- 人感センサ(M-09627:最大検知距離:7m、検知角度:120度)

使用サービス
-
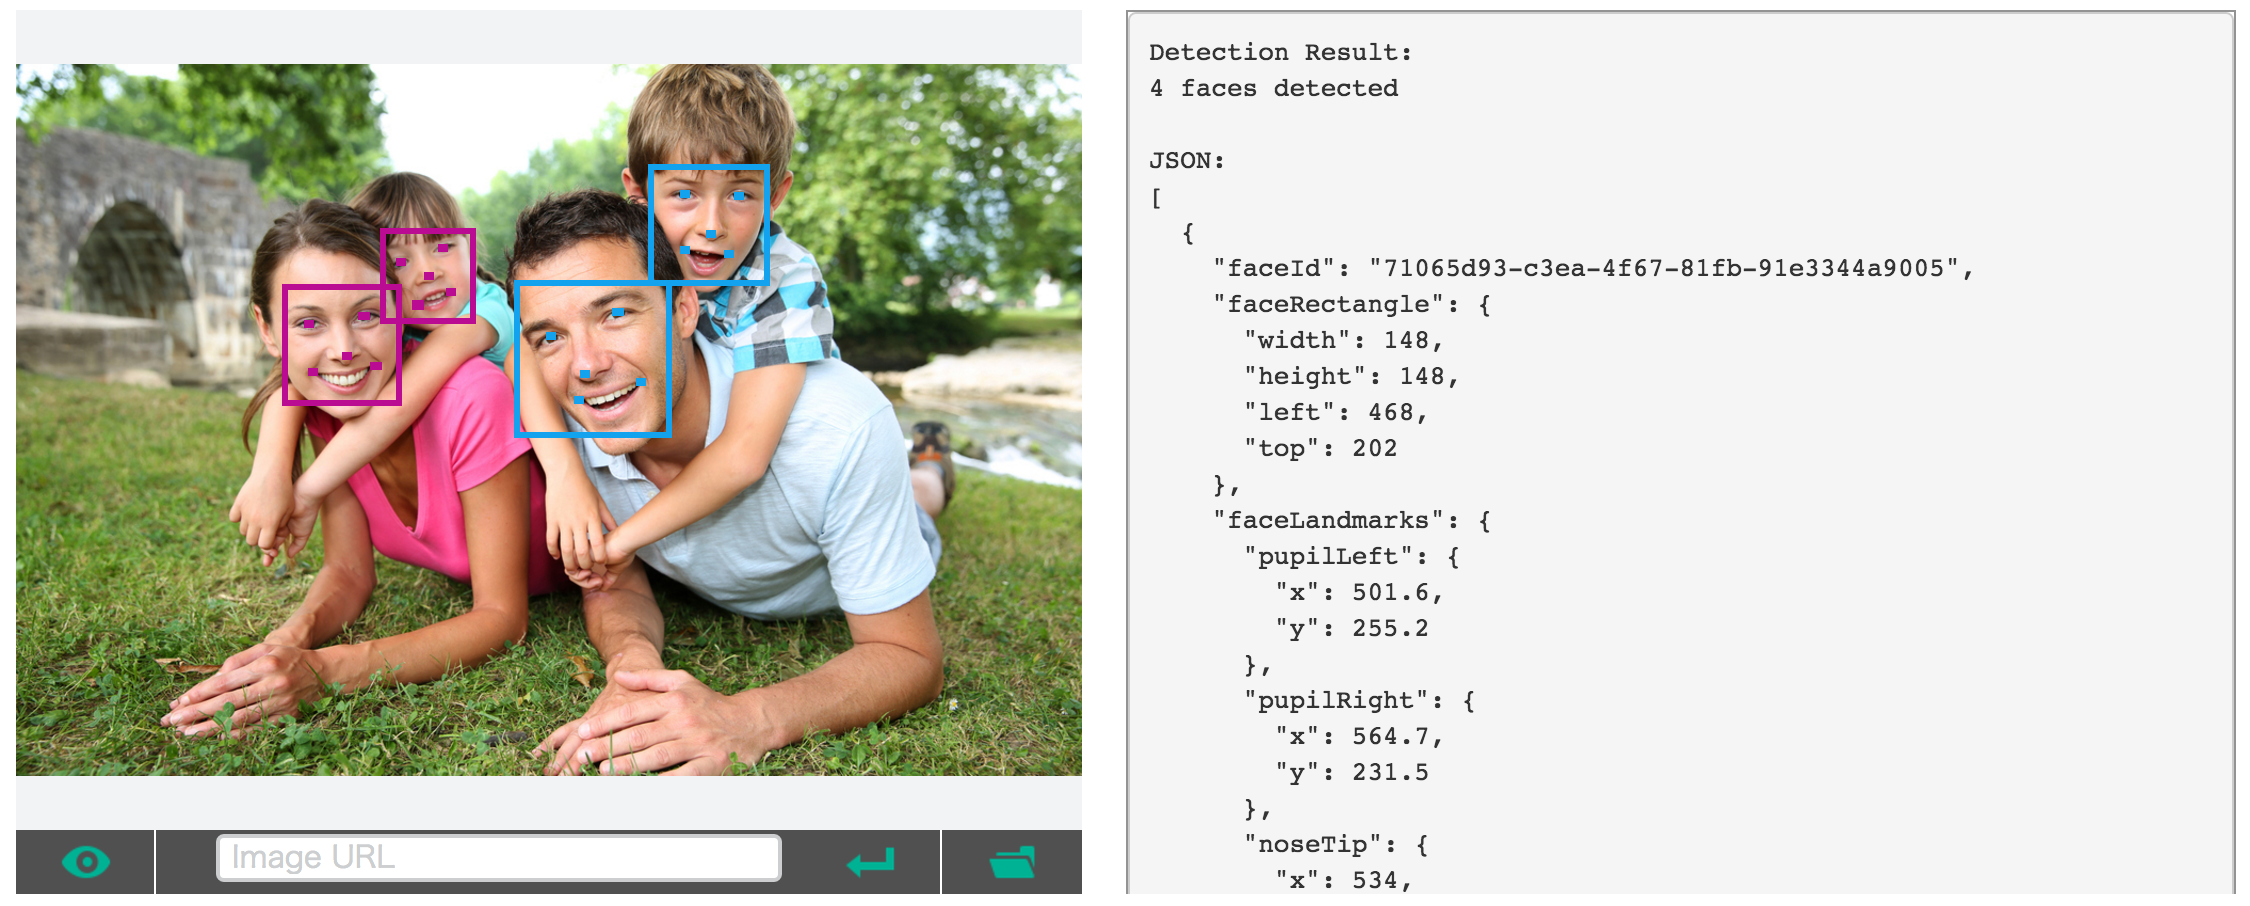
Microsoft Cognitive Services - Face API
- Face API画像から顔を検出・解析するのに使うAPIです
- 64個の顔まで検出可能です
- Microsoft Cognitive ServicesのAPIはvision, speech, languageなどの領域のサービスを提供しています
 [公式ページ](https://www.microsoft.com/cognitive-services/en-us/face-api)より引用
-
kintone API
- 解析したデータを保存、可視化するのに使います
- 登録していないかたは、30日間無料でトライアルできるので登録してください
kintoneとは↓↓

公式ページより引用
構成図
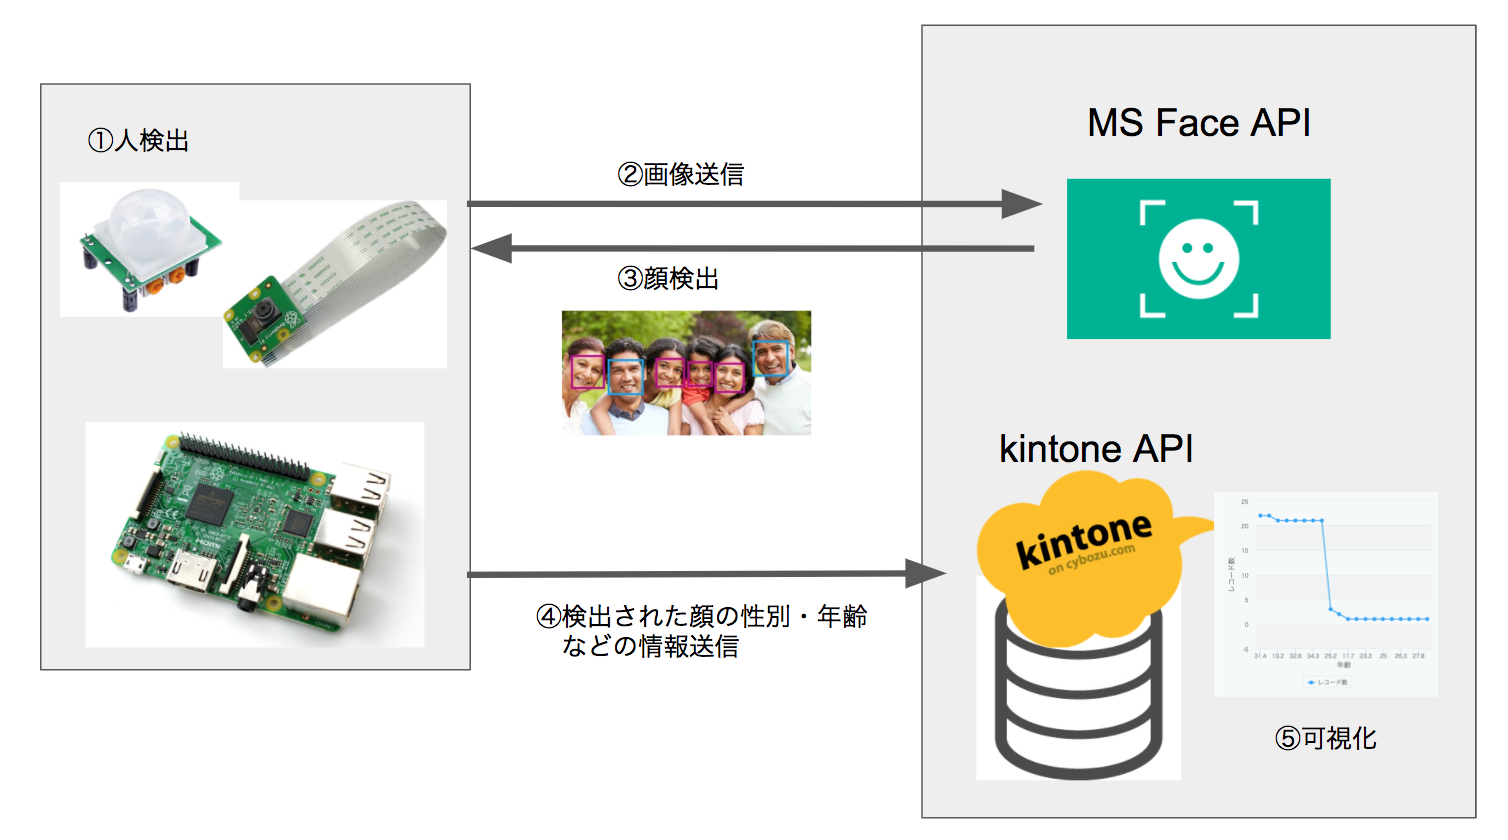
①まず、人が来たことを人感センサで検知し、カメラで写真を撮ります
②その写真をクラウド上のMS Face APIに投げて、顔検出と年齢と性別を推定します
③受け取った年齢と性別のデータを、kintone上に投げてデータを保存します
④kintone上で可視化(グラフ化)します
準備
1. Microsoft Face APIキーの取得
まず、ここからMicrosoftアカウントまたはGithubアカウント(※)でログインしてください。
※Githubアカウントで入る場合は、自分のGitHubページでメアドをpublicにする必要があります。

ログインしたら、Face APIをサブスクリプションします。サブスクリプションするためには、事前にメールの認証が必要になります。「Send email verification」をクリックすると自分のメアドにMicrosoftからメールが来るので、認証しておきましょう。この後、Face APIを「Subscribe to new free trials」からサブスクリプションしてください。

サブスクリプションすると、Face APIキーが手に入ります。これを後で使うので、メモしておきましょう。

2. kintoneアプリの作成(アプリのドメイン、IDの設定とトークンの取得)
kintone APIから無料登録し、ログインしてください。
次に、アプリを作成しましょう。右上の…(点三つ)をクリックして、「アプリの追加」をクリックします。

「はじめから作成」を選びます。

フォームには日時と数値、文字列(1行)を右部にドラッグアンドドロップし、フィールド名とフィールドコードを下記のように設定してください。


同じように他のフィールドも変更しましょう。
| フィールド名 | フィールドコード |
|---|---|
| 日時 | datetime |
| 年齢 | age |
| 性別 | gender |
設定タブをクリックし、APIトークンを選ぶと、APIトークンが表示されます。これもメモしておきます。
アクセス権限には「レコード追加」にもチェックしておきましょう。

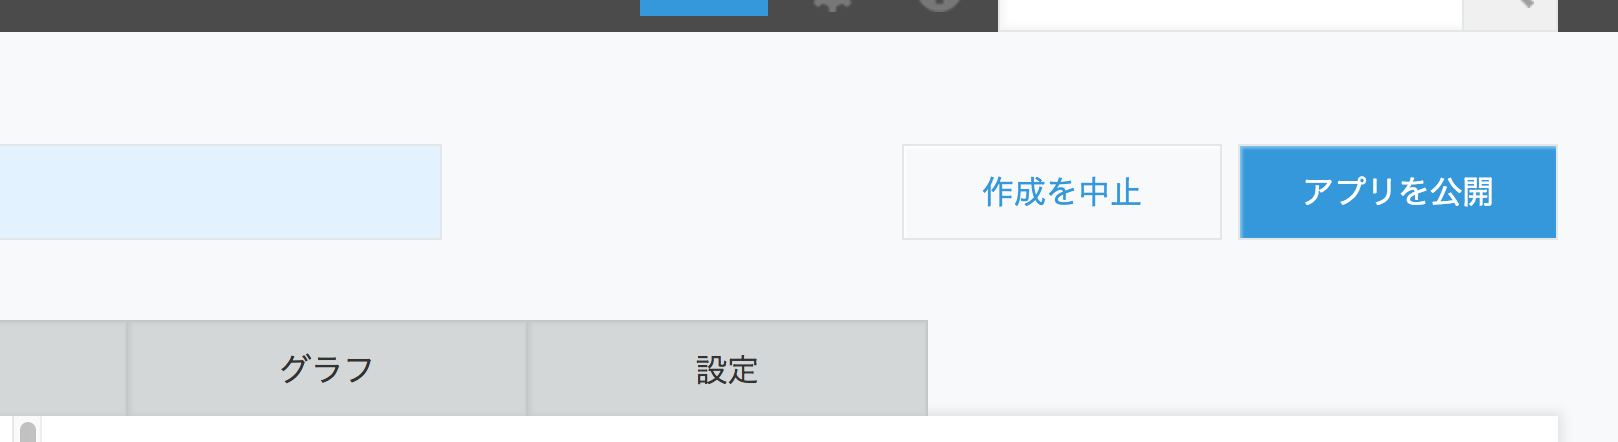
ここまできたら、右の「アプリを公開」ボタンを押して、公開しましょう!!
公開したアプリのURLを見ると以下のようになっています。
https://ドメイン名.cybozu.com/k/アプリID/
このうちドメイン名とアプリIDをメモしておきます。
3. コンフィグファイルms_api_key.yaml とkintone_conf.yamlに、上記情報を書き込む
confというフォルダを作り、その下に下記二つのファイルを新規に作って、先ほど取得した情報を入力してください。
コロンの後のスペースは一つあけておきましょう。
key: ここにFaceAPIキーを入力
domain: アプリのドメインを入力
id: アプリのIDを入力
token: アプリのトークンを入力
4. 回路作成

上記図の人感センサと、今回使った人感センサ(M-09627)の赤(5V)と黒(GND)は配置が逆ですが、この図のとおりにつなげばOKです。
pyyamlのインストール
sudo pip3 install pyyaml
ソースコード
# -*- coding: utf-8 -*-

"""
ラズパイに接続された人感センサから人を検知し、検出された場合は写真を撮影して
検出された人の年齢と性別を推定してkintoneにデータを送信するサンプルプログラムです。

使用デバイス:ラズパイ3、ラズパイカメラ、人感センサ(M-09627)
外部サービス:Microsoft Face API(写真から人検出)
       kintone API(推定結果の保存・ビジュアライズ)

準備:
   1. MS Face APIキーの取得
   2. kintoneアプリの作成(アプリのドメイン、IDの設定とトークンの取得)
  3. config/配下にms_api_key.yaml とkintone_conf.yamlを新規作成し、上記情報を書き込む

"""

import urllib
import os
import sys
import subprocess
import json
from datetime import datetime
import requests
import yaml
from time import sleep
import RPi.GPIO as GPIO

PIN = 4
GPIO.setmode(GPIO.BCM)
GPIO.setup(PIN, GPIO.IN)

BASE_DIR = os.path.dirname(__file__)

# ファイルからMS APIキーとkintone設定ファイルのの読み込み
ms_api_key = yaml.load(open(os.path.join(BASE_DIR, 'conf/ms_api_key.yaml')).read())
kintone_conf = yaml.load(open(os.path.join(BASE_DIR, 'conf/kintone_conf.yaml')).read())

# MS Face APIのヘッダ
face_api_headers = {
    'Content-Type': 'application/octet-stream',
    'Ocp-Apim-Subscription-Key': ms_api_key['key'],
}

# kintone APIのヘッダ
kintone_api_headers = {
    'Content-Type': 'application/json',
    'X-Cybozu-API-Token': kintone_conf['token'],
}

# MS Face APIのパラメータ
# 参考:https://dev.projectoxford.ai/docs/services/563879b61984550e40cbbe8d/operations/563879b61984550f30395236
face_api_params = urllib.parse.urlencode({
    'returnFaceId': 'false',
    'returnFaceLandmarks': 'false',
    'returnFaceAttributes': 'age,gender',
})

def send_face_attr_to_kintone(face_results):
    """
    検出されたすべての顔データをkintoneにPOSTする
    """

    # 顔の検出人数分だけループ
    for result in face_results:
        # 性別と年齢のみ取り出す
        gender = result['faceAttributes']['gender']
        age = result['faceAttributes']['age']

        record = {"datetime": {'value': datetime.now().strftime('%Y-%m-%dT%H:%M:%S+09:00')}, "age": {'value': age}, "gender": {'value': gender}}
        payload = {'app': kintone_conf['id'], 'record': record }

        # 1人分をkintoneへPOST
        response = requests.post('https://{}.cybozu.com/k/v1/record.json'.format(kintone_conf['domain']), data=json.dumps(payload), headers=kintone_api_headers)

        if response.ok:
            pass
        else:
            print('Error!')
            print(response.raise_for_status())

def detect_faces(filename):
    """
    Microsoft Face APIで画像から顔を検出する
    """

    face_image = open(filename, "r+b").read()

    # Miscosoft Face APIへ画像ファイルをPOST
    response = requests.post('https://westus.api.cognitive.microsoft.com/face/v1.0/detect?%s' % face_api_params, data=face_image, headers=face_api_headers)
    results = response.json()

    if response.ok:
        print('Result-->  {}'.format(results))
    else:
        print(response.raise_for_status())
    return results

def shutter_camera():
    """
    ラズパイカメラで撮影する
    """

    # cam.jpgというファイル名、640x480のサイズ、待ち時間5秒で撮影する
    cmd = "raspistill -o cam.jpg -h 640 -w 480 -t 5000"
    subprocess.call(cmd, shell=True)

try:
    while True:
        # 人間センサからデータを読みこむ(0: 検出なし, 1:検出あり)
        human_exists = int(GPIO.input(PIN) == GPIO.HIGH)

        if human_exists:
            print('Human exists!')

            print('Taking a picture in 5 seconds...')
            shutter_camera()
            print('Done.')

            # MS Face APIで顔検出
            print('Sending the image to MS face API...')
            results = detect_faces('cam.jpg')
            print('Done.')

            if len(results) > 0:
                # kintoneに送信
                print('Sending face attributes to kintone...')
                send_face_attr_to_kintone(results)
                print('Done.')
            else:
                print('No faces detected')
        else:
            print('No human')

        print('Wait 10 seconds...')
        print('------------------')
        sleep(10)

except KeyboardInterrupt:
    pass
except Exception as e:
    print(e)

GPIO.cleanup()
実行方法
pi@raspberrypi:~ $ python3 face_api_kintone.py
Human exists!
Taking a picture in 5 seconds...
Done.
Sending the image to MS face API...
Result-->  [{u'faceRectangle': {u'width': 185, u'top': 246, u'height': 185, u'left': 155}, u'faceAttributes': {u'gender': u'male', u'age': 27.4}}]
Done.
Sending face attributes to kintone...
Done.
Wait 10 seconds...
------------------
f^Cpi@raspberrypi:~ $
- プログラムを起動したら、人検出が始まるので人感センサを人にむけてください
- 人を検知したら、5秒後にラズパイカメラで撮影され、Face APIに送信されます
- そこで人の顔が写っていた場合、属性(年齢や性別)を取り出してkintone上に送信されます
- 10秒後スリープし、はじめにもどります
kintone上で確認
- kintone上で正しく反映されているか、確認してみましょう。

例えば横軸に年齢、縦軸にレコード数でグラフ化すると次のようになります。

(練習でトランプファミリーをたくさん見せていたので、30代と70代と10代が多い結果となりました笑)
kintoneで10代、20代、、、80代というふうに幅を持たせたグラフってどうやってつくるんだろう。ラズパイ内のPythonプログラムで年齢層を判断するしかないのかな?知っている人がいたらおしえてください!!
さいごに
- 人を感知したら写真を自動で撮り、画像から年齢や性別を解析してクラウド上で可視化するという実践的なアプリケーションを作成しました
- いろいろな場面で応用ができそうなので、ご自由に考えてみてください!