とりあえず初めてみませんか?
iPhoneのアプリ作ってみたいな〜、難しいのかな〜?って思っているそこのあなた!
僕もつい数ヶ月前まではそんな一人でした。え?それでどんなことしてたかって?
いや〜、実はやろうやろうと思って何もしてなかったんですよね〜。
なので、そんな僕のようにならないように簡単なところから
一歩踏み出してみませんか?
ってことで手っ取り早く実装してみよう!
え?いきなり過ぎないかって?
大丈夫大丈夫、思ってより簡単なんでやってみましょう♪
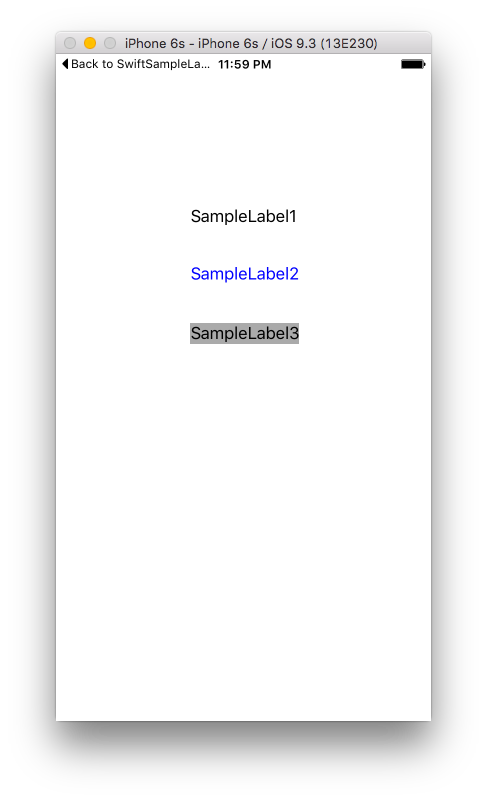
今回はUILabelに好きな文字を表示させてみましょう!
あ、UILabelは文字列を表示する時に使うものです。
上がObjective-C、下がSwiftです!
まずはストーリーボードでUILabelを配置します。
そこからわからねーよという方は、他のサイトでちょっと調べてみてください。
分かりやすいのが沢山あります。
(分かりやすいスクショが撮れなかったので、、)
ここから実装↓
試しに3種類ほどラベルを用意してみました。
@interface ViewController ()

@property (weak, nonatomic) IBOutlet UILabel *SampleLabel1;
@property (weak, nonatomic) IBOutlet UILabel *SampleLabel2;
@property (weak, nonatomic) IBOutlet UILabel *SampleLabel3;

@end

@implementation ViewController

- (void)viewDidLoad {
    [super viewDidLoad];
    // Do any additional setup after loading the view, typically from a nib.

    //ここから下を追加してみましょう!
    //文字を表示
    _SampleLabel1.text = @"SampleLabel1";

    //文字を表示して、テキストの色を変更
    _SampleLabel2.text = @"SampleLabel2";
    _SampleLabel2.textColor = [UIColor blueColor];

    //文字を表示して、背景色を変更
    _SampleLabel3.text = @"SampleLabel3";
    _SampleLabel3.backgroundColor = [UIColor lightGrayColor];
}

- (void)didReceiveMemoryWarning {
    [super didReceiveMemoryWarning];
    // Dispose of any resources that can be recreated.
}

@end
class ViewController: UIViewController {

    @IBOutlet weak var SampleLabel1: UILabel!
    @IBOutlet weak var SampleLabel2: UILabel!
    @IBOutlet weak var SampleLabel3: UILabel!

    override func viewDidLoad() {
        super.viewDidLoad()
        // Do any additional setup after loading the view, typically from a nib.

        //ここから下を追加してみましょう!
        //文字列の表示
        SampleLabel1.text = "SampleLabel1"

        //文字列を表示して、テキストの色を変更
        SampleLabel2.text = "SampleLabel2"
        SampleLabel2.textColor = UIColor.blueColor()

        //文字列を表示して、背景色を変更
        SampleLabel3.text = "SampleLabel3"
        SampleLabel3.backgroundColor = UIColor.lightGrayColor()
    }

    override func didReceiveMemoryWarning() {
        super.didReceiveMemoryWarning()
        // Dispose of any resources that can be recreated.
    }
}
やってみた感想。。
どうですか?思ってより簡単だったでしょう?
やってみたいなー、でも何からやったらいいか分からないなーって方は
こんな感じで、ちょっと実装してみると意外とすんなり一歩を踏み出せるんじゃないでしょうか。
最後に
今回このような基礎的なことを書いてみたのは、自分が勉強し始めの頃にあったら嬉しいなと思ったのと、
もっと分かりやすい記事もありますが、一人でも初学者の助けになればと思い、
復習も込めて書いてみました。
(あとでストーリーボードのことも追記しときます。)
「お、意外と自分でも作れるんじゃね?」と思ったら勝ちですよ!(笑)
次回もまた別の基礎的な事を書いていこうと思います。
モチベが続けば、、、、(笑)
