Opal Advent Calendar 2016ではOpalとElectronを組み合わせてデスクトップアプリを作るという記事がありました。今回はOpalとCarloという組み合わせを試してみたので手順を説明します。
CarloはElectron同様、JavaScriptでデスクトップアプリを作るためのものですが、環境に入っているChromeを利用するため、配布サイズが小さいというメリットがあるようです。
Carloのインストール
基本的にはnpm i carloだけなのですが、環境によって(?)bignum@0.11.0がコンパイルできないことがありました。その場合はnodebrewでNode.js 8.11.2を入れることでなんとかできました(下記手順)。あるいは最新のNodeでも大丈夫かもしれません。
$ brew install nodebrew
...
==> Caveats
You need to manually run setup_dirs to create directories required by nodebrew:
  /usr/local/opt/nodebrew/bin/nodebrew setup_dirs

Add path:
  export PATH=$HOME/.nodebrew/current/bin:$PATH

To use Homebrew's directories rather than ~/.nodebrew add to your profile:
  export NODEBREW_ROOT=/usr/local/var/nodebrew
...
$ /usr/local/opt/nodebrew/bin/nodebrew setup_dirs
$ nodebrew install 8.11.2
$ export PATH=$HOME/.nodebrew/current/bin:$PATH
$ nodebrew use 8.11.2
$ node -v
$ npm i carlo
Exampleを動かす
Carloがインストールできたら、まずはJavaScriptでアプリを作れる状態を作りましょう。https://github.com/GoogleChromeLabs/carlo にあるようにexample.jsとexample.htmlを用意します。
const carlo = require('carlo');

(async () => {
  // Launch the browser.
  const app = await carlo.launch();

  // Terminate Node.js process on app window closing.
  app.on('exit', () => process.exit());

  // Tell carlo where your web files are located.
  app.serveFolder(__dirname);

  // Expose 'env' function in the web environment.
  await app.exposeFunction('env', _ => process.env);

  // Navigate to the main page of your app.
  await app.load('example.html');
})();
<script>
async function run() {
  // Call the function that was exposed in Node.
  const data = await env();
  for (const type in data) {
    const div = document.createElement('div');
    div.textContent = `${type}: ${data[type]}`;
    document.body.appendChild(div);
  }
}
</script>
<body onload="run()">
node example.jsで実行すると、Chromeが起動して、環境変数の一覧が表示されます。
Opalのコードを組み込む
Opalのコードをこれに組み込むのは簡単で、.rbをopal -cで.jsに変換し、それをscriptタグで読み込むだけです。
例として、Ovtoのサンプルコードを組み込んでみます。yhara/ovtoのexamples/static/以下をコピーして、bundle installとrakeを実行してapp.jsを作ります。
$ git clone https://github.com/yhara/ovto.git
$ cp ovto/example/static/* .
$ bundle install
$ rake
example.htmlは以下のようにします。
<!DOCTYPE html>
<html lang="ja">
  <head>
    <meta charset="utf-8" />
    <title>Carlo + Ovto example</title>
    <script src='app.js' type='text/javascript'></script>
  </head>
  <body>
    <div id='ovto'></div>
  </body>
</html>
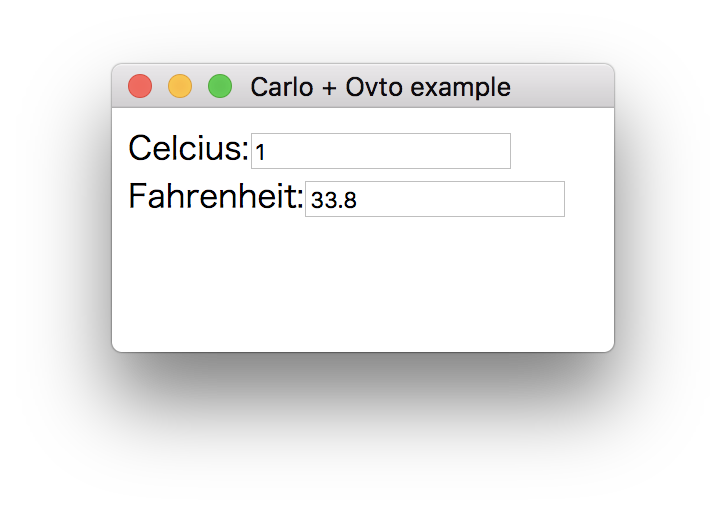
node example.jsで実行すると、以下のようになりました。

あとはpkgとかでexeにすれば単体で配布できるはずです。
これで、摂氏と華氏を変換するアプリが作れました…と言いたいところですが、2台のMacBookで試した結果、片方ではうまく動きませんでした![]() (inputタグにフォーカスしてキーを叩いても文字が入力できなかった。app.jsを外してただのinputタグを入れても同じだったので、Opalは関係なさそうですが…)
(inputタグにフォーカスしてキーを叩いても文字が入力できなかった。app.jsを外してただのinputタグを入れても同じだったので、Opalは関係なさそうですが…)
まとめ
今回はCarloを使ってOpalでデスクトップアプリを作る方法を解説しました。こうやってJavaScript関連の資産をRubyで流用できるのがOpalの面白いところですね。