はじめに
皆さん、どうもです。k.s.ロジャースのやすもんです。
今回は長くなりそうなので前編と後編に分けてお送りしたいと思います。
前編:ローカル構築編<-イマココ
後編:ECS構築編
今回は前編をお送りしたいと思います!それでは、早速いってみましょう!
環境構成
mac:10.13.4
Docker:18.03.1-ce-mac65
ElasticSearch:6.2.4
kibana:6.2.4
Dockerイメージの取得
dockerのインストール諸々は割愛します。
まずは公式のESとkibanaのDockerイメージを取得します。
$ docker pull docker.elastic.co/elasticsearch/elasticsearch:6.2.4
$ docker pull docker.elastic.co/kibana/kibana:6.2.4
Dockerfileを作成し、pluginを導入する
適当なworkフォルダを作成します。
$ mkdir es-work
$ cd es-work
embulkやkuromoji、s3バックアップなどを使いたいので、それらを既存のdockerイメージに追加するDockerfileを作成します
$ vi Dockerfile
# ElasticDocker
FROM docker.elastic.co/elasticsearch/elasticsearch:6.2.4

MAINTAINER Kenji Yasumoto <yasumoto@ks-rogers.co.jp>

RUN wget http://dl.embulk.org/embulk-latest.jar -O /usr/local/bin/embulk
RUN chmod +x /usr/local/bin/embulk
RUN embulk gem install embulk-input-mysql embulk-output-elasticsearch

RUN bin/elasticsearch-plugin install analysis-kuromoji
RUN bin/elasticsearch-plugin install repository-s3
作成できたら、Dockerfileをbuildします。
$ docker build -t es:latest ./
docker-composeを作成する
docker-compose.ymlを作成
$ vi docker-compose.yml
version: '2'
services:
  # es-server
  es:
    image: es:latest
    container_name: {コンテナ名}
    environment:
      - cluster.name=docker-cluster
      - bootstrap.memory_lock=true
      - "ES_JAVA_OPTS=-Xms512m -Xmx512m"
    ulimits:
      memlock:
        soft: -1
        hard: -1
    volumes:
      - esdata1:/usr/share/elasticsearch/data
    ports:
      - 9200:9200
  # kibana
  kibana:
    image: docker.elastic.co/kibana/kibana:6.2.4
    container_name: {コンテナ名}
    environment:
      SERVER_NAME: localhost:5601
      ELASTICSEARCH_URL: http://{esのコンテナ名}:9200
    ports:
      - 5601:5601
    depends_on:
      - es

volumes:
  esdata1:
    driver: local
docker-composeを立ち上げる
$ docker-compose up -d
起動確認
立ち上がるまで少し待って、以下を実行し、正常なレスポンスが帰ってくるのを確認
$ curl -X GET http://localhost:9200
{
  "name" : "pSgkODc",
  "cluster_name" : "docker-cluster",
  "cluster_uuid" : "MRO54I_tR3eWSp6igeLXVA",
  "version" : {
    "number" : "6.2.4",
    "build_hash" : "ccec39f",
    "build_date" : "2018-04-12T20:37:28.497551Z",
    "build_snapshot" : false,
    "lucene_version" : "7.2.1",
    "minimum_wire_compatibility_version" : "5.6.0",
    "minimum_index_compatibility_version" : "5.0.0"
  },
  "tagline" : "You Know, for Search"
適当にmappingを作成
シェルスクでゴリッと書いちゃいます。
$ vi es-mapping.sh
curl -X PUT $1':9200/test' -d '{
  "settings": {
    "index": {
      "analysis": {
        "tokenizer": {
          "kuromoji_user_dict": {
            "type": "kuromoji_tokenizer",
            "mode": "search",
            "discard_punctuation": "false"
          }
        },
        "analyzer": {
          "my_analyzer": {
            "type": "custom",
            "tokenizer": "kuromoji_user_dict",
            "filter": ["cjk_width"]
          }
        }
      }
    }
  },
  "mappings": {
    "test": {
      "properties": {
        "id": {
          "type": "long"
        },
        "name": {
          "type": "text",
          "analyzer": "my_analyzer"
        },
        "url": {
          "type": "text"
        }
      }
    }
  }
}' -H 'Content-Type: application/json'
シェルを実行し、mappingを行う
$ sh es-mapping.sh localhost
{"acknowledged":true,"shards_acknowledged":true,"index":"test"}
インデックスの確認
$ curl -X GET http://localhost:9201/test/_search?pretty
{
  "took" : 76,
  "timed_out" : false,
  "_shards" : {
    "total" : 5,
    "successful" : 5,
    "skipped" : 0,
    "failed" : 0
  },
  "hits" : {
    "total" : 0,
    "max_score" : null,
    "hits" : [ ]
  }
}
データを入れてみる
今回は弊社のwantedlyで投稿しているブログ記事のタイトルとURLを突っ込んでみたいと思います。
まずはゴリッとシェル作成
vi import-data.sh
curl -X PUT $1':9200/test/test/1' -d '{
    "id" : 1,
    "name" : "プライマリブラウザにfirefoxをお勧めする3つの理由",
    "url" : "https://www.wantedly.com/companies/ks-rogers/post_articles/118049"
}' -H 'Content-Type: application/json'

curl -X PUT $1':9200/test/test/2' -d '{
    "id" : 2,
    "name" : "この会社って一体なんなのか?",
    "url" : "https://www.wantedly.com/companies/ks-rogers/post_articles/118050"
}' -H 'Content-Type: application/json'

curl -X PUT $1':9200/test/test/3' -d '{
    "id" : 3,
    "name" : "非エンジニアが考えるエンジニアとの関わり方",
    "url" : "https://www.wantedly.com/companies/ks-rogers/post_articles/119827"
}' -H 'Content-Type: application/json'

curl -X PUT $1':9200/test/test/4' -d '{
    "id" : 4,
    "name" : "sublime愛用者に捧げるjetBrain系キーコンフィグ",
    "url" : "https://www.wantedly.com/companies/ks-rogers/post_articles/120354"
}' -H 'Content-Type: application/json'

curl -X PUT $1':9200/test/test/5' -d '{
    "id" : 5,
    "name" : "自分がフリーランスの人と契約する時に意識すること",
    "url" : "https://www.wantedly.com/companies/ks-rogers/post_articles/120559"
}' -H 'Content-Type: application/json'

curl -X PUT $1':9200/test/test/6' -d '{
    "id" : 6,
    "name" : "【おすすめ】知っておきたいデザインツール",
    "url" : "https://www.wantedly.com/companies/ks-rogers/post_articles/122383"
}' -H 'Content-Type: application/json'
このとき、-H 'Content-Type: application/json'をつけないと、エラーが出るので注意。どうやらES6系以降は必要みたいですな
shellを実行してデータ投入
$ sh import-data.sh localhost
{"_index":"test","_type":"test","_id":"1","_version":1,"result":"created","_shards":{"total":2,"successful":1,"failed":0},"_seq_no":0,"_primary_term":1}{"_index":"test","_type":"test","_id":"2","_version":1,"result":"created","_shards":{"total":2,"successful":1,"failed":0},"_seq_no":0,"_primary_term":1}{"_index":"test","_type":"test","_id":"3","_version":1,"result":"created","_shards":{"total":2,"successful":1,"failed":0},"_seq_no":0,"_primary_term":1}{"_index":"test","_type":"test","_id":"4","_version":1,"result":"created","_shards":{"total":2,"successful":1,"failed":0},"_seq_no":1,"_primary_term":1}{"_index":"test","_type":"test","_id":"5","_version":1,"result":"created","_shards":{"total":2,"successful":1,"failed":0},"_seq_no":0,"_primary_term":1}{"_index":"test","_type":"test","_id":"6","_version":1,"result":"created","_shards":{"total":2,"successful":1,"failed":0},"_seq_no":2,"_primary_term":1}
中身を確認してみる
 $ curl -X GET http://localhost:9201/test/_search?pretty
{
  "took" : 38,
  "timed_out" : false,
  "_shards" : {
    "total" : 5,
    "successful" : 5,
    "skipped" : 0,
    "failed" : 0
  },
  "hits" : {
    "total" : 6,
    "max_score" : 1.0,
    "hits" : [
      {
        "_index" : "test",
        "_type" : "test",
        "_id" : "5",
        "_score" : 1.0,
        "_source" : {
          "id" : 5,
          "name" : "自分がフリーランスの人と契約する時に意識すること",
          "url" : "https://www.wantedly.com/companies/ks-rogers/post_articles/120559"
        }
      },
…(省略)
      {
        "_index" : "test",
        "_type" : "test",
        "_id" : "3",
        "_score" : 1.0,
        "_source" : {
          "id" : 3,
          "name" : "非エンジニアが考えるエンジニアとの関わり方",
          "url" : "https://www.wantedly.com/companies/ks-rogers/post_articles/119827"
        }
      }
    ]
  }
}
ふむ、問題なさそうである。
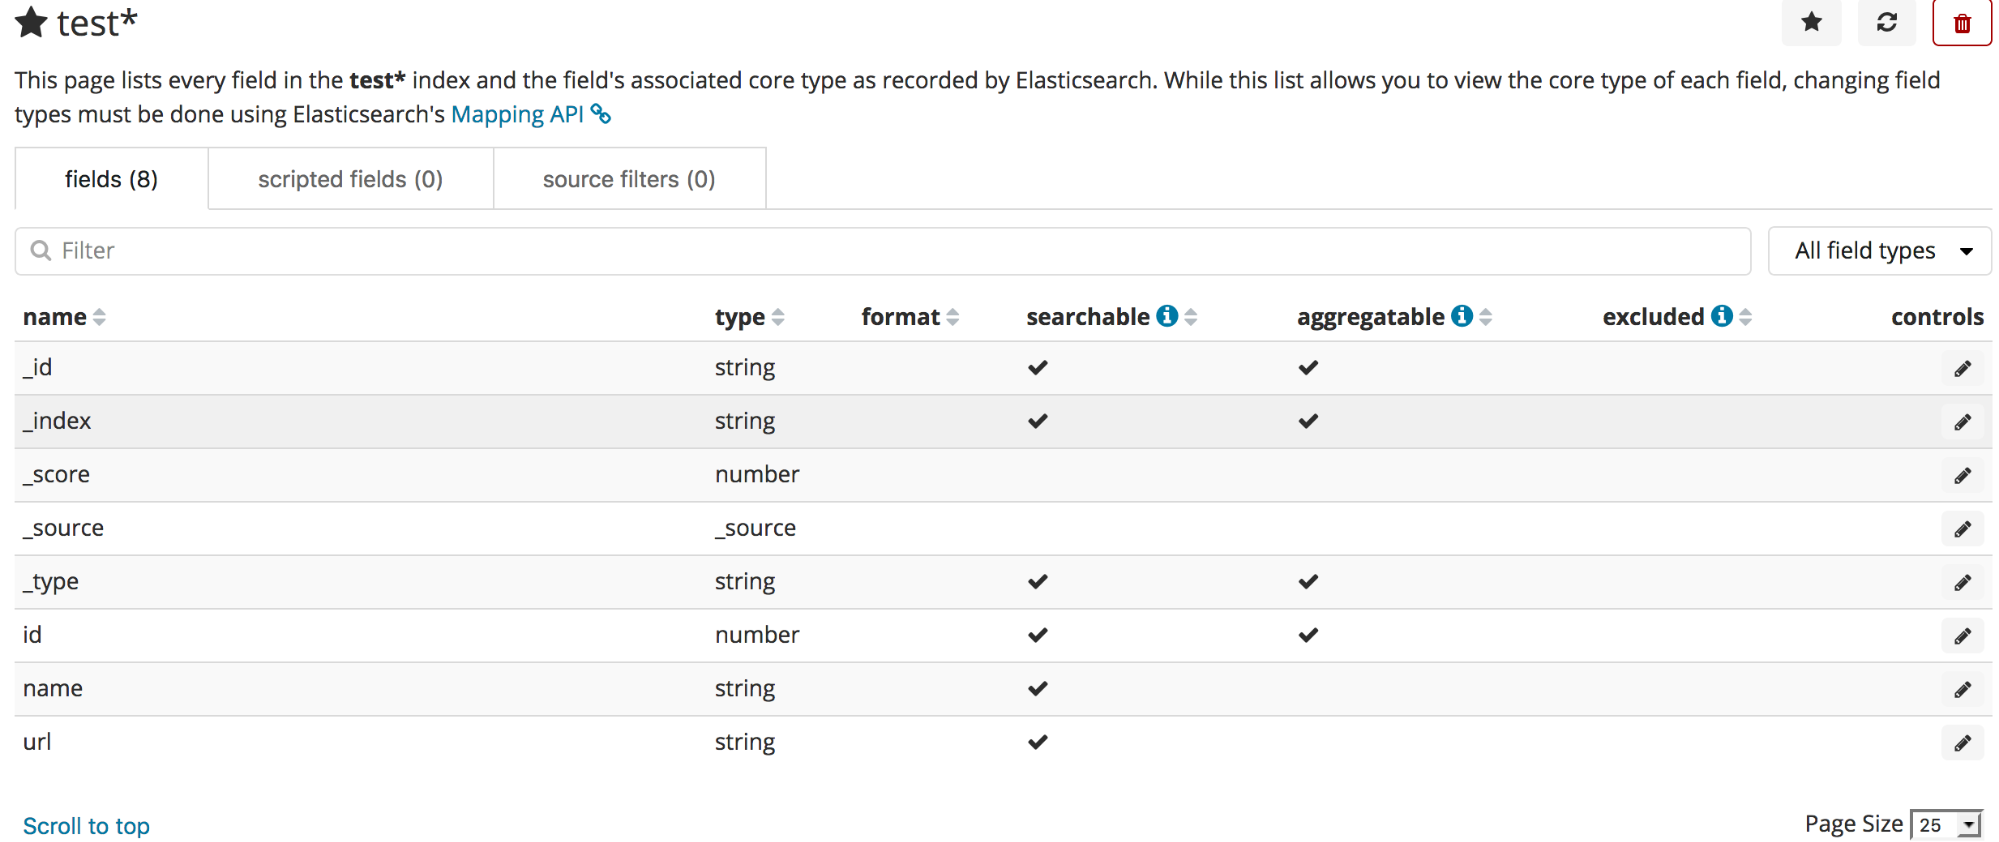
kibanaの確認
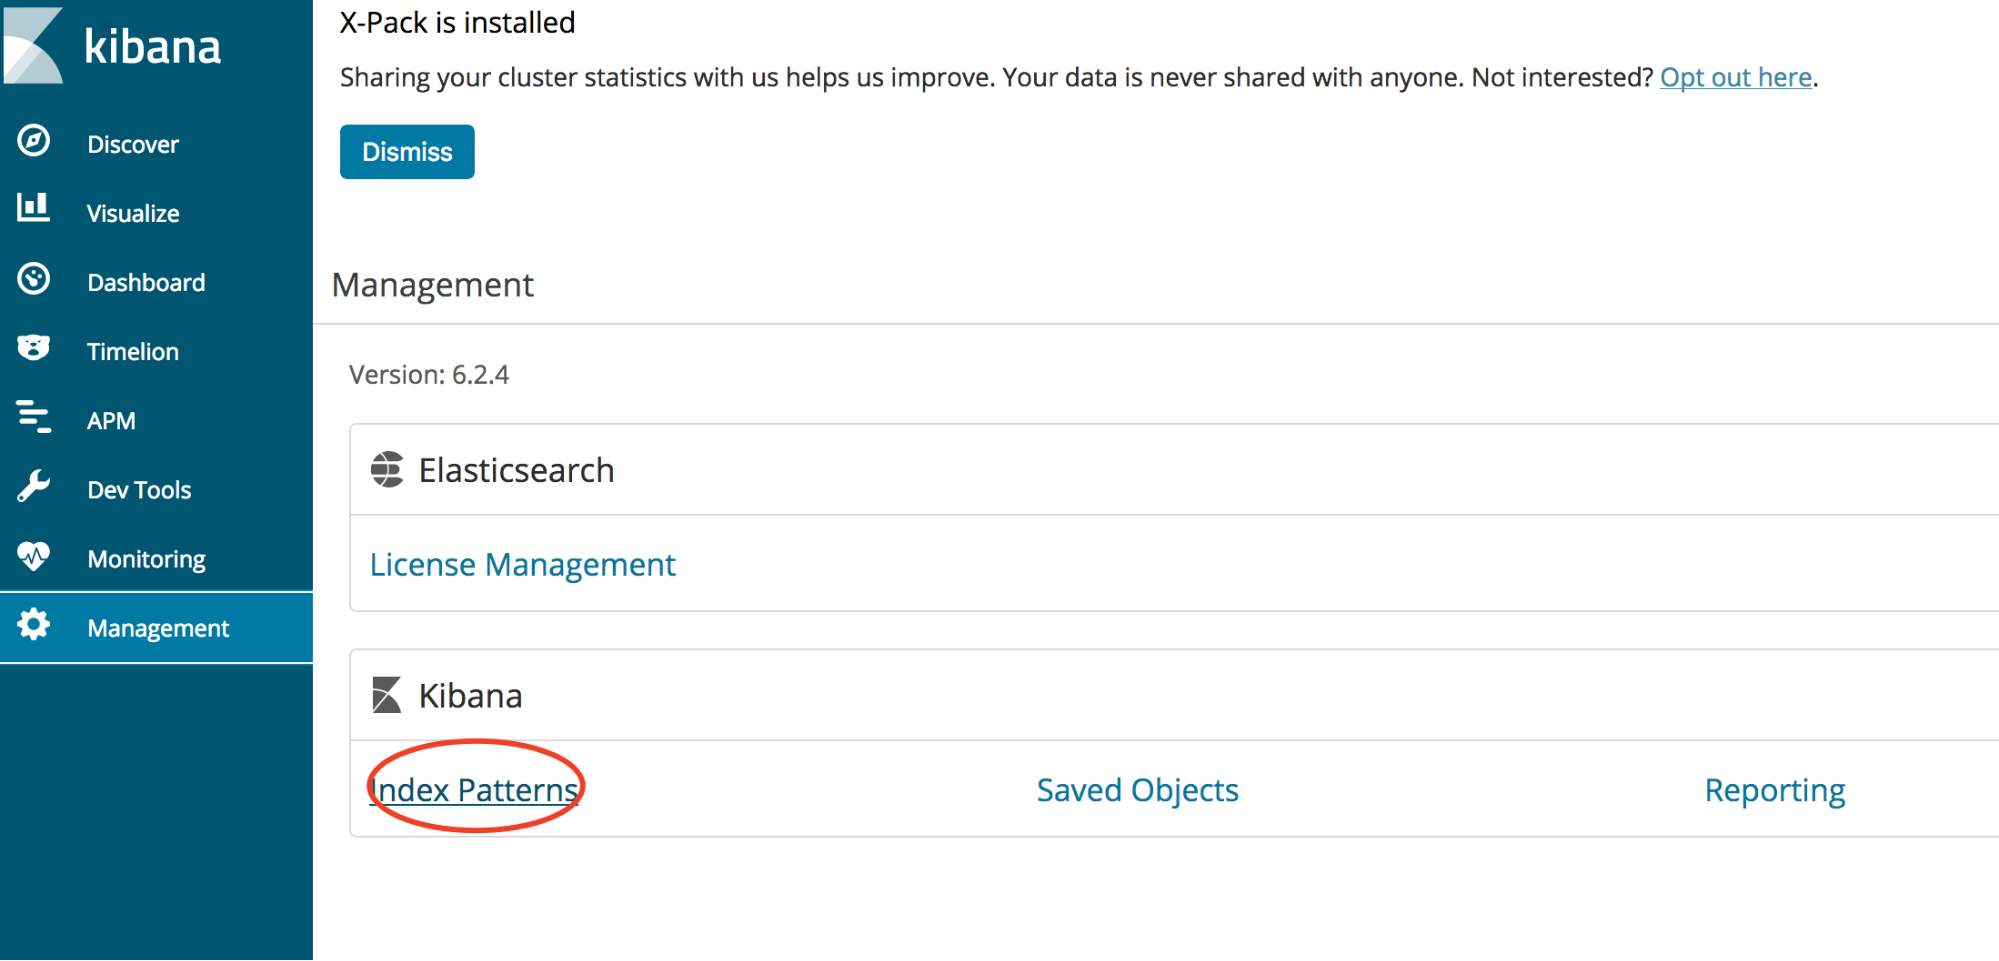
manageからindex_patternsへ
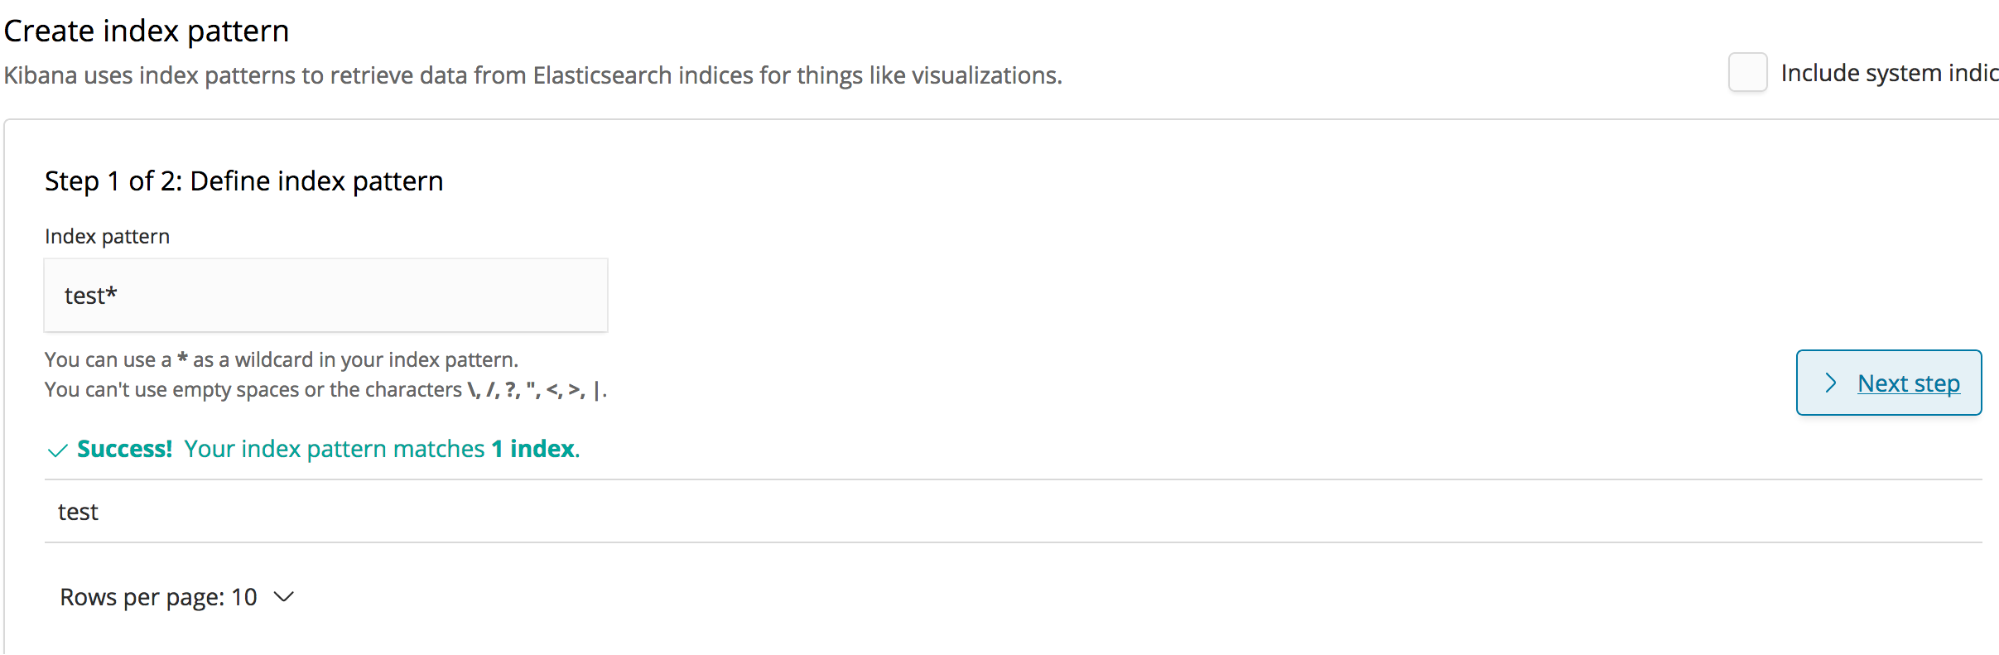
testを入力し、next_step
そのまま、createを押して作成する
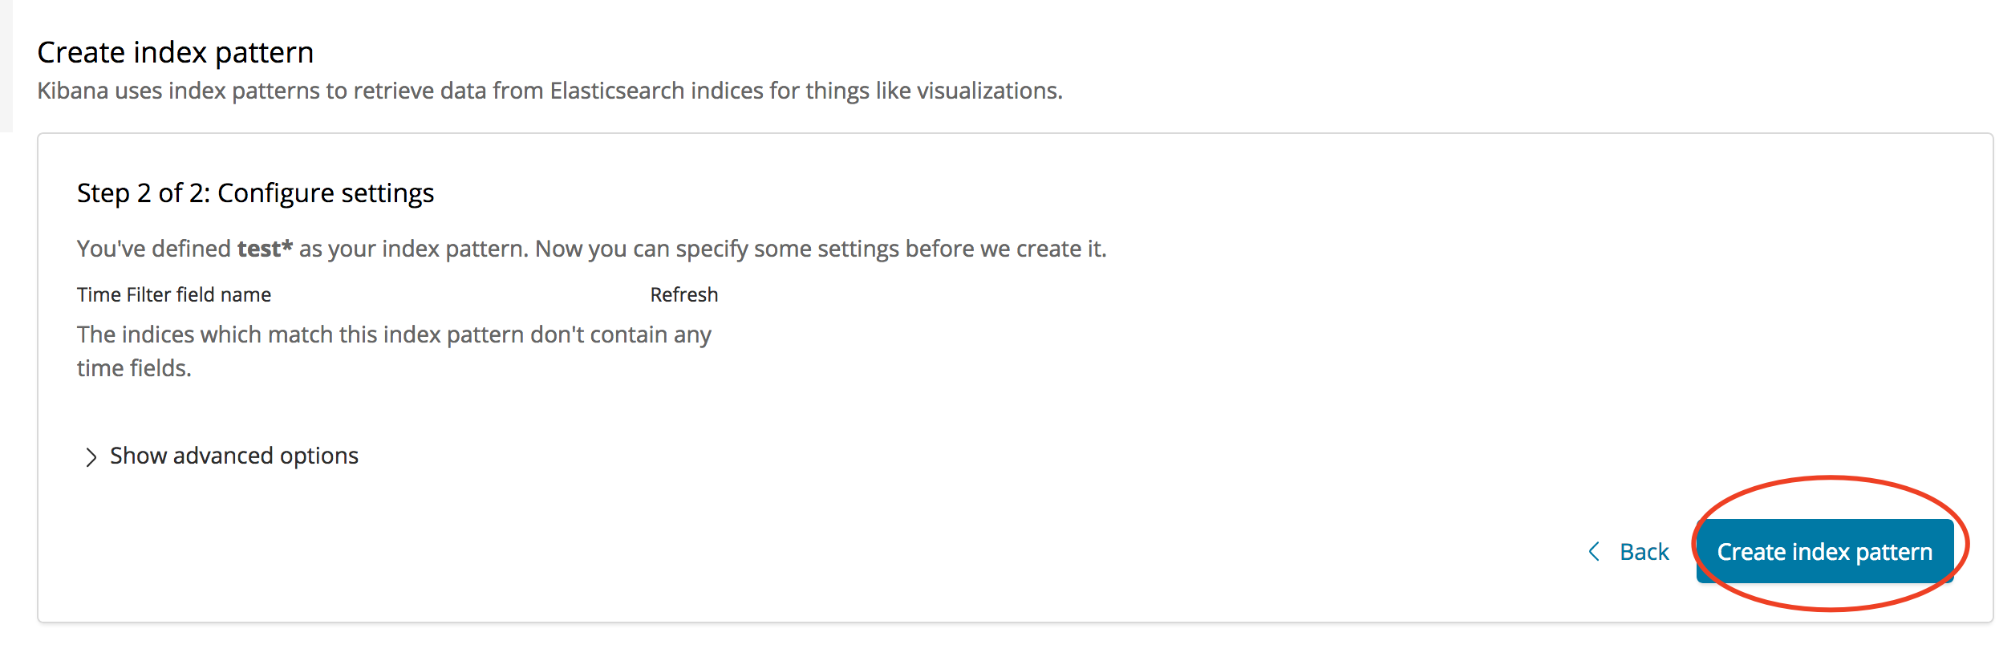
できましたね、どうやらesコンテナとの接続も問題なさそうです
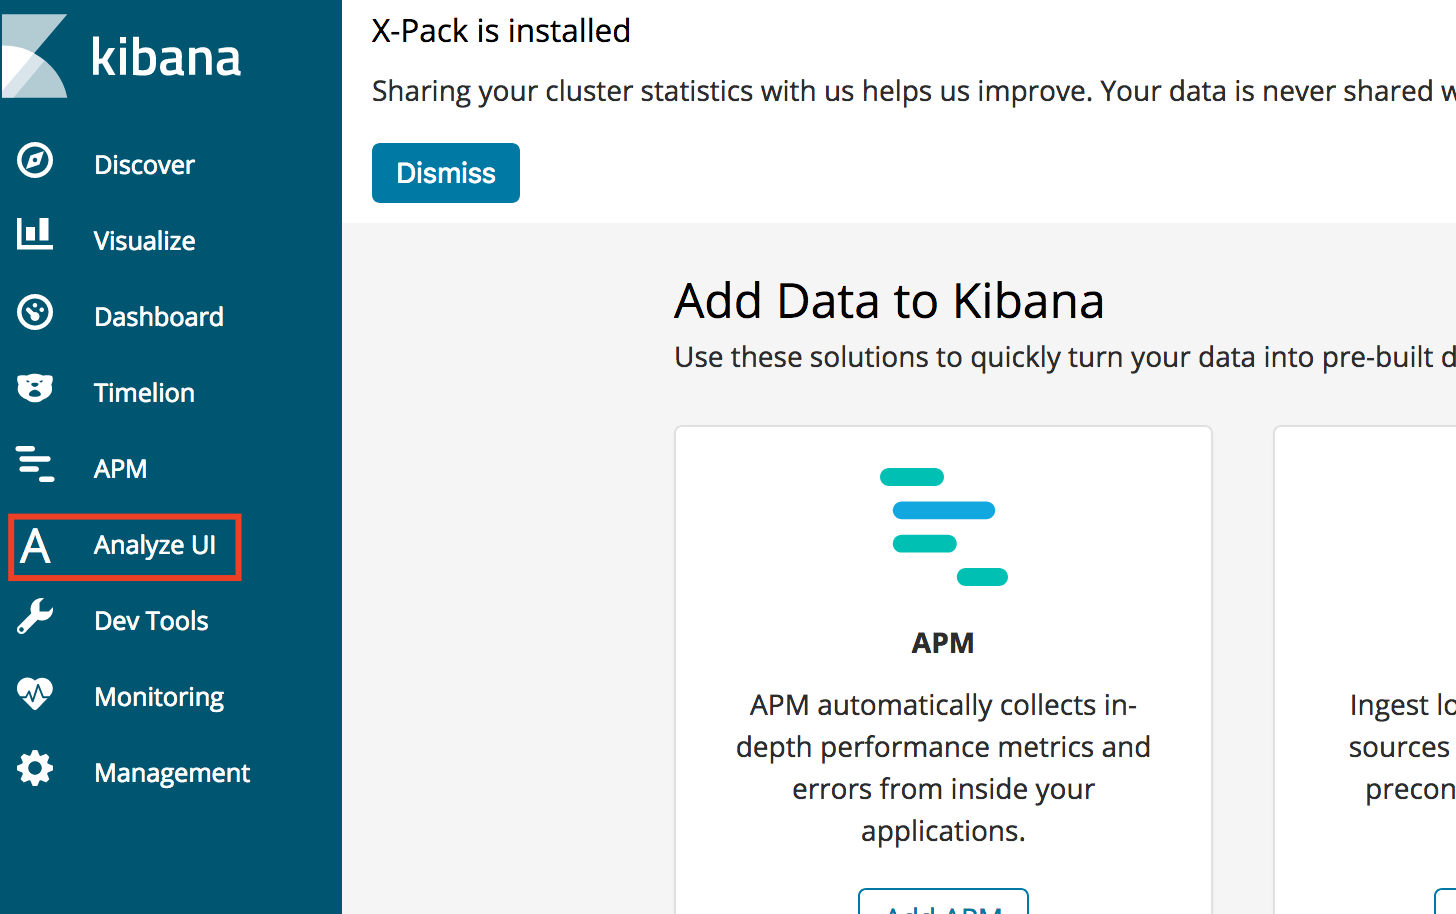
kibanaにanalyze-uiプラグインを入れてみる
まず、kibanaコンテナにログイン
docker exec -it kibana-test /bin/bash
pluginのインストールコマンドを叩く
$ ./bin/kibana-plugin install https://github.com/johtani/analyze-api-ui-plugin/releases/download/6.2.4/analyze-api-ui-plugin-6.2.4.zip
忘れずrestartする
$ docker-compose restart
analize_uiが出現
index名と解析したい文字列、indexに設定したanalyzerを指定して、実行すると
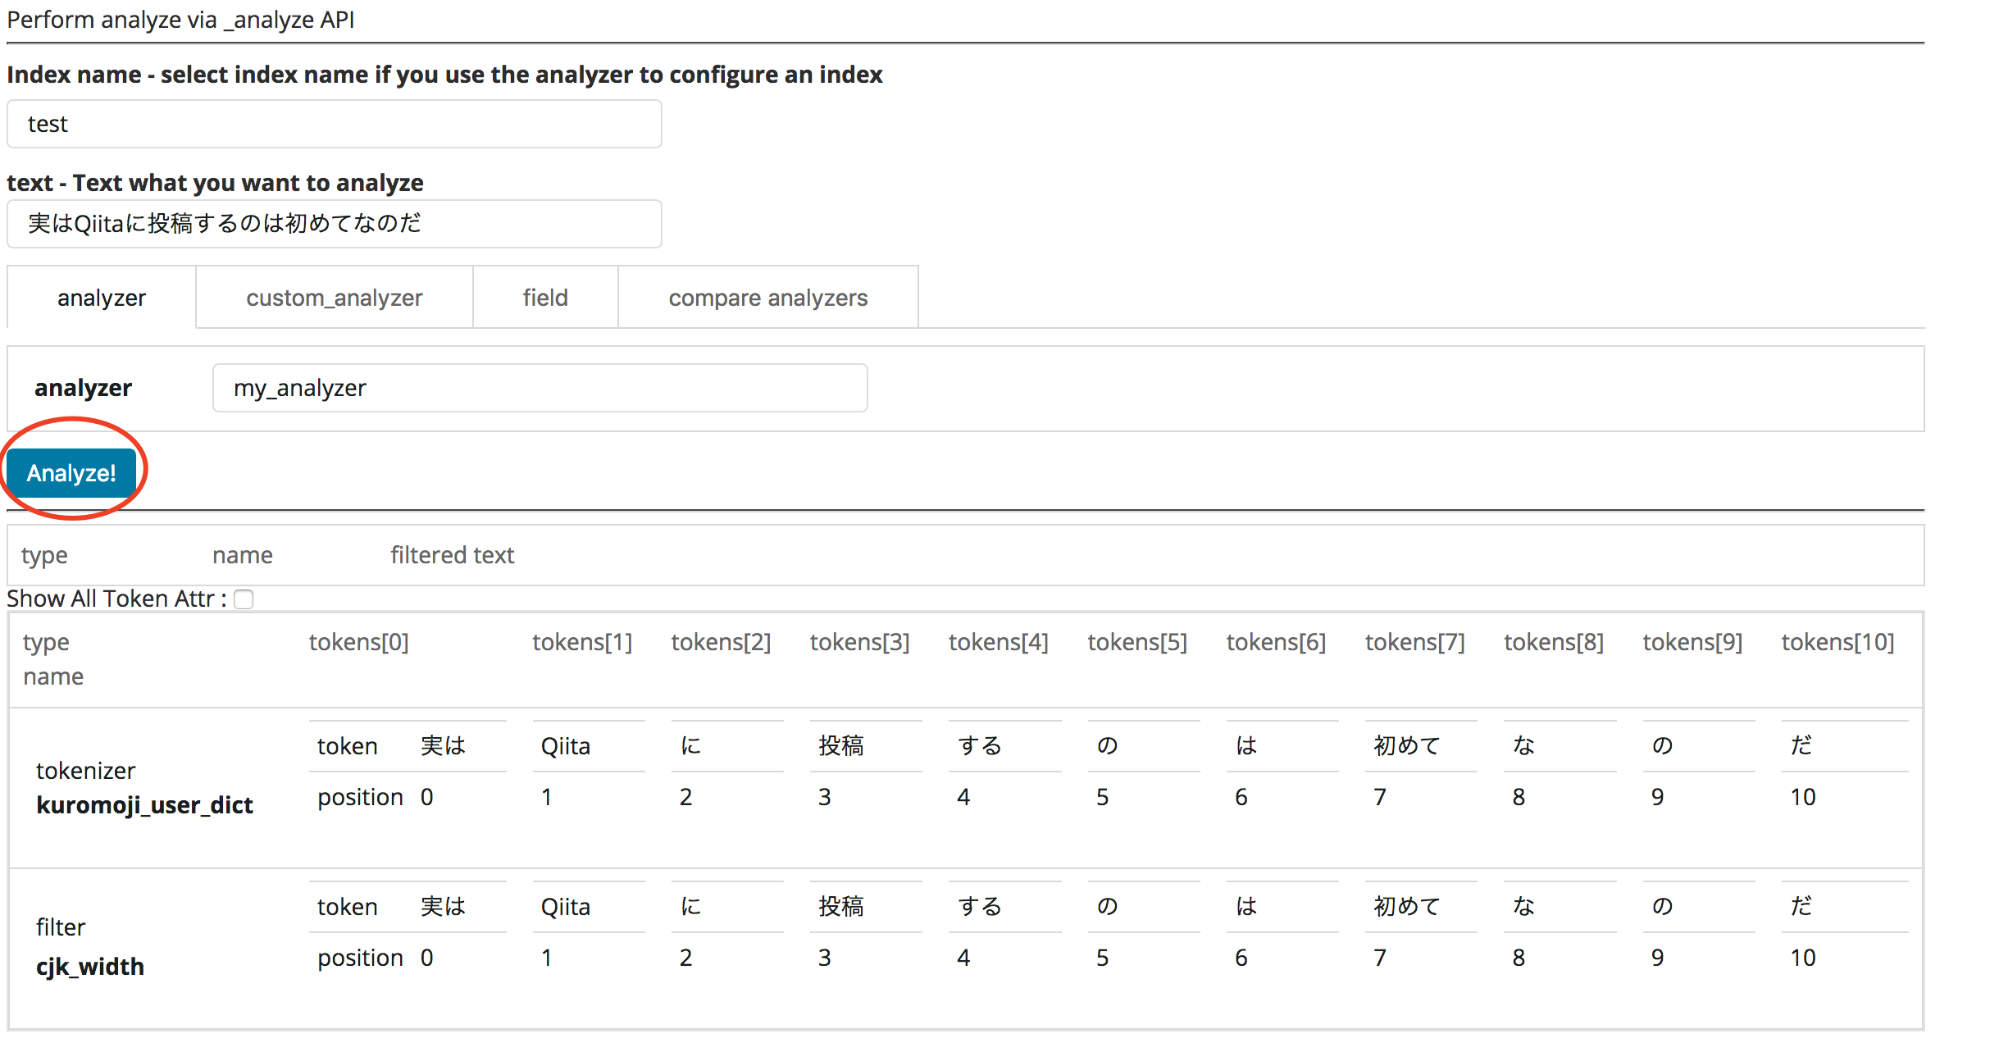
jsonよりもみやすく解析結果が出てきましたね。
analyzeはcurlを投げるよりもこちらで確認したほうが視覚的にわかりやすいと思います!
最後に
いかがでしたでしょうか、今回はECSにデプロイするためのESコンテナの作成を行いました。
次の投稿では実際にESへのデプロイやEC2インスタンスで行う注意などを書いていけたらよいかと思います。
今回はDockerやESに不慣れな方でも、上から順番になぞっていけば構築できるようにかいてみましたので、これを機にDocker on ESを触ってみてはいかがでしょうか?
また、ESの仕様が6系から変わっているみたいなので、6系にアップデートしたいと思っている方の参考にでもなれば幸いです。
Wantedlyでもブログ投稿してます
Techブログに加えて会社ブログなどもやっているので、気になった方はぜひ覗いてみてください。
https://www.wantedly.com/companies/ks-rogers