RancherからKubernetesを覚える
Kubernetes完全ガイド(今後、良書と略す)に書いている内容をRancherを使いながら見てみた記事になります。
Kubernetesの理解を深めるのと、Rancherからだとどんな風に(どこまで)できるかを整理してみました。
なお、記事上に出てくる「参照:Pxx」は良書のページです。
ここでは前提として、GKEで作成したKubernetesをRancherから見える状態にしています。
Node
Rancherからの確認
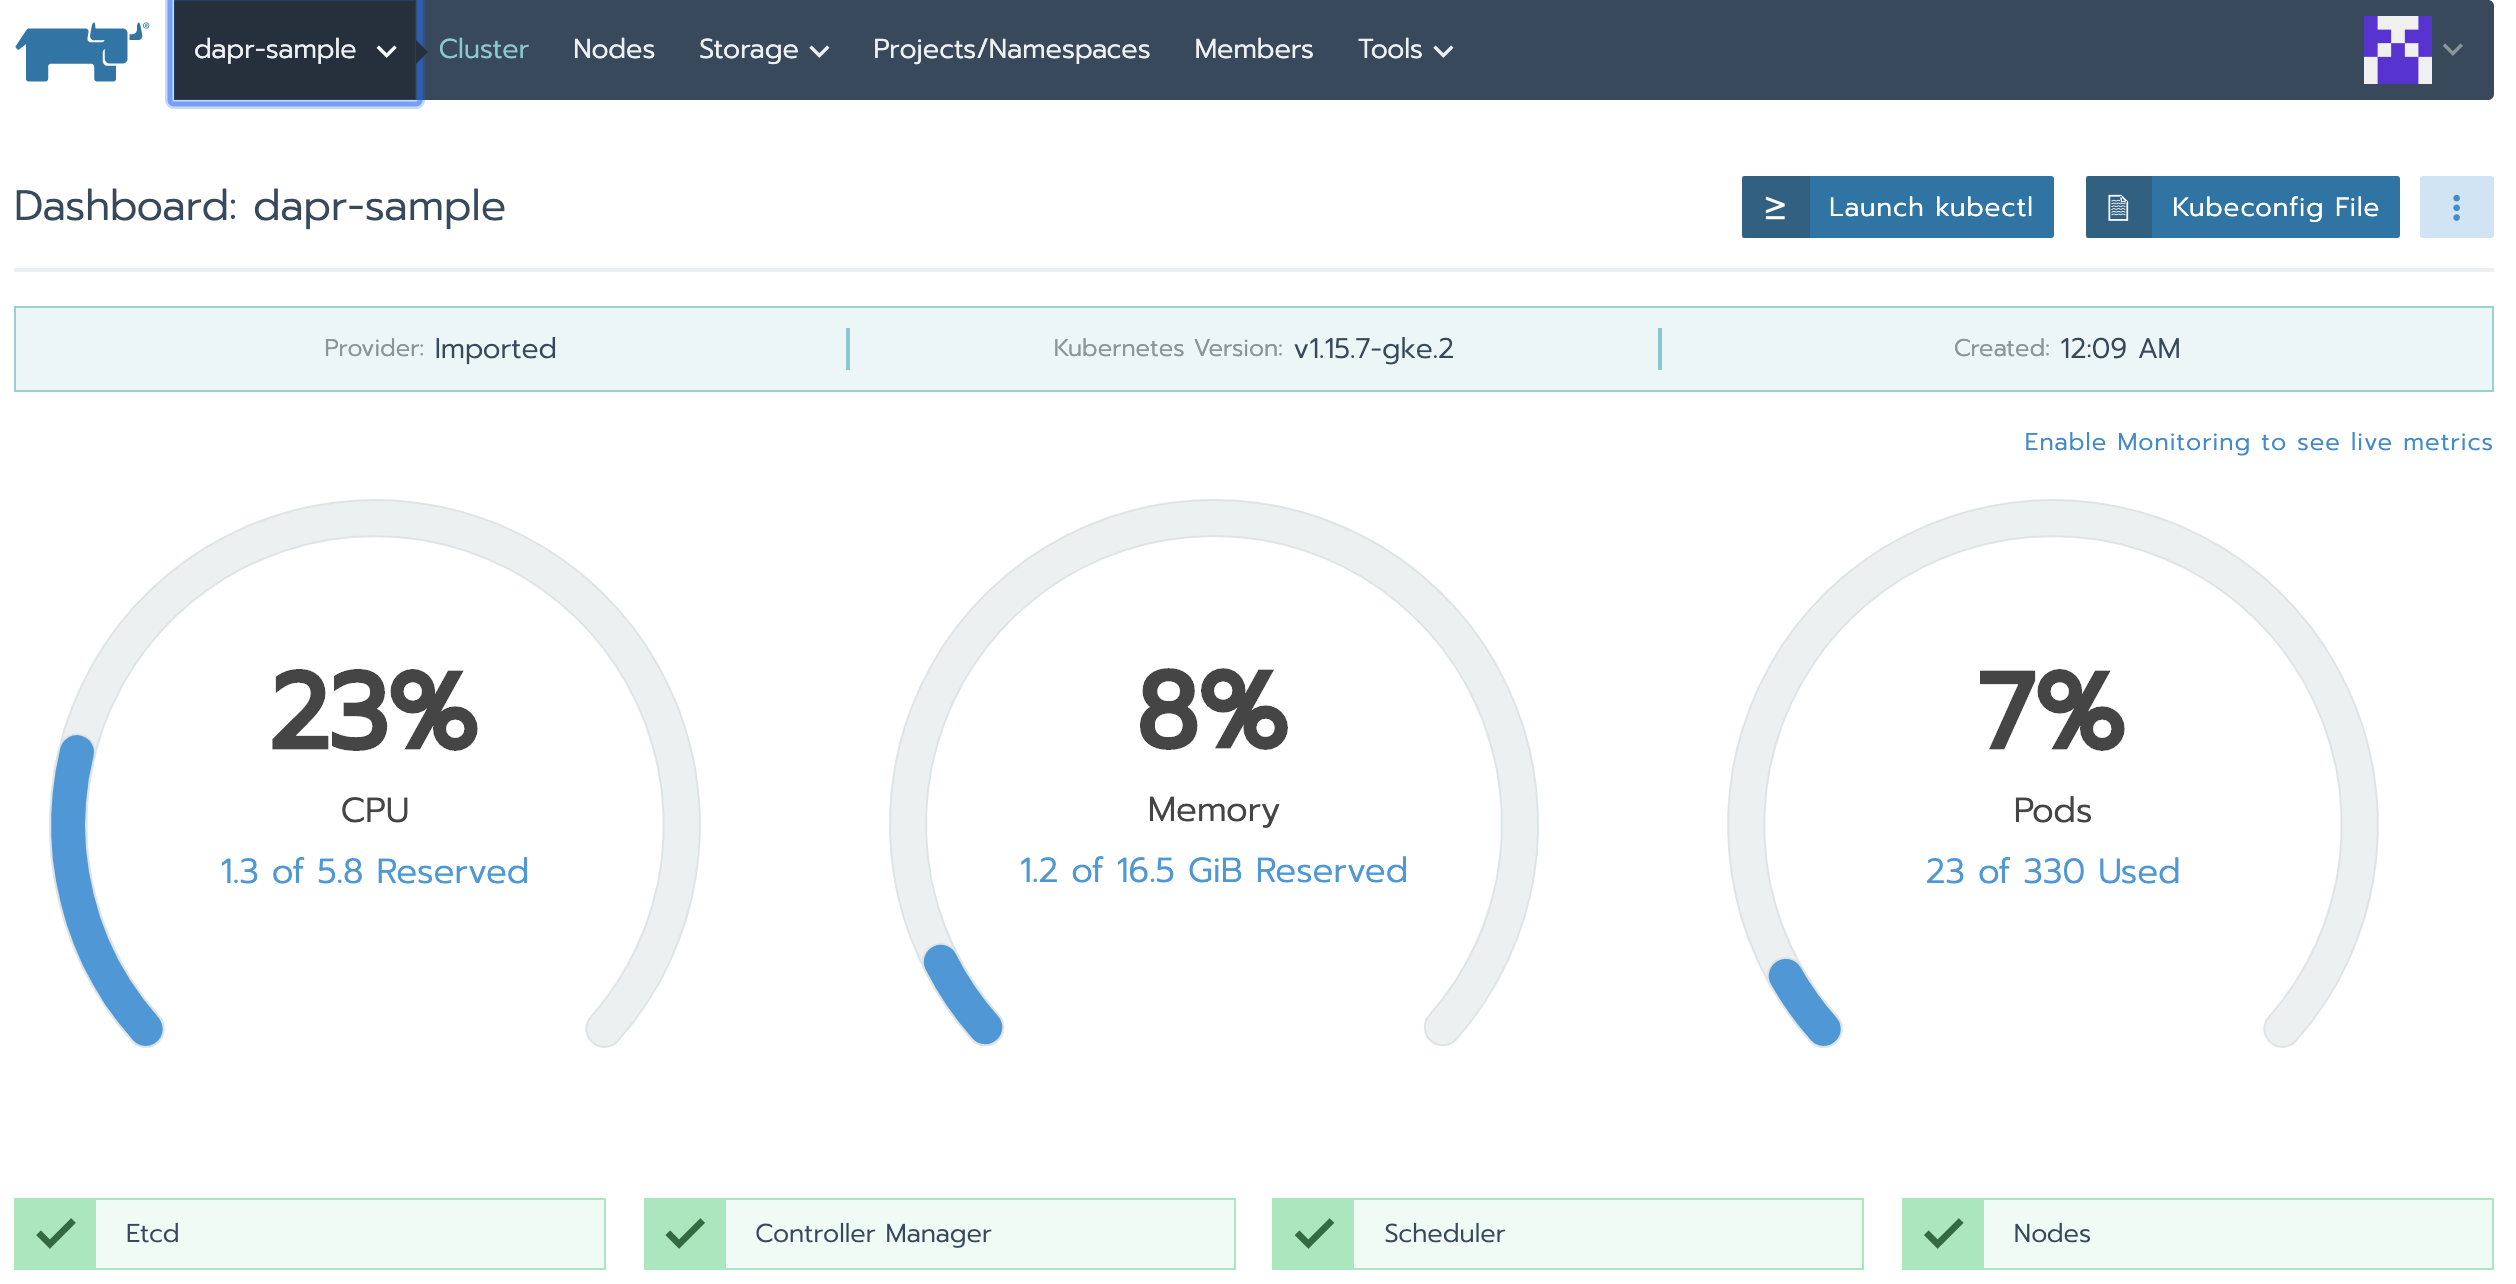
Rancherの画面を起動してクラスタを選択すると、まずはノードの状態が見れます。
CPU/メモリ/Podなどの上限値や確保済み(使用済み)の数が確認できます。
kubectlからの確認
これと同じものをkubectlで見ると以下のような感じで、ノードの上限値、起動中のPod数、CPUやメモリのRequests/Limitsが見れます。
良書に書かれてますが、リソース確保されているのは、Requests値なので、Rancher上で見える使用量も各ノードのRequests値の合計になっていました。
参照:P.258
kubectl describe node <ノード名>
...
Allocatable:
 attachable-volumes-gce-pd:  127
 cpu:                        1930m
 ephemeral-storage:          18858075679
 hugepages-2Mi:              0
 memory:                     5776416Ki
 pods:                       110
…
Non-terminated Pods:         (10 in total)
...
Resource                   Requests    Limits
  --------                   --------    ------
  cpu                        509m (26%)  1146m (59%)
  memory                     435Mi (7%)  1045Mi (18%)
  ephemeral-storage          0 (0%)      0 (0%)
  attachable-volumes-gce-pd  0           0
Namespace
Rancherからの操作
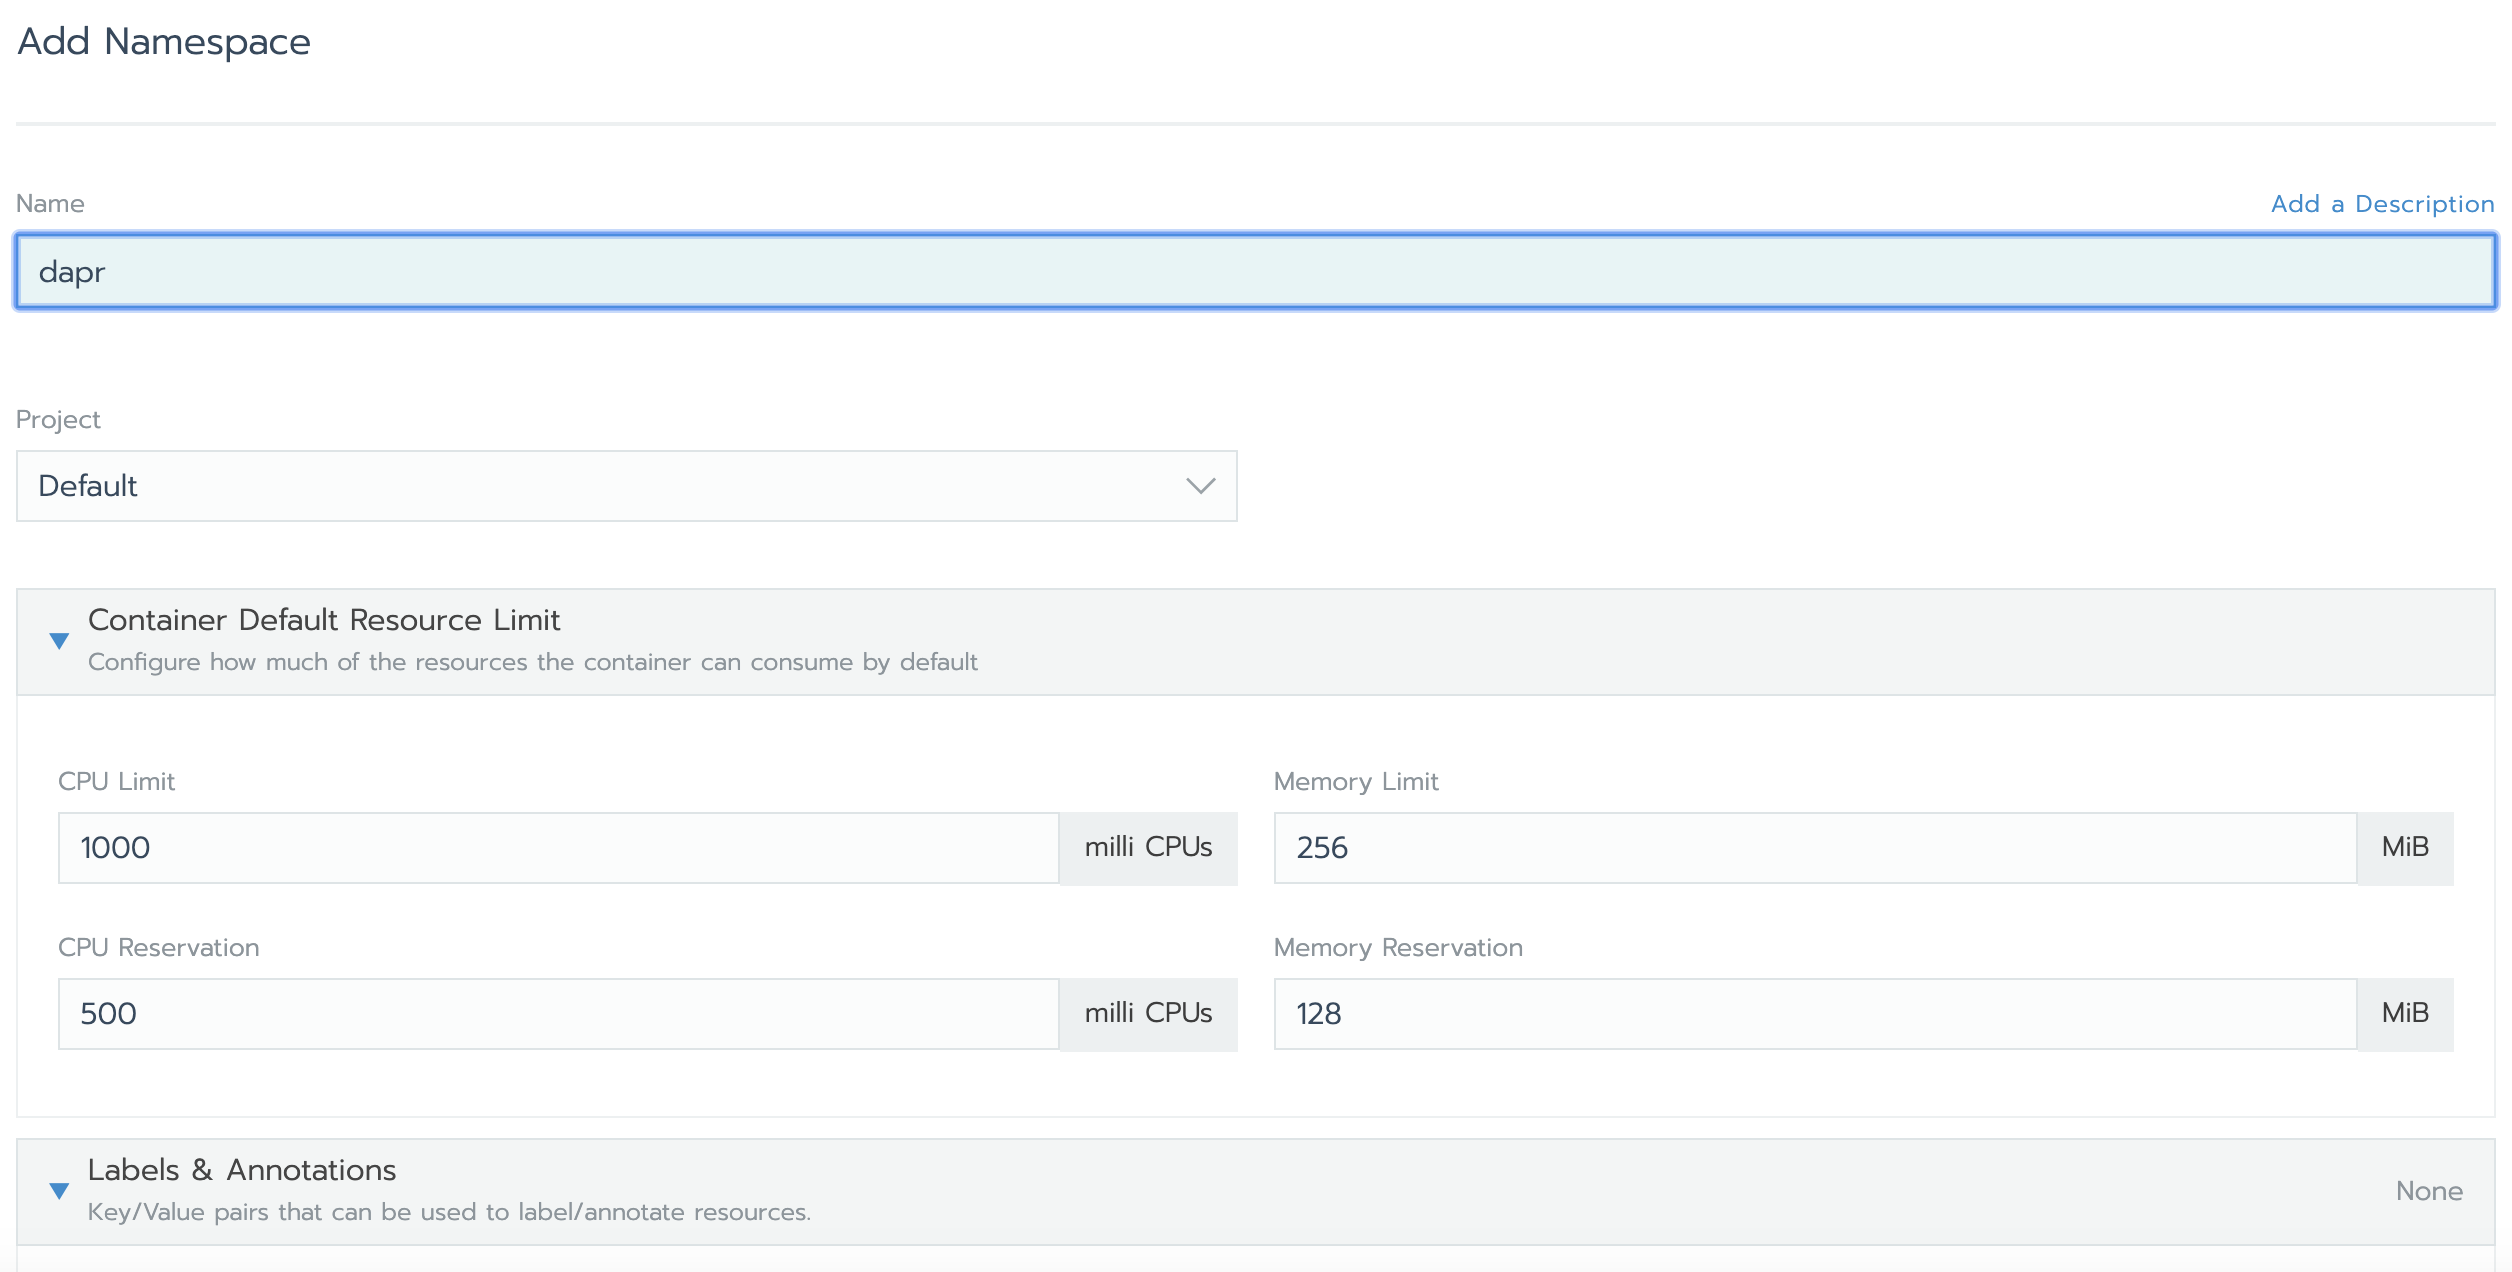
単純な作成だけでなく、LimitRangeによるPodへの制限もかけれます。(requests/limits)
リソースクォータは設定できなさそうでした。
| 制約 | 内容 |
|---|---|
| LimitRange | Namespace内のPodにCPU/メモリなどの使用上限を設定する |
| リソースクォータ | Namespaceにリソース作成の制限を設ける |
なお、Rancherでは複数のNamespaceを束ねたプロジェクトという概念がありますが、Namespaceと混同しないように注意が必要。
参照:Namespace P.255 LimitRangeによるリソース制限 P.264 リソースクォータ P.270
kubectlからの操作
Namespaceの確認
kubectl describe namespace <ネームスペース>
Resource Quotas
 Name:                       gke-resource-quotas
 Resource                    Used  Hard
 --------                    ---   ---
 count/ingresses.extensions  0     100
 count/jobs.batch            0     5k
 pods                        0     1500
 services                    0     500

Resource Limits
 Type       Resource  Min  Max  Default Request  Default Limit  Max Limit/Request Ratio
 ----       --------  ---  ---  ---------------  -------------  -----------------------
 Container  memory    -    -    256Mi            512Mi          -
 Container  cpu       -    -    1500m            2              -
LimitRangeの確認
kubectl describe limitrange -n <ネームスペース>
Name:       xxxxxx-xxxxx-xxxxxx-xxxxxx
Namespace:  dapr
Type        Resource  Min  Max  Default Request  Default Limit  Max Limit/Request Ratio
----        --------  ---  ---  ---------------  -------------  -----------------------
Container   cpu       -    -    500m             1              -
Container   memory    -    -    256Mi            512Mi          -
LimitRangeの設定
apiVersion: v1
kind: LimitRange
metadata:
  name: xxxxx-xxxxx-xxxxxx-xxxxxx
  namespace: xxxx
spec:
  limits:
    - type: Container
      default:
        memory: 1024Mi
        cpu: 1000m
      defaultRequest:
        memory: 512Mi
        cpu: 500m
      max:
        memory: 2048Mi
        cpu: 2000m
      min:
        memory: 256Mi
        cpu: 100m
kubectl apply -f limitRange.yaml
kubectl describe limitrange -n <ネームスペース>
Resource Limits
 Type       Resource  Min    Max  Default Request  Default Limit  Max Limit/Request Ratio
 ----       --------  ---    ---  ---------------  -------------  -----------------------
 Container   cpu       100m   2    500m             1              -
Container   memory    256Mi  2Gi  512Mi            1512Mi         -
なお、metadataのnameはdescribe limitrangeで確認したものと同じにしないと、別行でできてしまいます。
ResourceQuota
リソースクォータはRancherの画面からは設定できなかったので、kubectlで直接設定。
apiVersion: v1
kind: ResourceQuota
metadata:
  name: sample-resourcequota
  namespace: default
spec:
  hard:
    count/services: 10
    count/deployments.apps: 10
リソース
Rancherでリソースを作成する箇所は2カ所。
1つはクラスタのプロジェクトを開いたら表示されているWorkloads〜Volumes
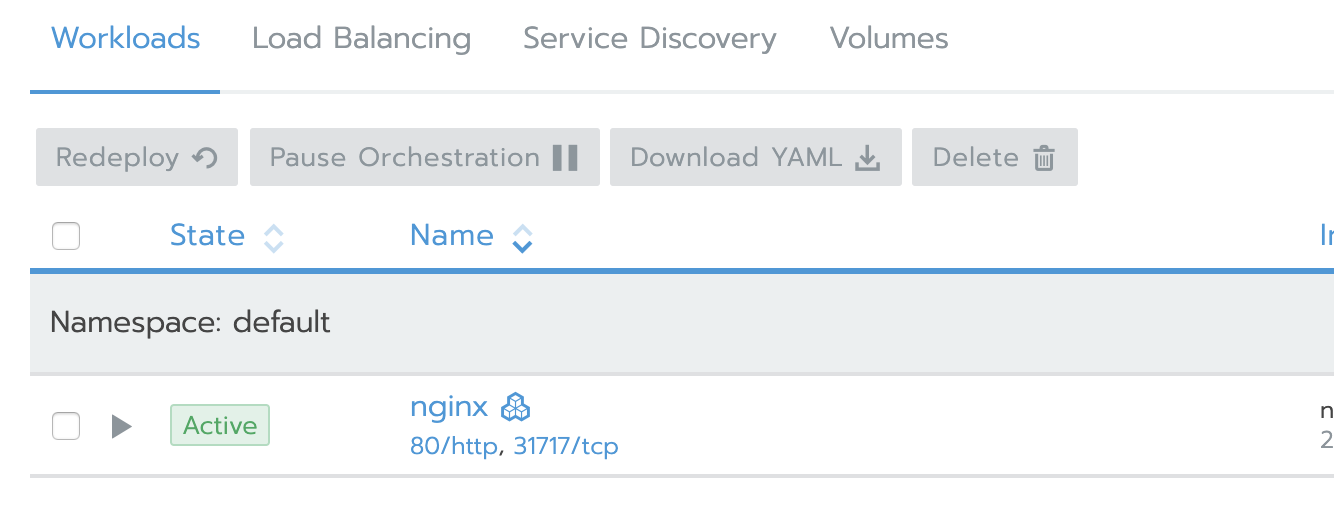
もうひとつはヘッダのResourcesメニューを開いたら出てくるWorkloads〜Config

今回は、Workloads、LoadBalancing、ServiceDiscoveryの3つについて確認。
Workloads
Rancherからの設定
ワークロードのデプロイは、Rancherからはタイプ(Deployment/Daemonset/StatefulSet/Job/CronJob)、ポートマッピング、スケジューラー、ヘルスチェック、ボリューム、スケーリングポリシーなどを画面から指定して、デプロイすることが可能。
Rancherの画面からデプロイした場合、Workloadだけでなく、Serviceも生成される。
また、デプロイ結果のYAMLのダウンロードやYAMLをアップロードしてのデプロイなどもできますので、まずは画面で作成して、結果のYAMLを管理して、変更はYAMLからのような運用も可能。
参照:Deploymentのアップデート戦略 P.108 スケジューリング P.306
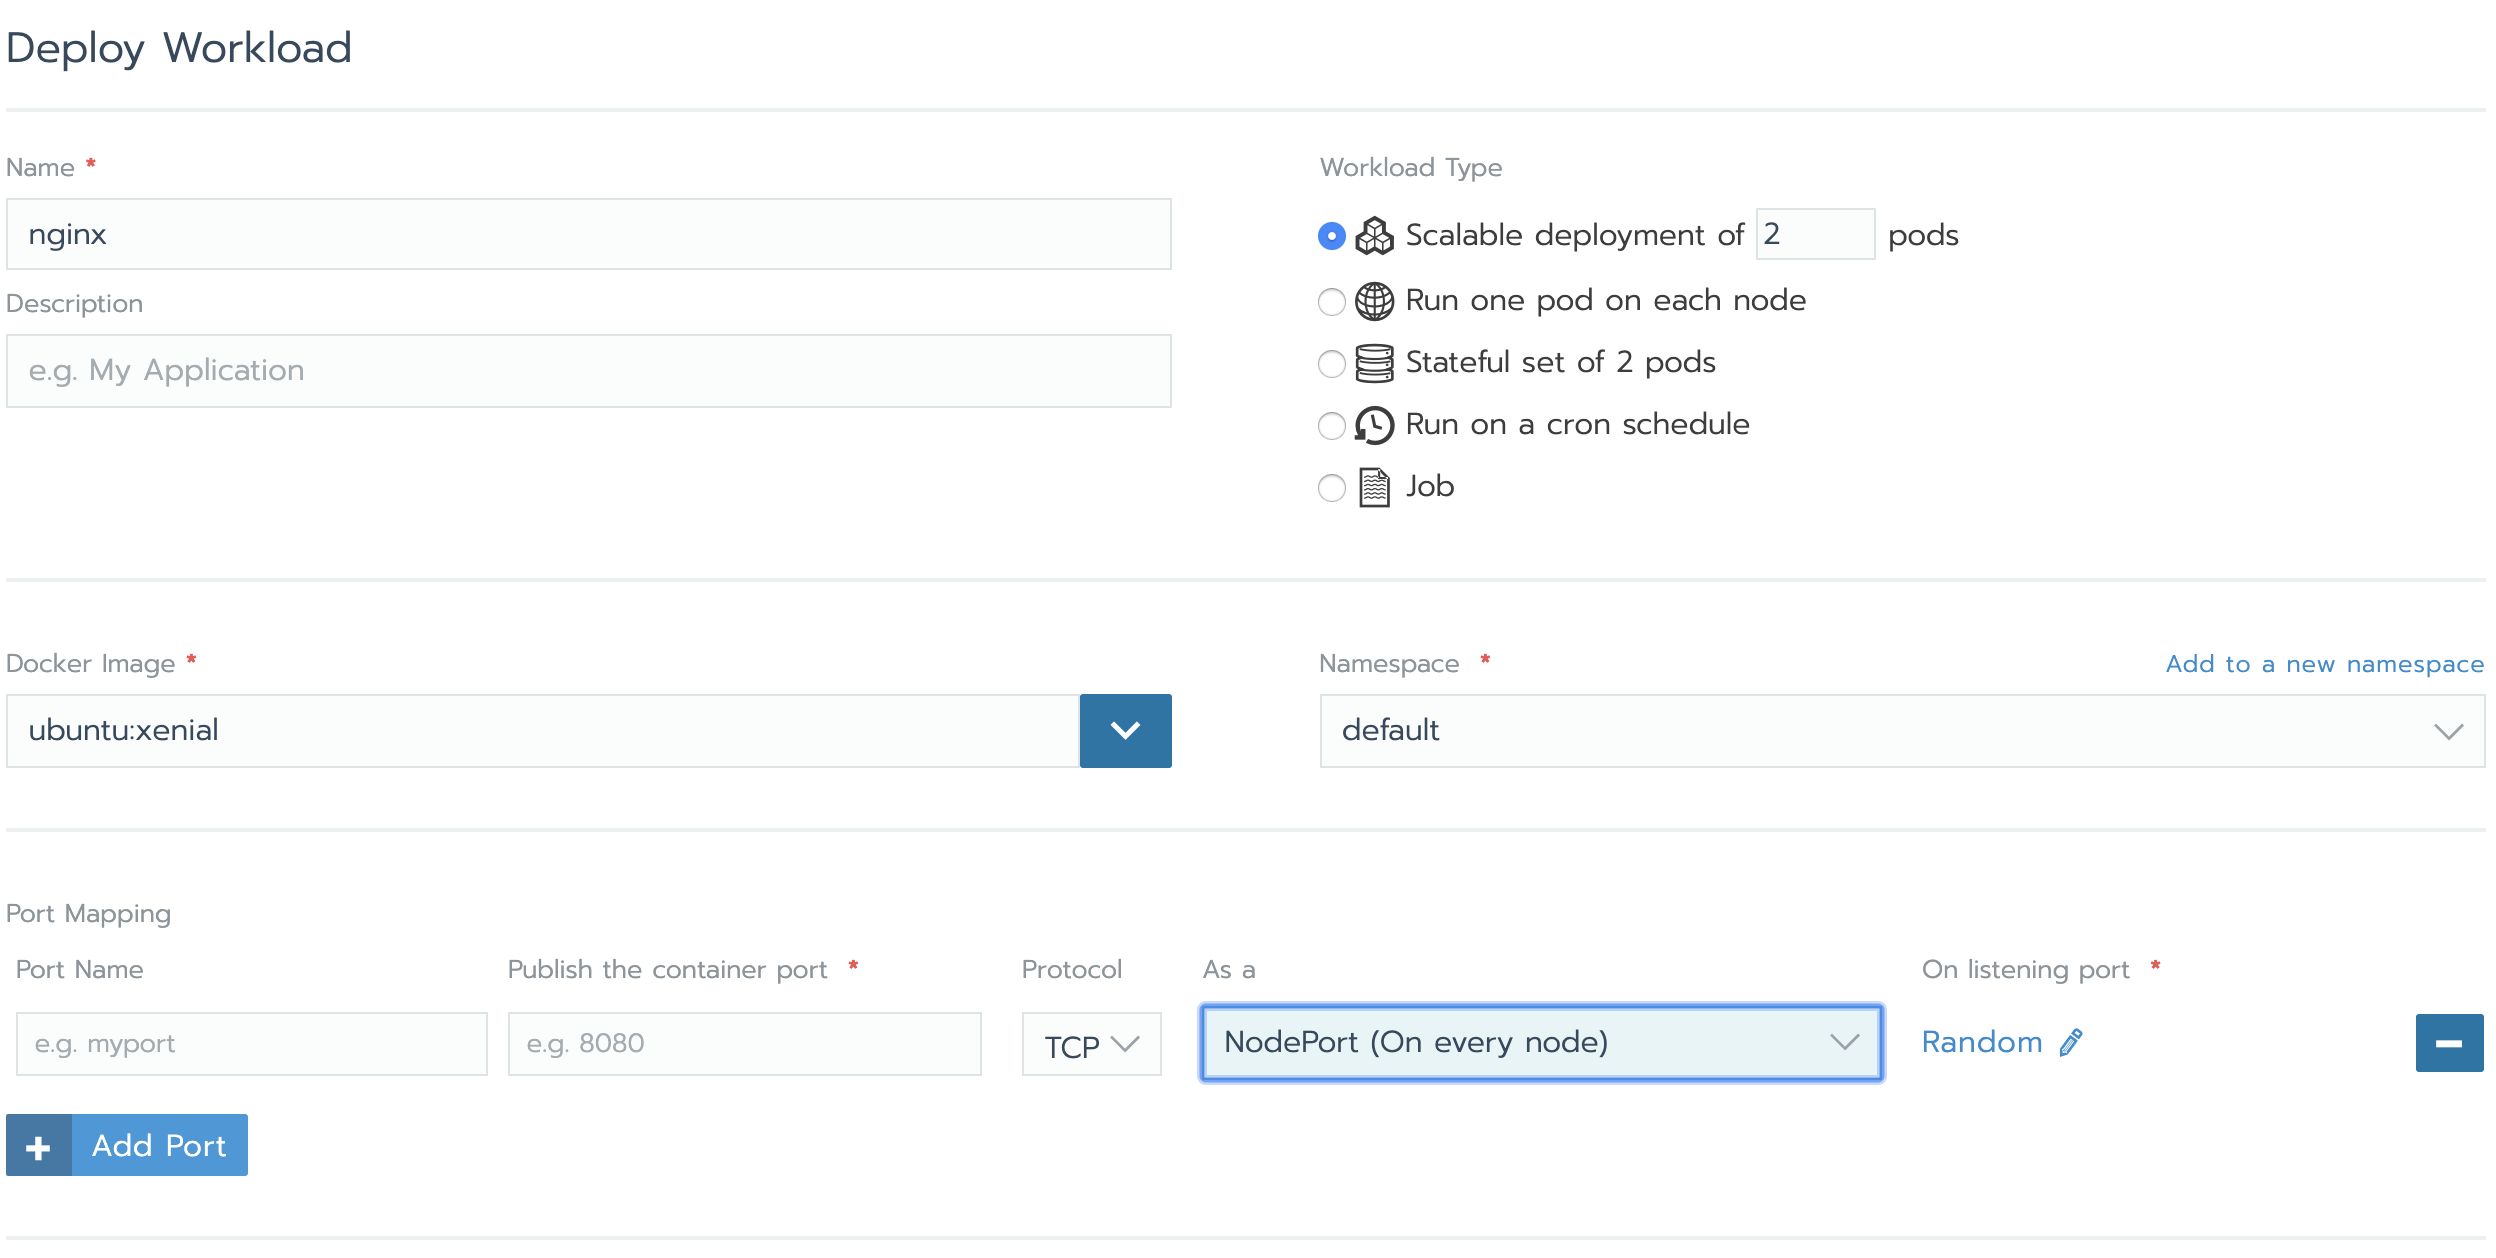
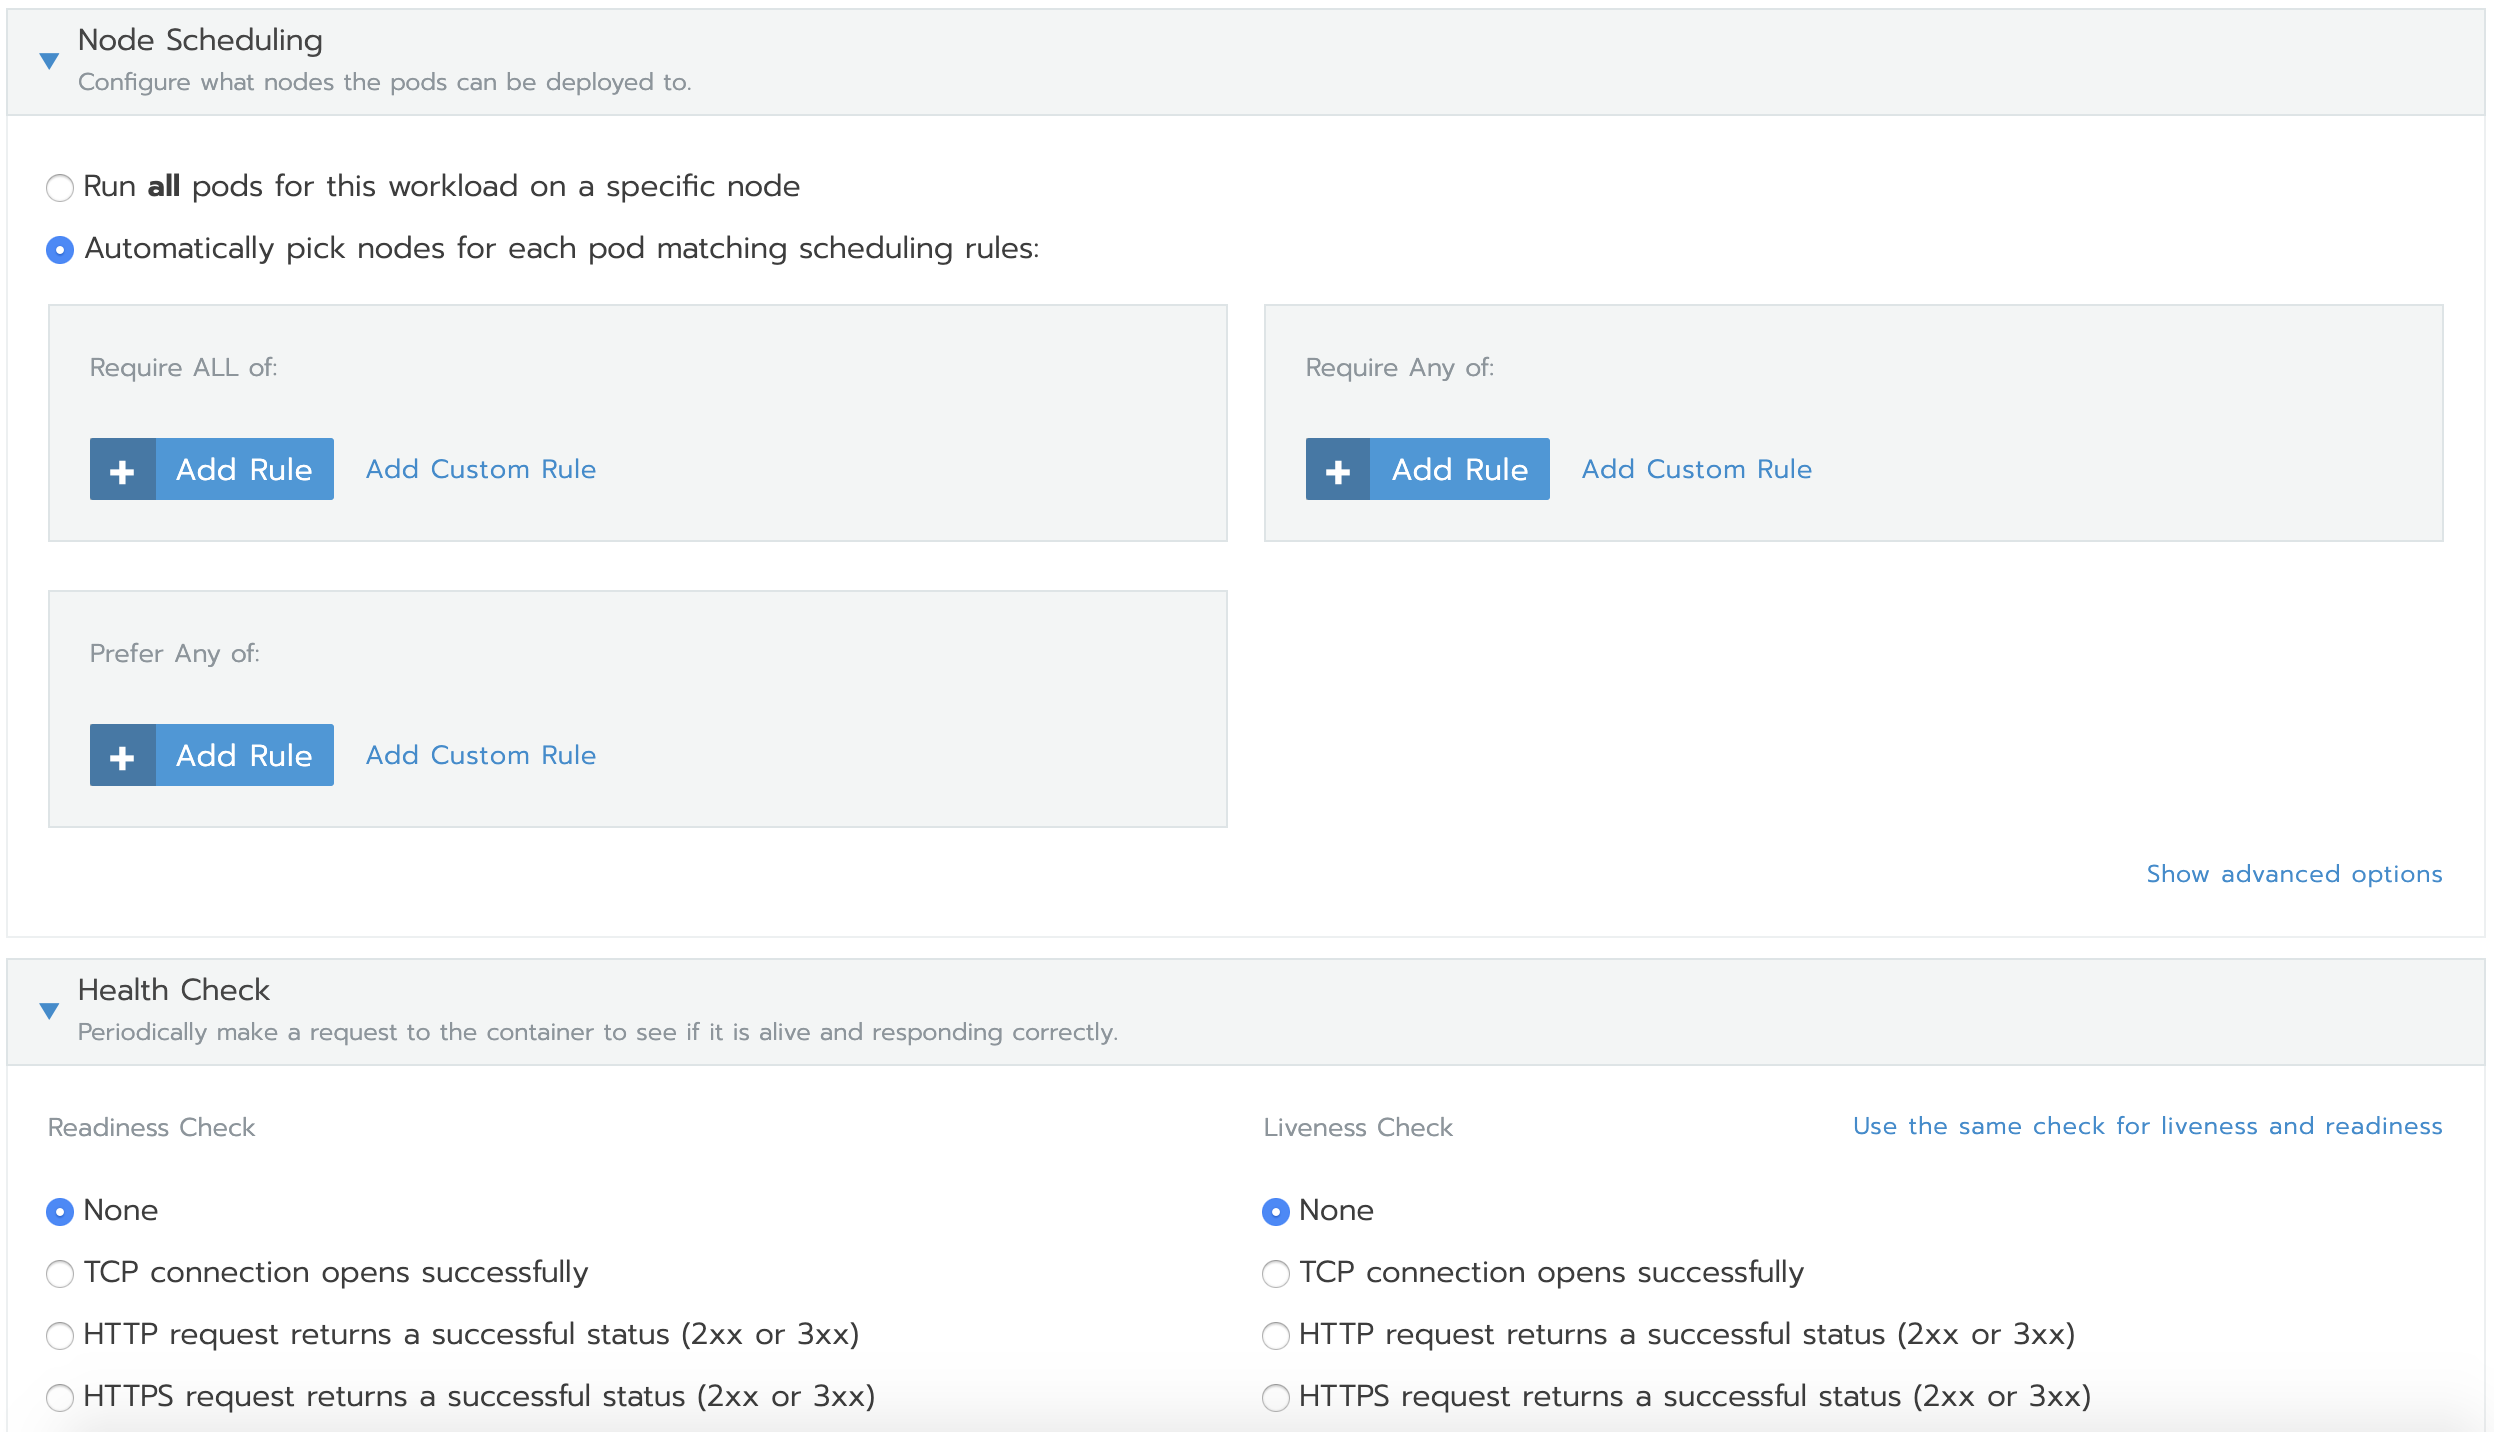
なお、現状画面からのデプロイでは、Podに入れるコンテナイメージは1つしか指定できなさそう。
kubectlでPodを作成する
apiVersion: apps/v1
kind: Deployment
metadata:
  name: sample-deployment
spec:
  replicas: 3
  selector:
    matchLabels:
      app: sample-app
  template:
    metadata:
      labels:
        app: sample-app
    spec:
      containers:
      - name: nginx-containers
        image: nginx:1.17.7
        ports:
        - containerPort: 80
ヘルスチェックの設定
ここでは、livenessProbe(Podが生きているか)のチェックに80番ポートアクセス、readinessProbe(サービスインの準備ができているか)にHttpGetで/にアクセスするように設定。
apiVersion: apps/v1
kind: Deployment
metadata:
  name: sample-deployment
spec:
  replicas: 3
  selector:
    matchLabels:
      app: sample-nginx
  template:
    metadata:
      labels:
        app: sample-nginx
    spec:
      containers:
      - name: nginx-containers
        image: nginx:1.17.7
        ports:
        - containerPort: 80
        livenessProbe:
          failureThreshold: 3
          initialDelaySeconds: 10
          periodSeconds: 2
          successThreshold: 1
          tcpSocket:
            port: 80
          timeoutSeconds: 2
        readinessProbe:
          failureThreshold: 3
          httpGet:
            httpHeaders:
            - name: Host
              value: /
            path: /
            port: 80
            scheme: HTTP
          initialDelaySeconds: 10
          periodSeconds: 2
          successThreshold: 2
          timeoutSeconds: 2
ServiceDiscovery
ServiceDiscoveryではサービスリソースを作成。
Rancherからの設定
ターゲットの指定(IP/DNS/Workload/Selectorなど)、タイプ(ClustorIP/Nodeport/L4Blancer)、ポートマッピングなどを画面から行える。

kubectlからの設定
apiVersion: v1
kind: Service
metadata:
  name: sample-service-nginx
spec:
  type: ClusterIP
  ports:
  - name: "http-port"
    protocol: "TCP"
    port: 8080
    targetPort: 80
  selector:
    workload.user.cattle.io/workloadselector: deployment-default-nginx
※selectorの内容は、Deploymentのyamlで確認。(RancherからDeploymentを作成した場合、おそらくdelployment-Namespace名-Workloads名になる)
参照:P.144
LoadBalancing
LoadBalancingではクラスタ外のロードバランサを利用したIngressの作成ができる。
(GCPの場合、Ingressを作成するとGCPのロードバランサが実態として作成される)
ドメインの指定、ルーティング、SSL/TLSの設定を行うことができる。(ドメインは自分で持ってなければxip.ioを使用することが可)
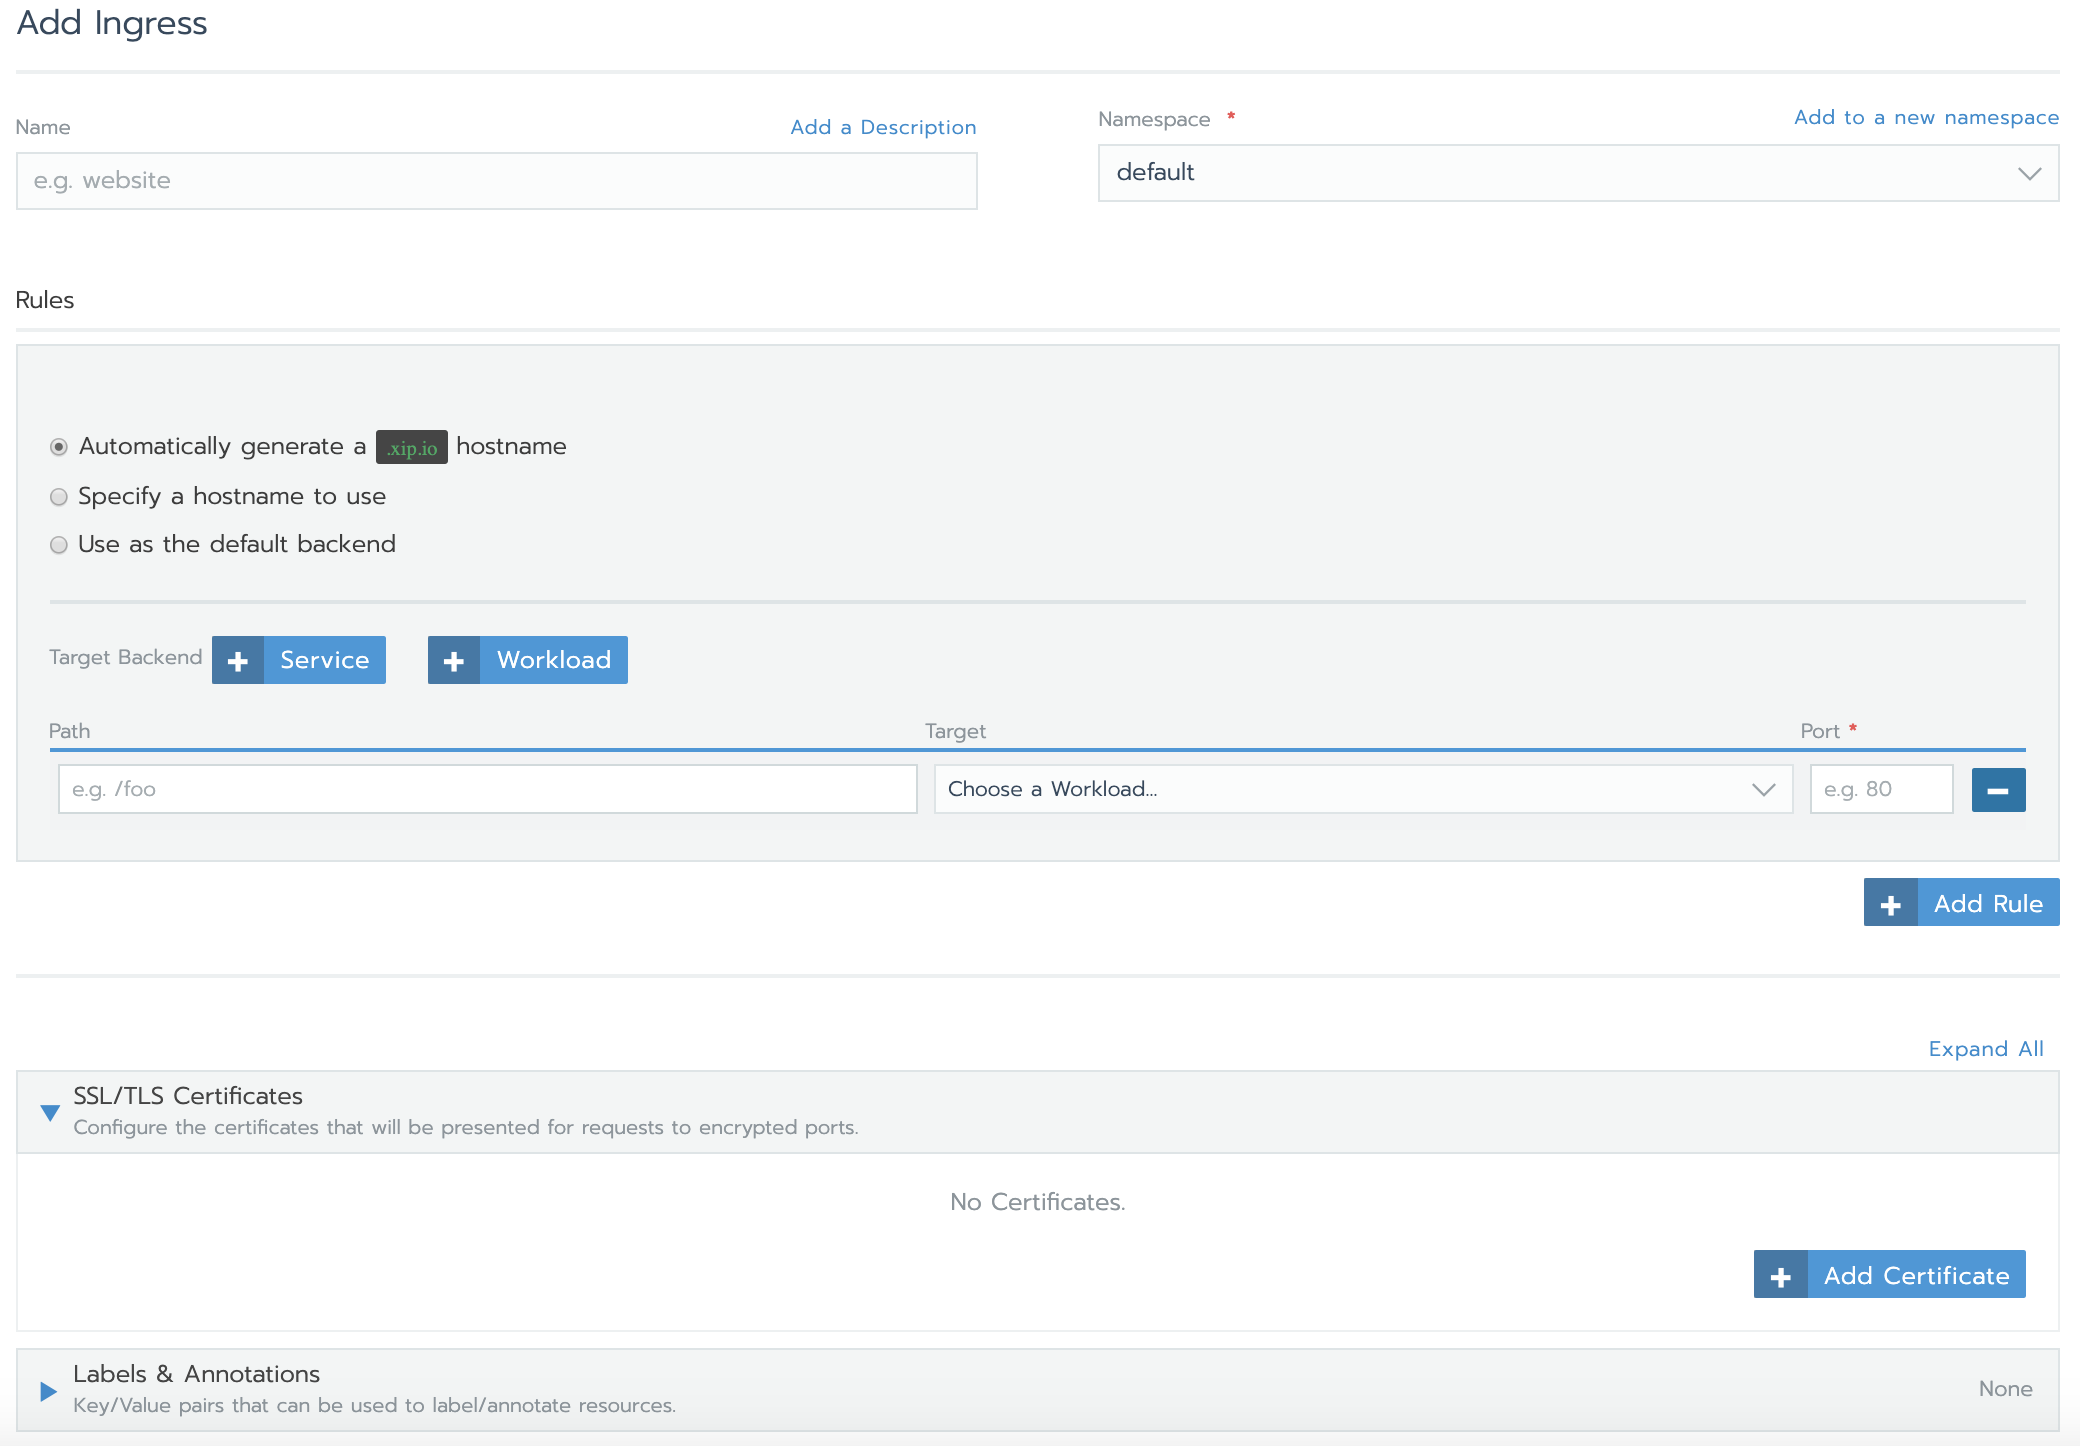
kubectlで作成
apiVersion: networking.k8s.io/v1beta1
kind: Ingress
metadata:
  name: test-ingress
  annotations:
    nginx.ingress.kubernetes.io/rewrite-target: /
spec:
  rules:
  - http:
      paths:
      - path: /
        backend:
          serviceName: sample-service-nginx
          servicePort: 8080
参照:P.183