Skipの魅力はSwiftでAndroid向けにコンパイル・ビルドできることですが、現状では100% Swiftのコードだけで完結するわけではありません
この記事では、SkipでSwiftからJetpack ComposeやKotlinのコードを呼び出す方法をまとめます。
環境
- Skip1.5.5
- Xcode 16.3
前提知識
Skip1.5.0が出るまでは、Native ModeであってもSwiftUIはJetpack Composeにtranspileされる環境でした。(これは超ざっくりな説明と超ざっくりな図です。)

Skip1.5.0からはSwiftUIもそのままAndroid向けにコンパイルされるようになり、完全にnativeなSwiftコードで実行できるようになりました。

Skip1.5.0以上であっても以前のモード(Transpiled Mode, UI側がtranspileされるNative Mode)は実行できますが、新規プロジェクトを作成するとtranspileなしの完全なNative Modeとなります。(設定で戻せる可能性もあるが未検証)
従来はimport SwiftUIをする必要がありましたが、現在はimport SkipFuseUIとなっています。
注意事項
本記事ではimport SkipFuseUIとしていますが、環境に合わせてimport SwiftUIと読み替えてください。また、本記事執筆時点(Skip1.5.5)で#if SKIP側に入らないパターンがあるので、記事内のコードの一部が意図してない挙動になる可能性があります。それ以前のNative Modeであれば問題ないです。
基本的な形式
import SkipFuseUI

struct SampleView: View {
    var body: some View {
        VStack {
            #if os(Android)
            ComposeView { _ in
                SampleCompose(text: "Android")
            }
            #else
            Text("Hello, iOS")
            #endif
        }
    }
}

#if SKIP  // KotlinやJavaのAPIを呼び出す場合は#if SKIP
struct SampleCompose: ContentComposer {
    let text: String

    @Composable func Compose(context: ComposeContext) {
        androidx.compose.material3.Text("Hello \(text)", modifier: context.modifier)
    }
}
#endif
手順としては以下の通り
- ContentComposerに準拠した構造体で
Compose(context:)を定義 - Jetpack ComposeのViewを定義
-
ComposeViewで呼び出す

以下のようにComposeView{}を使わずとも問題なく呼び出せる。skip側がコンパイル時にwrapしてくれてるのかも?
#if SKIP
SampleCompose(text: "Skip")
#else
簡易的な書き方
ComposeView内に直接定義も可能
#if SKIP
ComposeView { context in
    androidx.compose.material3.Text("💚", modifier: context.modifier)
}
#endif
Androidで必要なものをimport
androidx.compose.material3.TextとしているのはSwiftUI側のTextと競合するため。
あらかじめimportしておけばTextだけで済む。
#if SKIP
import androidx.compose.material3.Text

struct SampleCompose: ContentComposer {
    let text: String

    @Composable func Compose(context: ComposeContext) {
        Text("Hello \(text)", modifier: context.modifier)
    }
}
#endif
Composeを呼び出す例
サンプルとして参考になりそうなものなどを集めた
GoogleMapを呼び出す
#if SKIP
// skip.yml: implementation("com.google.maps.android:maps-compose:4.3.3")
import com.google.maps.android.compose.__
import com.google.android.gms.maps.model.CameraPosition
import com.google.android.gms.maps.model.LatLng

struct MapComposer : ContentComposer {
    let latitude: Double
    let longitude: Double

    @Composable func Compose(context: ComposeContext) {
        GoogleMap(cameraPositionState: rememberCameraPositionState {
            position = CameraPosition.fromLatLngZoom(LatLng(latitude, longitude), Float(12.0))
        })
    }
}

#endif
ComposeのLazyVerticalGridを呼び出す
LazyVerticalGridを呼ぶ例
https://gist.github.com/yamakentoc/57908c372f81dc8070201b4aef2e758b

AndroidViewを使う
サンプルアプリのSkipWeatherでは、AndroidViewを用いてWebViewを実現している。
これはSwiftUIでまだ実現できないものをUIKit使ってSwiftUI側に組み込むみたいなのと同じらしく、Composeでまだ実現できないものをクラシックなAndroidViewを用いてどうにか実現する的な感じ。
#if SKIP
import android.webkit.WebView
import android.webkit.WebViewClient
import androidx.compose.ui.viewinterop.AndroidView

struct WebContentComposer : ContentComposer {
    let url: URL
    let enableJavaScript: Bool

    @Composable func Compose(context: ComposeContext) {
        AndroidView(factory: { ctx in
            let webView = WebView(ctx)
            let client = WebViewClient()
            webView.webViewClient = client
            webView.settings.javaScriptEnabled = enableJavaScript
            webView.setBackgroundColor(0x000000)
            webView.loadUrl(url.absoluteString)
            return webView
        }, modifier: context.modifier, update: { webView in
        })
    }
}

#endif
ComposeからSwiftUIのViewを呼ぶ
SwiftUIのViewに対して.Compose(context:)を使用することで、Compose側のViewからSwiftUIのViewを呼び出せる。これは例えばComposeのColumnやLazyVerticalGridなど子Viewの一部でSwiftUIと共通のViewを呼び出したい場合によく使える。
#if SKIP
ComposeView { context in
    androidx.compose.foundation.layout.Column(modifier: context.modifier) {
        ZStack {
            RoundedRectangle(cornerRadius: 8)
                .fill(Color.red)
                .frame(width: 100, height: 100)
            Text("SwiftUIのText")
        }.Compose(context: context.content())
        androidx.compose.material3.Text("Hello from Compose")
    }
}
#else
Text("Hello, iOS")
#endif
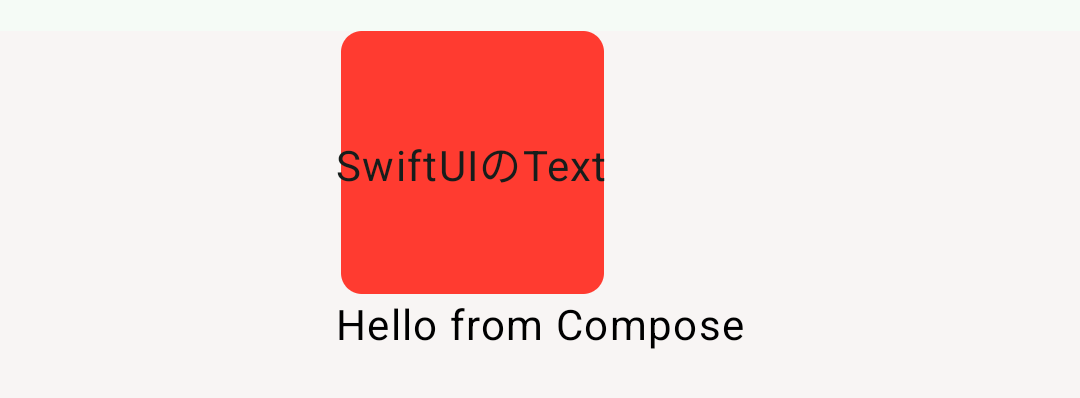
(↑Column内で中央表示の指定が無いため片寄っている)
また、次のような定義もできるためComposeとSwiftUIのコードをシームレスに行き来できる。
#if SKIP
ComposeView { context in
    VStack {
        RoundedRectangle(cornerRadius: 8)
            .fill(Color.red)
            .frame(width: 100, height: 100)
            .Compose(context: context.content())
        androidx.compose.material3.Text("Hello from Compose")
    }.Compose(context: context)
}
#else
Text("Hello, iOS")
#endif
VStackに対してはcontextを渡しているが、RoundedRectangleにはcontext.content()を渡している。これはRoundedRectangleが子Viewであるため。

kotlinのコードを呼び出す
.ktファイルに定義したkotlinのコードを呼び出すには以下のように行う。
UI側ではProcessInfo.processInfo.androidContextでcontextを取得して.ktに定義した処理を呼び出す。
import SkipFuseUI

struct SampleView: View {

    var body: some View {
        Text(getText())
    }

    func getText() -> String {
        #if SKIP
        // Androidのcontext取得
        let context = ProcessInfo.processInfo.androidContext
        return getGreetingFromKotlin(context: context)
        #else
        return "iOS"
        #endif
    }
}
kotlinファイルをSources/モジュール名/Skip/CustomKotlin.ktのように定義する。ファイル名はなんでもいい。
package sample.skip
import android.content.Context

fun getGreetingFromKotlin(context: Context): String {
    return "Hello from Kotlin code! Running on Android ${android.os.Build.VERSION.RELEASE}"
}
↓package名は基本的にSkip.envのANDROID_PACKAGE_NAMEをそのまま設定する。
// The package name for the Android entry point, referenced by the AndroidManifest.xml
ANDROID_PACKAGE_NAME = sample.skip

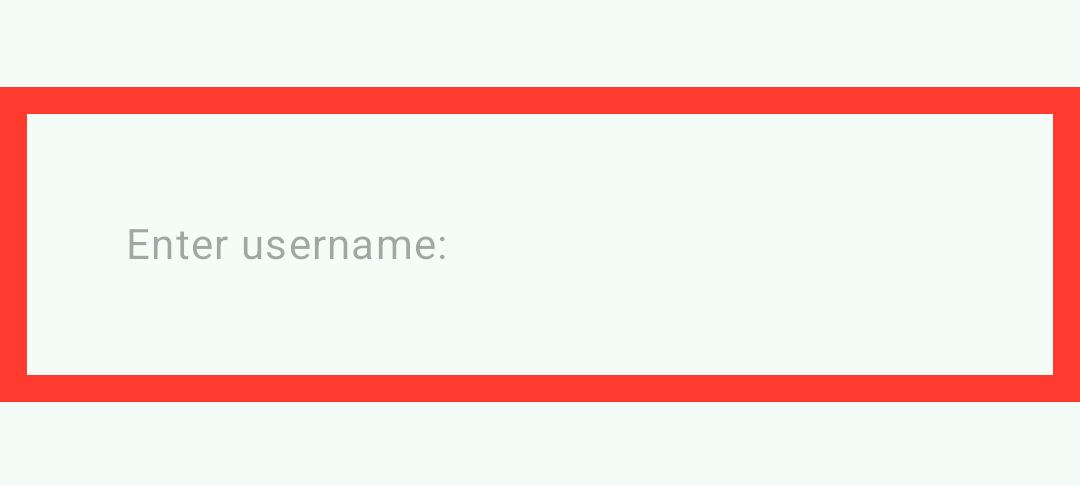
Composeのmodifierを使う
.composeModifierでComposeのmodifierを使用できる。
#if SKIP
import androidx.compose.foundation.layout.padding
import androidx.compose.ui.unit.dp
#endif

struct SampleView: View {
    @State var username = ""

    var body: some View {
        TextField("Enter username:", text: $username)
            .textFieldStyle(.plain)
            #if SKIP
            .composeModifier { $0.padding(32.dp) }
            #endif
            .border(Color.red, width: 10)
    }
}
おわりに
公式のBlogにも記載されている通り、Skipは公開されていますがまだtechnology preview段階です。なので100% Swiftのコードだけで目的としているプロダクトを作成するのはまだ難しいと思います。
私自身もSkipを使ったアプリを作成中ではありますが、Android側の対応でかなり時間を使ってしまっているのが正直なところです。しかしコミュニティのSlackでは毎日のようにskip本体や周辺ライブラリに更新が入っており、進化が目覚ましいです。
Skipが更に進化していくことを1ユーザとして願っています。