概要
ROOT の GUI は使い勝手がよいものの、その使い方がイマイチわからないことが多い。ここでは下記の内容について簡単に紹介してみます。
サンプルファイルの作成
で生成される tree1.root を用いて説明します。root がインストールされてる環境下で、
root -l
root [0] .x tree1.C
で実行すれば tree1.root が生成されます。
tree1.C と tree1.root は下記からも取れるように置いてあります。
ROOT の GUI の基本的な使い方
ROOTファイルの開き方 root –l ROOTファイル
root -l ファイル名.root
もしくは、
TFile *f1 = TFile::Open("run0222.root")
でファイルを開く。
.ls で中身を確認できる。
$ root -l tree1.root                                                        root [0]
Attaching file tree1.root as _file0...
(TFile *) 0x7fa5d75ddc90
root [1] .ls
TFile**		tree1.root
 TFile*		tree1.root
  KEY: TTree	t1;1	a simple Tree with simple variables
TTreeのオブジェクト名->Print() で TTree の中身をプリントできる。このファイルの場合、TTreeのオブジェクト名は t1 なので、t1->Print() で中身がわかる。
root [4] t1->Print()
******************************************************************************
*Tree    :t1        : a simple Tree with simple variables                    *
*Entries :    10000 : Total =          243567 bytes  File  Size =     180826 *
*        :          : Tree compression factor =   1.34                       *
******************************************************************************
*Br    0 :px        : px/F                                                   *
*Entries :    10000 : Total  Size=      40607 bytes  File Size  =      37333 *
*Baskets :        2 : Basket Size=      32000 bytes  Compression=   1.08     *
*............................................................................*
*Br    1 :py        : py/F                                                   *
*Entries :    10000 : Total  Size=      40607 bytes  File Size  =      37310 *
*Baskets :        2 : Basket Size=      32000 bytes  Compression=   1.08     *
*............................................................................*
*Br    2 :pz        : pz/F                                                   *
*Entries :    10000 : Total  Size=      40607 bytes  File Size  =      36663 *
*Baskets :        2 : Basket Size=      32000 bytes  Compression=   1.09     *
*............................................................................*
*Br    3 :random    : random/D                                               *
*Entries :    10000 : Total  Size=      80710 bytes  File Size  =      54555 *
*Baskets :        3 : Basket Size=      32000 bytes  Compression=   1.47     *
*............................................................................*
*Br    4 :ev        : ev/I                                                   *
*Entries :    10000 : Total  Size=      40607 bytes  File Size  =      14155 *
*Baskets :        2 : Basket Size=      32000 bytes  Compression=   2.84     *
*............................................................................*
Tree からの 1D ヒストグラムの書き方
Tree から最も簡単に 1D ヒストグラムを書くためには、
root [N] t1->Draw("px")
だけでよい。ただし、これは自動で適当にビンまとめしたヒストグラムである。
明示的にビン数と範囲を指定したい場合は、
root [N] t1->Draw("px>>h(1000,-10,10)")
とすると、h(ビン数、下限値、上限値) の一次元のヒストグラムを作成してくれる。

Tree からの 2D ヒストグラムの書き方
Tree から最も簡単に 2D ヒストグラムを書くためには、
root [N] t1->Draw("px:py")
だけでよい。ただし、これは自動で適当にビンまとめしたヒストグラムである。
明示的にビン数と範囲を指定したい場合は、
root [1] t1->Draw("px:py>>h2d(100,-5,5,100,-10,10)","","colz")
とすると、h2d(y方向のビン数、y方向の下限値、y方向の上限値、x方向のビン数、x方向の下限値、x方向の上限値) の2次元のヒストグラムを作成してくれる。

Tbrowser & TTreeViewer の使い方
> root -l tree1.root
root [N] TBrowser b
で、TBrower が立ち上がる。
TTree のアイコンを選択してから、右クリックで、StartViewer を立ち上げる。

TTreeViewer の使い方は、ドラッグ&ドロップを用いて、ヒストグラムを作成したり、Expression Editor を用いてカット条件を入れたりするなど、GUIで絵を見ながら調べることができる。

使い方の詳細などは下記を参照ください。
2D ヒストグラムの1Dのプロジェクション
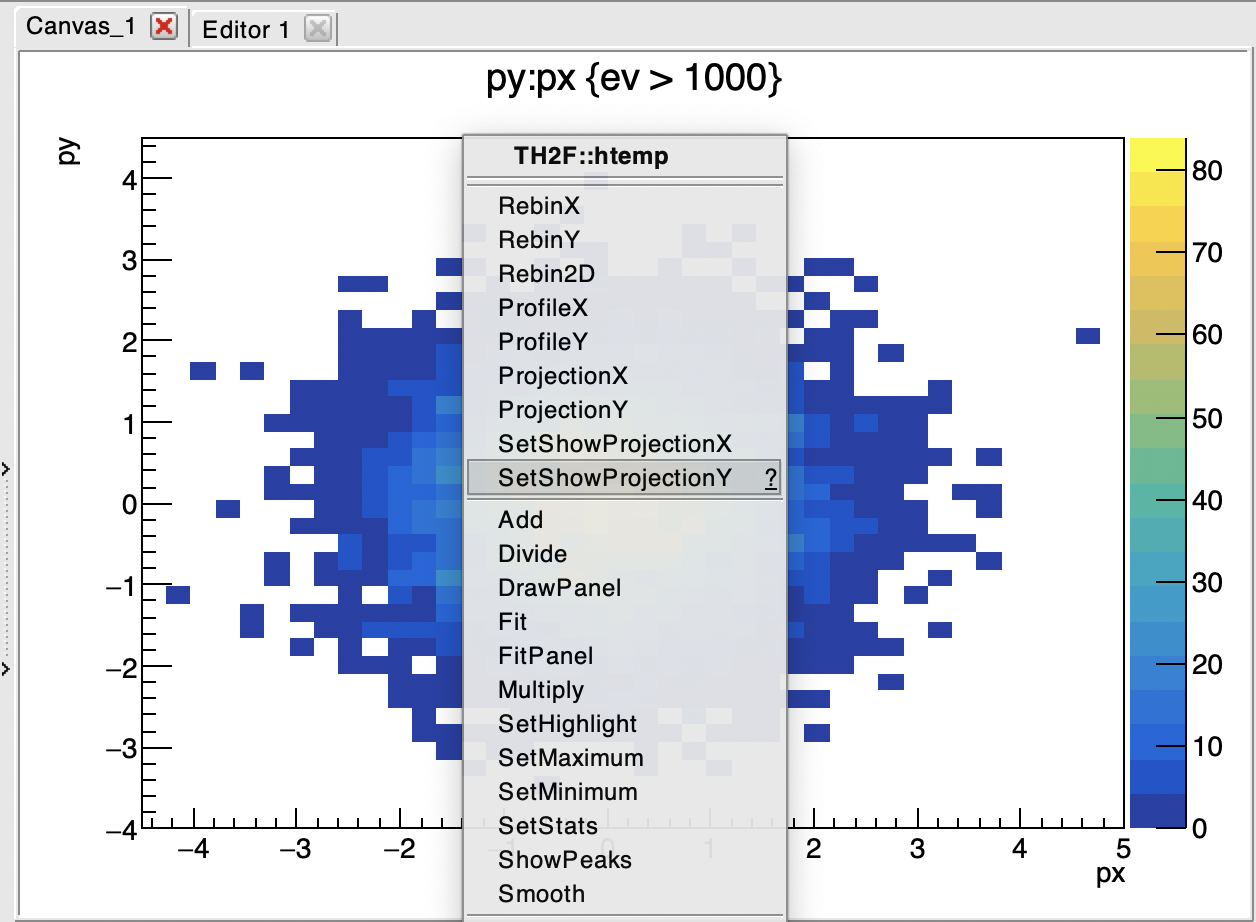
2次元ヒストグラムのデータ点のある場所で、右クリックし、SetShowProjectionY をクリックする。
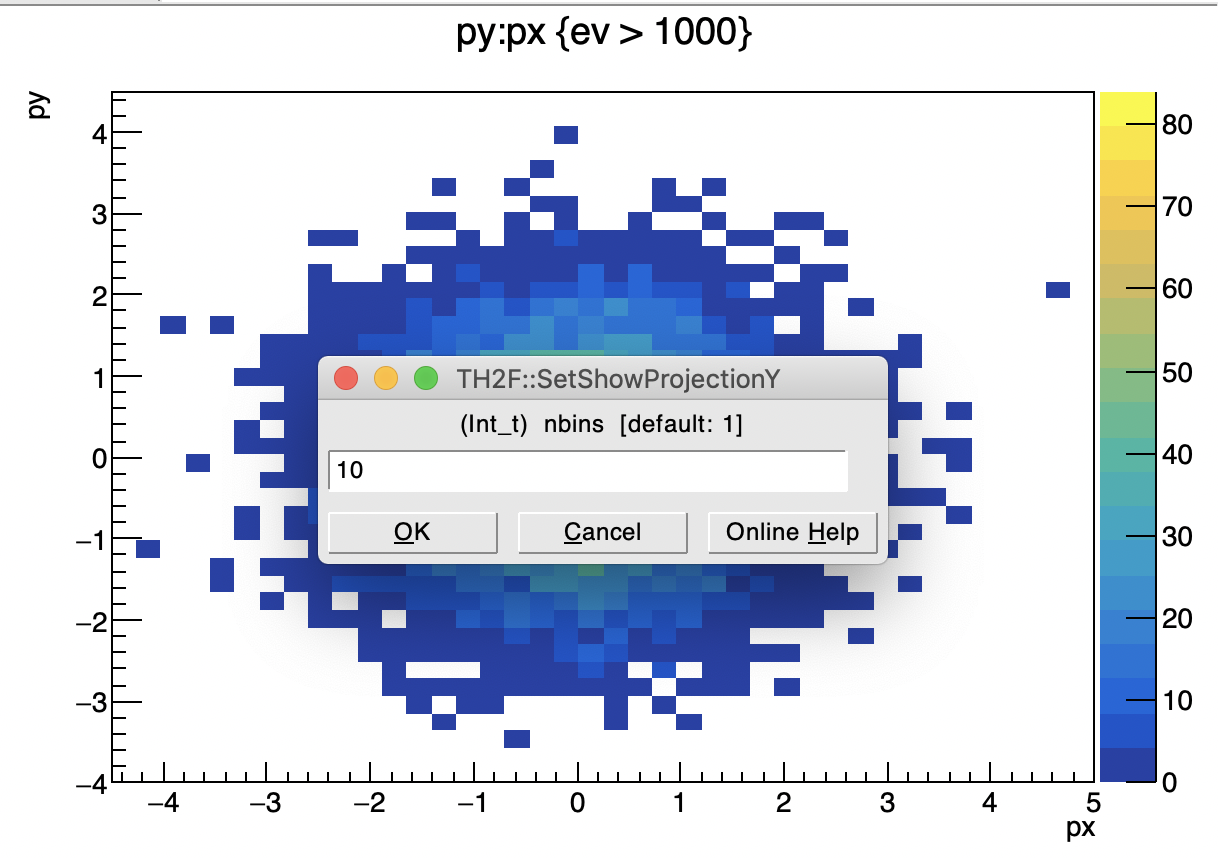
nbins を聞かれるので、ここでは 10 ビンを設定する。
マウスを置いた場所から X方向の10 ビンの幅で、Y方向にプロジェクションしたヒストグラムを表示してくれる。2Dヒストグラム上でマウスを動かすと、X方向の10 ビンの幅の範囲が変わるので、1Dヒストグラムの絵も変わる。
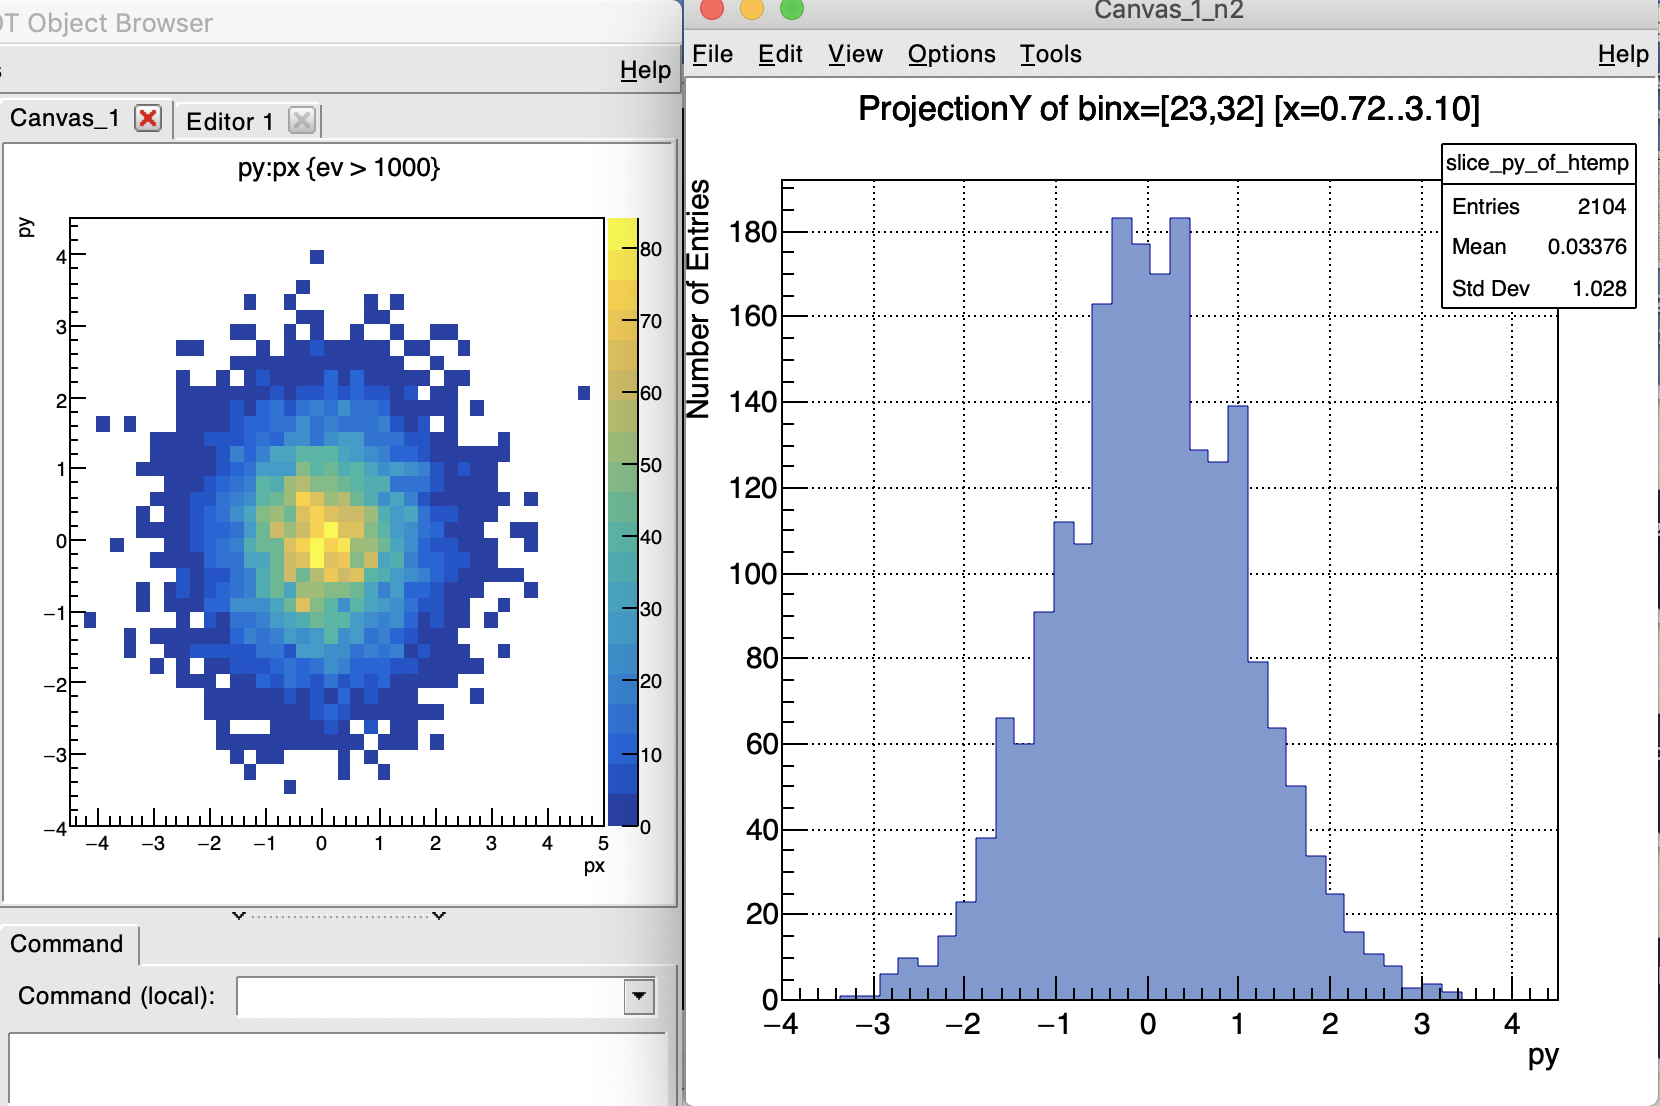
SetShowProjectionX も射影する方向が違うだけで、使い方は同じ。