こんにちは!
最近、Reactのプロジェクトに関わっているので、学習を兼ねて、何か作ってみることにしました。
やはり自分で色々作ってみるのが一番ですね!
やりたいこと
- Google認証
- 組織内のみ、認証を通す
- 認証が通ったらダッシュボードに遷移する
環境構築
Reactの開発環境を作る
今までcreate-react-appしか使ってなかったので、viteを使ってみました。
$ npm create vite@latest test_project
? Select a framework: › - Use arrow-keys. Return to submit.
    Vanilla
    Vue
❯   React
    Preact
    Lit
    Svelte
    Solid
    Qwik
    Others
フレームワークはReactで、variantは「TypeScript + SWC」を選択してみます。SWCはRustベースのWebプラットフォームで、コンパイルがviteの通常版(Babel)より20倍以上早いらしいです。
$ npm create vite@latest test_project
✔ Select a framework: › React
? Select a variant: › - Use arrow-keys. Return to submit.
    TypeScript
❯   TypeScript + SWC
    JavaScript
    JavaScript + SWC
以下の指示に従って、コマンドを実行してみます。
$ npm create vite@latest test_project
✔ Select a framework: › React
✔ Select a variant: › TypeScript + SWC

Scaffolding project in /Users/xxx/dev/test_project...

Done. Now run:

  cd test_project
  npm install
  npm run dev
まずはnpm install。これは普通ですね。
$ npm install

added 152 packages, and audited 153 packages in 31s

37 packages are looking for funding
  run `npm fund` for details

found 0 vulnerabilities
そしてnpm runを実行。
$ npm run dev

> test_project@0.0.0 dev
> vite


  VITE v4.4.9  ready in 487 ms

  ➜  Local:   http://127.0.0.1:5173/
  ➜  Network: use --host to expose
  ➜  press h to show help
はやっ
体感的にも、かなり早く起動しました。

これはSWCの効果があったのか??
試しに、「TypeScript」だけの方を選択してみると
$ npm run dev

> tsonly@0.0.0 dev
> vite


  VITE v4.4.9  ready in 997 ms

  ➜  Local:   http://127.0.0.1:5173/
  ➜  Network: use --host to expose
  ➜  press h to show help
「TypeScript + SWC」は487msだったので、SWCありの方が早いようです。
早いに越したことないので、このままSWCの方で進めます。
要件
今回は、以下の要件で作成します。
組織内認証が目的なので、機能はシンプルです。
- 未認証の場合は、認証ボタンが表示されている
- 認証が成功したら、ダッシュボードに遷移する
参考にするソースコード
やはり公式ドキュメントが一番いいので、公式のソースコードを参考にしました。
ディレクトリ構成
最終的なディレクトリ構成は、こんな感じ。
test_project
├── README.md
├── index.html
├── node_modules
│   └── ....
│   └── ....
├── package-lock.json
├── package.json
├── public
│   └── vite.svg
├── src
│   ├── App.css
│   ├── App.tsx
│   ├── AuthContext.tsx
│   ├── Dashboard.tsx
│   ├── PrivateRoute.tsx
│   ├── assets
│   │   └── react.svg
│   ├── index.css
│   ├── main.tsx
│   ├── oauthUtils.ts
│   └── vite-env.d.ts
├── tsconfig.json
├── tsconfig.node.json
└── vite.config.ts
追加したファイル
OAuth関連の処理を行うユーティリティ関数
// oauthUtils.ts
export function parseFragmentString(fragmentString: string) {
    const params: { [key: string]: string } = {};
    const regex = /([^&=]+)=([^&]*)/g;
    let m: RegExpExecArray | null;

    while ((m = regex.exec(fragmentString)) !== null) {
      params[decodeURIComponent(m[1])] = decodeURIComponent(m[2]);
    }
    return params;
  }

  export function saveOAuthParams(params: { [key: string]: string }) {
    localStorage.setItem('oauth2-params', JSON.stringify(params));
  }

  export function getSavedOAuthParams() {
    return JSON.parse(localStorage.getItem('oauth2-params') || '{}');
  }
認証状態の管理
// AuthContext.tsx
import React, { createContext, useContext, useState, ReactNode } from 'react';

interface AuthContextProps {
  isAuthenticated: boolean;
  handleAuthSuccess: () => void;
}

const AuthContext = createContext<AuthContextProps | null>(null);

export const useAuth = () => {
    const context = useContext(AuthContext);
    if (!context) {
      throw new Error("useAuth must be used within an AuthProvider");
    }
    return context;
  };

interface AuthProviderProps {
  children: ReactNode;
}

export const AuthProvider: React.FC<AuthProviderProps> = ({ children }) => {
  const [isAuthenticated, setIsAuthenticated] = useState(false);

  const handleAuthSuccess = () => {
    setIsAuthenticated(true);
  };

  return (
    <AuthContext.Provider value={{ isAuthenticated, handleAuthSuccess }}>
      {children}
    </AuthContext.Provider>
  );
};
認証状態に応じたルーティング
import React from 'react';
import { useAuth } from './AuthContext';
import { Navigate } from 'react-router-dom';

interface PrivateRouteProps {
  children: React.ReactNode;
}

const PrivateRoute: React.FC<PrivateRouteProps> = ({ children }) => {
  const { isAuthenticated } = useAuth();

  return isAuthenticated ? <>{children}</> : <Navigate to="/" />;
};

export default PrivateRoute;
ダッシュボード用
import React from 'react';

const Dashboard: React.FC = () => {
  return (
    <div>
      <h1>Dashboard</h1>
      <p>You are authenticated.</p>
    </div>
  );
};

export default Dashboard;
修正したファイル
続いて、viteで作成されたファイルを修正します。
Google認証ボタンのCSSは手を抜いて、ここに埋め込んでます。
// App.tsx
import React, { useEffect, useCallback } from 'react';
import { BrowserRouter as Router, Route, Routes } from 'react-router-dom';
import Dashboard from './Dashboard';
import { AuthProvider } from './AuthContext';
import PrivateRoute from './PrivateRoute';
import { useAuth } from './AuthContext';
import { useNavigate } from 'react-router-dom';

import { parseFragmentString, saveOAuthParams, getSavedOAuthParams } from './oauthUtils';

const YOUR_CLIENT_ID = 'xxx-xxx.apps.googleusercontent.com';
const YOUR_REDIRECT_URI = 'http://localhost:5173';

type OAuthParams = {
  [key: string]: string;
};

const buttonStyle = {
  backgroundColor: "#4285f4",
  color: "white",
  padding: "10px 20px",
  border: "none",
  borderRadius: "2px",
  fontSize: "18px",
  cursor: "pointer",
  position: "absolute",
  top: "50px",
  left: "50%",
  transform: "translateX(-50%)",
};

const MainApp: React.FC = () => {
  const { handleAuthSuccess, isAuthenticated } = useAuth();
  const navigate = useNavigate();

  useEffect(() => {
    if (isAuthenticated) {
      navigate('/dashboard');
    }
  }, [isAuthenticated, navigate]);

  const performGoogleAuth = useCallback(() => {
    const params = getSavedOAuthParams();
    if (params && params['access_token']) {
      const xhr = new XMLHttpRequest();
      xhr.open('GET', `https://www.googleapis.com/drive/v3/about?fields=user&access_token=${params['access_token']}`);
      xhr.onreadystatechange = function () {
        if (xhr.readyState === 4 && xhr.status === 200) {
          handleAuthSuccess();
        } else if (xhr.readyState === 4 && xhr.status === 401) {
          oauth2SignIn();
        }
      };
      xhr.send(null);
    } else {
      oauth2SignIn();
    }
  }, [handleAuthSuccess]);

  const oauth2SignIn = () => {
    const oauth2Endpoint = 'https://accounts.google.com/o/oauth2/v2/auth';
    const params: OAuthParams = {
      'client_id': YOUR_CLIENT_ID,
      'redirect_uri': YOUR_REDIRECT_URI,
      'scope': 'https://www.googleapis.com/auth/drive.metadata.readonly',
      'state': 'perform_google_auth',
      'include_granted_scopes': 'true',
      'response_type': 'token'
    };

    const form = document.createElement('form');
    form.setAttribute('method', 'GET');
    form.setAttribute('action', oauth2Endpoint);

    for (const p in params) {
      const input = document.createElement('input');
      input.setAttribute('type', 'hidden');
      input.setAttribute('name', p);
      input.setAttribute('value', params[p]);
      form.appendChild(input);
    }

    document.body.appendChild(form);
    form.submit();
  };

  useEffect(() => {
    function handleHashChange() {
      const fragmentString = window.location.hash.substring(1);
      const params = parseFragmentString(fragmentString);

      if (Object.keys(params).length > 0) {
        saveOAuthParams(params);
        if (params['state'] && params['state'] === 'perform_google_auth') {
          performGoogleAuth();
        }
      }
    }

    handleHashChange();

    window.addEventListener('hashchange', handleHashChange);

    return () => {
      window.removeEventListener('hashchange', handleHashChange);
    };
  }, [performGoogleAuth]);

  const Home: React.FC = () => (
    <button style={buttonStyle} onClick={performGoogleAuth}>Google認証</button>
  );

  return (
    <Routes>
      <Route path="/" element={<Home />} />
      <Route
        path="/dashboard"
        element={<PrivateRoute><Dashboard /></PrivateRoute>}
      />
    </Routes>
  );
};

const App: React.FC = () => {
  return (
    <AuthProvider>
      <Router>
        <MainApp />
      </Router>
    </AuthProvider>
  );
};

export default App;
YOUR_CLIENT_IDには、公式ドキュメントの手順で取得したクライアントIDをセットしてください。
また、YOUR_REDIRECT_URIには、認証後のリダイレクト先URLをセットします。今回はviteで作成したものをローカルで動かしているので、http://localhost:5173をセットしました。
// main.tsx
import React from 'react';
import { createRoot } from 'react-dom/client';
import App from './App';

const root = document.getElementById('root');
if (root) {
  const appRoot = createRoot(root);
  appRoot.render(
    <React.StrictMode>
      <App />
    </React.StrictMode>
  );
}
動かしてみる
組織外アカウントの場合
アクセスすると、Google認証ボタンだけが表示されてます。

ボタンをクリックすると
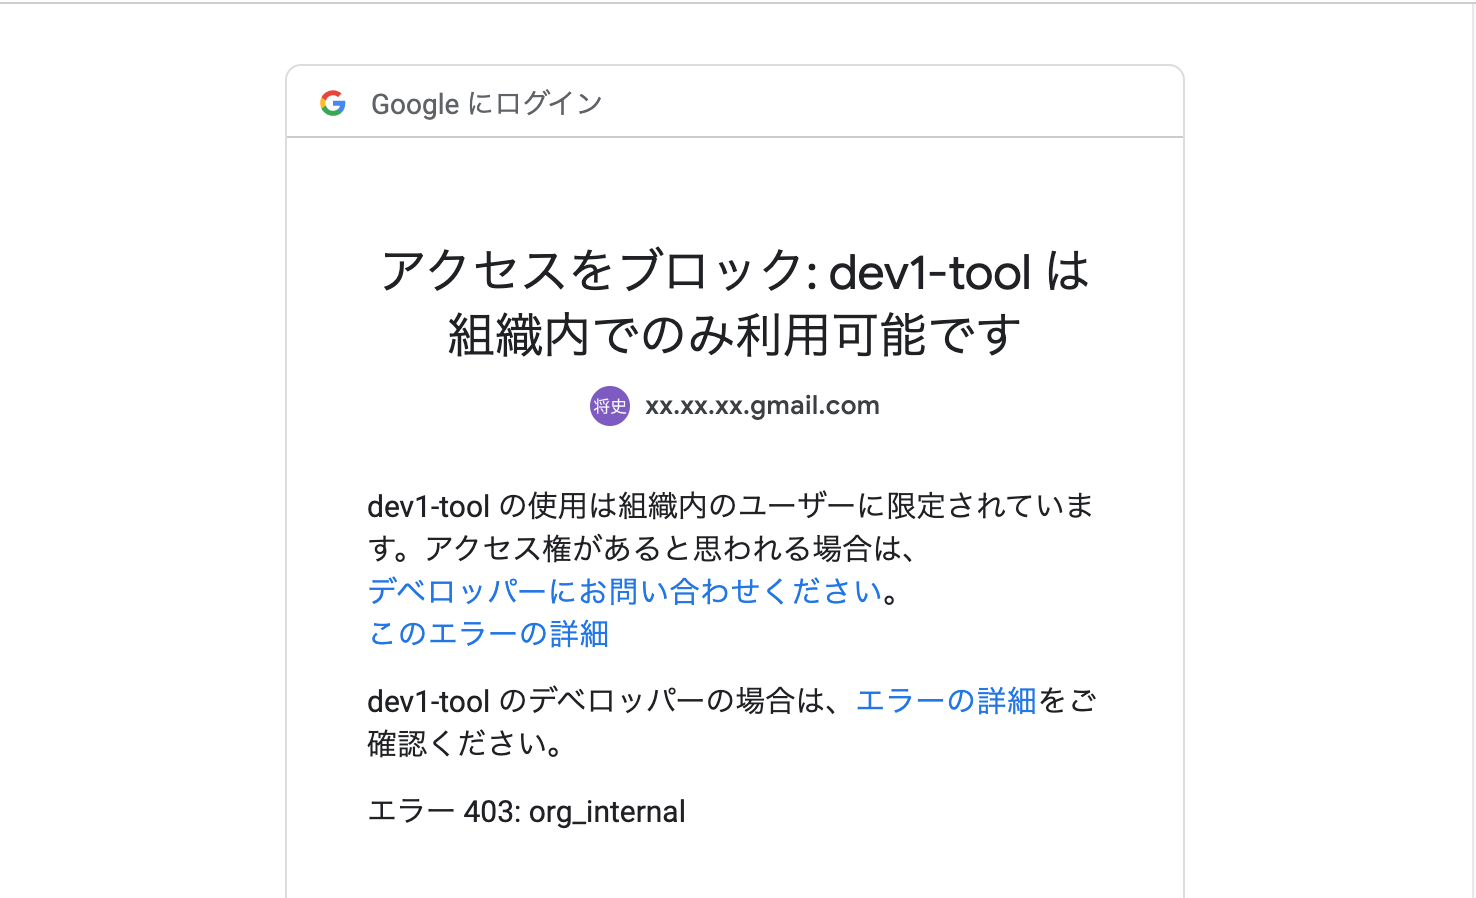
おー!いいですね!
認証画面の設定で「内部」を指定しただけで、組織外のアカウントを弾いてくれました。
組織内アカウントの場合
それでは次に、組織内のアカウントでやってみましょう。
アクセスすると、Google認証ボタンだけが表示されてます。ここは同じですね。

Google認証ボタンをクリックします。
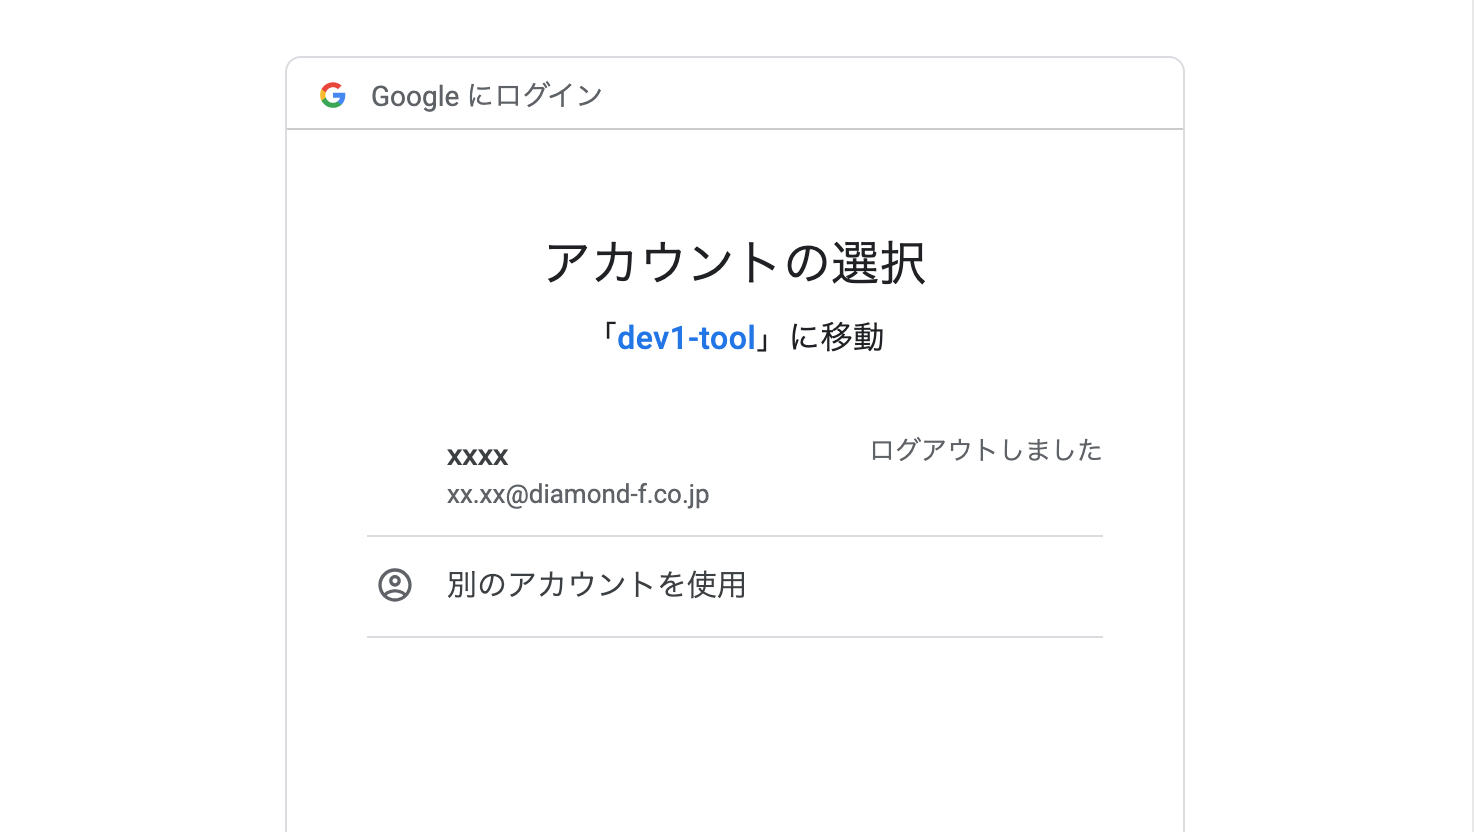
アカウントの選択画面が表示されたので、そのまま進めます。

パスワードを入力して、次へ。

認証が成功して、ダッシュボードに遷移しました🎉🎉🎉
まとめ
今回は、Reactで組織内のGoogle認証を行いました。
会社によって、様々な業務がありますが、なかなか、その会社の業務内容にピッタリのサービスが無かったりします。
認証周りが楽になるだけでも、ユーザー管理をしなくて済むので、作りやすくなりますね😃
次はもう少し本格的な実装をしようと思うので、またお知らせします!