はじめに
前記事にて Spring Thymeleaf を使用しましたが、動かしたいプロジェクトでは JSP を使用しています。今度改善作業をしたいという要望もあるようなので、Thymeleaf と JSP を共存して動くようにしておきたい。
環境
- Windows 11 Home
- Eclipse 2023
- SQL Server 2022(開発者向けの無料エディション)
- Microsoft SQL Server Management Studio
- Java 17
- Maven
- Spring Boot 3.1.0
- Spring Data JPA 3.1.0
- Spring Thymleaf 3.1.0
- Lombok 1.18.26
- mssql-jdbc 11.2.3
JSP用に新規追加
- tomcat-embed-jasper
- jakarta.servlet.jsp.jstl
xml pom.xml
<dependency>
    <groupId>org.apache.tomcat.embed</groupId>
    <artifactId>tomcat-embed-jasper</artifactId>
</dependency>
<dependency>
    <groupId>org.glassfish.web</groupId>
    <artifactId>jakarta.servlet.jsp.jstl</artifactId>
</dependency>
ThymeleafとJSPを共存
下記サイトを参考にしました。
この記事では Thymeleaf用に thフォルダを作成していますが、今回は Thymeleafは前回のままにして、JSP用のフォルダ作成のみに留めます。
JSP用フォルダを追加
src\main\webapp\WEB-INFフォルダ配下に views フォルダを追加します。
index.jsp を作成
html index.jsp
<!DOCTYPE html>
<%@ taglib prefix="c" uri="http://java.sun.com/jsp/jstl/core"%>
<html lang="ja">
<head>
  <meta charset="UTF-8" />
  <title>JSP(src/main)</title>
</head>
<body>
<p>
  <span><c:out value="${title}" /></span>
</p>
<table>
  <c:forEach var="data" items="${weatherDataList}">
   <tr>
    <td>${data.id}</td>
    <td>${data.name}</td>
    <td>${data.temperature}</td>
    <td>${data.humidity}</td>
   </tr>
  </c:forEach>
 </table>
</body>
</html>
HelloSqlServerController の変更
JSP側のマッピングを"/"に、Thymeleaf側のマッピングを"/th"にしています。
HelloSqlServerController.java
package com.example;
import java.util.List;
import org.springframework.beans.factory.annotation.Autowired;
import org.springframework.stereotype.Controller;
import org.springframework.ui.Model;
import org.springframework.web.bind.annotation.RequestMapping;
import com.example.model.Weather;
import com.example.services.WeatherService;
@Controller
public class HelloSqlServerController {
@Autowired
WeatherService weatherService;
@RequestMapping("/")
public String index(Model model) {
model.addAttribute("title", "JSP版:SQL Serverから取得したデータ");
// 気象データの取得
List<Weather> weatherDataList = weatherService.findAllWeatherData();
model.addAttribute("weatherDataList", weatherDataList);
model.addAttribute("date", new java.util.Date());
return "views/index";
}
@RequestMapping("/th")
public String hello(Model model) {
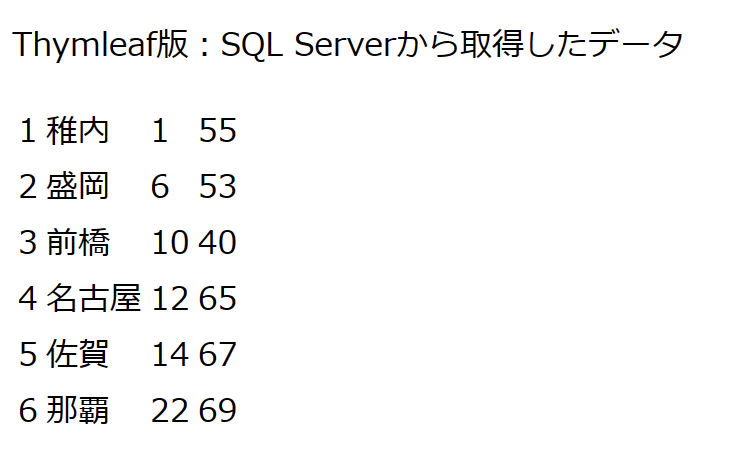
model.addAttribute("title", "Thymleaf版:SQL Serverから取得したデータ");
// 気象データの取得
List<Weather> weatherDataList = weatherService.findAllWeatherData();
model.addAttribute("weatherDataList", weatherDataList);
return "index";
}
}
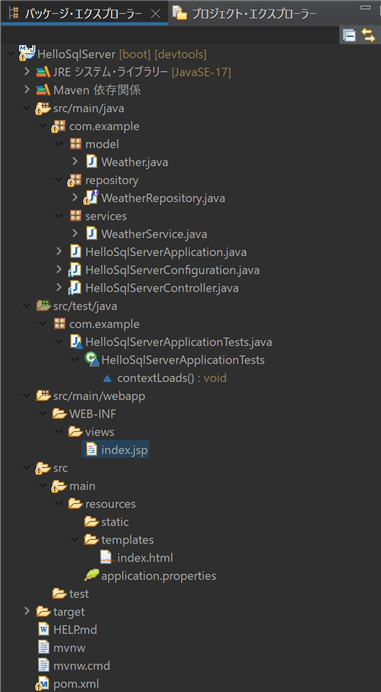
最終プロジェクト
実行結果
JSP
ブラウザに http://localhost:8080/ と入力して、JSP ページを表示します。

Thymeleaf
ブラウザに http://localhost:8080/th/ と入力して、JSP ページを表示します。
最後に
実はEclipseからの実行では、JSPとThymeleafの両方とも表示できたのですが、Jarファイルを生成して実行すると、JSP側のみ「HTTP Status 404 – Not Found」エラーとなってしまいました。
そこらへん含めて、長くなりそうなので別記事に内容を分けることにしました。